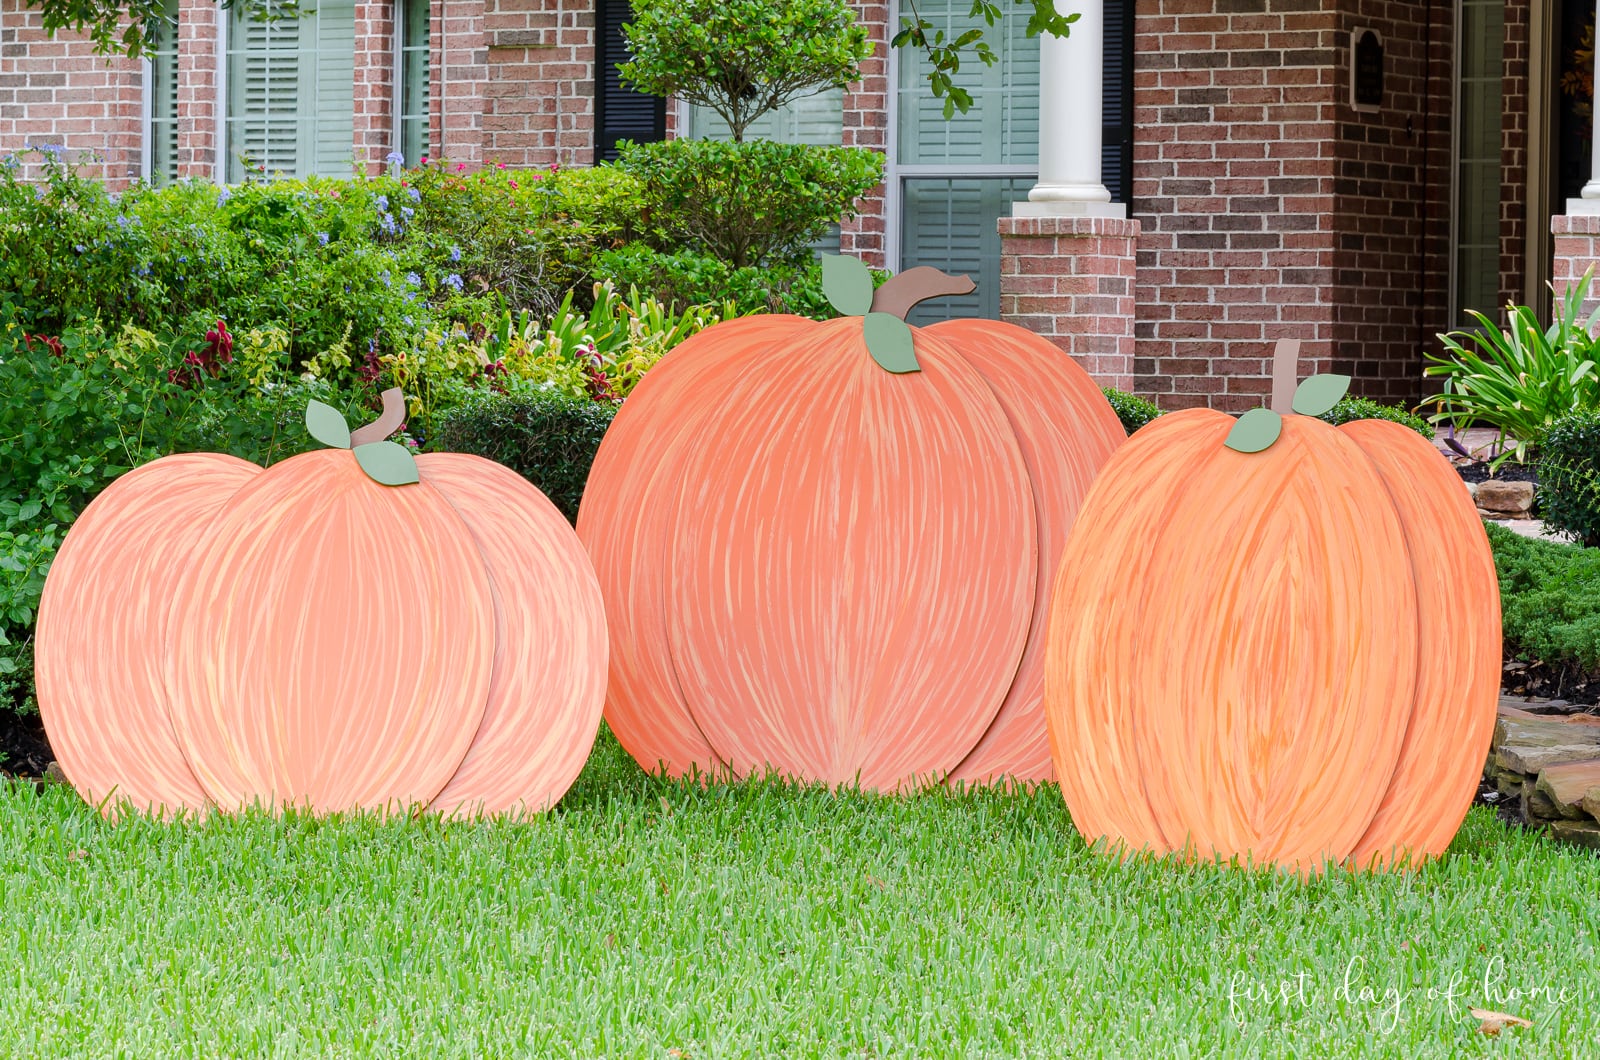
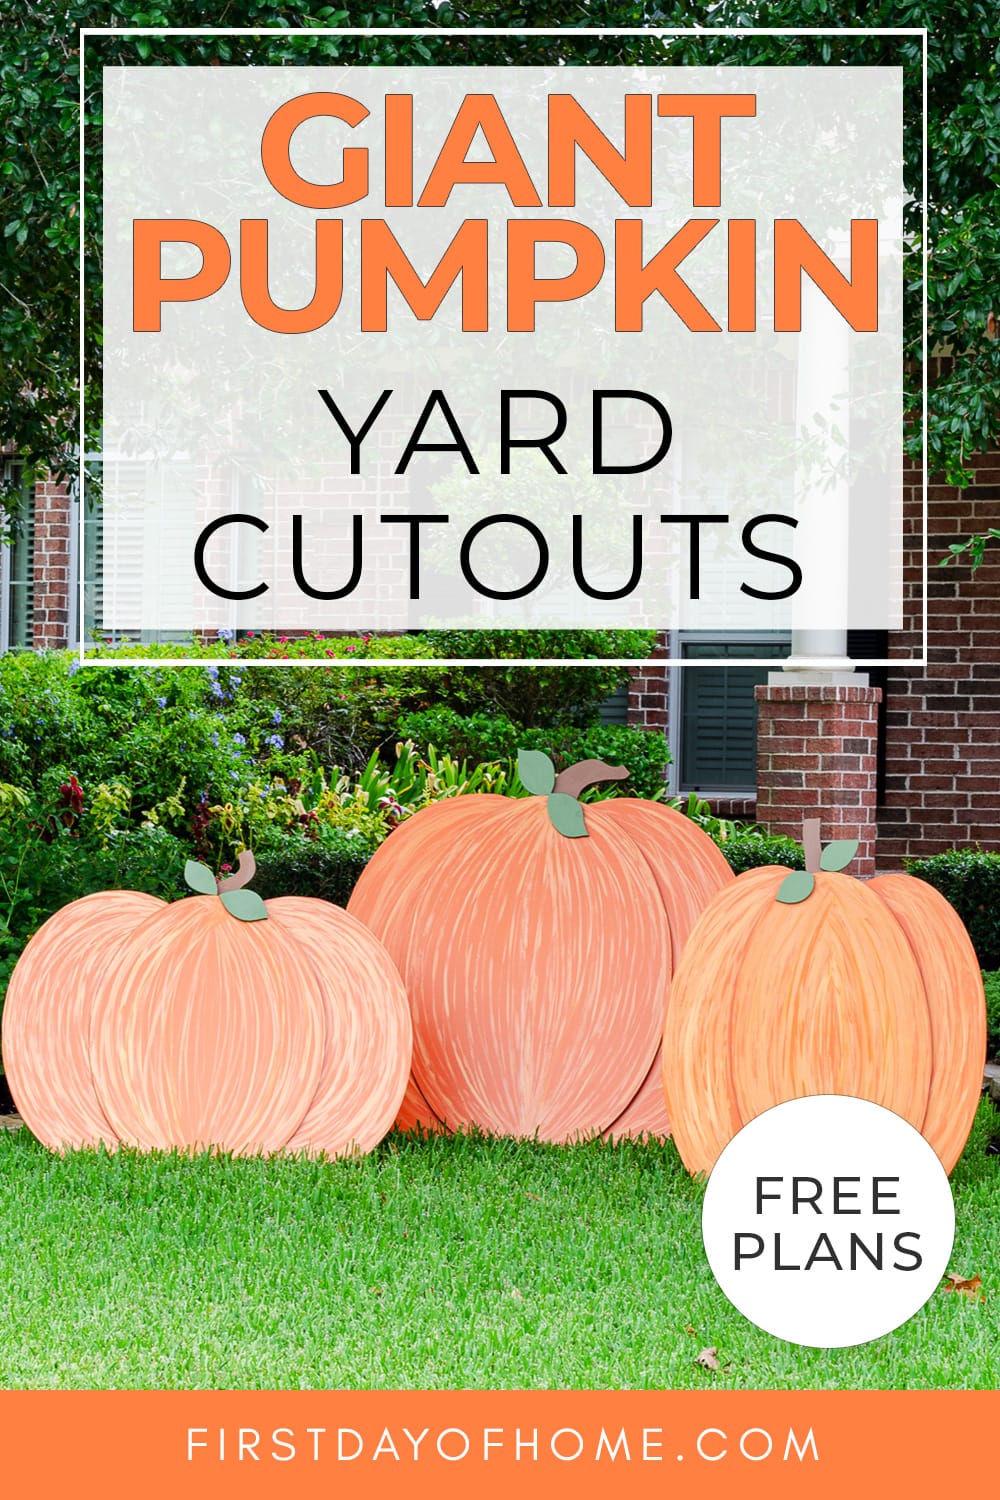
How to Make Wooden Pumpkins for Yard Decorations
I designed these wooden pumpkins as a way to try my hand at the jigsaw for the first time. Well, I’m here to tell you that if I can make wooden pumpkins for yard decorations, so can you! Read on to get the plans and complete guide.
This post contains affiliate links, and I will be compensated if you make a purchase after clicking on my links. For more information, please see my disclosures.
How to Make Wooden Pumpkins
A year ago, I got the itch to learn woodworking. My husband has a garage workshop where he builds incredible things, like these farmhouse wooden headboards we designed together.
But why should the boys have all the fun?
I’m here to prove that making wooden pumpkins for yard decorations is easier than you think!
With just a jigsaw and a scroll saw, I made three wooden pumpkins of varying heights and widths as well as a few stems and leaves. You can watch my DIY pumpkin tutorial on YouTube to see the full step-by-step process.
Read on to download FREE patterns and get a printable version of the full tutorial.
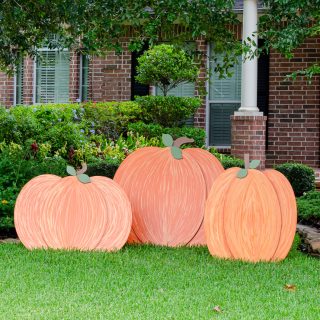
Wooden Pumpkin Specs
I designed three pumpkins in different sizes. Below, I’m including the project plans (PDF format) so you can build your wooden pumpkins to the same specs. (Download Adobe Acrobat PDF reader for free if you need it.)
- Large Pumpkin (43 x 38.5 inches): download
- Small & Wide Pumpkin (39.5 x 29-inches): download
- Tall & Skinny Pumpkin (30.5 x 33.5-inches): download
See the end of this post to print out the full tutorial with detailed steps and a supply list.
Supply List
- Plywood (About two 4×8-foot sheets)
- Jigsaw
- Scroll saw (for cutting stems and leaves)
- Sandpaper
- Drill and screws
- Multi-purpose primer
- Exterior paint (about 1 pint)
- Sealer (optional)
- Paint brushes and/or roller brushes
Step 1: Printing the Pumpkin Patterns
Each pumpkin comes with a numbered pattern that looks like this:
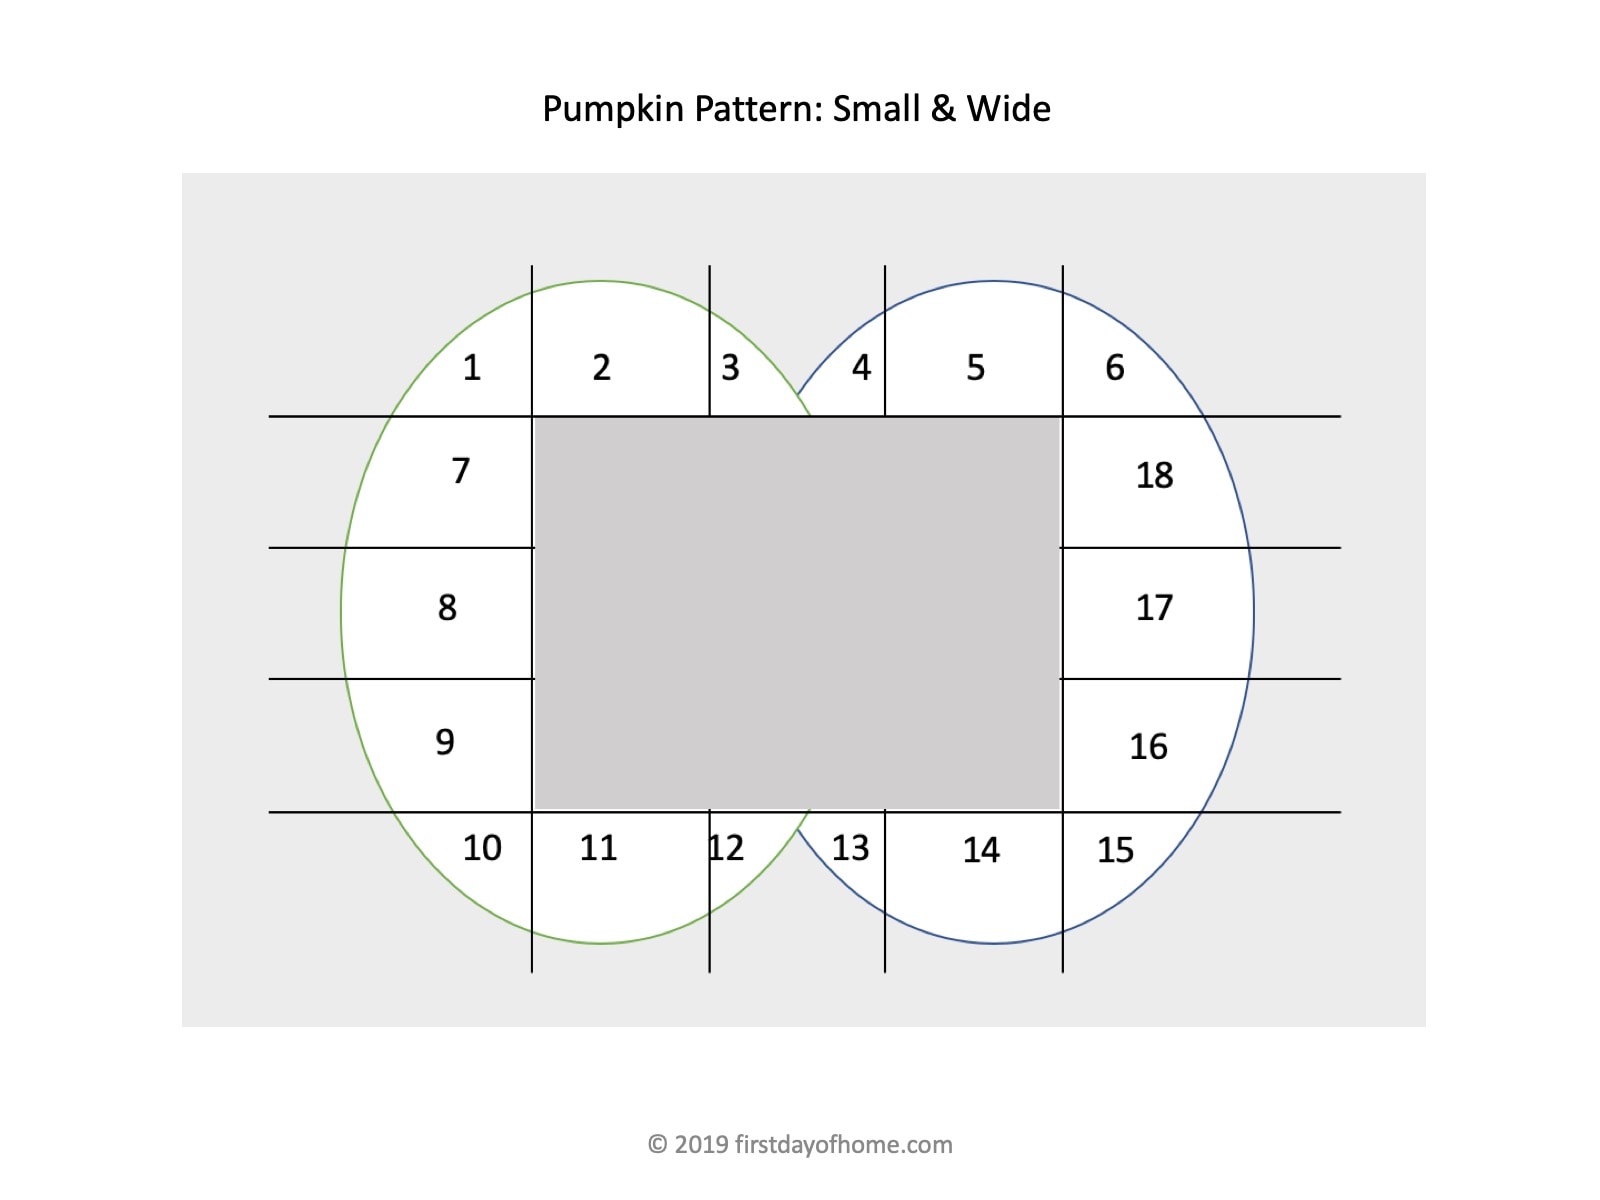
You’ll print and cut the shapes on 8.5×11-inch printer paper, then tape the pages together and create a life-size pattern that looks like this:
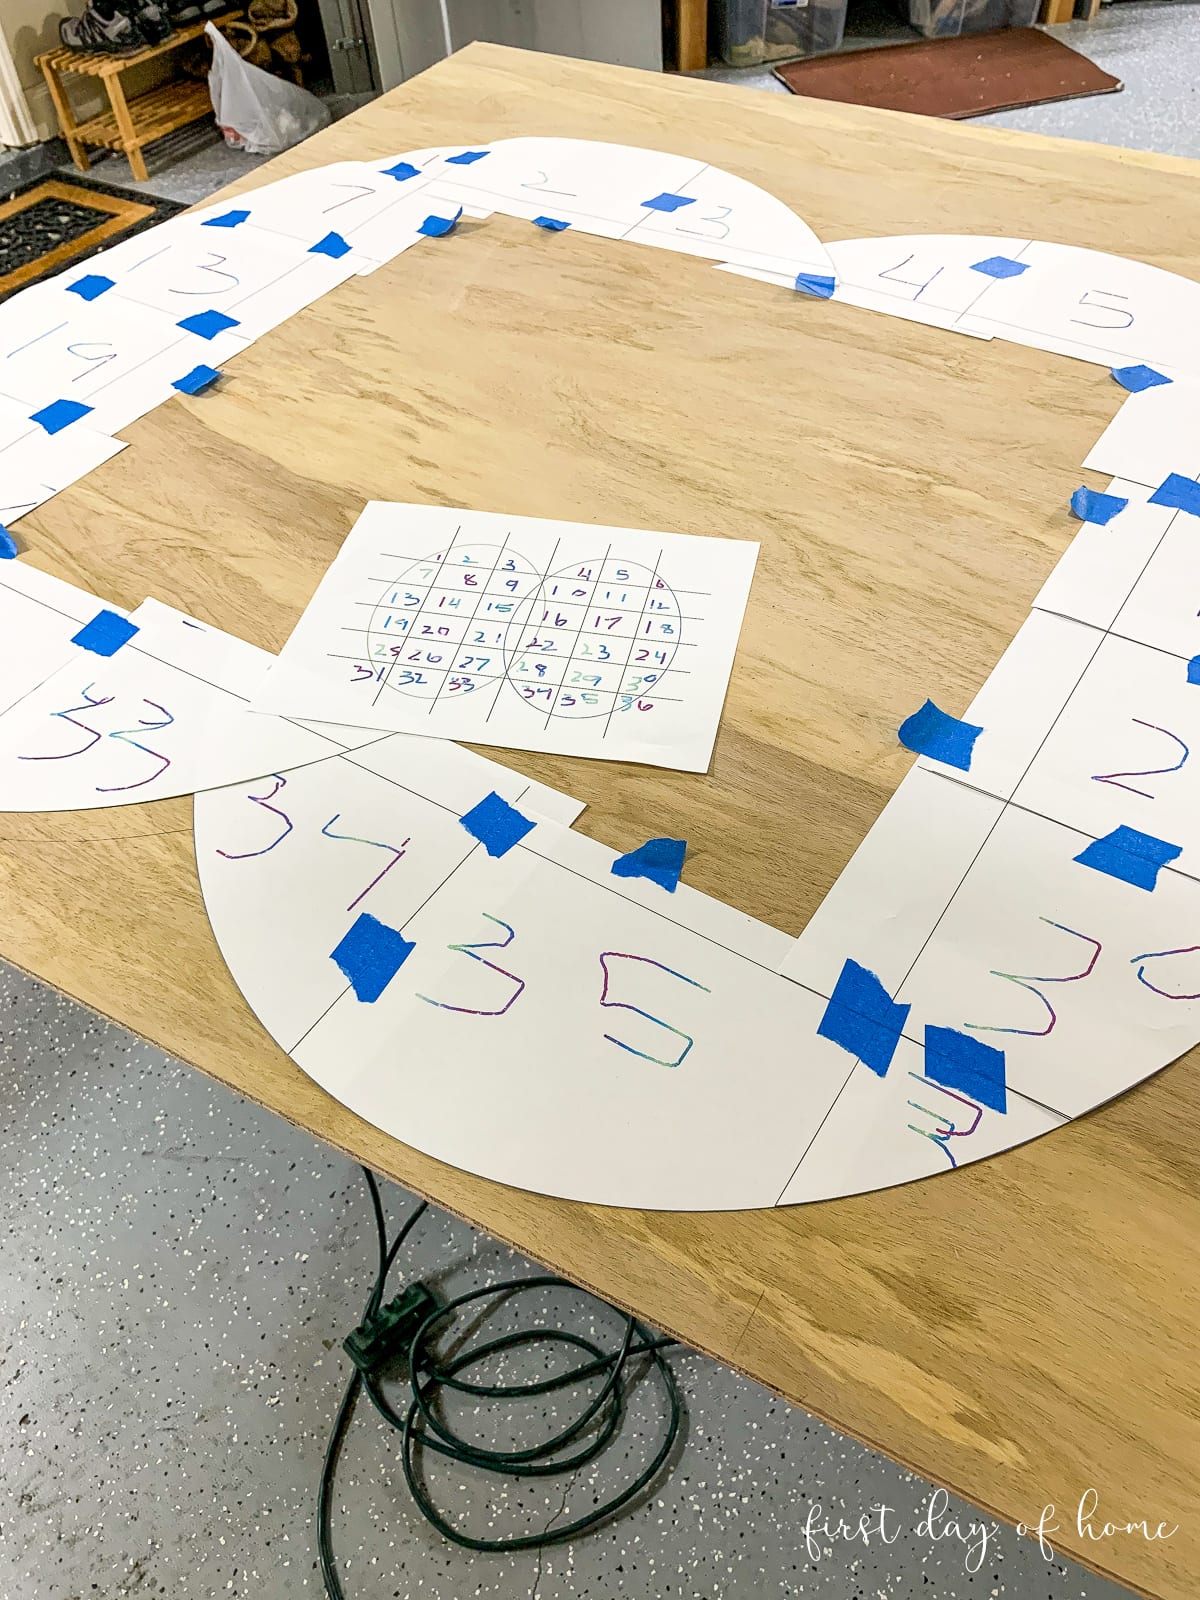
Note: The vertical and horizontal grid lines are there to help you line up the pages in the pattern. You always have the option to free-hand your pumpkins, too.
Don’t worry, I reformatted the numbers to look cleaner in your downloaded pattern!
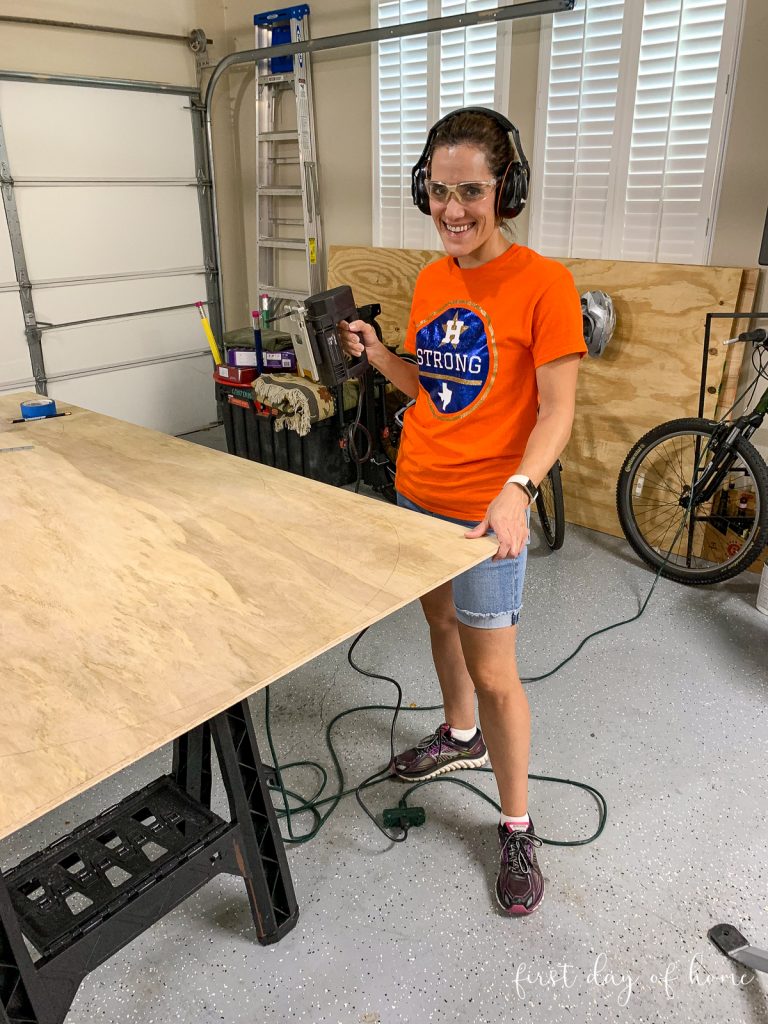
Step 2: Tracing Your Pumpkins & Cutting
Once your pattern is assembled, simply tape the outline onto your wood and trace it.
Then you can begin the fun part…cutting with the jigsaw!!
(Cue Ariana Grande’s ‘Dangerous Woman’…)
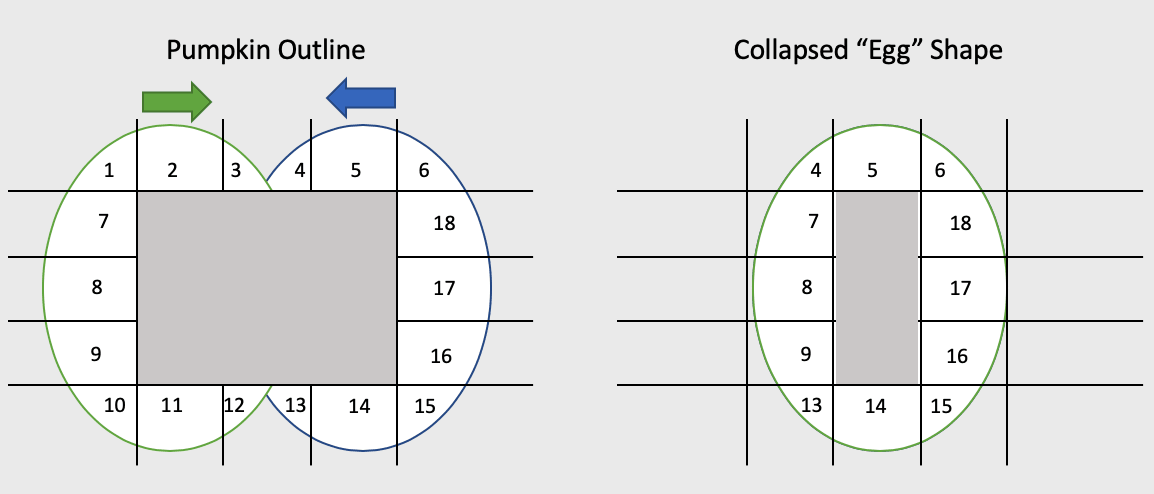
To create the center oval, you’ll overlap the two halves of each pattern to form an “egg” shape:
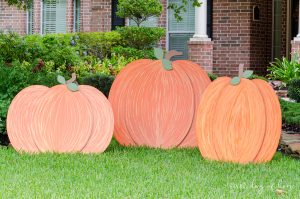
Here’s a look at the finished cutouts, waiting to become fabulous!

Step 3: Creating Stems and Leaves
For each of the pumpkin stems and leaves, I created a freehand pattern. You can get creative with it!
I then used a scroll saw to cut the shapes more easily.
Step 4: Painting & Sealing
Before painting, you’ll need to sand each piece of wood and fill any holes that might invite critters or raindrops down the road (especially for outdoor displays).

I also primed each piece of wood before painting. This helps protect the wood and get better coverage.
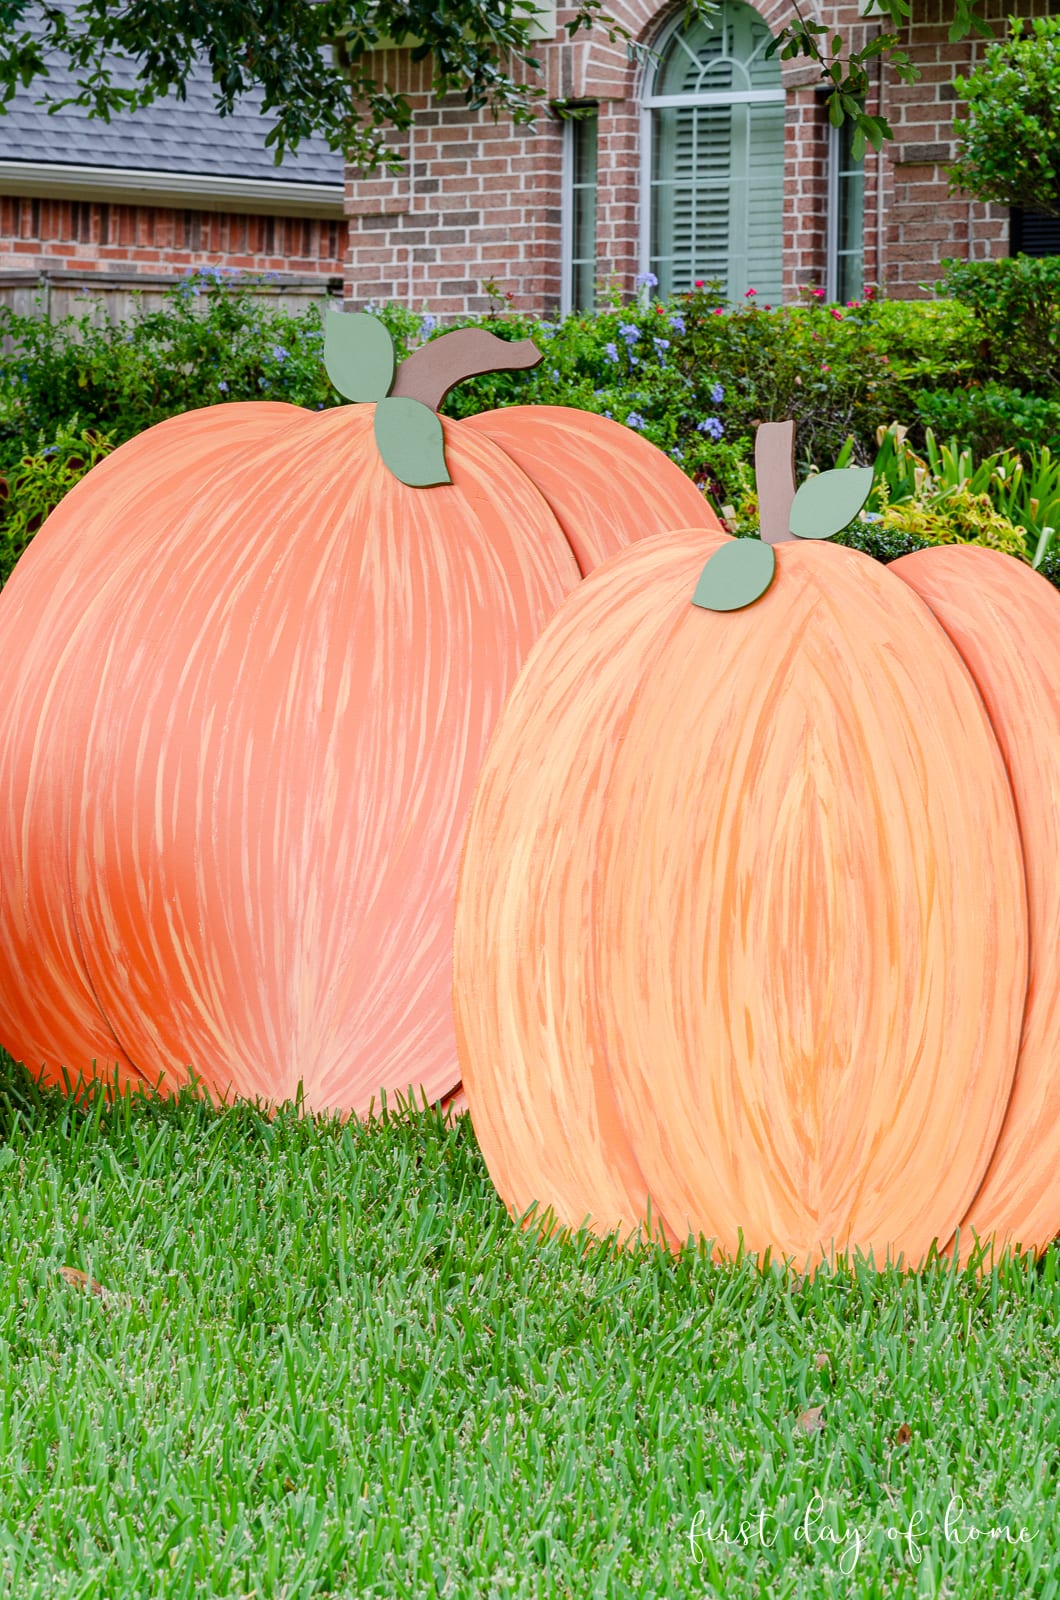
Definitely apply at least two coats of paint. See my video to learn how I added some highlights to create more texture on the pumpkins.
Update: Over the years, we’ve filled in holes and replaced a few stems/leaves as needed, but the pumpkins are still going strong!
Step 5: Assembling the Pumpkins
To assemble the pumpkins, we pre-drilled holes on the back (to keep the plywood from splitting) and then used exterior screws to attach all of the pieces (stems, leaves, etc.).
Note: Make sure the screws are short enough that they don’t accidentally poke through the front of the pumpkin! Then, you’d have a jack-o-lantern, my friend!
You can also use wood glue, but we liked having the flexibility to disassemble the pieces if needed. You know, when I change my mind next year!
I recommend using clamps to keep the pieces in the right position and mark your holes before drilling.
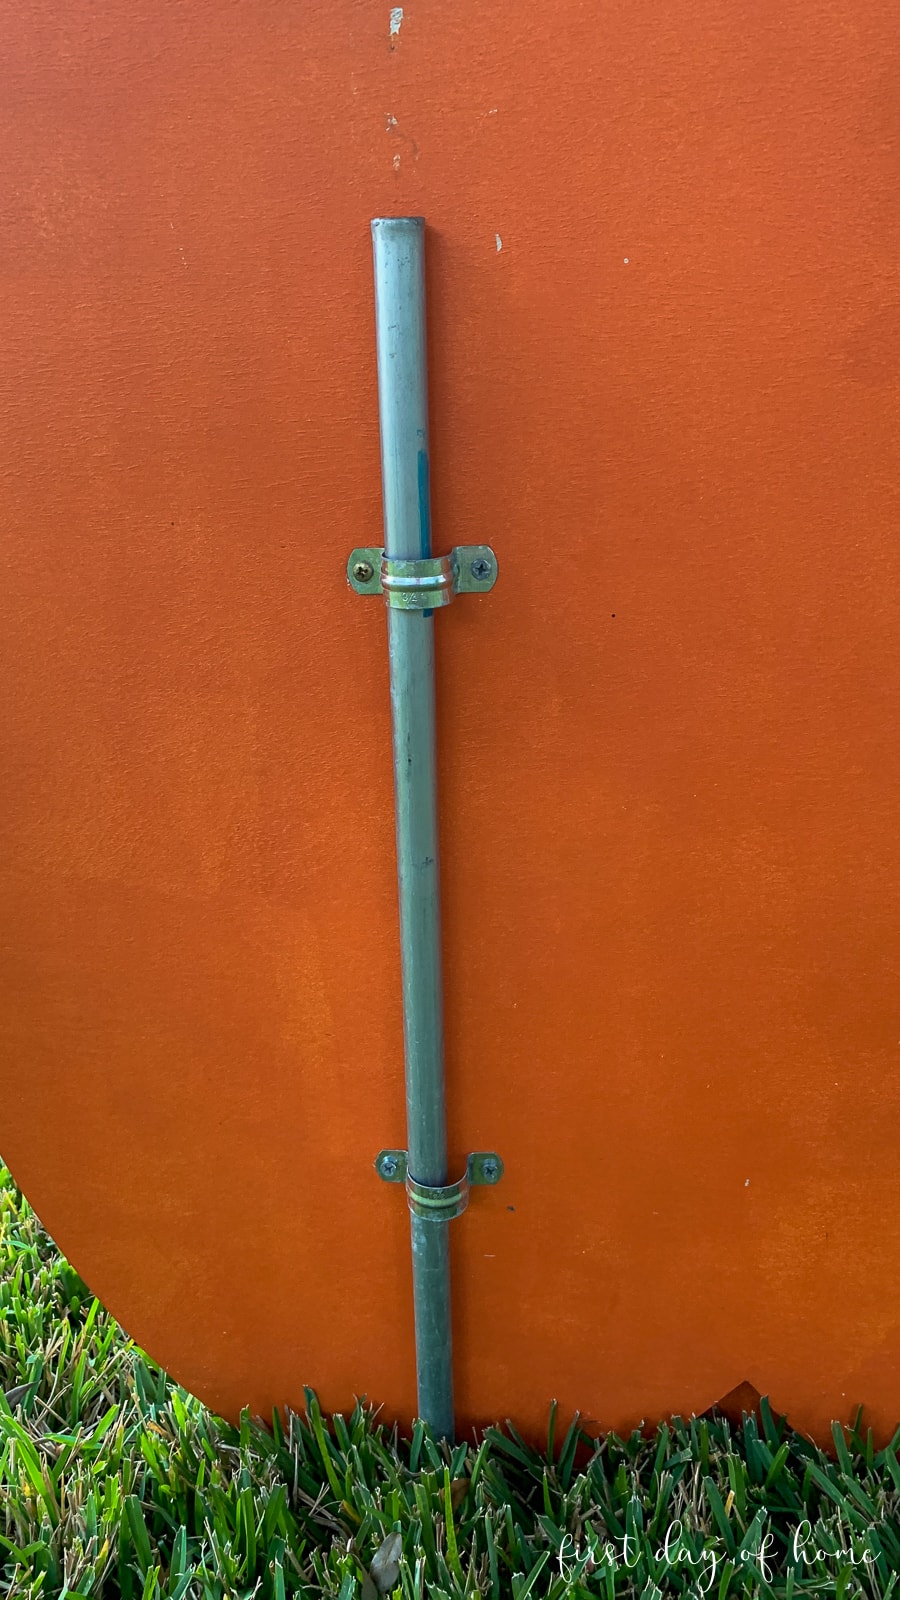
Step 6: Attach brackets to backs of pumpkins
To secure the pumpkins, you can screw on two sets of pipe brackets on the backside of each cutout. Then, place stakes through brackets and hammer the stakes into the ground.
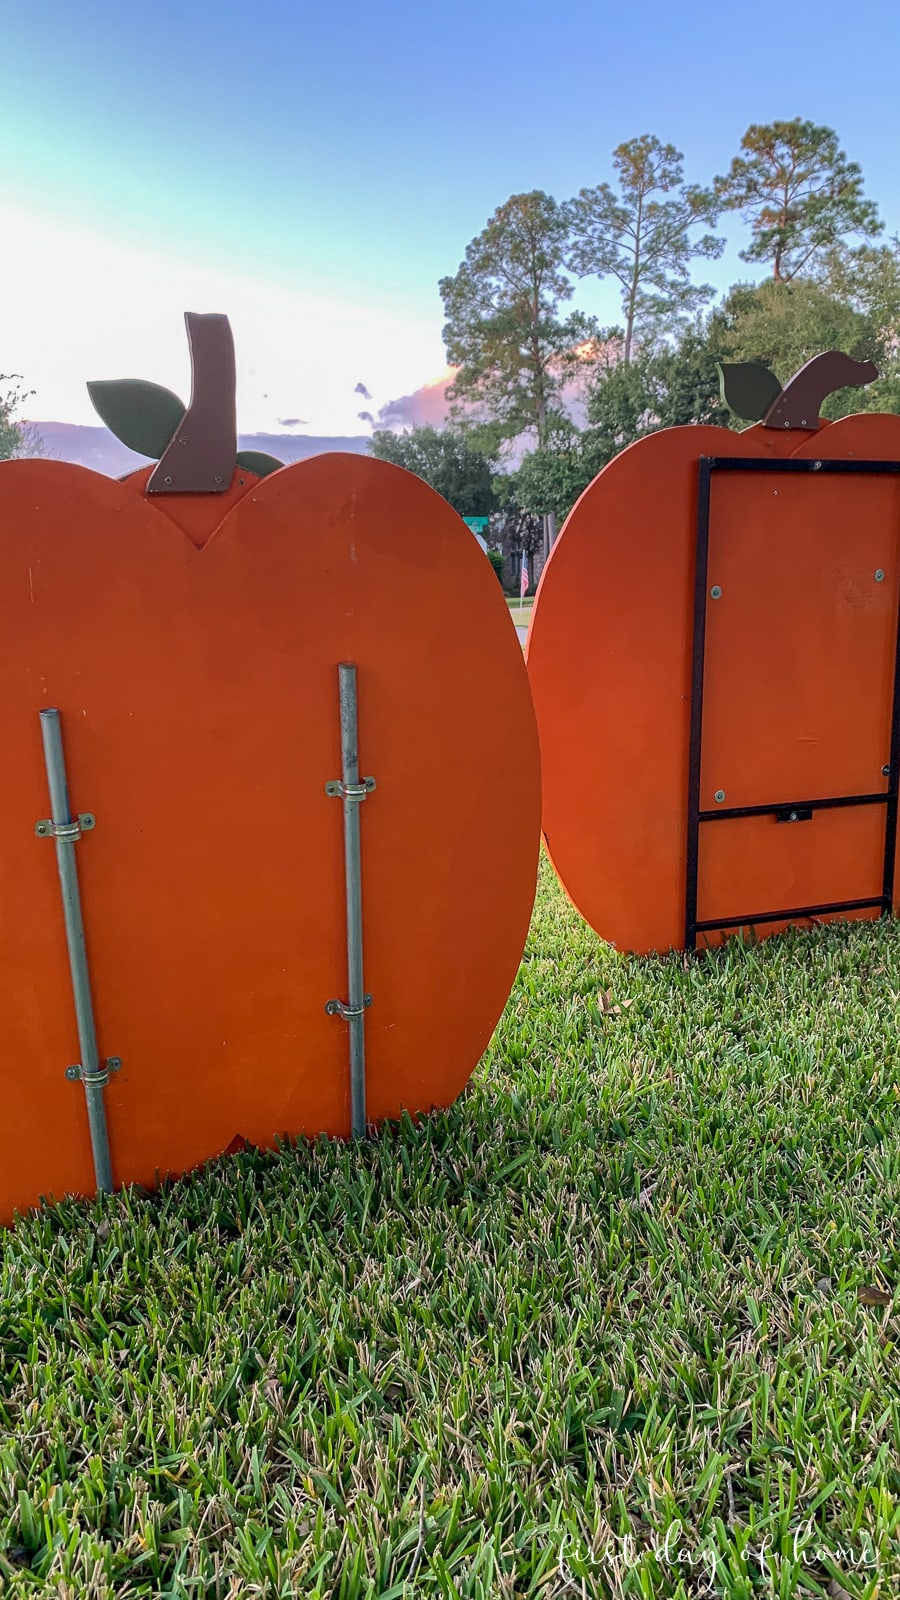
As you can see, we also put a realtor frame to good use for one of the pumpkins and screwed it into the back.
Pipe brackets have worked really well for the other pumpkins. Just make sure the bracket leaves enough wiggle room for the pipe.
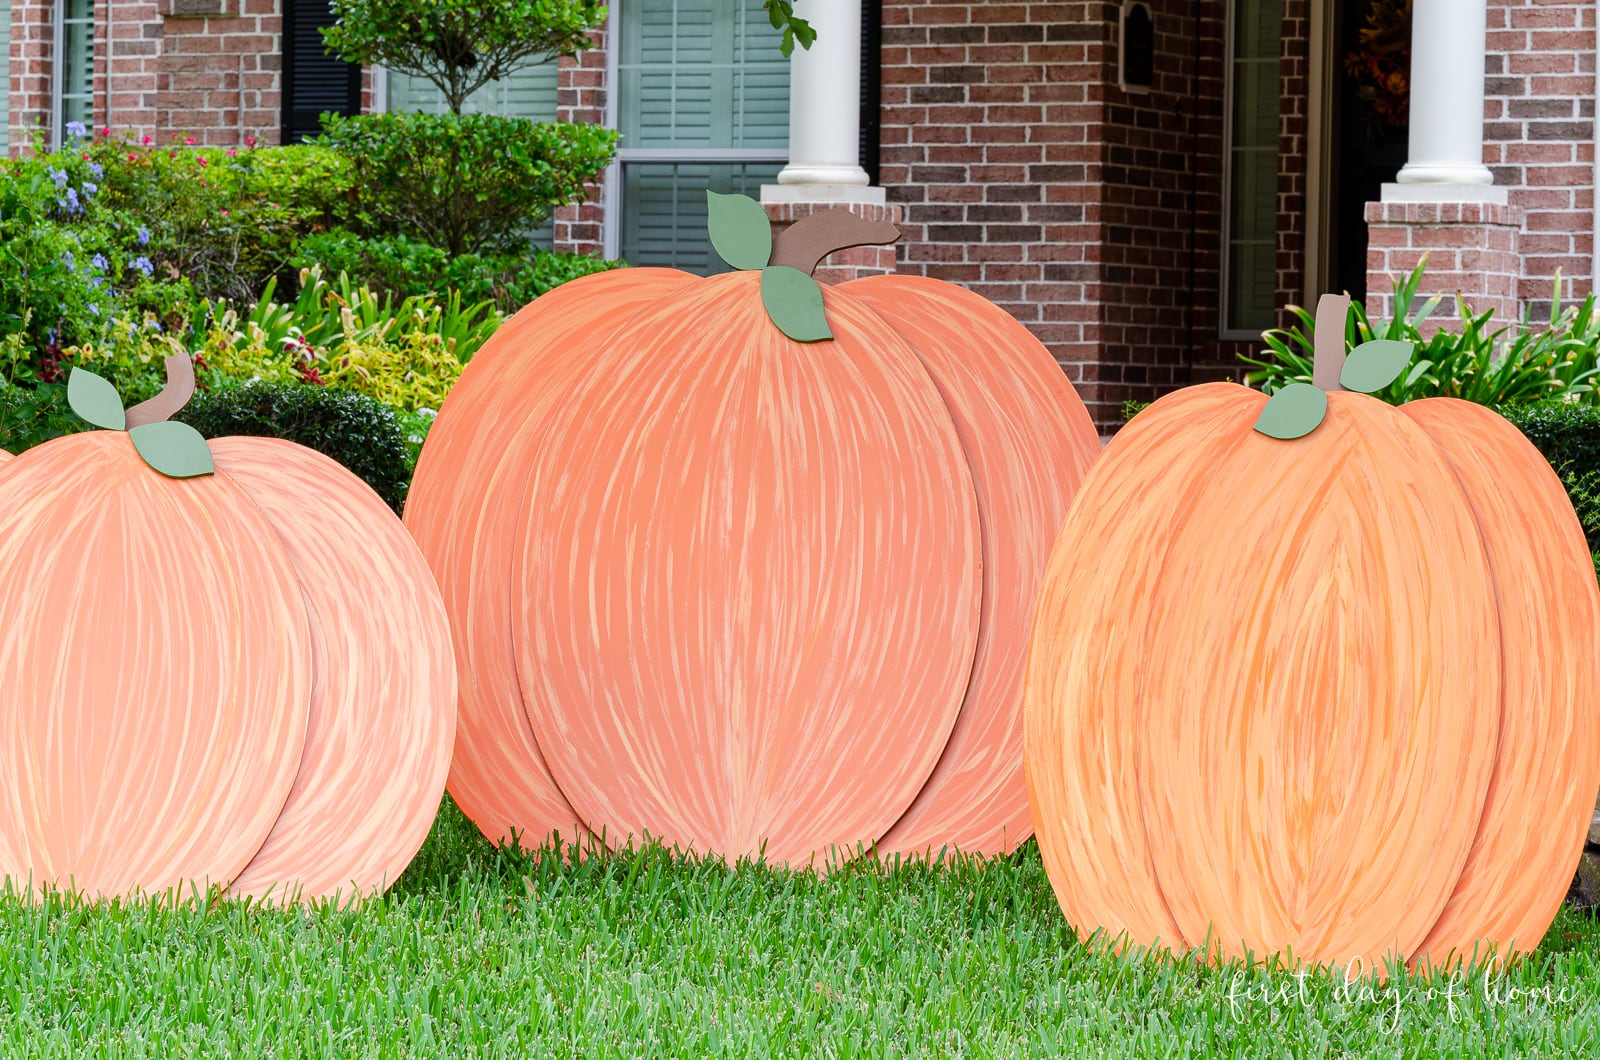
I like the way the pumpkins almost look velvety from a distance…maybe if I squint a little…at dusk? (wink)

Knowing me, I’ll be playing with other embellishments or touching up the paint a little before these stay put for the season.
If you end up trying this project, please give me a shoutout on Instagram and leave a comment below!
Pin it for later!
How to Make Wooden Pumpkins for Outdoors
Equipment
- Paint brushes and/or roller brushes
Supplies
- Plywood (About 2 sheets of 4×8-foot)
- Sandpaper
- Screws (exterior use)
- Multi-purpose primer (or exterior paint with primer)
- Orange exterior paint (about 1 quart)
- Yellow exterior paint (for highlights)
- Brown exterior paint (for stems)
- Green exterior paint (for leaves)
- Sealer
- Plumbing brackets (u-type, for display purposes)
- Metal stakes (for display purposes)
Instructions
- Start by downloading and printing the FREE pumpkin patterns available at www.firstdayofhome.com/wooden-pumpkin-yard-decorations. Cut out the pumpkin outline, and tape the pattern together as directed.
- Trace the outer pumpkin patterns onto plywood with a pencil, and cut using a jigsaw. Then, overlap the two halves of each paper pattern, forming an "egg" shape that will become the center part of each pumpkin. Trace and cut the egg shapes.
- Design as many leaves and stems as desired using leftover pieces of plywood. (You can simply freehand these parts.) Cut with a scroll saw.
- Sand all edges of the wood cutouts, and use a primer to coat all sides. Then, paint 1-2 coats of outdoor paint and seal with an outdoor sealer.
- Assemble all pieces using either wood glue or small screws. If using screws, drill holes to attach pieces, being careful not to drill through the wood.
- Attach brackets on the back of the pumpkin cutouts and use stakes to secure in ground, or prop the pumpkins against trees.

Notes
You Might Also Like…
Hello. I love your pumpkins! I wanted to know the name of the orange colors you used for each pumpkin as well as the paint you used to make the highlights on the pumpkins! Thanks.
Hi Andrea! Thanks so much! Here are the paint colors. I’ll be adding this to the post as well since I didn’t realize it wasn’t in there yet. Have fun making your own! Orange: https://rstyle.me/+tHuSkwmsC1xl1AJ5DFmwLQ Yellow (highlight): https://rstyle.me/+-LC2LSh8Zkj44XGeg1VU-Q Brown stem: https://rstyle.me/+SBq7mpB324ZGk4UI-IJTjQ Green leaves: https://rstyle.me/+NnTpP0ie34sOT2q_Ku9dgQ
Hi! Love love these pumpkins. Can I see what the back looks like after being completed in the ground?
Hi Fran! I’ve gotten this question before, so I decided to snap a few photos and put them on the blog while the pumpkins are still out in my yard. (It’s been 3 years, and they’re still going strong!) I hope this helps! Best wishes, Crissy
Love the pumpkins and thanks for the information about priming and sealing. What type of paint did you use for the orange, brown, and green? Was that all exterior paint or do you think I can use outdoor acrylic and seal that? I’m moving on to Christmas 🙂
Thanks so much for the directions
These are great
Hi Jean! I’m so glad you liked the tutorial. Thanks for leaving such a nice comment. Happy Fall!
These are so precious!! Any chance you’d sell them? Lol there’s no way I could make them haha
Ha! Thanks, Taylor! I wish I had time to make some to sell! They are a ton of fun to make, but they do require a bit of “commitment.” I appreciate the sweet comment. Happy Fall! -Crissy
Hi! This is a great project. I don’t know if this question was asked previously. But could you tell me what type of sealer you used on this project please?
Hi Jill! You can always ask me questions. We didn’t use a sealer on this project but made sure we used exterior paint. If you want an added sealer, you can use a urethane that is rated for outdoors but a) it can be expensive and b) it can often “amber” your project (eventually turn a bit yellow). You really shouldn’t need it for exterior paint though – just like you don’t need it if your house is painted.
If you DO want to seal something, a good brand is General Finishes. GF is not cheap but is high-quality. I’ll try to add a link to the post with some options. Let me know how it goes, and have fun! -Crissy
I’ve never seen anything like these before for Fall/Halloween and think they are fabulous! Your pumpkins take me back to my childhood when my Dad made a silhouette style life size nativity scene similar to this. Pinned 🙂
Oh, Marie, that makes me so happy to hear. One of my older brothers once made Christmas cutouts for our yard, and I still think fondly of those. I’m glad I could take you back to your childhood, too. Thanks for pinning, my friend!
By the way, Marie, I’m doing a “premiere” YouTube video of my pumpkin yard cutouts in the morning at 8am CT. Please send me your YouTube channel if you have one, and we can become friends there, too!
I think these are some of the BEST outdoor pumpkin decor I have seen! You are quite the amazing DIYer, girlfriend! Pinned to two boards, and sharing on FB!
That’s a high compliment! Thanks so much for the sweet words. I feel so good to have finally finished this project that I started last year. I’m now itching to do some more jigsaw projects! Oh, if only there were enough time…