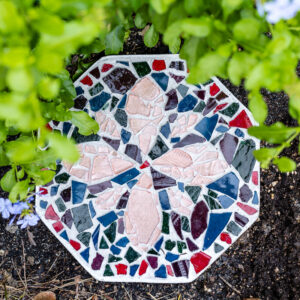
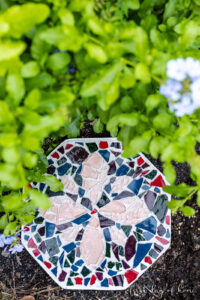
How to Make DIY Mosaic Stepping Stones
Learn how to make a DIY mosaic stepping stone to beautify your garden or add a personal touch to your outdoor decor.
Equipment
- Bucket
- Paint stir stick
- Putty knife or wooden craft stick
- Toothbrush or soft bristle brush
Supplies
- Stepping stone mold
- Stepping stone mix or sand-mix concrete
- Precut mosaic pattern
- Mosaic tiles of stained glass
- Dropcloth or cardboard for work surface
- Protective mask, safety glasses, and gloves
Instructions
- Create your mosaic design to fit the size of your stepping stone mold. You can use a pattern from a stepping stone kit or create your own pattern. You also have the option to create a freestyle design without a pattern.
- If using a specific pattern, print one copy of the pattern, and cut out a separate copy. (You can use a Cricut or Silhouette Cameo cutting machine for this step, if available.)

- Arrange the mosaic tiles on the printout of your pattern. This helps to ensure you have enough tiles for your design and makes it easier to place the tiles later.
- Wearing gloves, safety glasses, and a mask, mix 2 cups of water per 7 lbs of stone mix. Add more water (if needed) until the mix is the consistency of cookie batter.

- Pour the mix into your mold. Use a putty knife or wooden craft stick to smooth the surface of the mix.
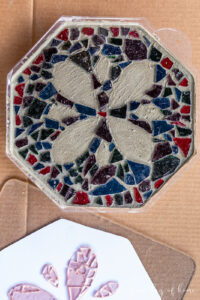
- Let the stone mix dry slightly (about 10 minutes). Then, apply your cut paper design on top if using a pattern. Add mosaic tiles around the main pattern.
- Remove the paper pattern, and add the remaining tiles.
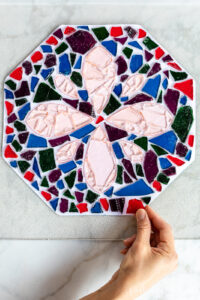
- After placing all the tiles, gently push the tiles down into the concrete mix to ensure they are secure.
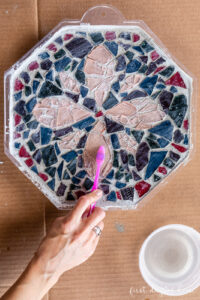
- Let the stone dry 24 hours. Then, use a toothbrush and water to clean the tiles.
- Carefully remove the stone from the mold, and polish it with a soft cloth.
- Wait 7-10 days before applying pressure to the stone.
Notes
If tiles do not adhere properly after the stone is set, you can reapply them with E6000 or tile adhesive. You also have the option to add a thin layer of grout in between the tiles.
You can sand any rough edges of your finished stone with high-grit sandpaper or the edge of a screwdriver if necessary.
Tried this project?Mention @firstdayofhome or tag #firstdayofhome!