
How to Use Infusible Ink Pens: Coaster Tutorial
Learn how to use Cricut infusible ink pens and markers to create custom ceramic coasters. These mandala-style DIY coasters make the perfect gift for Christmas, birthdays, Mother's Day, Father's Day, and anniversaries. Get tips for getting professional results with infusible ink every time.
Equipment
- Cricut Maker Cricut Explore or Cricut Joy will also work
- EasyPress 3 or heat press that reaches 400°F (205°C), including EasyPress 2, EasyPress Mini, or Autopress
Supplies
- Infusible ink pens
- Infusible ink markers (optional)
- Laser copy paper
- Cricut ceramic coaster blanks
- Lint roller or lint-free cloth
- Heat resistant tape
- White cardstock
- Butcher paper
Instructions
Customize the design in Cricut Design Space
- If desired, download the featured mandala designs, and save the SVG files on your computer. (See notes below to get the files for free.) Alternatively, you can choose a design from Cricut Design Space.
- If you are using an external file, start by uploading the SVG into Cricut Design space. Then resize your design to fit the Cricut coaster blank (about 3.6 inches).

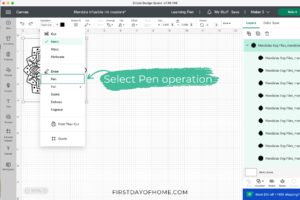
- In the Operation menu, select Pen under the Drawing section.
- Then choose a color for each part of the design under the color drop-down menu. Scroll until you see the "infusible ink" color options. You can select multiple colors for each shape, and the software will prompt you to load each color into the cutting machine at the appropriate time.

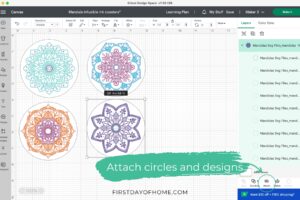
- Add circles to create coaster shapes behind each design. You may need to right-click the circle and select "Send to Back" to see your design on top. Align a circle to each coaster design, and click Attach to ensure they are drawn and cut together.
Draw and Cut the design
- Send the designs to your cutting machine by clicking Make It. When prompted, load a sheet of plain laser copy paper onto a LightGrip (light blue) cutting mat.

- Mirror the design. Then adjust the designs in the Preview screen to ensure they are drawn and cut within the dimensions of the laser copy paper.

- Select Laser paper as the base material, and load the appropriate pen in Clamp A of your Cricut machine.
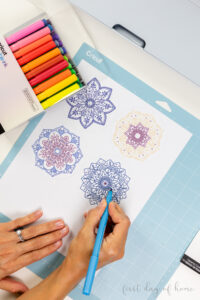
- Fill in with any additional colors desired using Cricut pens and markers. Once finished, remove the paper circles from the mat.
Heat the designs with a heat press
- Use the Cricut Heat app (for EasyPress 3) or the Cricut Heat Guide online to determine the heating temperature and time to press the coasters. For the EasyPress 3 and Cricut coaster blanks, the heat press should be at 400°F (205°C).
- Clean the coasters with a lint-free cloth.
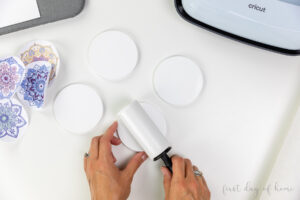
- Place the designs face down on each coaster, using heat-resistant tape to secure the designs in place.
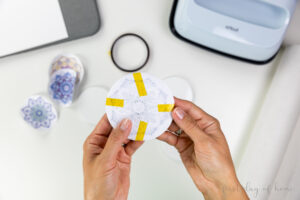
- Cover the EasyPress mat with cardstock to protect the surface from unwanted ink transfer. Then place each coaster face down on the cardstock.
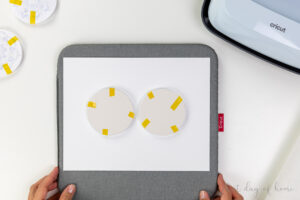
- Cover the coasters with a clean piece of butcher paper that is larger than the heat plate. (Cricut does not recommend reusing butcher paper after a heat transfer.)

- Once the heat press reaches the desired temperature, press the coasters for 240 seconds, applying no pressure.

- Remove the butcher paper and let the coasters cool completely. It may take up to 20-25 minutes for the coasters to cool.

- Once the coasters are cool to the touch, remove the heat-resistant tape to reveal the design. Coasters may be used immediately.

- Use your infusible ink coasters immediately, or attach a thin cork sheet on the back of the coasters for extra durability.

Notes
If you want to use the same mandala designs demonstrated in this tutorial, you can find the SVG files here. With an all-access trial to Creative Fabrica, you can get these designs as one of 10 free downloads.
For detailed heat pressing instructions, visit the Cricut Heat Guide (https://cricut.com/heatguide).
Tried this project?Mention @firstdayofhome or tag #firstdayofhome!
