Honeycomb Paper Christmas Ornaments (Free Pattern)
When I first saw these paper Christmas ornaments trending, I knew I had to design my own. There’s something so nostalgic and elegant about the honeycomb shape of these pretty ornaments. Once you discover the trick to making them, you’ll be hooked.

This post contains affiliate links, and I will be compensated if you make a purchase after clicking on my links. For more information, please see my disclosures.
How to Make Honeycomb Paper Ornaments
It’s unclear when honeycomb ornaments first appeared on the scene, but many associate them with the 1960s era. I love how a simple sheet of paper can magically transform into such beautiful shapes.
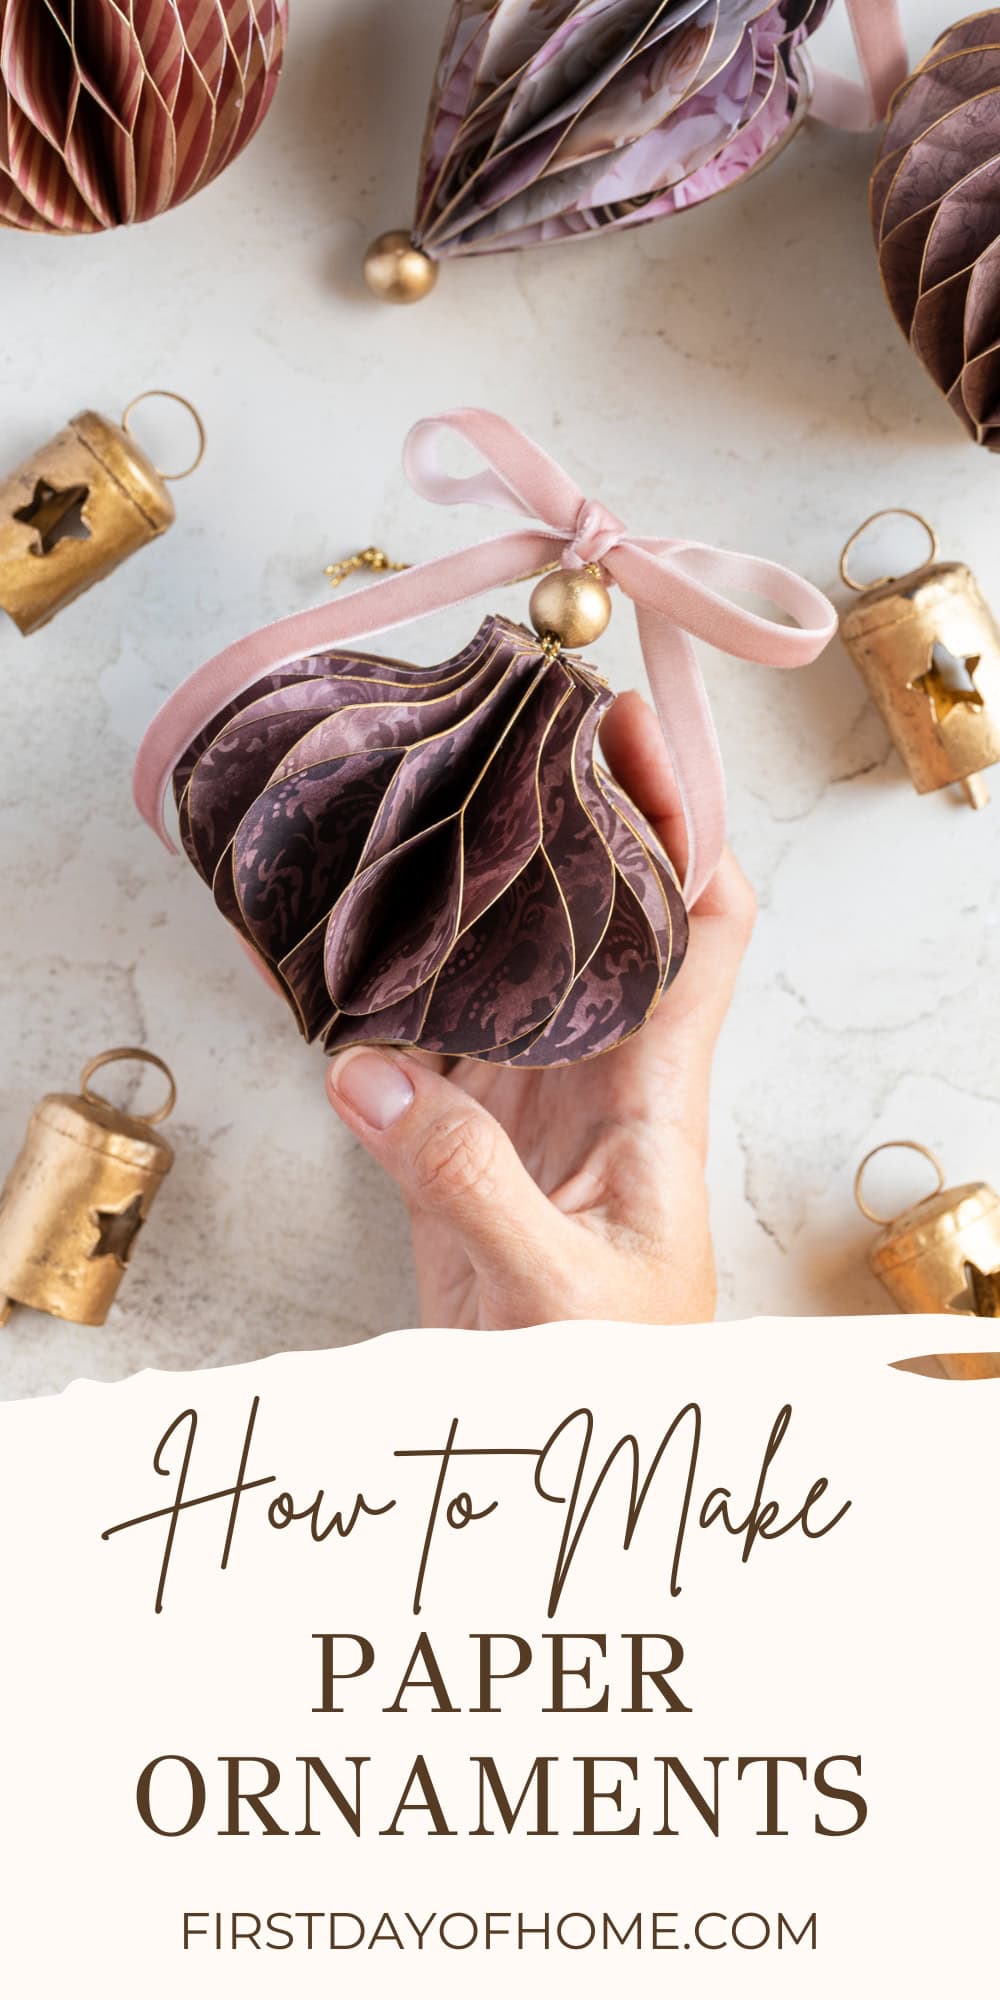
For my paper Christmas ornaments, I chose a romantic collection of double-sided paper, but you can easily substitute tissue paper, colored cardstock, wrapping paper, book pages, or rice paper.
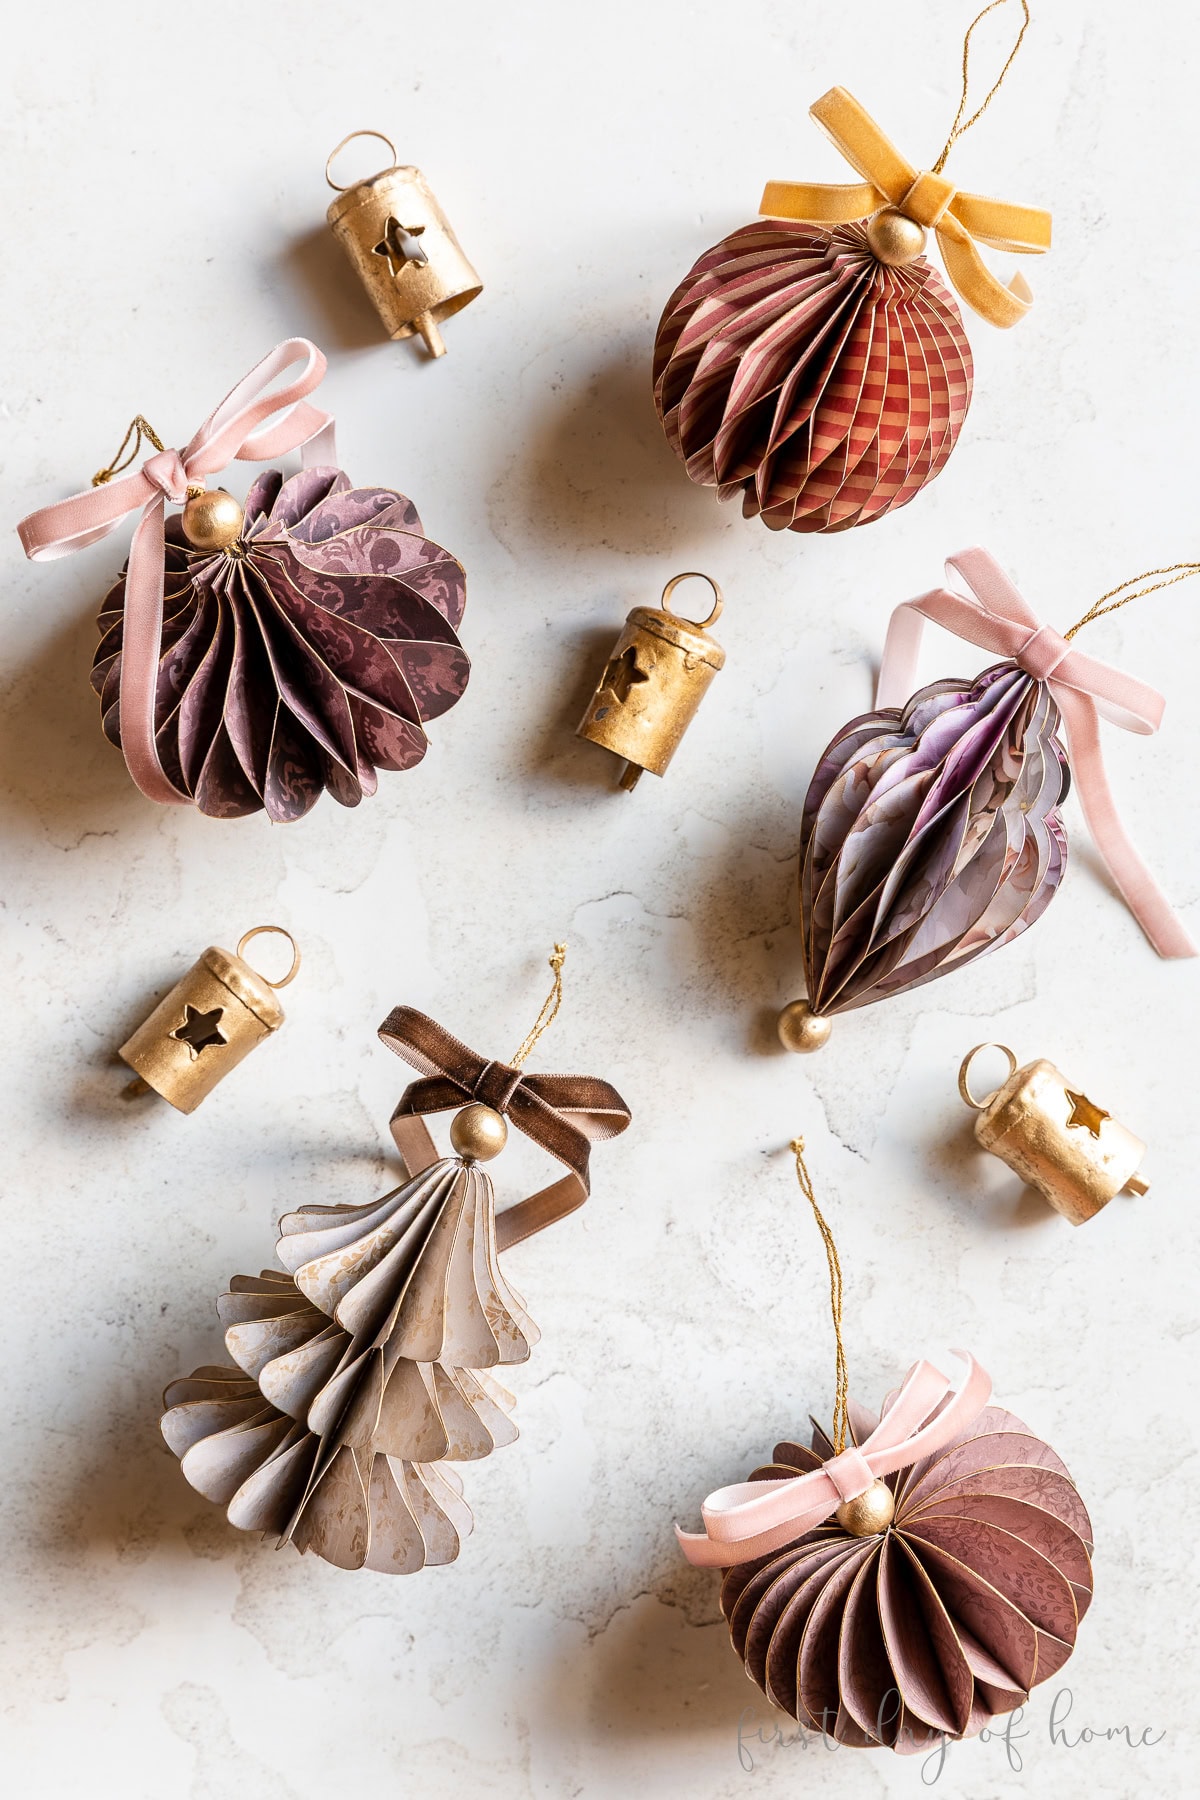
I’m offering a free template for the round ornament. The full collection, including a heart, bulb, Christmas tree, and finial, is available in my Christmas ornament bundle. This bundle includes both a PDF and SVG file compatible with Cricut or similar cutting machines.
Watch This Tutorial (<1 Min)
Supplies
If you only have school glue, paper, and string, you can easily make this craft. I enjoy adding some embellishments like velvet ribbon and wood beads to complete the look, but these are optional.
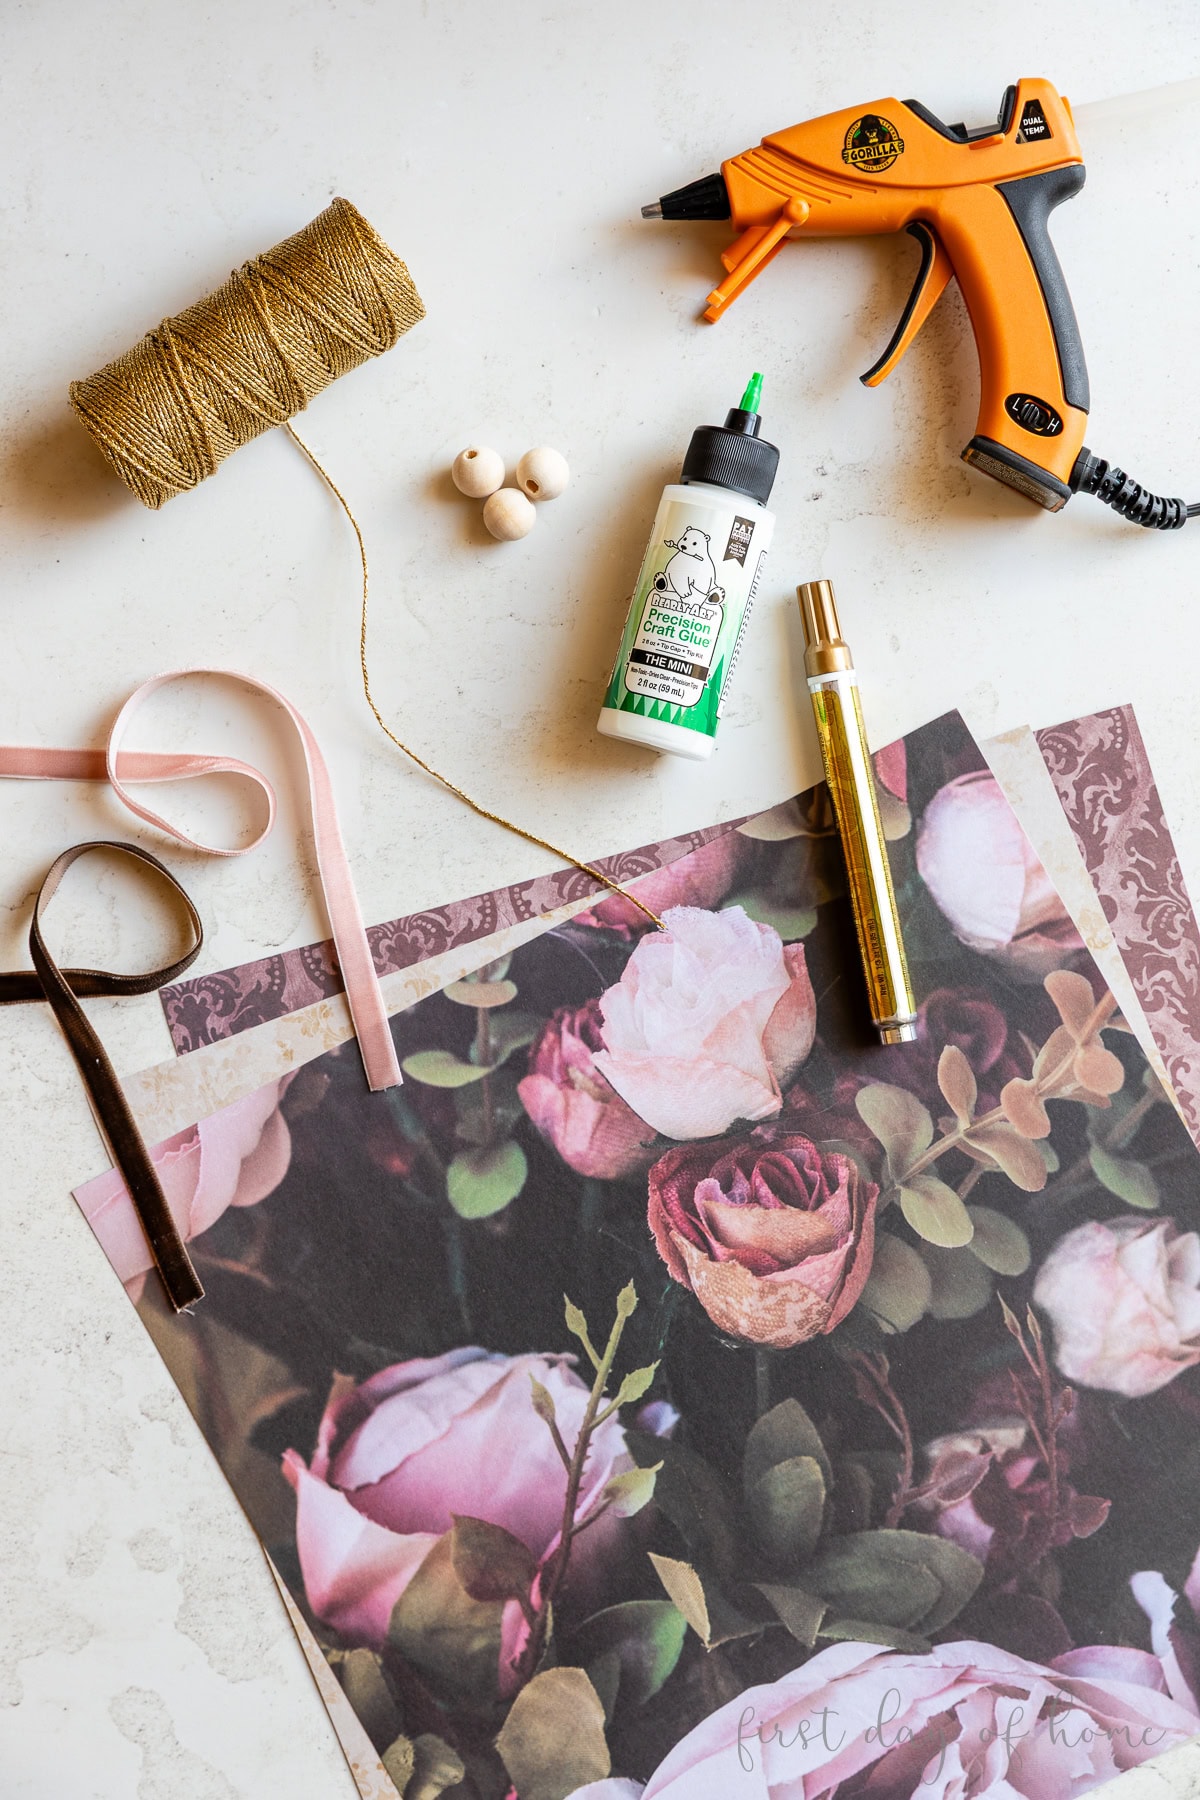
- Double-sided scrapbook paper*
- Paper glue (highly recommend this brand)
- Hot glue
- Velvet ribbon (optional)
- Wooden beads (optional)
- String or jute twine
- Gold paint (optional)
- Gold paint pen (optional)
*You can substitute nearly any kind of thin paper for this craft, like wrapping paper, tissue paper, or book pages.
Step 1: Cut the pattern
I used my Cricut Maker to cut and score the shapes for these ornaments. Each ornament measures around 2-4 inches in height and width.
You’ll need 16 cutouts for most ornaments and 22 for the heart shape and finial shape. Again, the full bundle is available in my shop, along with printable instructions.
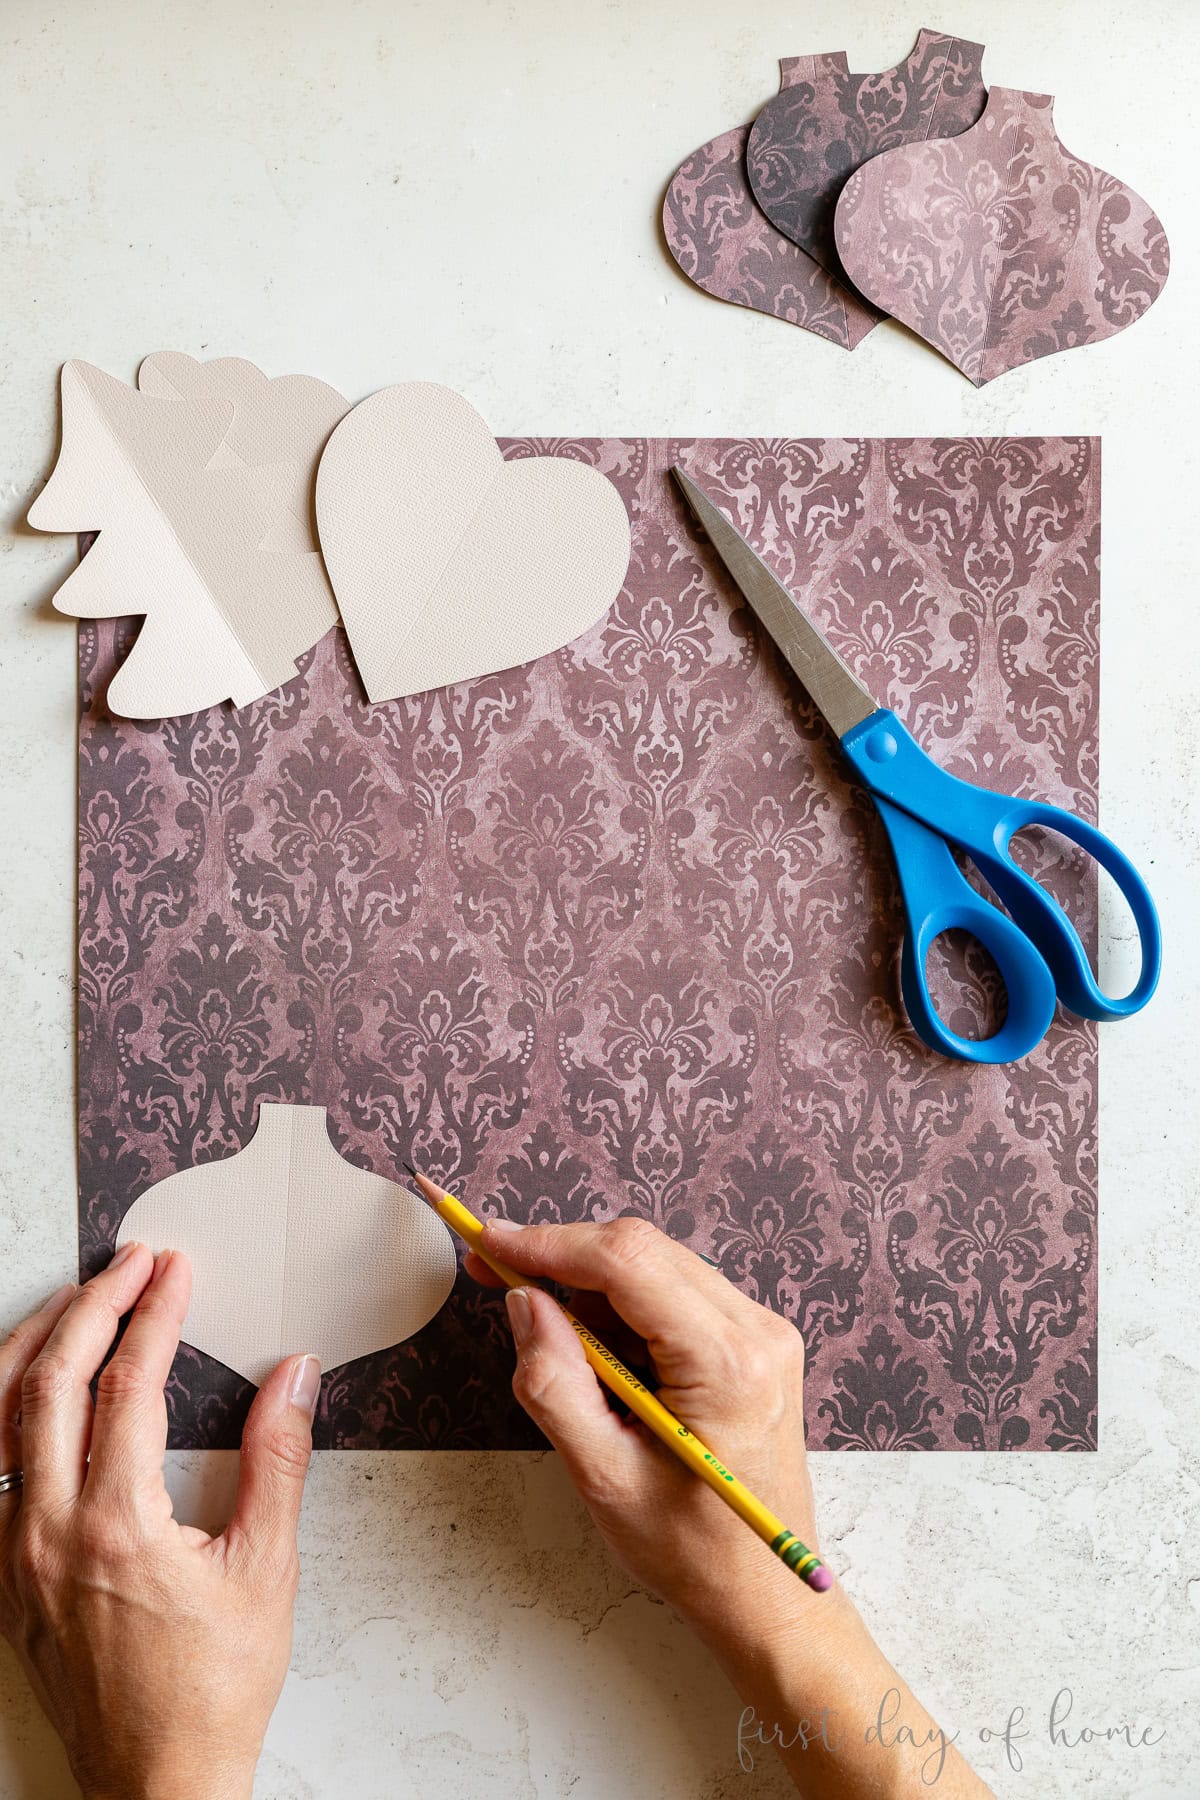
You can also trace and cut the ornaments by hand after printing and cutting the PDF pattern, as shown above.
Step 2: Fold and glue the pieces
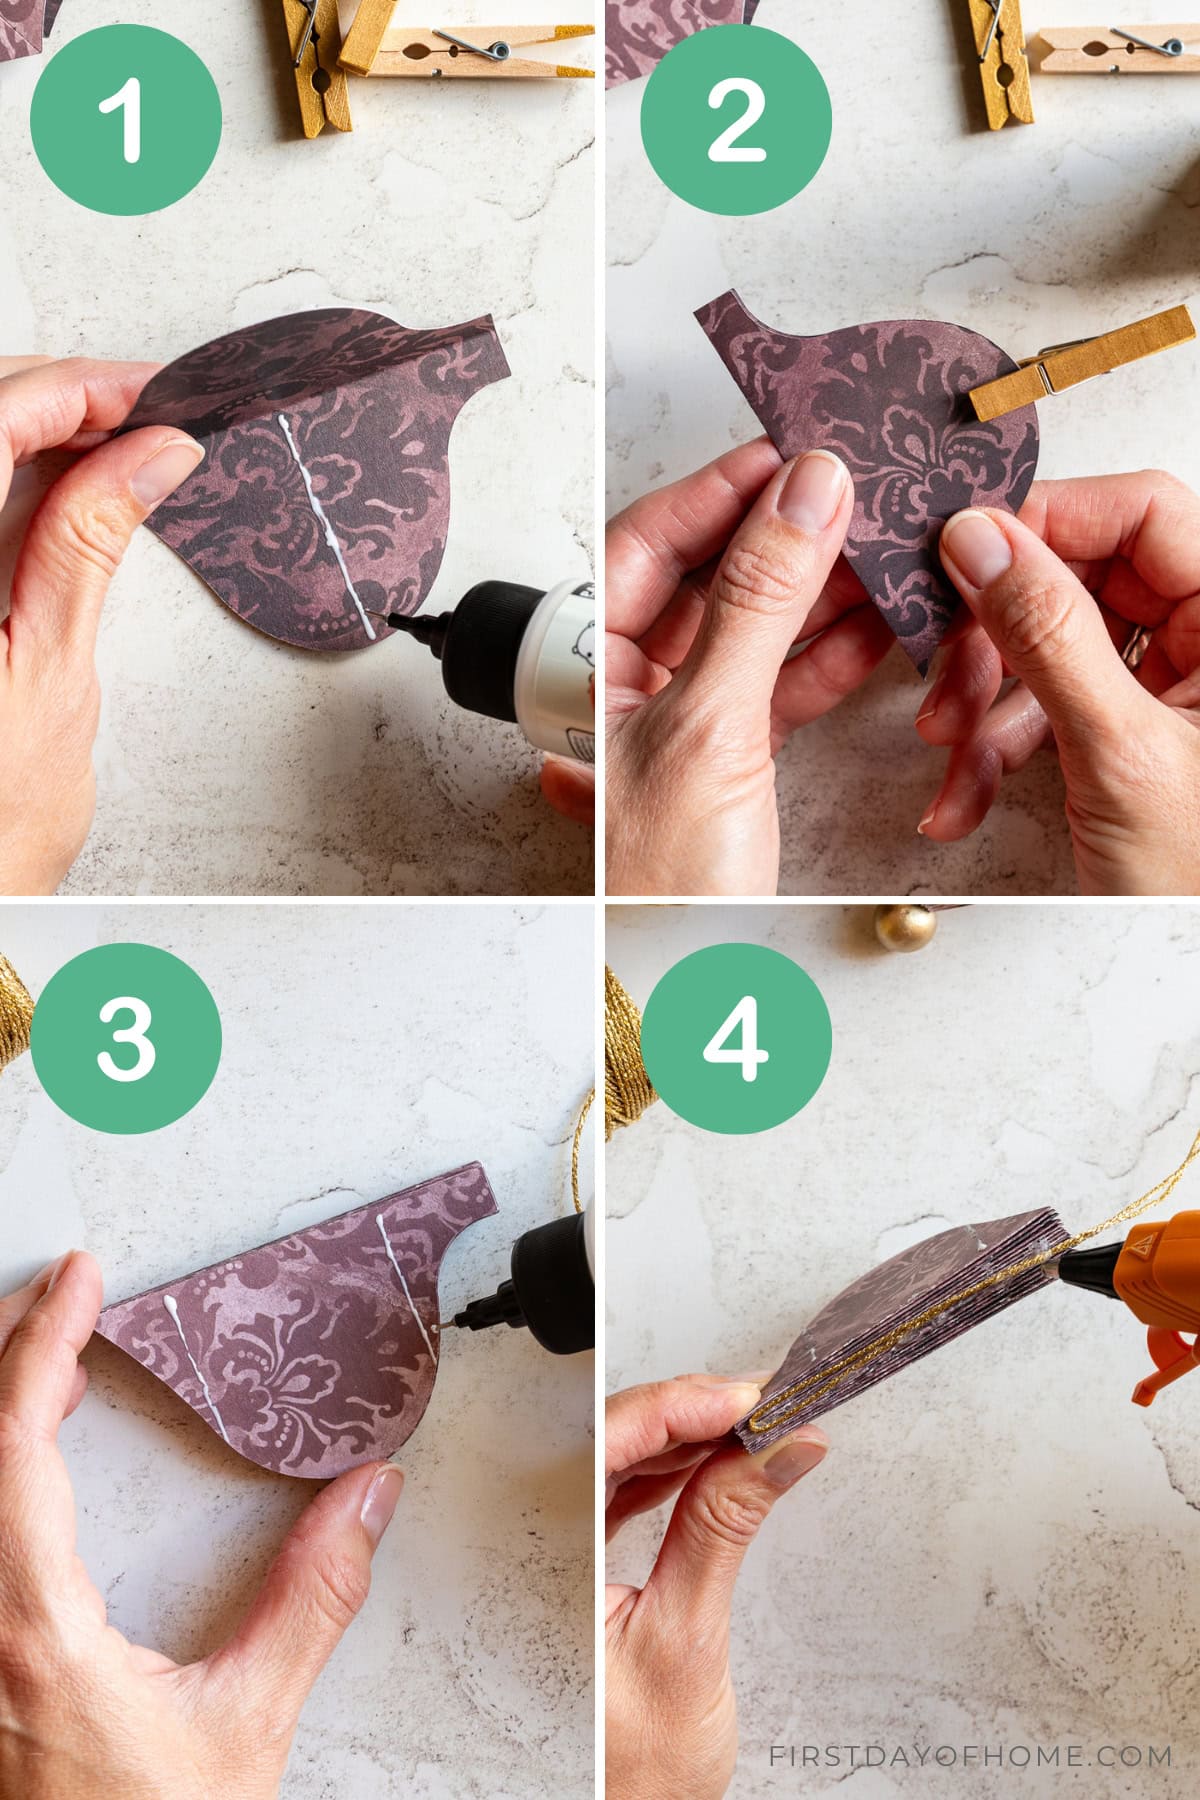
Assemble the paper ornament in four easy steps:
- Fold the ornament shape in half. Then, add a thin line of glue along the midpoint, going from the fold line to the outer edge. Fold the ornament closed. Repeat this step for all of the cutouts.
- Let the glue dry completely (about 15 minutes). It’s helpful to use a clothespin or paper clip to hold the paper in place.
- Add two more lines of glue along the upper third and lower third of the ornament. Then attach the next cutout, and repeat the process until all pieces are attached.
- Let the glue dry completely (about 15 minutes). Then use hot glue to attach a ribbon to hang.
How to Add Ribbon to Hang Your Ornament
Cut a ribbon about 16 inches in length. Fold it in half before gluing it inside the ornament. Tie the dangling strands in a knot after adding a wood bead, if desired.
Once the ornament has completely dried, carefully open the ornament, and seal the final edges using the same technique as step 3 above. Use paper clips to help bind the edges together until the glue is completely dry.
Alternatively, you can use a paper clip to close the ornament, making storage a bit easier since you can fold the ornament up again after Christmas.

For an extra finishing touch, I like adding gold paint along the edges of the ornament. I just love the gilded edge!
You could do this before opening the ornament, but I find it’s easier to get a fine line after the ornament is assembled.
Step 3: Add beads and ribbon

Before tying off the string, I like to add a painted wood bead. This gold metallic paint is my absolute favorite for any painted wood project.
The last step of adding a pretty velvet ribbon is optional, but in my opinion, it seals the deal. Velvet is trending, and it adds just the right contrast in texture.
Tips for success
- Cut ornaments with the pattern facing the same direction for a more cohesive look.
- Be patient. Wait for the glue to dry fully, especially before opening the ornament fully. Rushing the process can cause the paper to rip apart.
- Use clothespins or paper clips to help the glue cure and give a tighter bond.
Get one free ornament pattern!
To get all five ornament shapes in both PDF and Cricut SVG file formats, click “add to cart” below. You’ll also receive a supplies list and step-by-step instructions with photos. Your small contribution keeps my small business afloat, so THANK YOU!
Get all 5 patterns here!
I’m also sharing one free printable pattern for the round ornament if you want to try it out first.
Don’t forget to pin this article so you can find it later and help spread the word! You may also want to check out my Easter paper ornaments, which come in three honeycomb patterns.
Pin it for later!


Crissy, I love these ornaments! I think homemade ornaments give a Christmas tree such character!
Thanks so much, Kim! You’re always so kind. These were really fun to make. Hopefully my kids will enjoy them for years to come as well.
These are gorgeous, Crissy! You always do great crafts and DIYs with easy to follow instructions!
Thanks so much, Julie! It was a lot of fun (and a lot of work) to pull these together. I’m glad you like them.