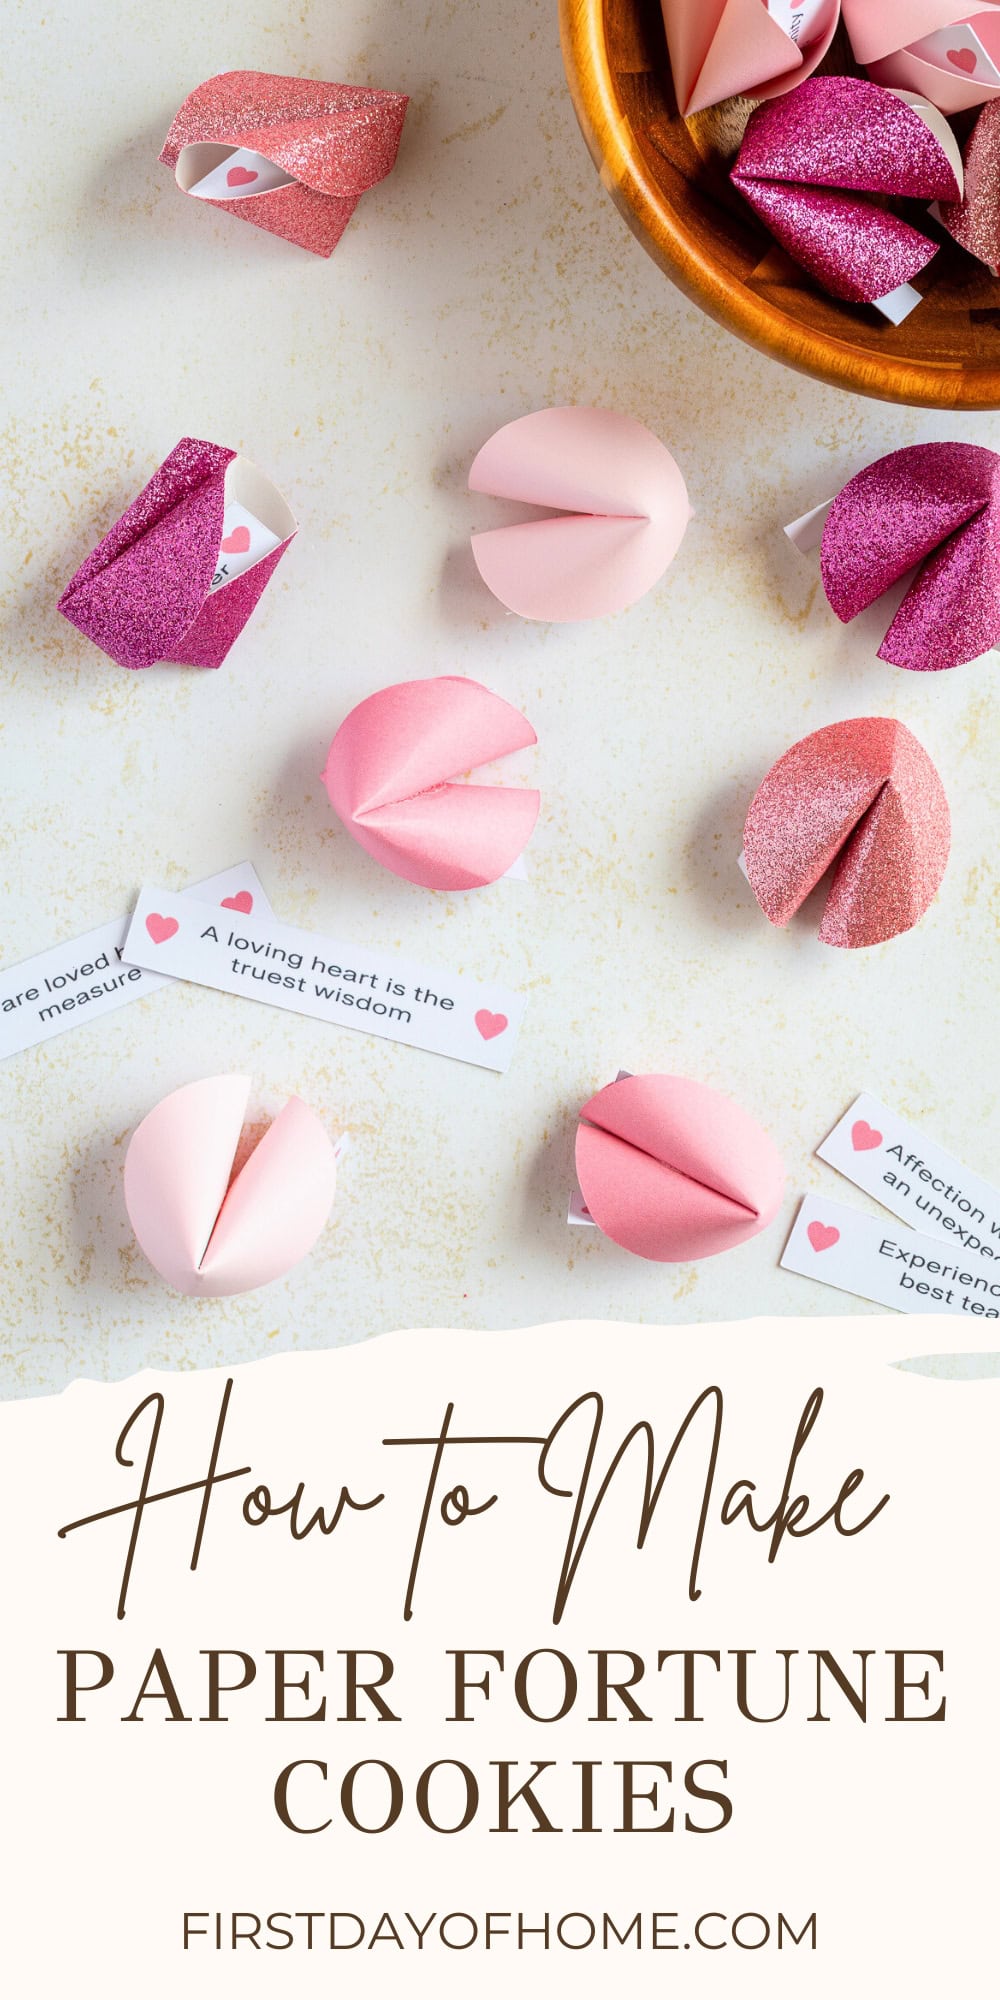
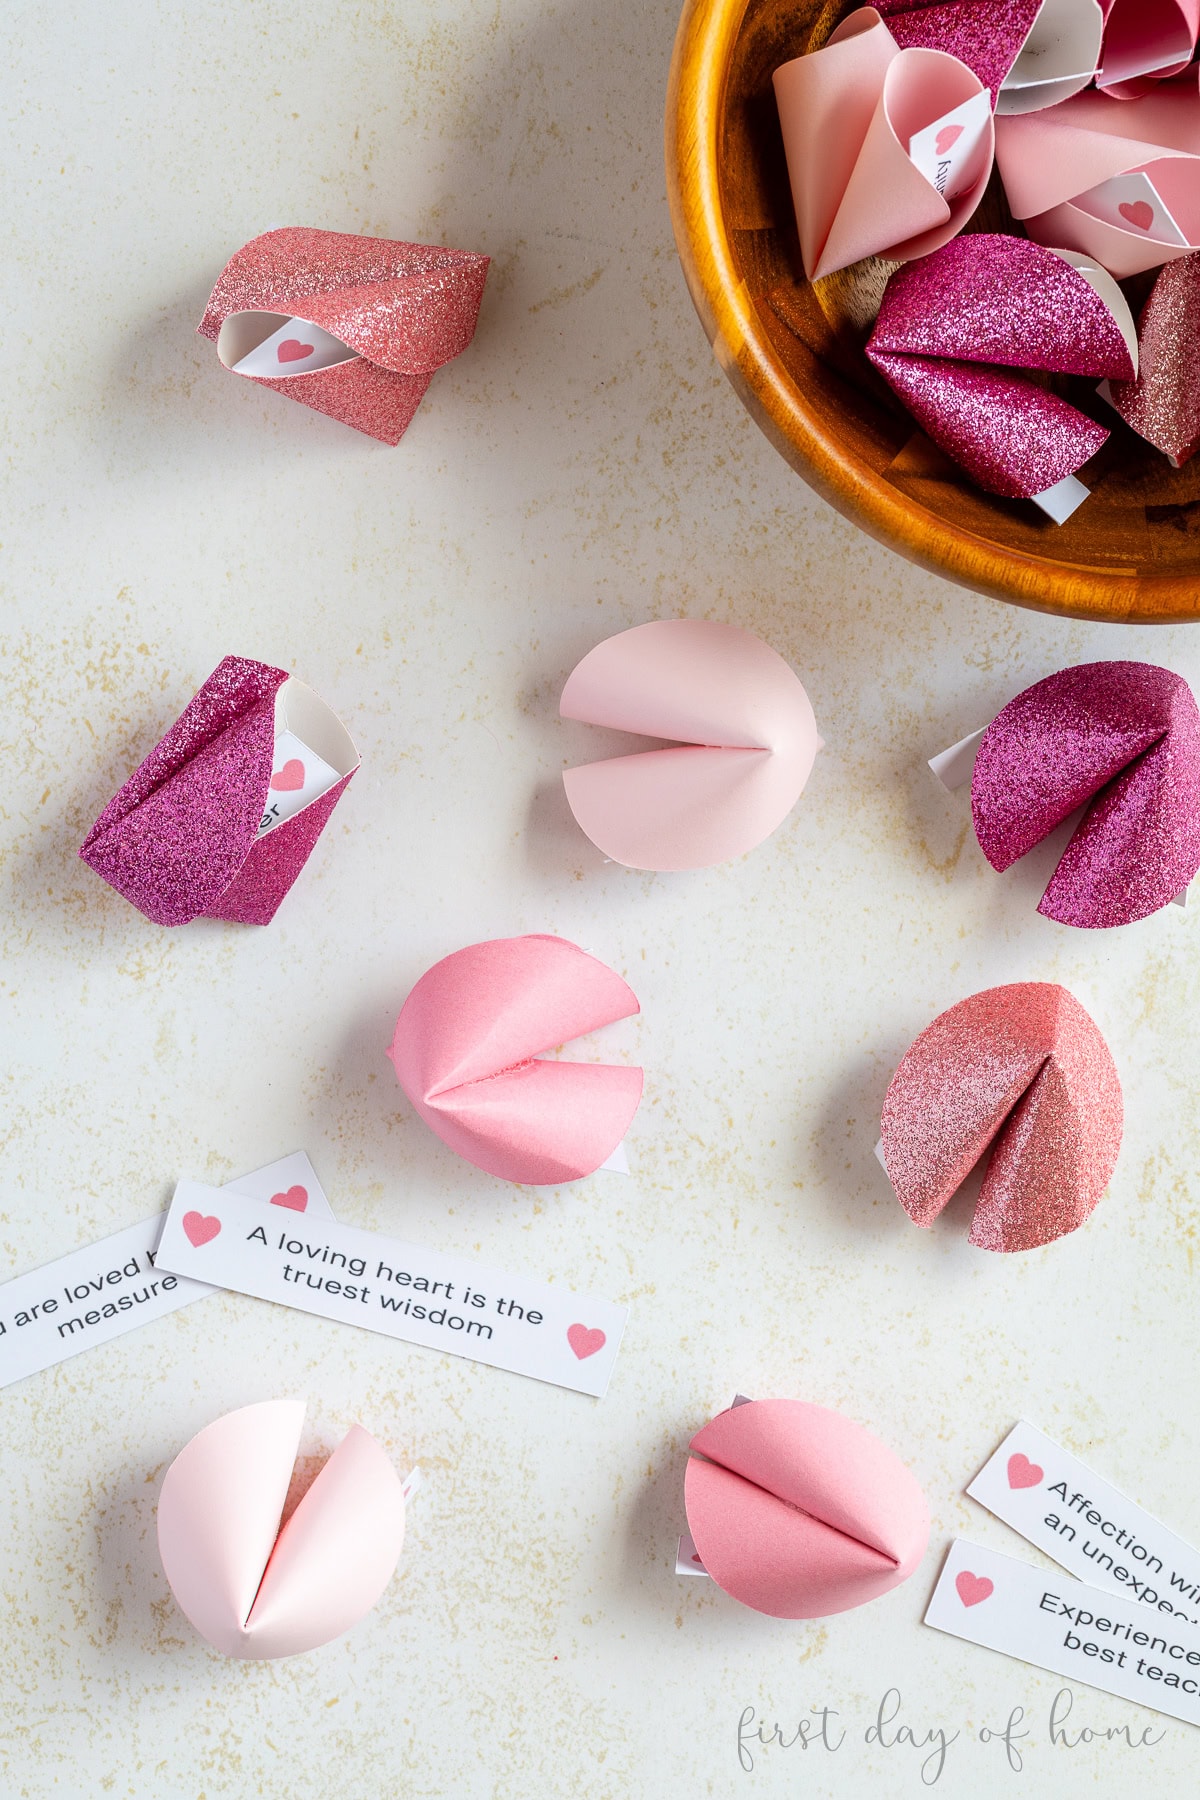
DIY Paper Fortune Cookies
Paper fortune cookies are my new favorite party trick. I’ve always loved getting my fortune after good Chinese takeout, so I thought it would be fun to recreate the experience with paper. Cut your fortune cookies by hand, or grab my Cricut design files to whip up a batch and surprise friends and family.
This post contains affiliate links, and I will be compensated if you make a purchase after clicking on my links. For more information, please see my disclosures.
In anticipation of Valentine’s Day, I decided to create paper fortune cookies filled with uplifting (and sometimes thought-provoking) sentiments. It was fun to think of phrases that might puzzle or delight my twin boys!
You can craft these fortune cookies with any scrapbook paper to customize them for birthdays, Mother’s Day, or New Year’s Eve. The paper fortunes are suitable for just about any occasion.
For another great Valentine’s Day craft, check out my dried flower gift tags.
How to Make Paper Fortune Cookies
You can grab the pre-formatted fortune cookie circles and 20 printable fortunes (PDF and PNG format) in my shop. These files are compatible with Cricut’s “Print Then Cut” feature. With this purchase, you support my small business, so thank you!
Get the Fortune Cookie Design
If you choose not to purchase the bundle, you can still follow these steps to make fortune cookies by hand and write your own fortune phrases.
Supplies
- Scrapbook paper or cardstock
- Cricut machine (optional)
- Craft glue
Step 1: Cut the circles and fortunes
Start by cutting out paper circles about 3 1/4 inches in diameter. In my fortune cookie bundle, the circles are pre-formatted for Cricut, and you can easily create extra copies.
If using my printable fortunes, upload them to Cricut Design Space as a PNG file (Flat Graphic). After adding the fortunes to your canvas in the software, reduce the size until it fits within the Print Then Cut dimensions and matches the circles’ size. My combined set of fortunes measured 6.77 x 8.47 inches.
Watch this Cricut fortune cookie video for instructions to upload and cut the Cricut design files.
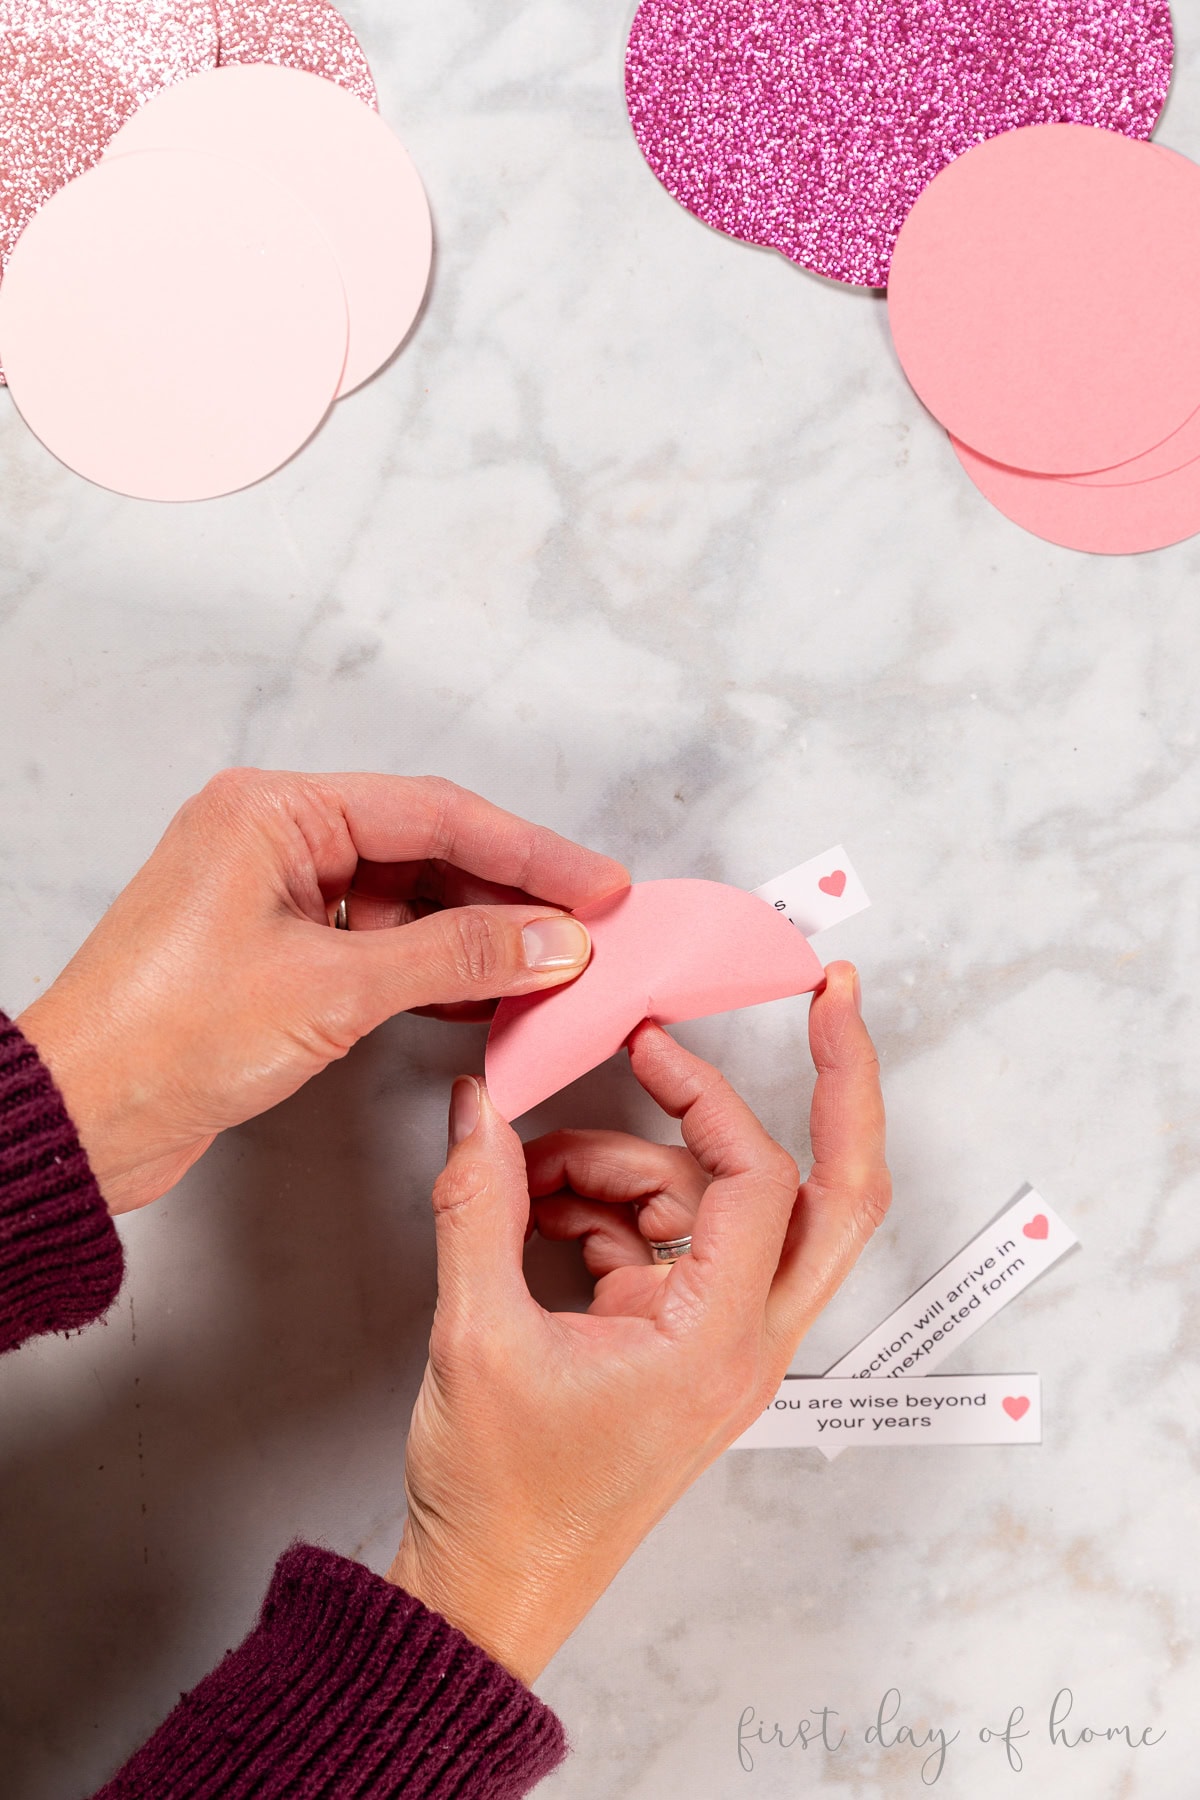
Step 2: Crease the circles in the center
Fold the circles in half, then gently pinch only the center, not the whole diameter. This should leave a roughly 1-inch crease in the center of the circle.

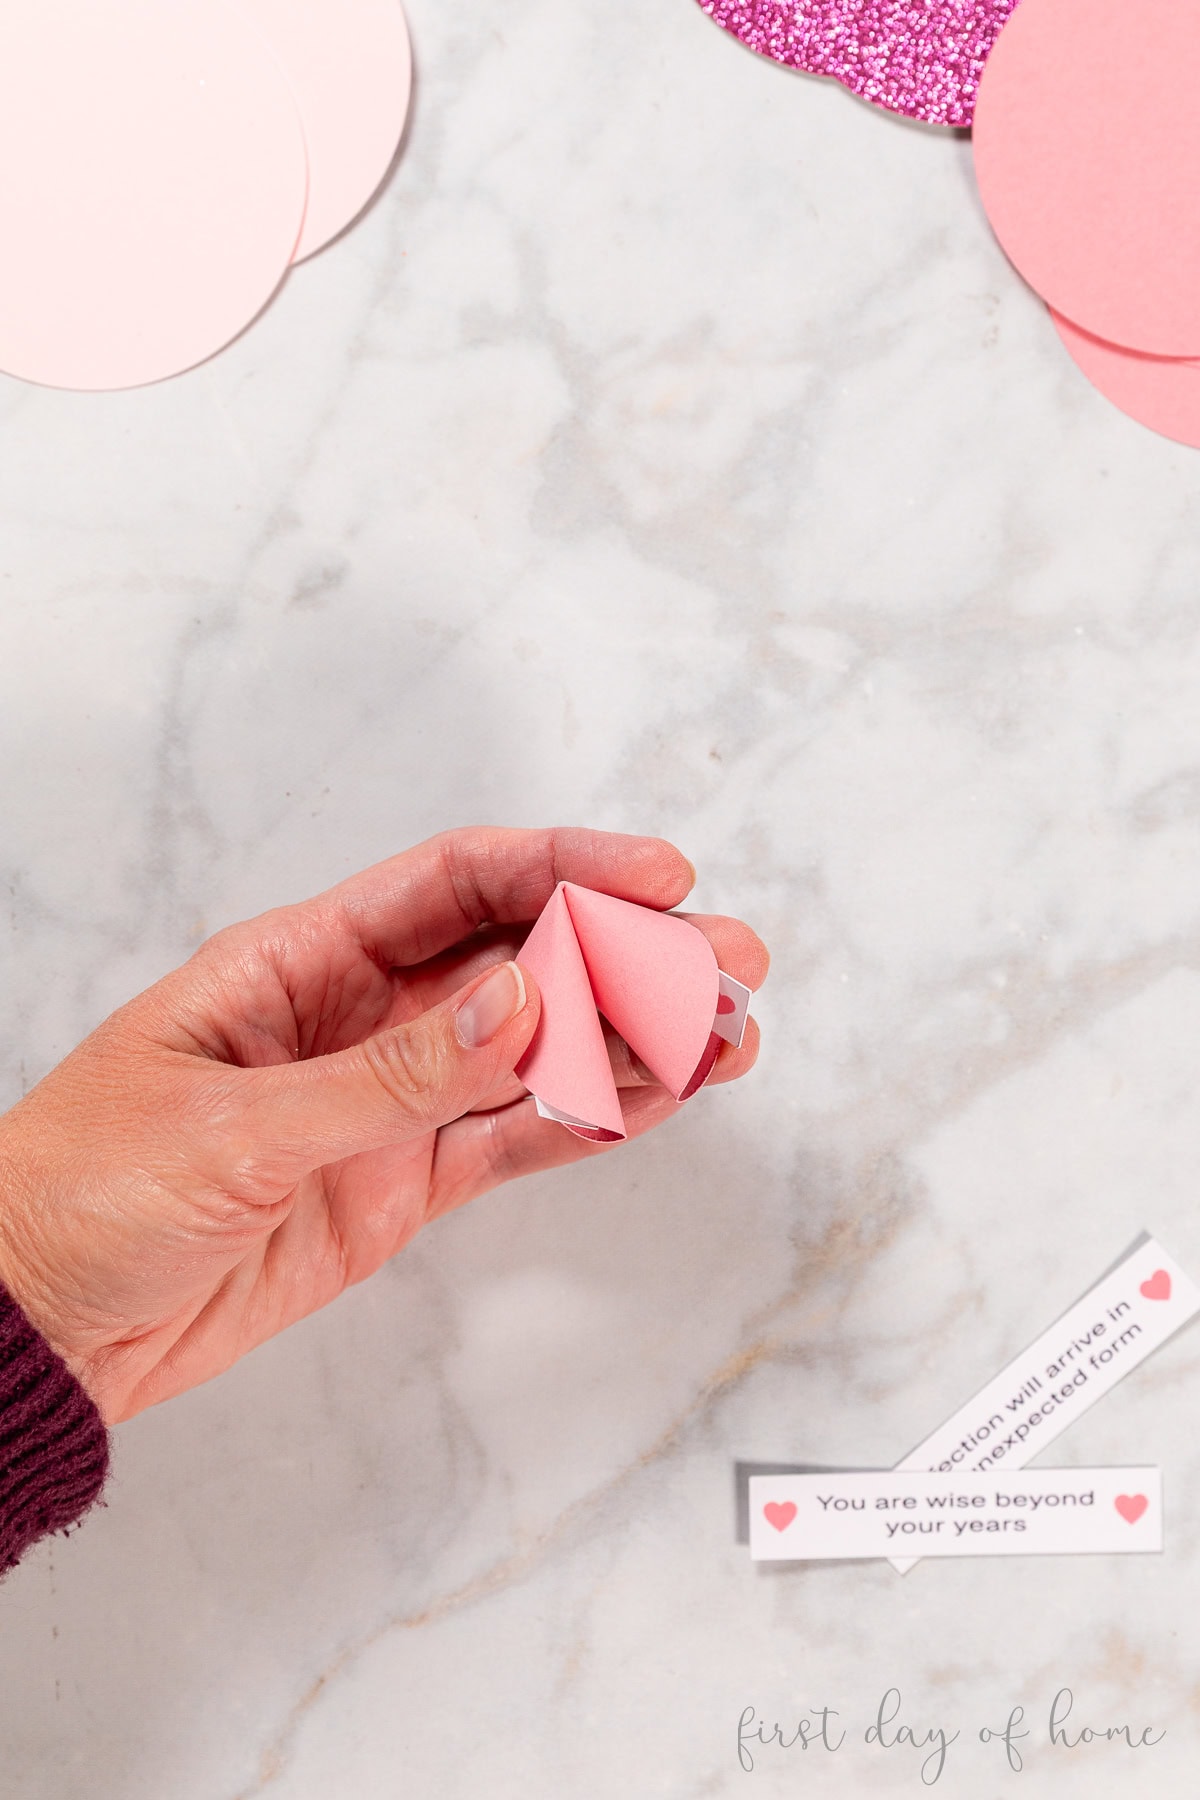
Step 3: Insert a fortune, and fold the circle closed
Open the circle, insert a paper fortune, and bend the circle in the opposite direction of your last fold. Then, press into the crease you created in the last step, as shown below.
After pressing into the first crease, the fortune cookie will fold and appear like the image below.
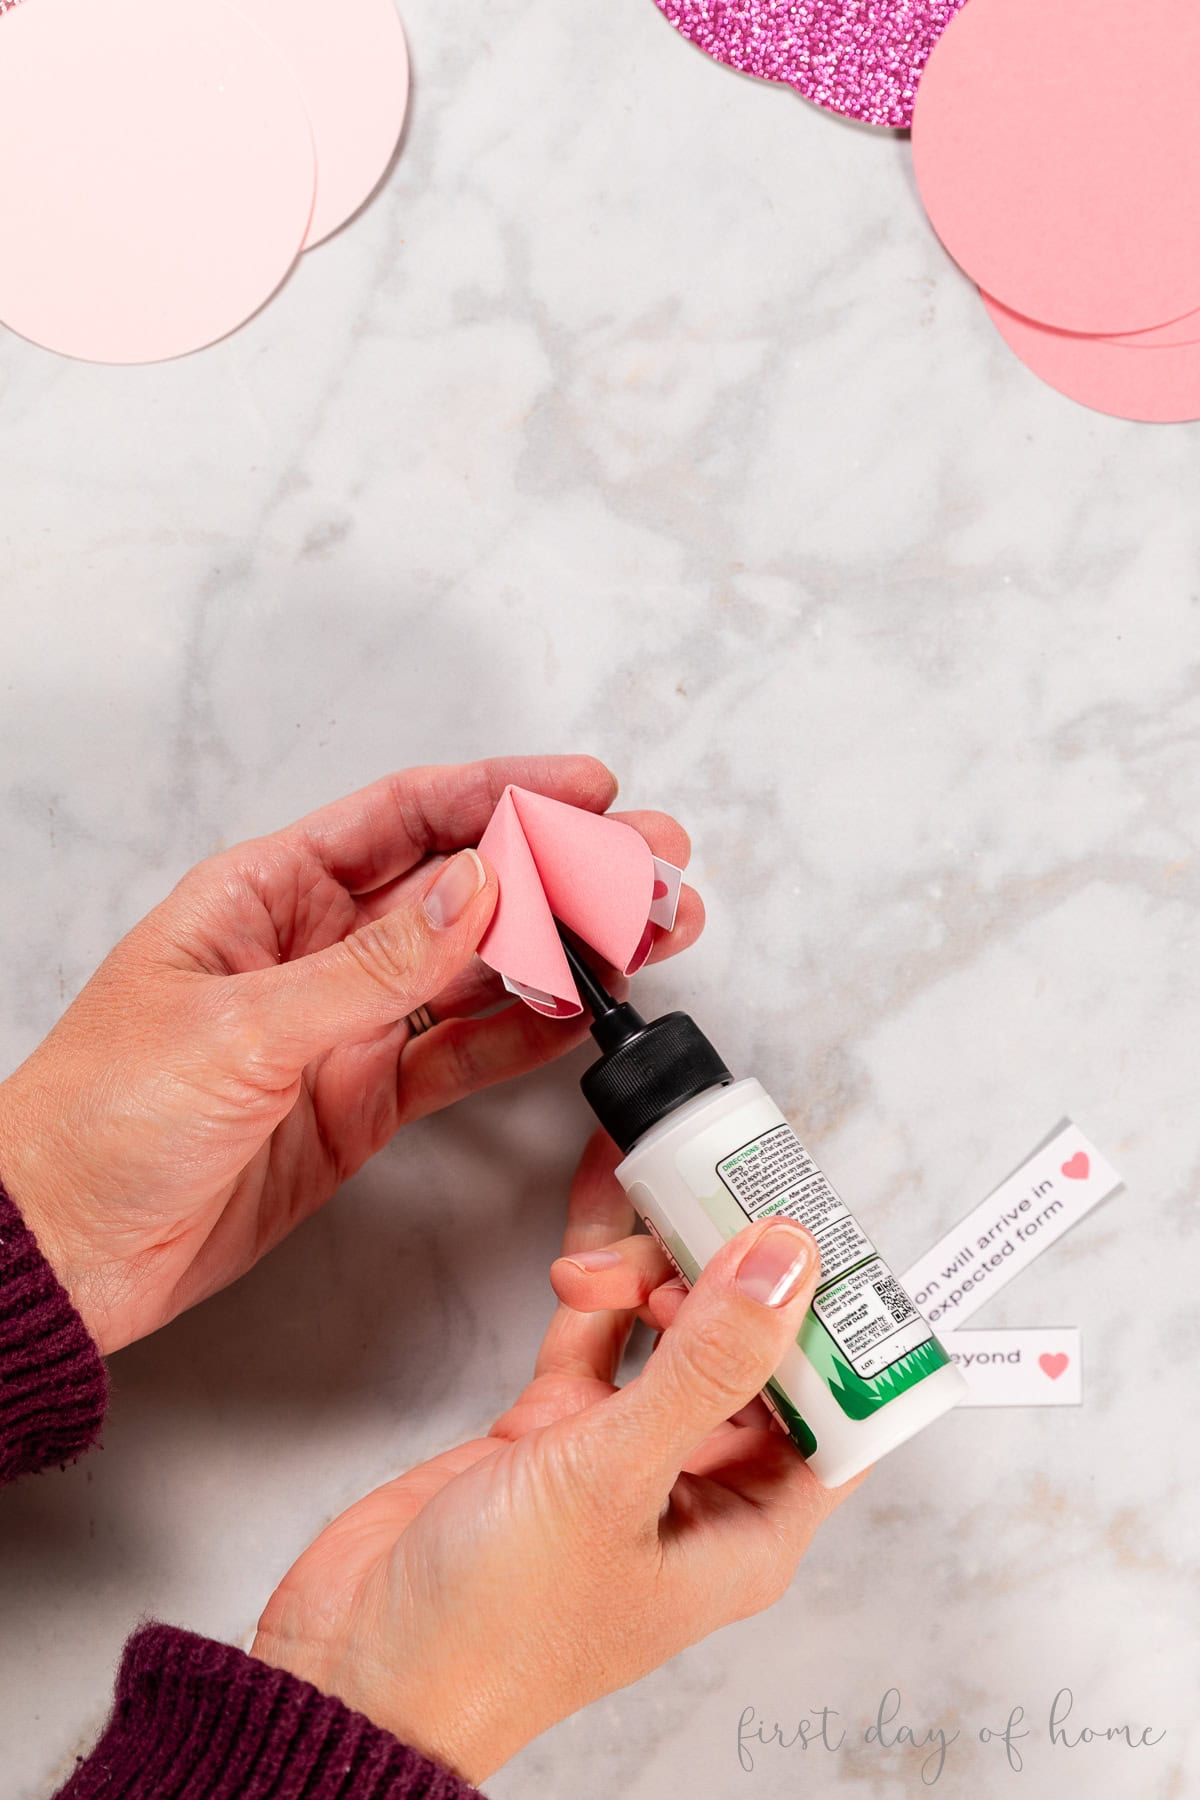
Step 4: Glue the fortune cookie closed
Add a small line of glue to keep the fortune cookie closed. You may want to use a clip or small clothespin to keep the fortune cookie closed while the glue dries.
How to Use Paper Fortune Cookies
I love the idea of passing out fortune cookies at the end of a party after guests have dined. When it’s time for the big reveal, rip open the paper fortune cookies and read your fortunes aloud.
You can also place these festive fortune cookies inside gift bags or at a place setting for an extra surprise.
Be sure to share your creations by tagging me on Instagram (@firstdayofhome) and pin this to Pinterest below!
Pin it for later!