Easy DIY Bead Garland Tutorial
I walked into a local boutique a few months ago and spotted the prettiest wood bead garland with gold accents. The only problem? It cost $120! Yikes! Come see how I created the “look for less” in this simple DIY bead garland project.
This post contains affiliate links, and I will be compensated if you make a purchase after clicking on my links. For more information, please see my disclosures.
Special thanks to Plaid for providing the paints used in this project!
Project Overview
Difficulty: Easy/Beginner
Time required: 1.5 hours active time, 2-3 days including drying time
Cost: $10-12
How to Make a DIY Wood Bead Garland
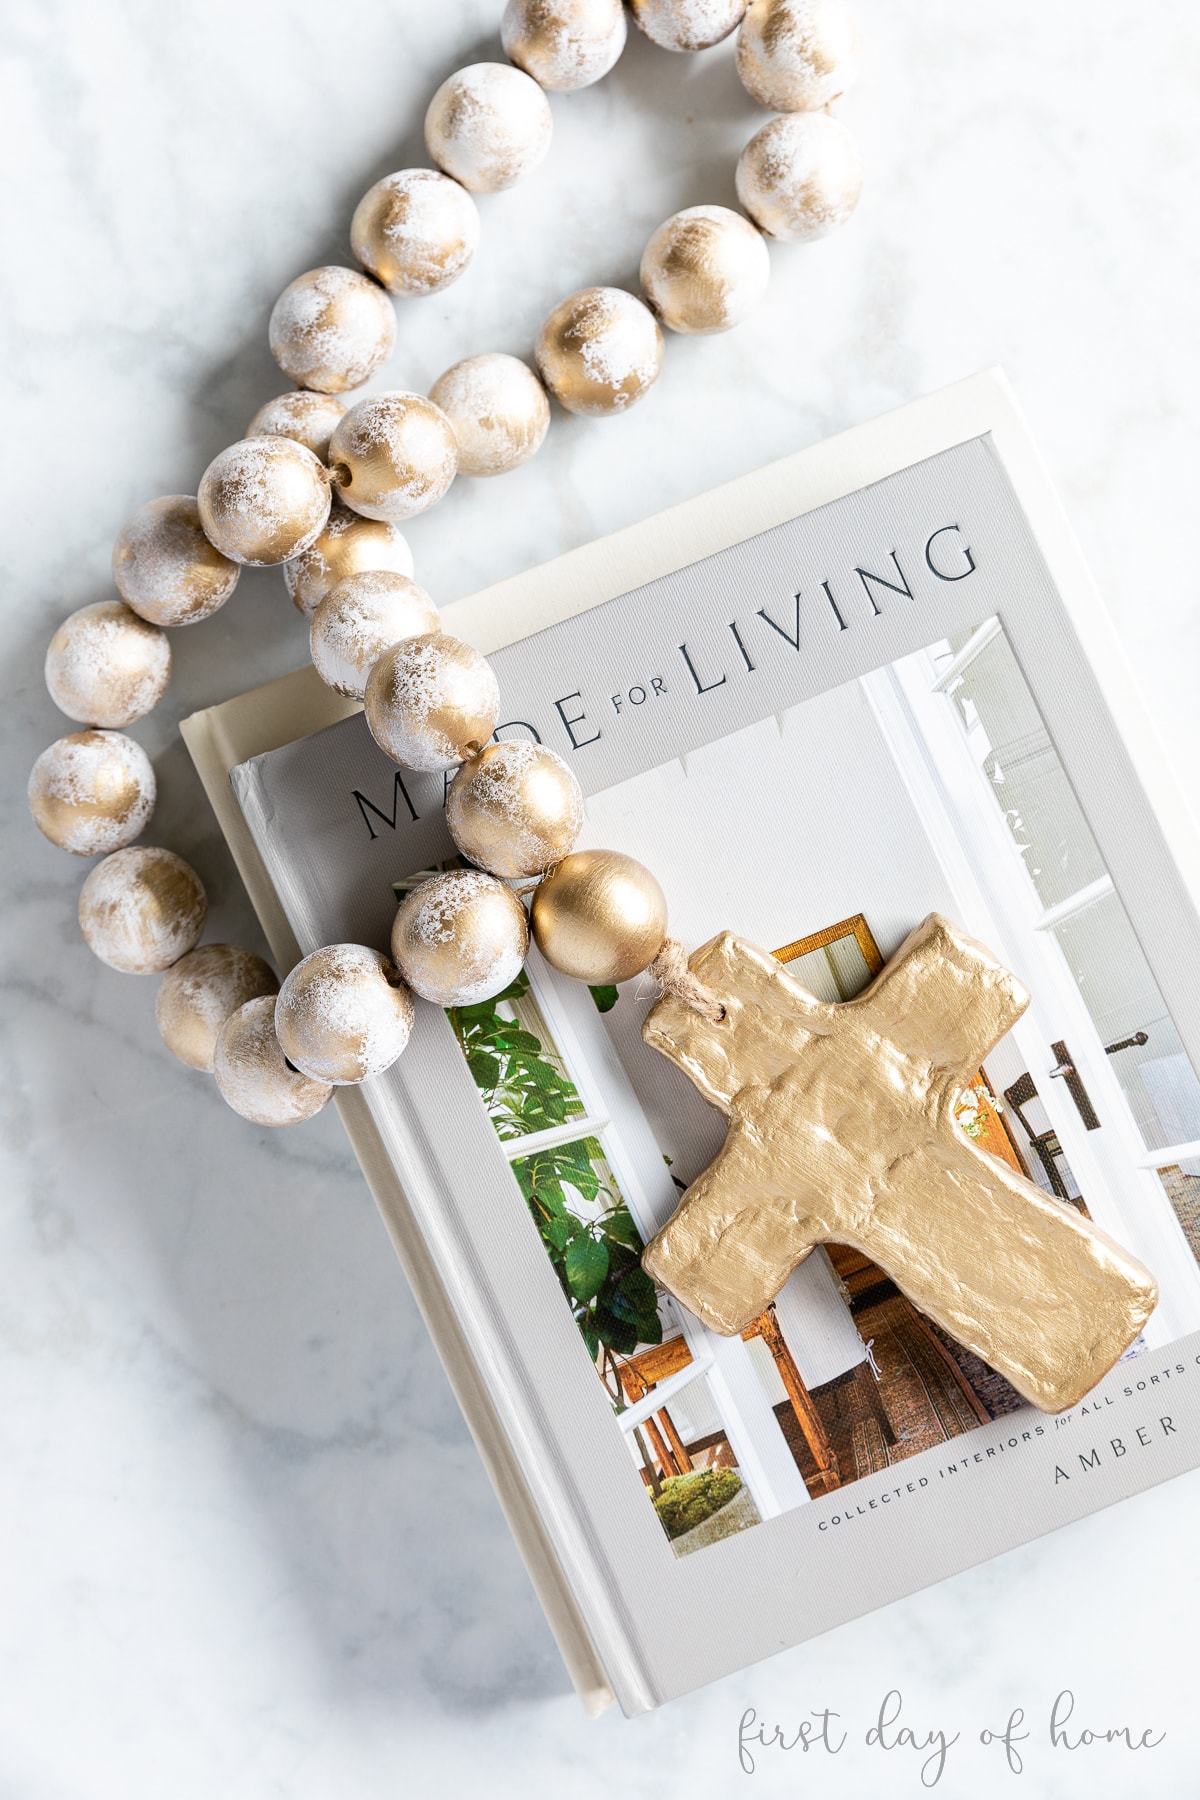
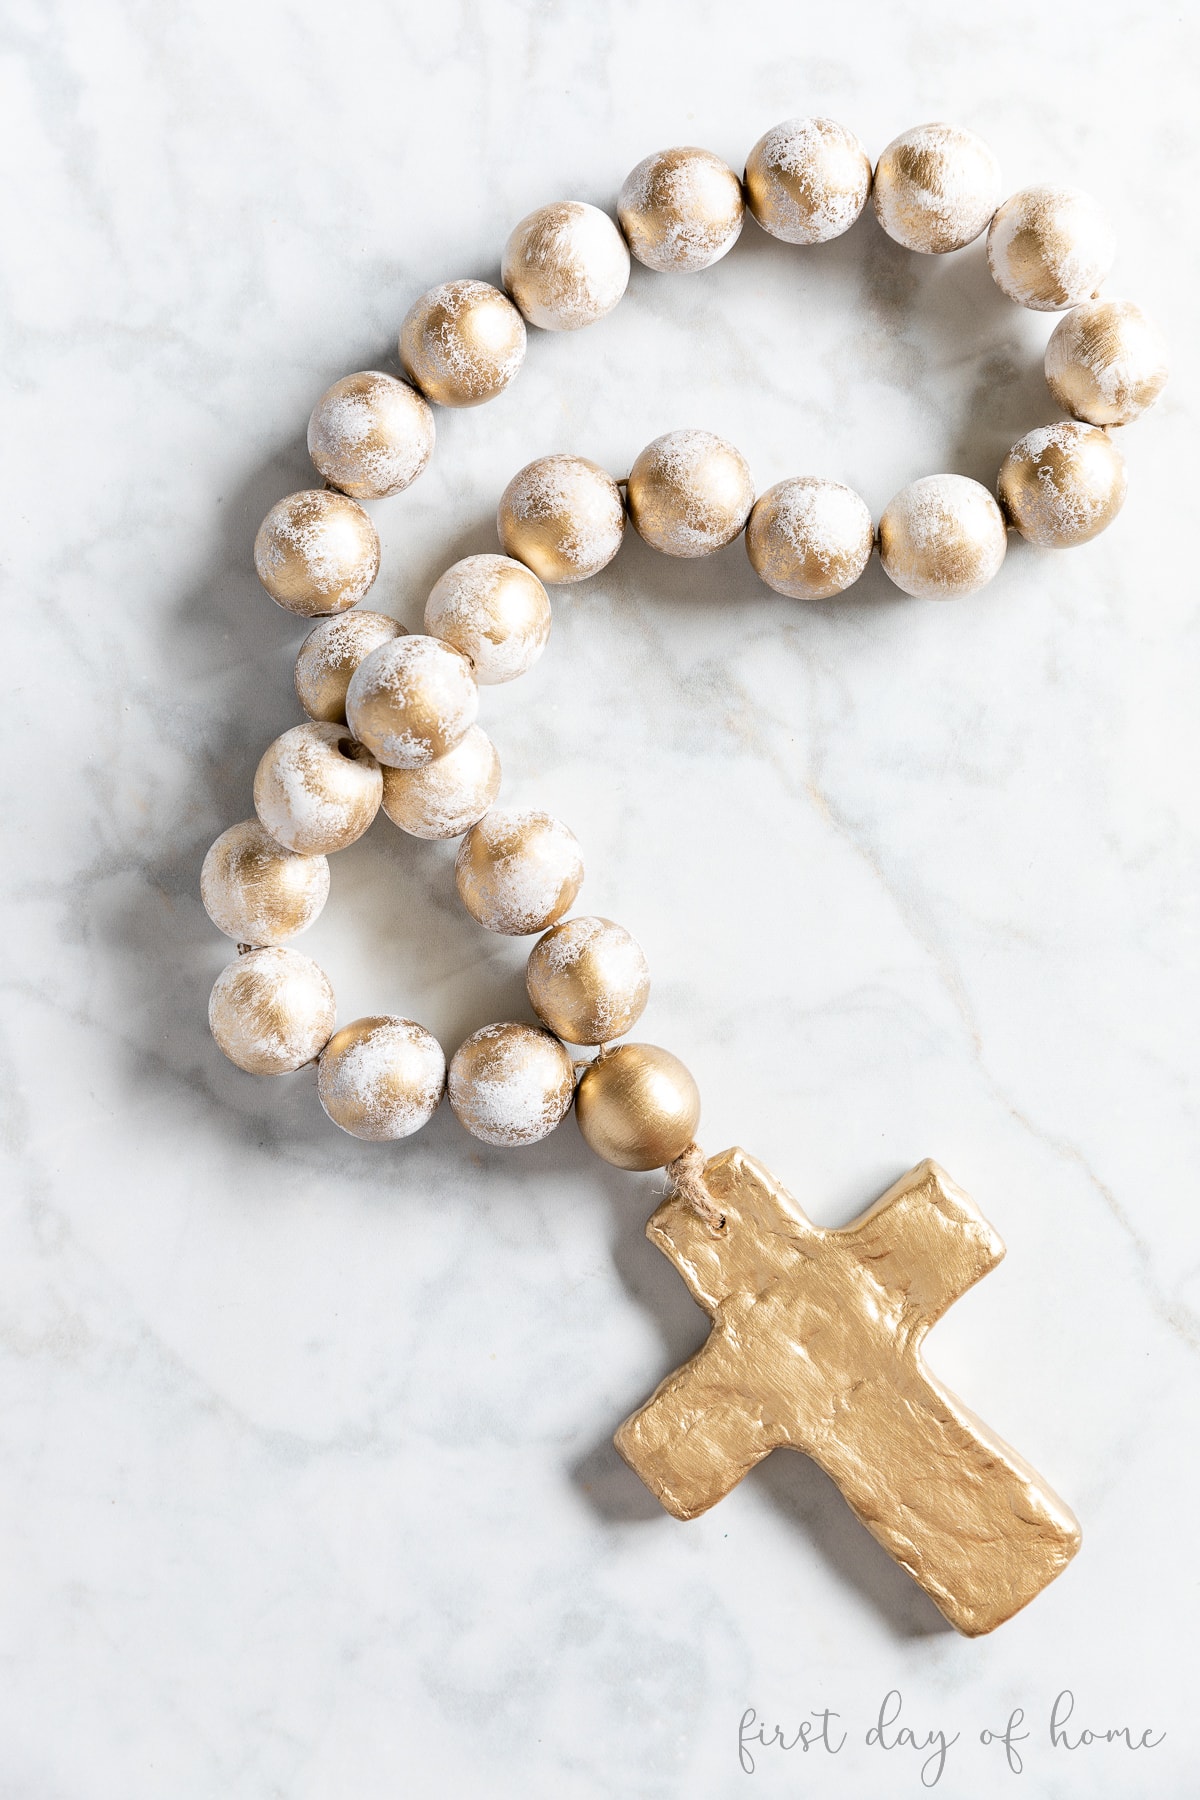
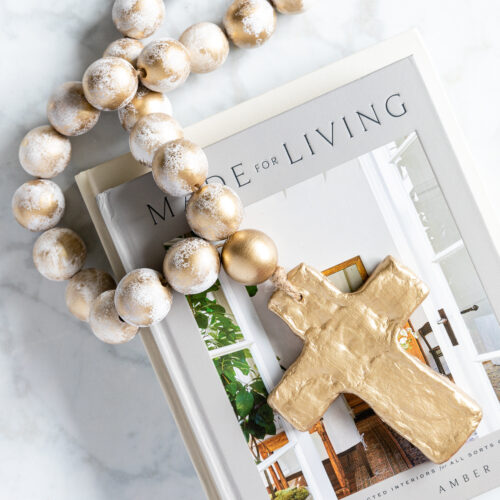
There are many variations in DIY wood bead garlands. Some have tassels on one or both ends. Some have a wooden charm like a fall leaf or a medallion.
For this tutorial, I put my air-dry clay skills to good use to mimic the garland I had seen in the store. The boutique had wooden garlands with hearts and crosses on the ends. I thought a simple cross would look great with my coffee table decor.
Watch on YouTube
To see this DIY project in action, click on the image or button below. You’ll also find four more air-dry clay projects to try at home.

Supplies
- Chunky wooden beads
- Air-dry clay
- Aluminum foil
- White chalk paint
- Gold acrylic paint (Mayan Gold color)
- Sponge
- Jute string
- Glass bottle or plastic rolling pin
- Paintbrushes
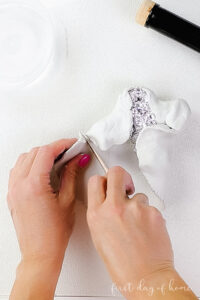
Step 1: Create an armature for the clay cross
When working with air-dry clay, it’s helpful to create an armature, or base, for your sculpture. In this case, I used household foil to create the cross shape.
There’s no set way to create your shape. Just smoosh the foil together until you achieve the shape you like.
To finish off the structure, you can use the pointed end of your sculpting tools to poke a small hole in the top. This is where you will thread the jute twine.
Step 2: Roll and shape the air-dry clay
Once you have formed the armature, roll out the clay into a sheet about 1/4-inch thick. You can use a tall glass bottle, vase, or plastic rolling pin for this step. I also recommend using a smooth plastic cutting board or parchment paper taped down to protect your work surface.
Once your clay is a smooth, even consistency, wrap it around the foil structure and smooth out any bumps or creases with your fingers.

If the clay begins to dry out, you can add more moisture with your fingertips. Feel free to add more clay to cover any gaps as needed.
Remember to make a small hole at the top of the clay to match the one in the foil. Then allow the clay to dry for 1-2 days until it feels completely dry to the touch.
Pro Tip
While your clay is drying, you can place the clay sculpture on a cookie rack to provide airflow on both sides. You can also use a damp paper towel to protect thin areas from drying too quickly.
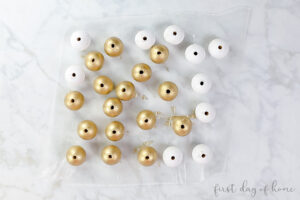
Step 3: Paint a base coat on the wooden beads

While the clay cross is drying, paint roughly half of the wooden beads with white chalk paint and half with metallic gold paint.
I can’t recommend this gold paint enough! It’s the same one I used for my craft room wireless lights, and it has a beautiful sheen.
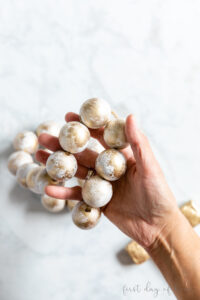
Step 4: Paint texture onto the wooden beads
After the first coat of paint has dried (about 1 hour), apply some texture to the wooden beads using the tip of a sponge and the opposite paint color.

Dampen the sponge in water before dipping the edge into the paint. Then, dab off the excess using a paper towel before applying it to the beads. This gives the beads a nice “dry brush” effect.
You can see this technique in action if you watch my YouTube video linked above. I left one wooden bead completely gold for the first bead of the garland.
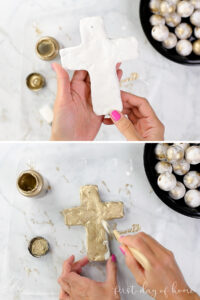
Step 5: Paint the clay cross
While the wood beads are drying, paint the clay cross with one or two coats of gold paint. Wait about one hour in between coats after painting each side.

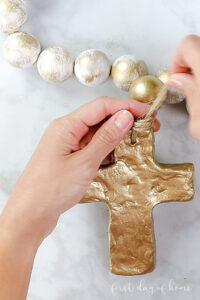
Step 6: Assemble the DIY bead garland
Once all of the pieces of the garland have dried, begin assembling them with jute twine. First, thread all of the wooden beads onto the jute twine, leaving the gold bead for last.

Then, cut the twine, leaving 8-10 inches on both ends to thread the last gold bead and the cross. Thread both ends of the twine through the last gold bead before threading the ends through the cross.
It helps to wrap a piece of scotch tape around the ends of the twine if the strands start to unravel.
Decorating with a DIY Bead Garland
Wood bead garlands are so trendy right now as a home decor accent. I like to display mine year-round on my coffee table. I love that it’s perfect for Christmas coffee table decor too!
You can also display beads on a tiered tray, bookcase, or fireplace mantel to add a variety of shapes and colors to your decor.
Let me know how you plan to use (or gift) your garland, and don’t forget to save this on Pinterest!
Pin it for later!

DIY Bead Garland
Equipment
- Glass bottle or plastic rolling pin
Supplies
Instructions
- Create an armature for the clay cross using tin foil. Simply shape and press two pieces of foil together to form a cross in your desired size. You can also choose to make a heart, star, or any other shape instead.
- Create a hole in the top of your shape where you will thread the garland later.
- Roll and shape the air-dry clay into a flat sheet about 1/4-inch thick. Then, shape the clay around the armature and smooth out any rough spots with your fingertips. Be sure to add a hole in the clay to match the foil underneath.

- Let the clay cross dry for 1-2 days, flipping it over as needed. You can also set the clay on a baking rack to provide more airflow.
- Paint 1-2 coats on the wooden beads, alternating gold or white paint for each bead. Wait 1 hour in between coats.

- Add texture to the beads using a damp sponge dipped in the opposite color of paint. Remove as much excess paint as possible on a paper towel for a "dry brush" effect as you gently dab the beads. Reserve one gold bead without texture for later.
- Once the clay is dry, paint the surface with 1-2 coats of gold paint or any other color you desire. Let the paint dry completely in between coats.
- After all of the pieces are dry, begin stringing the beads onto jute twine, leaving the gold bead for last.
- Cut the jute twine, leaving about 8-10 inches on both ends. Place both ends of the jute cord through the last gold bead. Then attach the cross and tie a knot. Cut off any excess string.
Notes
You Might Also Like…
I agree. The dry brush effect definitely looks better than if it was painted a pure golden color. Have you tried this technique with other colors?
Hi Blake. I do love the chalky finish with the dry brush technique. I plan to try this with some other neutral or warm colors and experiment with it. Thanks for stopping by!
Great idea, Crissy. You’ve given me an idea for making a similar one. Very pretty. Pinned.
Thanks, Carol! It was very relaxing to make this. I hope you enjoy adding a new spin on it! Thanks for pinning as well.