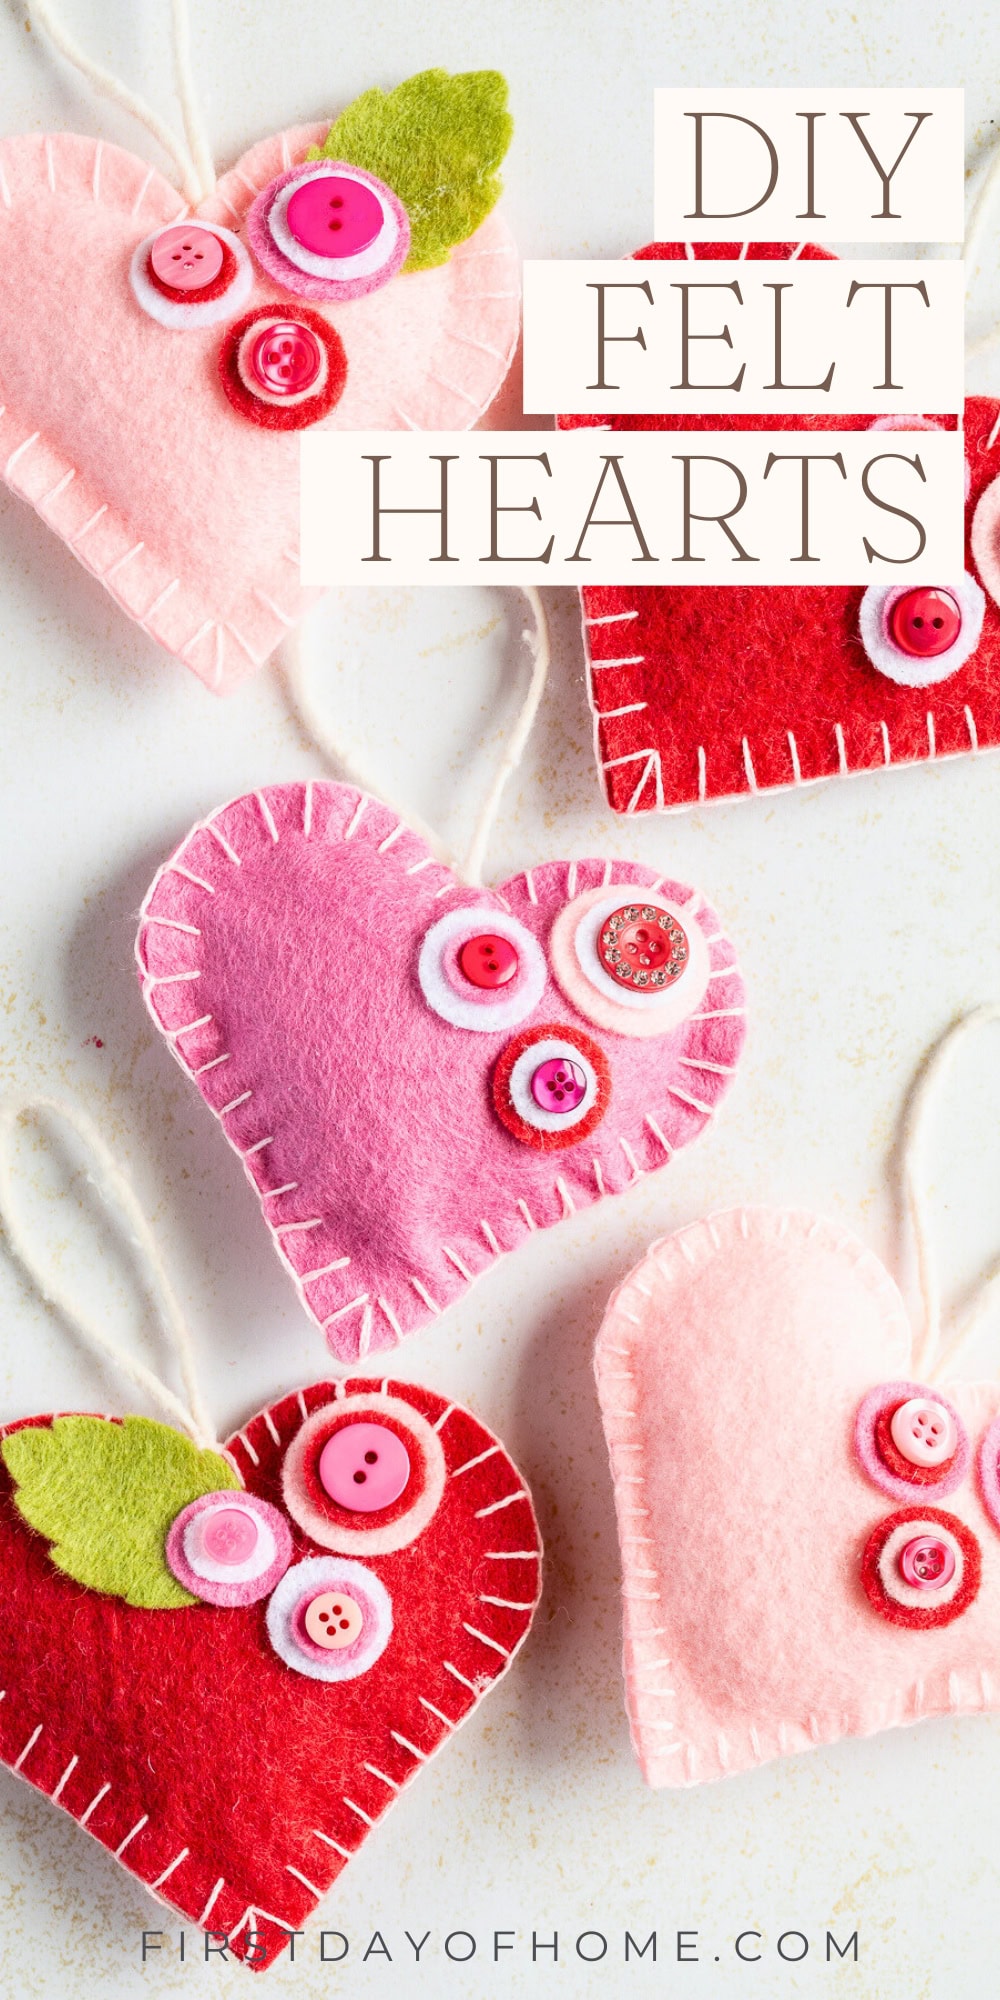
Felt Heart Ornaments with Buttons
I’ve finally warmed up to the idea of a Valentine’s Day tree, so I decided to create some DIY felt heart ornaments to decorate it! These felt hearts have adorable button accents that resemble flowers, which adds to the charm. You can whip these up in no time using a Cricut machine or cutting by hand.
This post contains affiliate links, and I will be compensated if you make a purchase after clicking on my links. For more information, please see my disclosures.
Felt is having a moment right now, and why shouldn’t it? It’s a great material for crafting all types of seasonal decor, including ornaments, garlands, and flowers. After making a Valentine’s Day heart garland, I knew I wanted to tackle another felt project.
There’s just something so cozy about this fuzzy material that gives things a sweet, nostalgic touch.
You’ll find a wide variety of felt for crafting, from synthetic blends to 100% wool. I decided to use a synthetic wool blend for this project, but I’ve also used polyester craft felt for a stiffer structure. You can see an example of that in my felt pennant flags.
I used my Cricut Maker 3 for this project, but you could easily cut the pieces by hand.
How to Make Felt Heart Ornaments
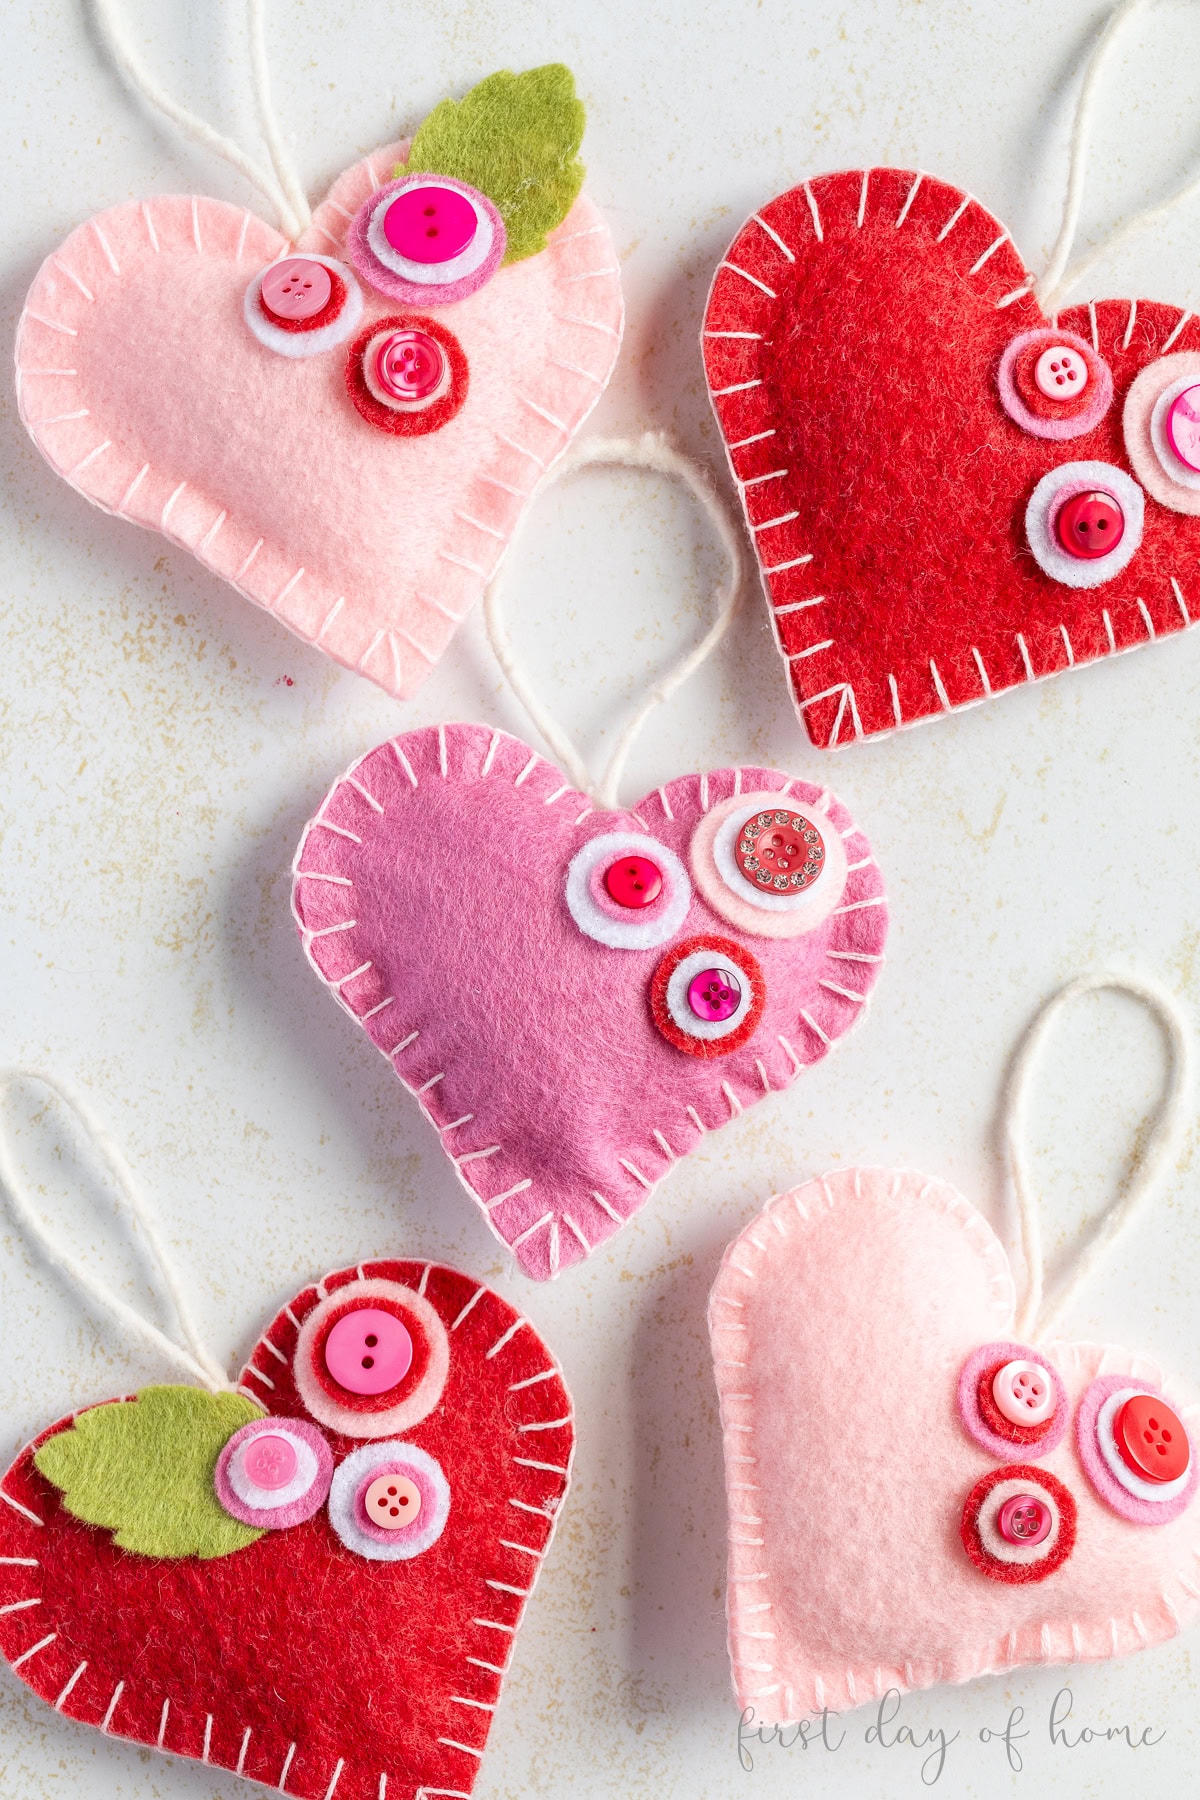
These felt hearts feature a decorative blanket stitch around the edges, along with button flowers and felt leaves. However, you can also keep things simple by skipping the buttons or gluing the edges of the hearts.
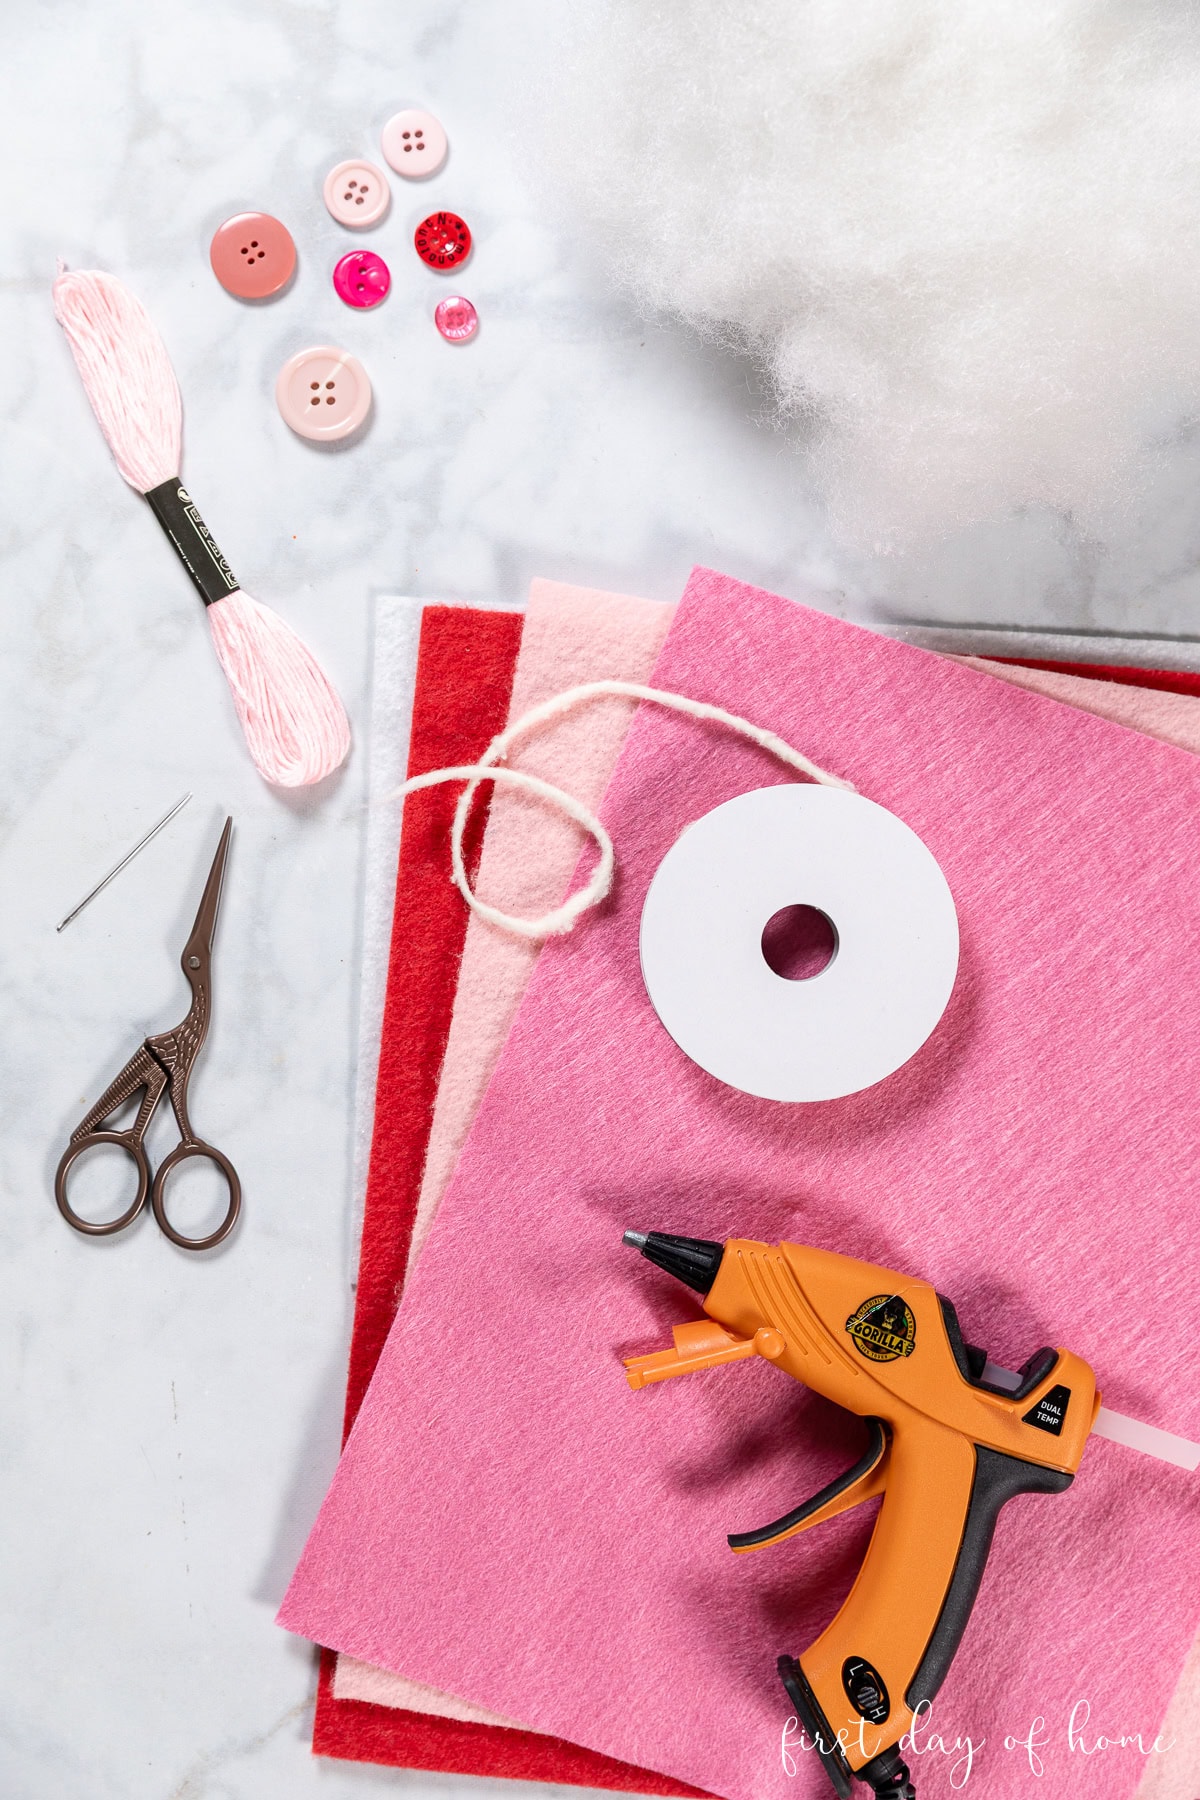
Supplies
- Cricut machine (Joy*, Joy Xtra, Maker, or Explore series) – optional
- Cricut Rotary Blade – preferred for Maker machines
- Cricut Strong Grip Cutting Mat – recommended
- Wool blend felt
- Embroidery floss
- Fiber fill
- Ribbon
- Buttons – optional
- Hot glue
If using the Cricut Joy, you may need to cut with more pressure and place transfer tape on the mat (sticky side up) to attach the felt. Test a small piece for cutting the entire project.
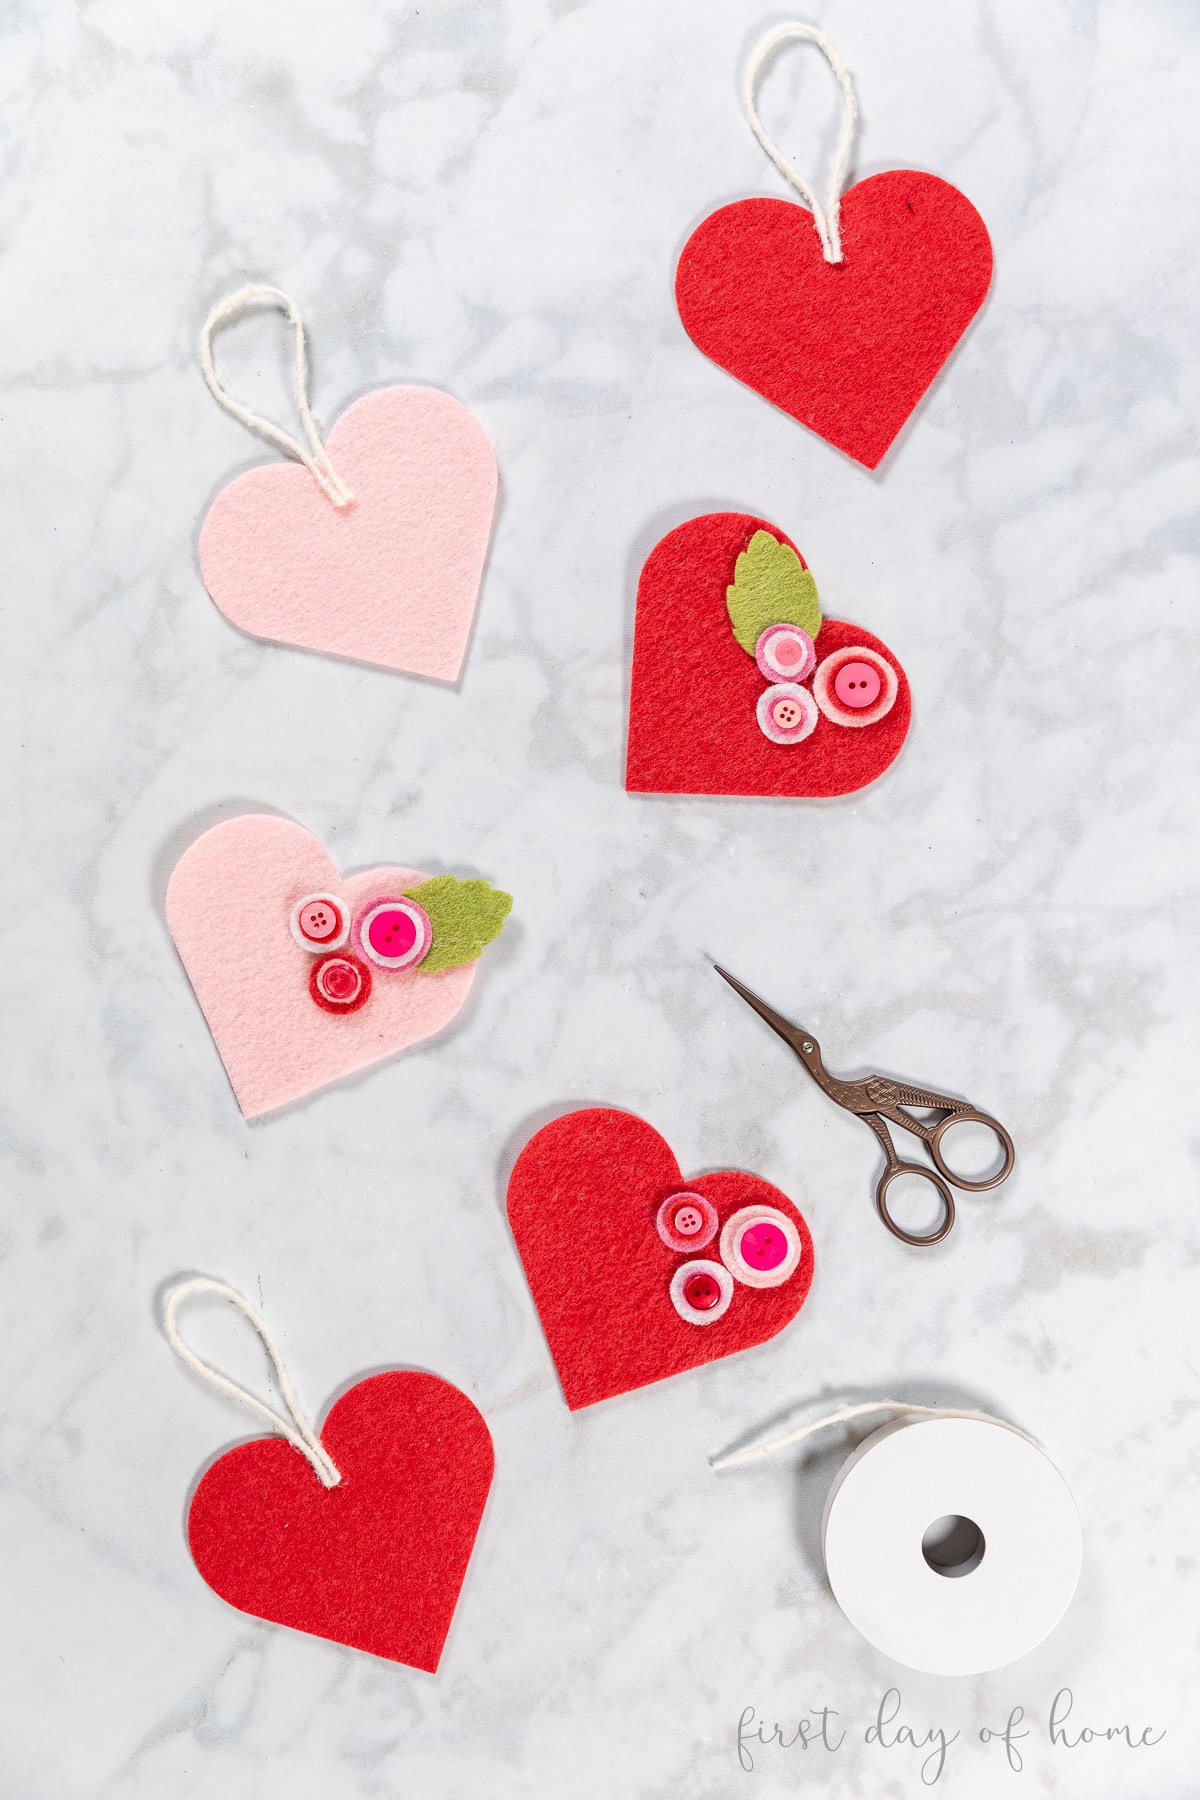
Step 1: Cut the felt pieces
Option 1 – Cut by hand
A Cricut machine certainly comes in handy, but it’s not critical. If you cut the shapes by hand, you can make a quick template with cardstock for the hearts and circles.
Note: You’ll need two sizes of circles for the button flowers.
Option 2 – Cut with Cricut
You can find the pattern for the hearts and small circle pieces under my Cricut Design Space profile. Please be sure to follow me so you can see more of my future projects on the platform!
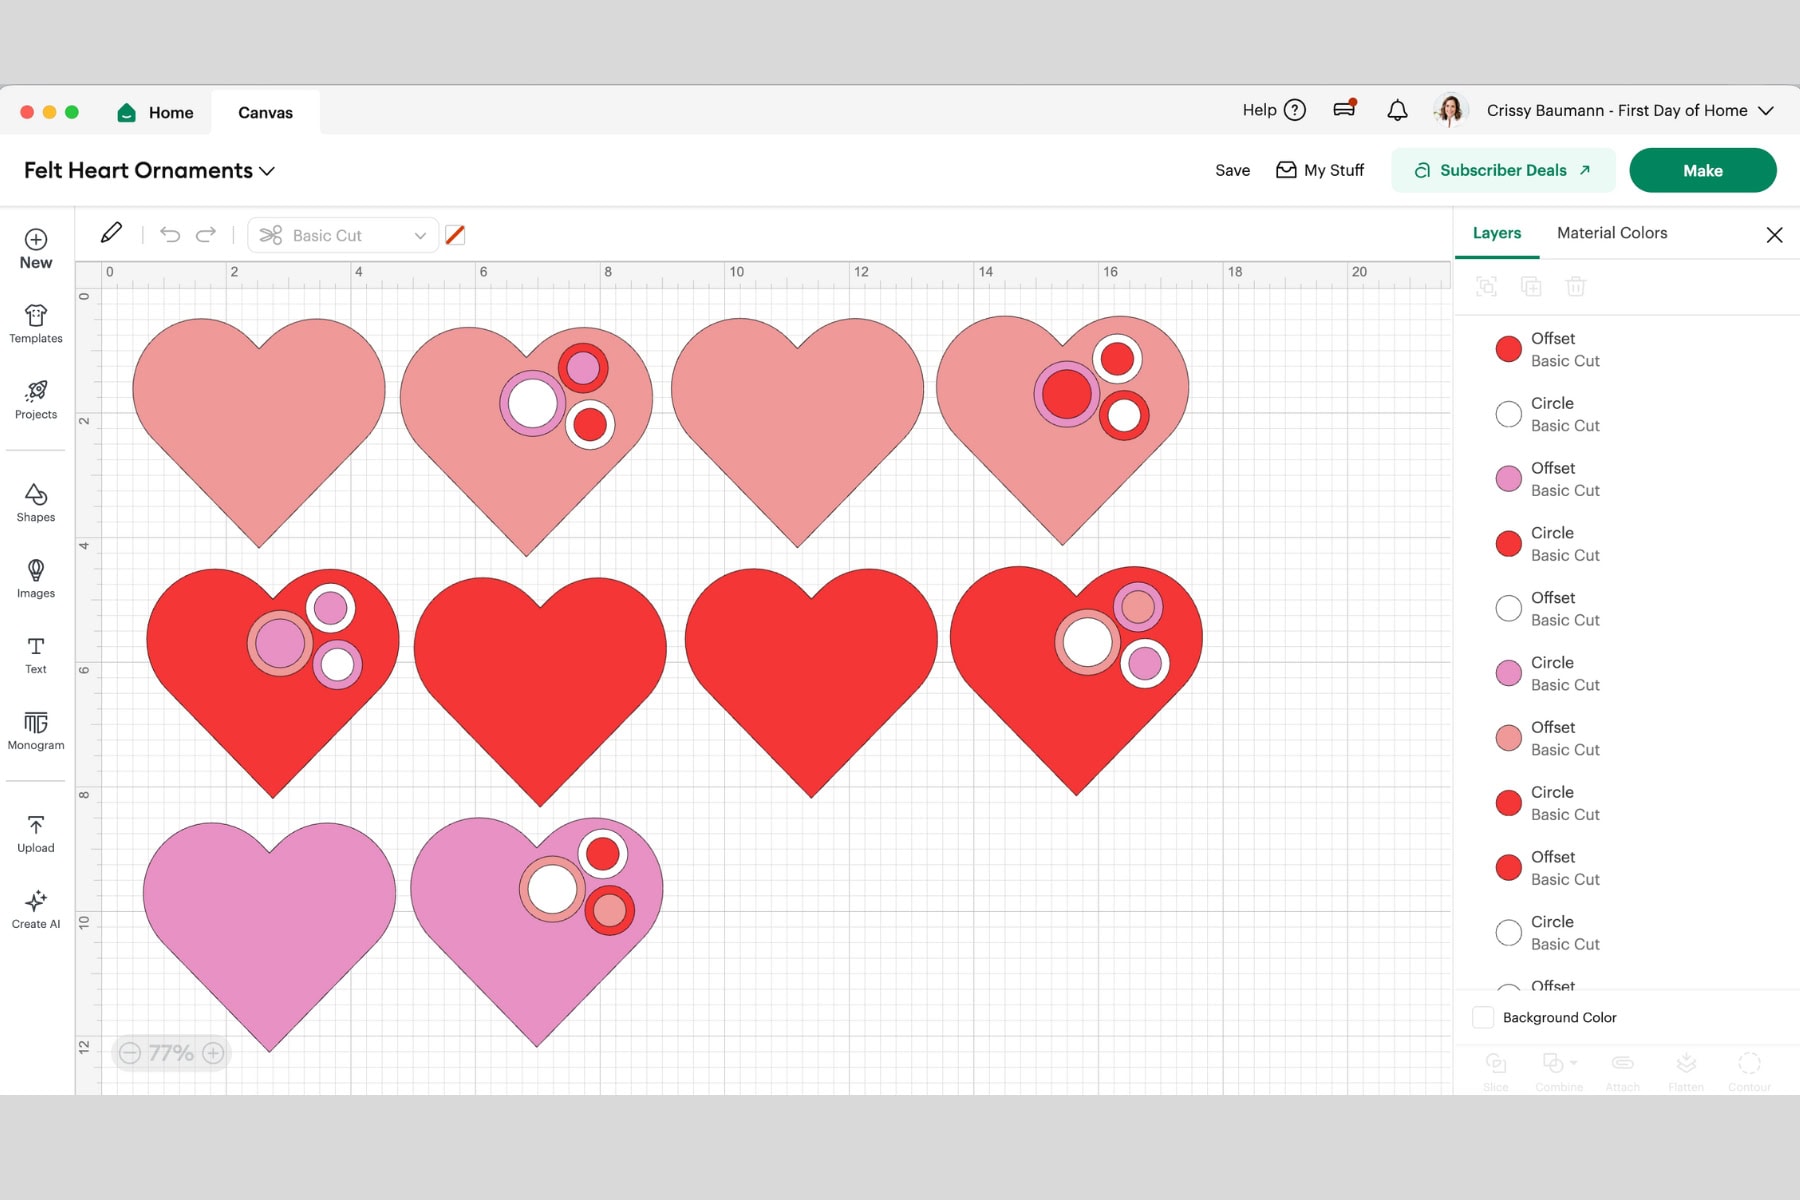
CUT SETTINGS
- Cutting Mat: Strong Grip Mat (purple) – Explore and Maker models
- Material: Felt, Wool Fabric
- Blade: Rotary Blade (Maker) or Fine-Point Blade (Explore)
You will need two hearts for every ornament. The design in Cricut Design Space includes enough pieces for five hearts, each with three button flowers.
Step 2: Attach button accents and ribbons
Once you’ve cut the felt pieces, you can embellish one side of the ornament with the circles and buttons using hot glue. I also added some felt leaves left over from another project.
At this point, you can also glue ribbon to the heart piece that will form the back of the ornament. The ribbon will be tucked inside once the heart is sewn (or glued) together.
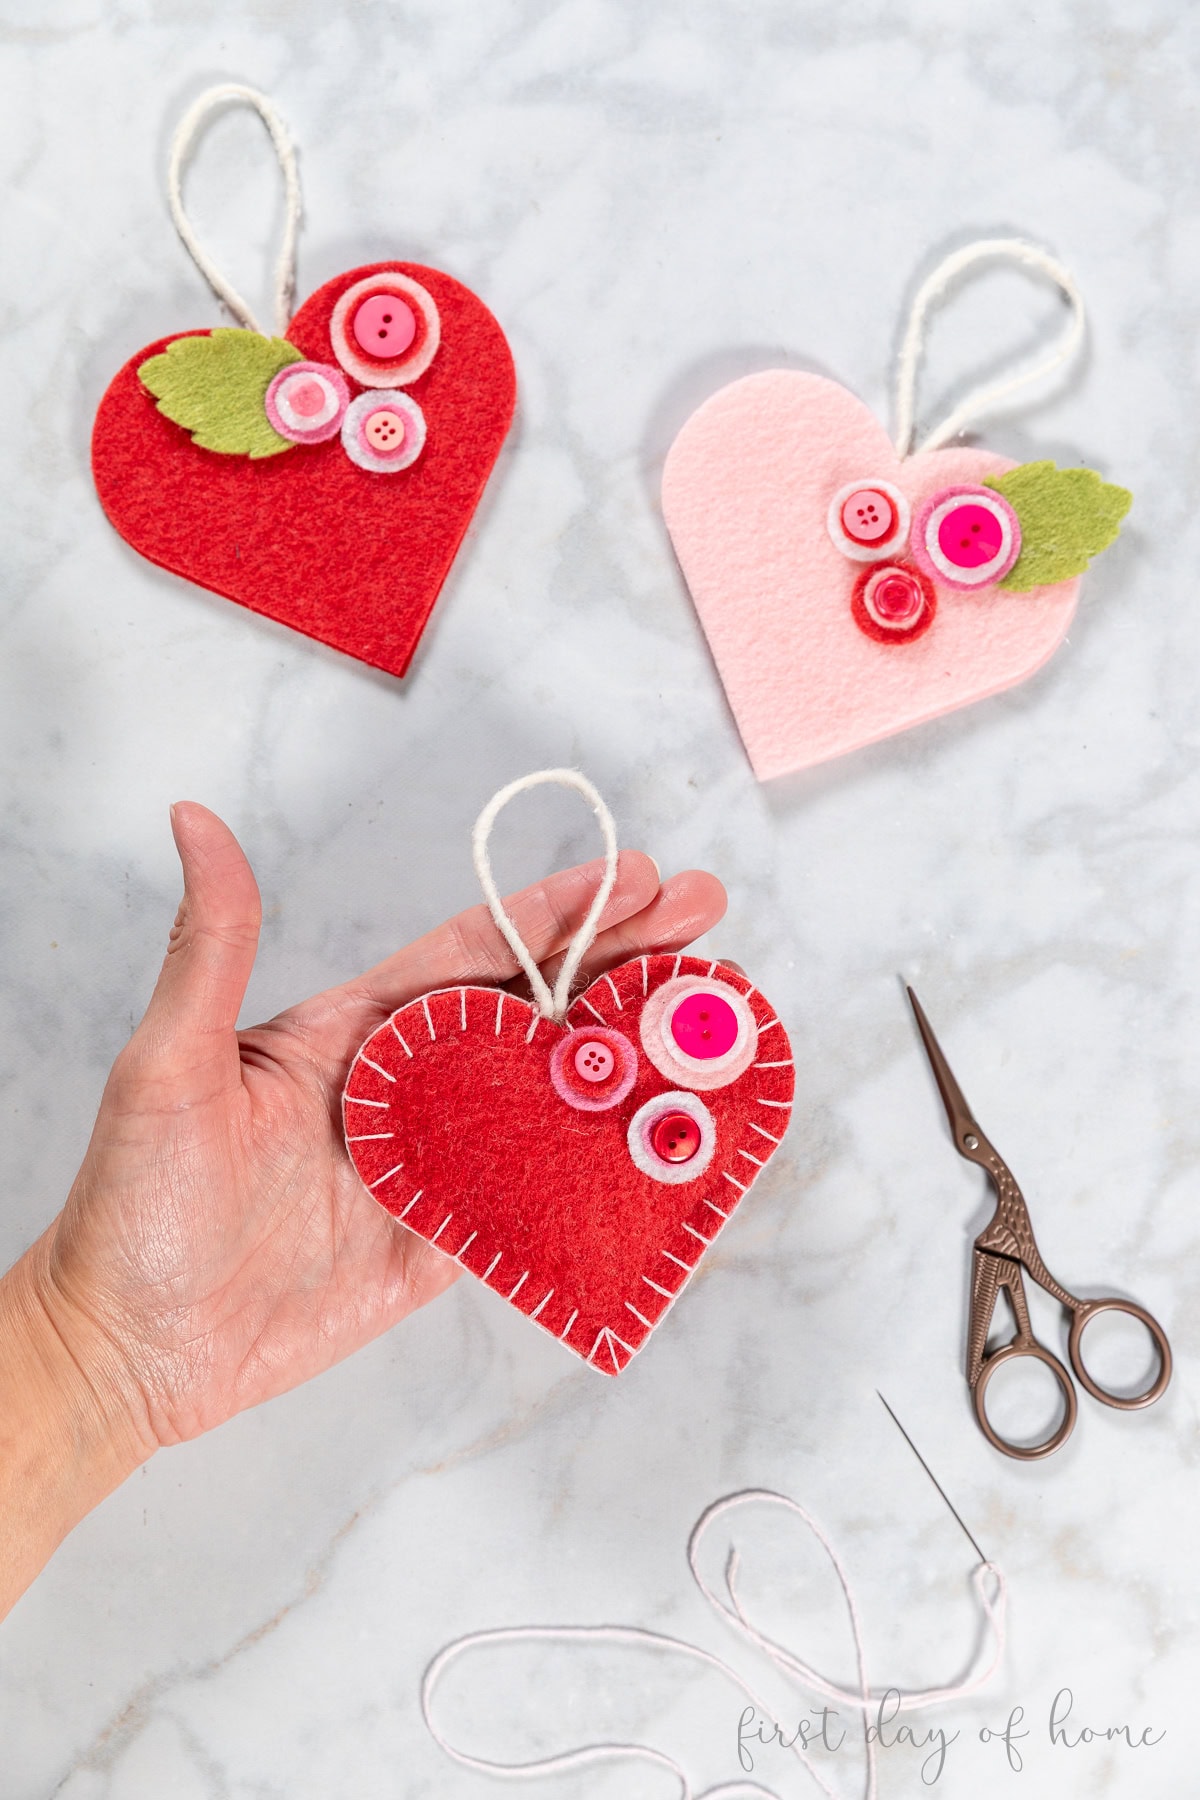
Step 3: Stitch the edges and stuff the heart
I used a blanket stitch to join the front and back pieces of the heart. You’ll want to stitch from the top left side of the heart until you have a small opening on the right side, as shown below.
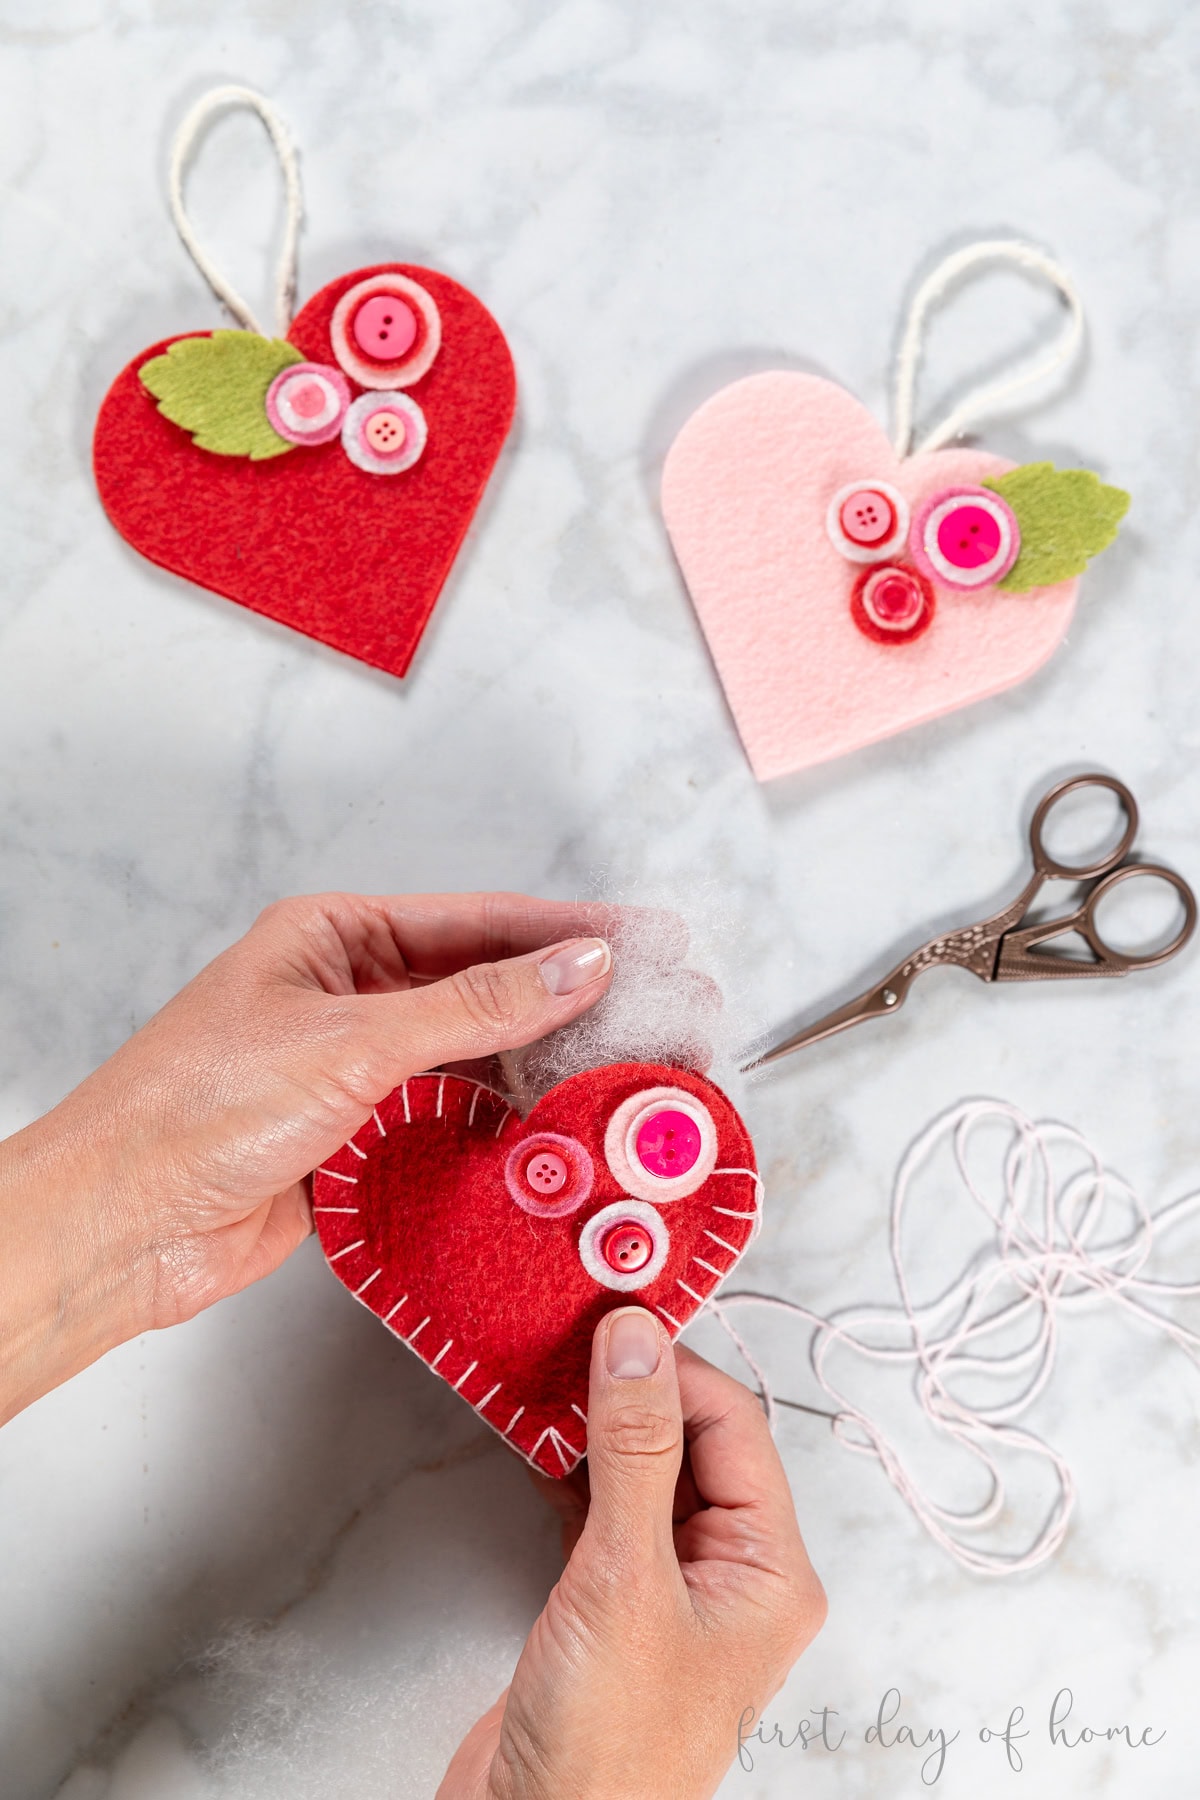
Then, stuff the heart with a small amount of fiber fill. Don’t overstuff the heart, as a plump heart can make the stitches buckle.
After adding the stuffing, you can close the remaining edge of the heart using the same blanket stitch.
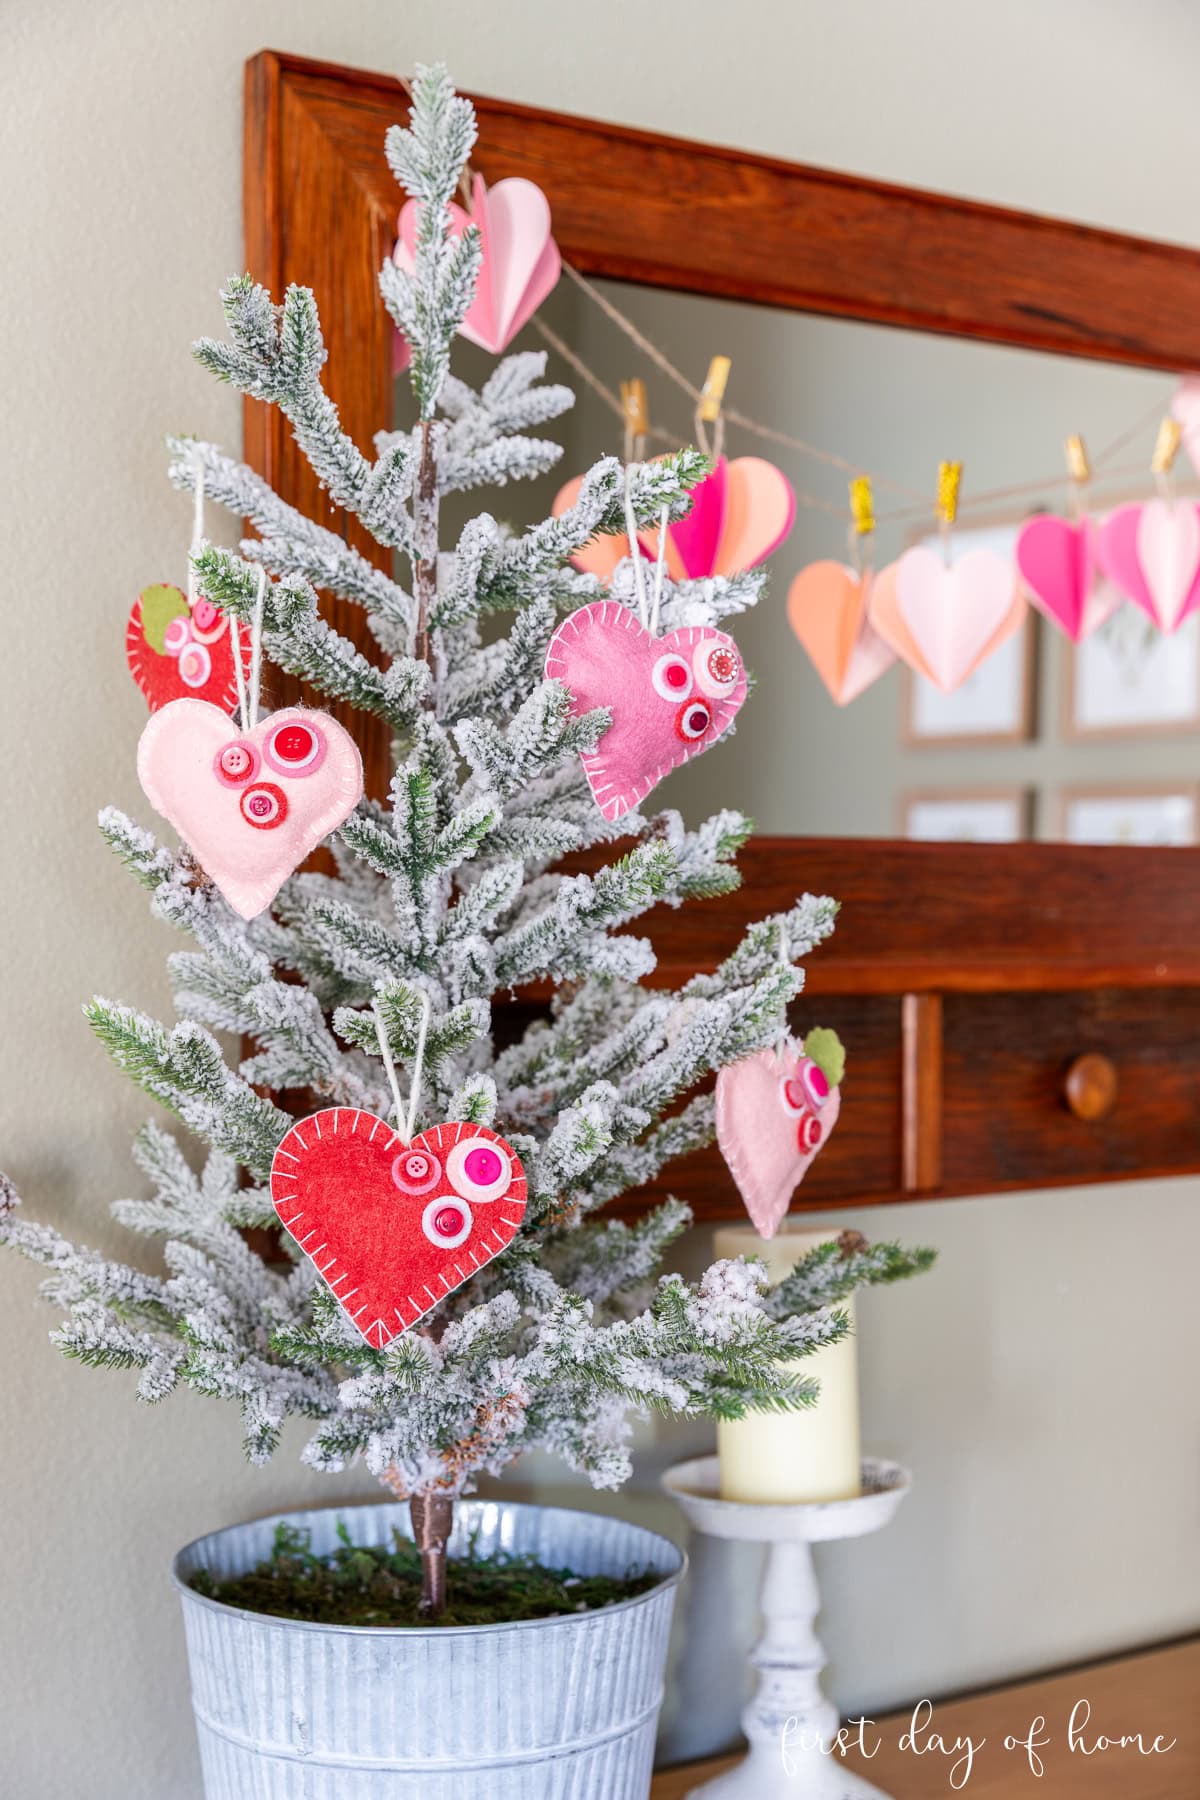
Decorating with Felt Heart Ornaments
These days, Valentine’s Day trees are all the rage. Perhaps everyone is feeling reluctant to take down our Christmas trees! I used my felt heart ornaments to decorate a small tabletop flocked tree.
Stay tuned for a cute tree topper!
Don’t forget to pin this (below) to share the tutorial with others!
Pin it for later!