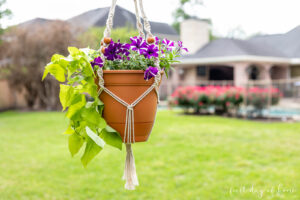
DIY Macrame Plant Hanger: Beginner’s Guide
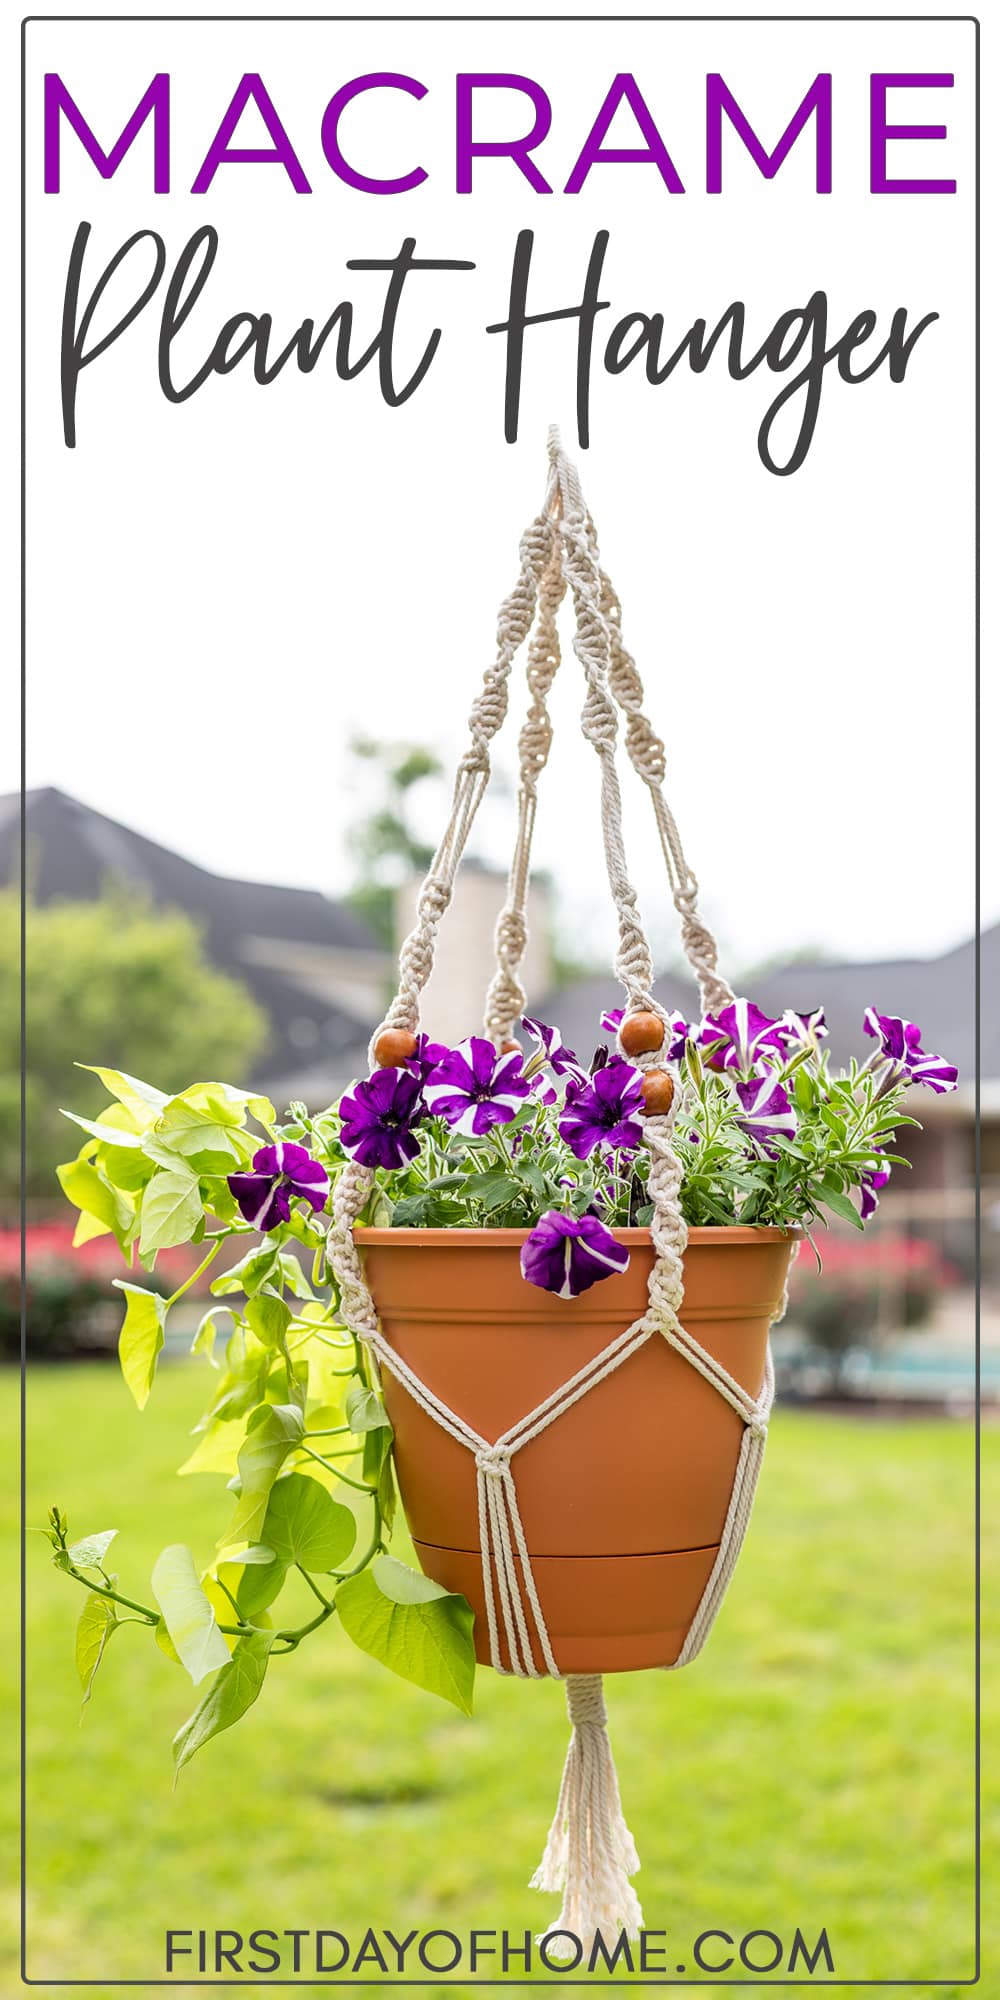
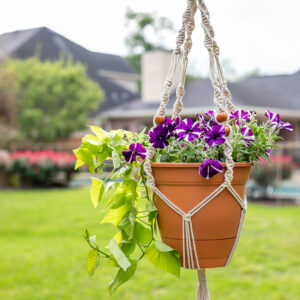
After experiencing a record-setting freeze a few months ago, I’ve been craving all things spring! This DIY macrame plant hanger is just what I needed. It has a retro/boho vibe and was oodles of fun to make. If you’re new to macrame (or even if you’re not), this tutorial is for you!
This post contains affiliate links, and I will be compensated if you make a purchase after clicking on my links. For more information, please see my disclosures.
Welcome to a DIY Home Decor Blog Hop
I’m especially excited to bring you this project as part of a DIY decor hop with seven other bloggers!
Jen from Midwest Life & Style and Aliya from Open Doors Open Hearts have graciously hosted this fun collaboration. These ladies have some serious talent, so I highly suggest paying them a visit.
In fact, some of you may have clicked over from Aliya’s beautiful DIY aged stone vase project. If so, you already know what an absolutely charming and talented lady she is. We became fast friends on this blogging journey!
There are plenty of other DIY projects to add to your list at the end of this post.
Watch This Tutorial
The Basics of Macrame
When I told my mom I was weaving a macrame plant holder, she was shocked. “Really?! We used to have those!” Ah, yes, I remember seeing those as a kid. They looked great next to our lime green curtains and yellow armchair at the time.

If you’re not familiar with macrame, it’s simply a craft that uses a row of knots to form various textile patterns. It also happened to be all the rage in the 70s and has now come roaring back.
With macrame patterns, you can make decor and accessories like wall hangings, handbags, and yes–plant hangers. I’ve even made macrame gnomes that look absolutely adorable as Christmas ornaments!
This simple DIY macrame plant hanger doesn’t require fancy skills or special tools. All you need is macrame cord, a mounting ring, and some scissors.
Okay, I also added some wooden beads just to complete my homage to the 70s.
Related: DIY Mosaic Flower Pots
Tips for Measuring Your Cord
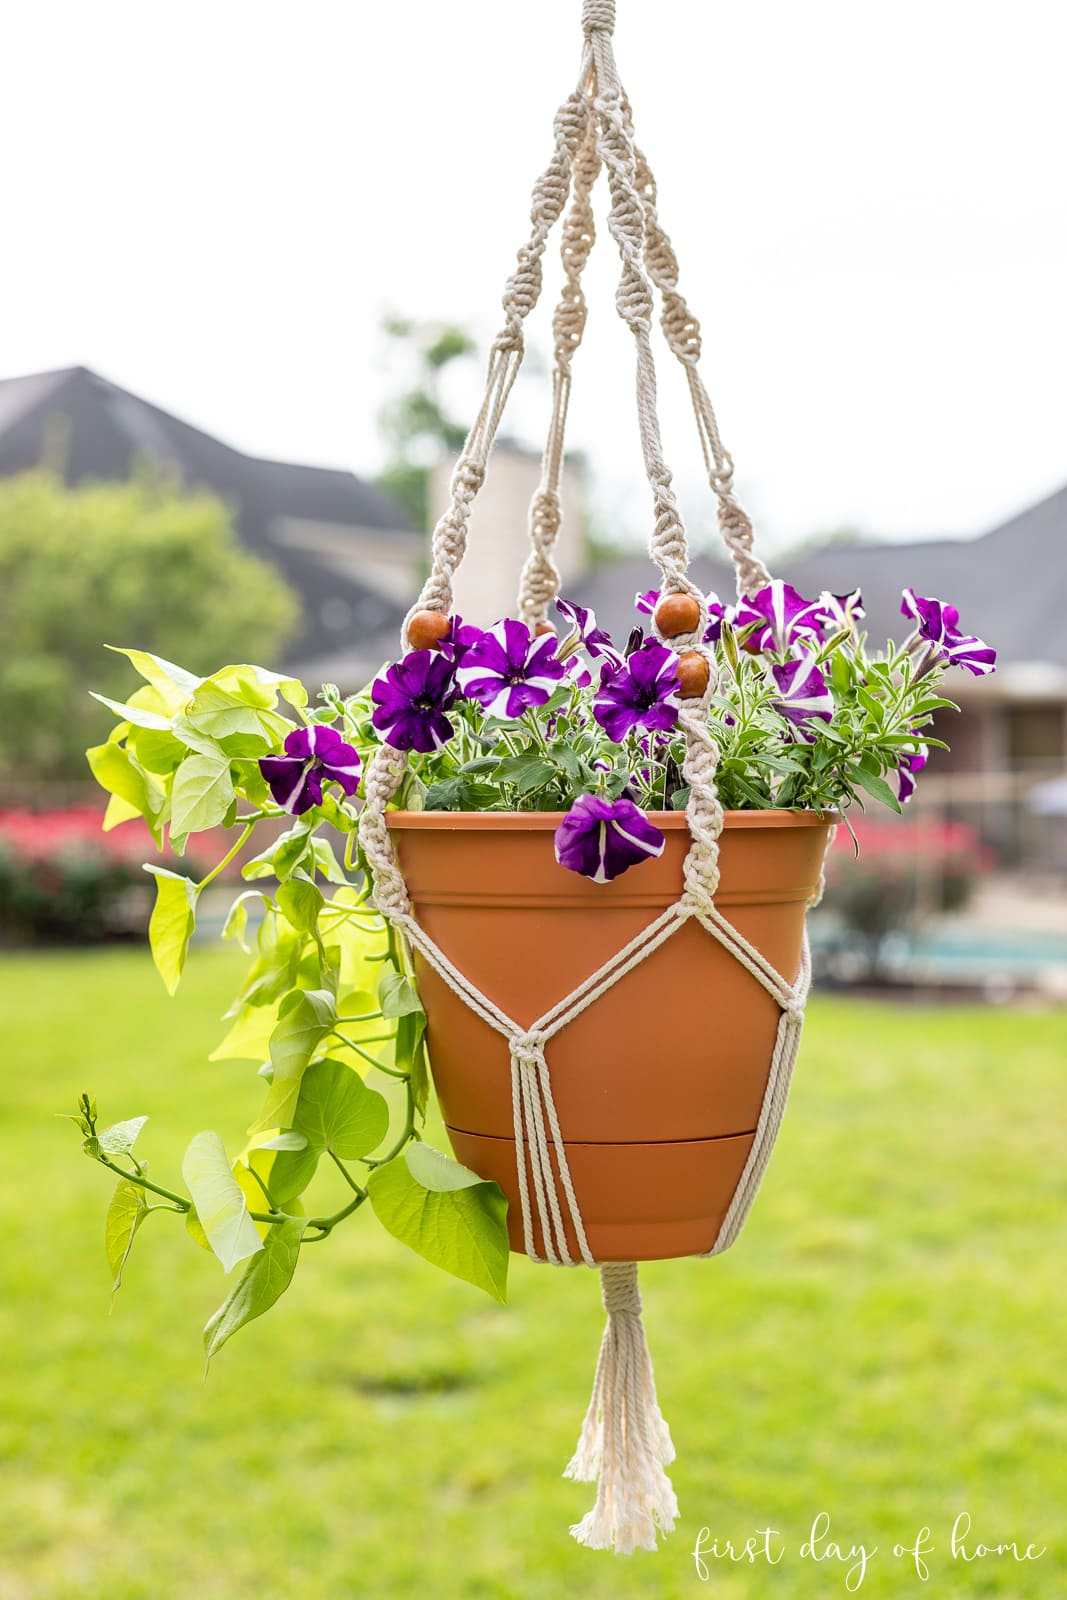
My pot was about 8.5 inches tall and 9 inches in diameter at the top. I measured each cord to be about 120 inches long (or 60 inches when you fold it in half to form two strings).
In hindsight, I probably would’ve added another 20 inches to provide some buffer.
For a similar macrame pattern as mine, here are some helpful measuring tips:
- Measure the height of your plant pot, then multiply by 16. Cut out a set of eight cords for a four-rope plant hanger or six cords for a three-rope hanger.
- If you plan to add beads or more complicated knots, adjust your length accordingly.
- You can always change your pattern if you find yourself running out of cord. You’ll notice I have sections of cords without knots (see video tutorial).
Below you can read the full step-by-step tutorial for this macrame project. By experimenting with different basic knots, you can make a variety of macramé plant hangers with different patterns.
Pin it for later!

DIY Macrame Plant Hanger
Equipment
- Scissors
- Rod or hanger to hang the mounting ring
- Measuring tape
Supplies
- Cotton cord (optional jute, twine, yarn, clothesline, or hemp)
- Wooden ring or metal ring
- Wooden beads (optional)
Instructions
- Measure your flower pot height, and multiply by 16 to find the required length of each cord. Cut eight cords of this length. (My pot was 8.5 inches tall, so I cut eight cords, each 136 inches long.)
- Cut two additional pieces of cord about 1 foot in length. These will be used for gathering knots.
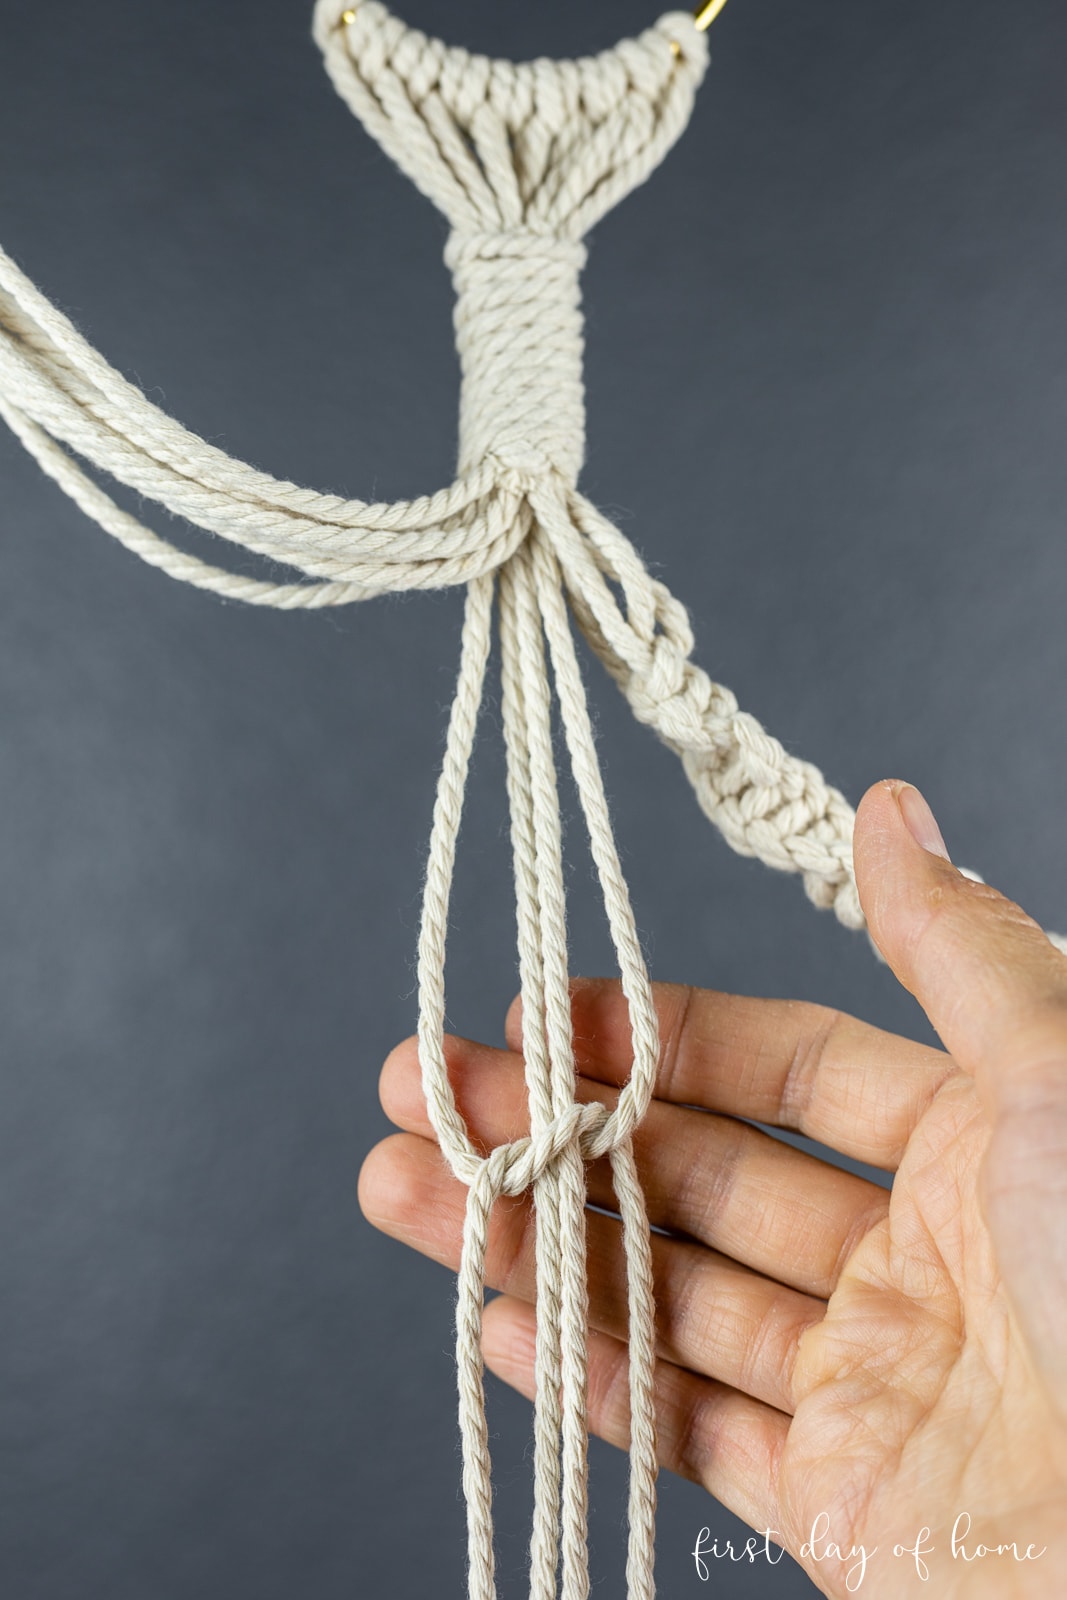
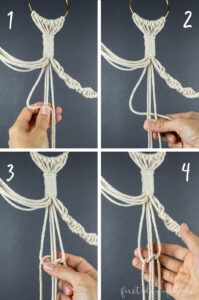
- Begin by folding each cord in half. Attach each cord to the mounting ring using a lark's spur knot. You will feed each loose end of your hanging cord through the loop you have created at the fold to enclose your mounting ring. (See video.)
- Tie the bundle of cords together using a gathering knot (see video) or a simple knot. This is also referred to as a wrapped knot.
- Grab four strands of cord and begin making a half square knot, also called a spiral knot. You'll create a shape of the number "4" with the left cord and place the right cord over the left cord. Then, fold the right cord behind the center cords to come out through the opening in the number 4. (See video.)

- Complete 24 spiral knots.

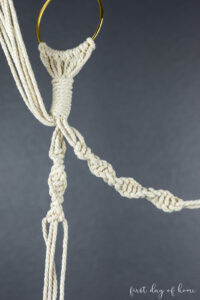
- Swap the outside cords with the center cords. Leave about 2 inches of un-knotted cord, then continue making 12 spiral square knots.

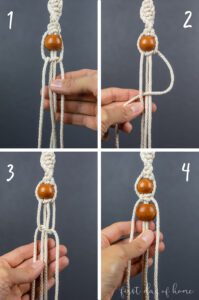
- Add two beads, if desired. Make a full square knot in between the beads.
- Continue making 18 spiral knots (a.k.a. half square knots).
- Repeat the process for all four cords.
- Once finished, measure your pot to determine where the cords should be joined together. Join two adjacent cords from each set of four using a full square knot. With a full square knot, you'll start with the same half square knot (spiral knot) forming the number 4 and then mirror the knot with right cord forming a reverse number 4.
- Make a final gathering knot to join all 16 cords together at the bottom. You also have the option of making a simple knot instead.
- Trim cords at the bottom to create fringe.


Notes
Continue Your Tour
Don’t stop here! You have 7 other inspiring home decor projects calling your name below. Next on your list is Jordan from A Blue Nest. She’s sharing a very clever idea for a lampshade makeover.
8 DIY Home Decor Projects
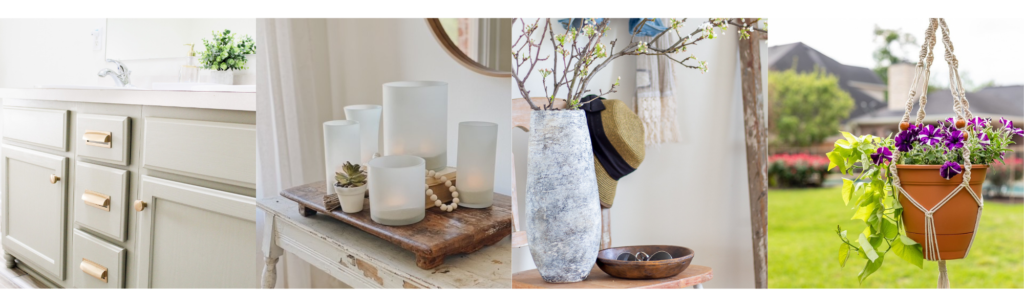
Midwest Life & Style| Easy DIY Bathroom Vanity Makeover
She Gave It A Go | DIY Sea Glass Vases on a Budget
Open Doors Open Hearts | DIY Aged Stone Vase
First Day of Home | DIY Macrame Plant Hanger
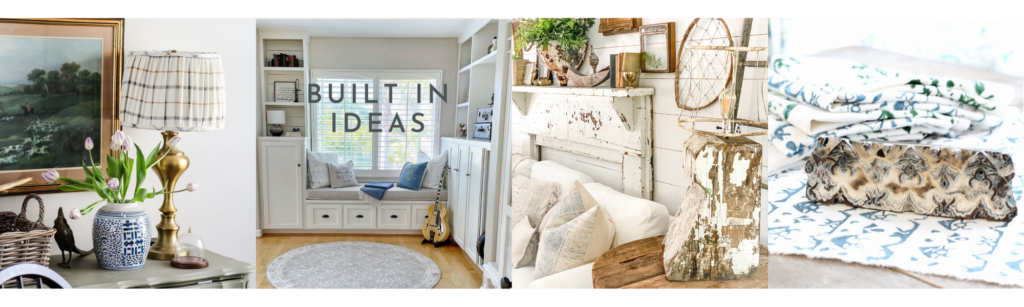
A Blue Nest | DIY Pleated Lampshade
Pasha is Home | DIY Built-in Ideas
Robyn’s French Nest | Architectural Salvage Lamp DIY
The Tattered Pew | DIY Block Printing on Fabric
This is my favorite macrame plant hanger I have made! Thank you!
I’m so happy to hear that! I hope you’re enjoying your plant hanger. Thanks for leaving a nice comment and rating.
How long is this plant hanger from ring to the bottom of the plant holder?
Hello! From the top of the ring to the bottom strands, it’s 36 inches when not hanging. Once I put a 9-inch pot inside, it’s about 28 inches from top to bottom. I hope this helps!
Your macrame plant hanger is so pretty! I remember macrame very well from the 70s and always loved the plant hangers that my mom and her friends made. It’s fun that macrame is back in style for 2021.
Thank you, Paula! Yes, it is fun to see things trending again. I remember having some of these around the house when I was growing up, too. I had a blast making this one and sharing the pics with my mom.
Such a fun, Spring project!! I love how it turned out!
Thanks so much, Jordan. It was nice to meet you through this hop!
With little to no experience in macrame, this is so inspiring! The end result is stunning. Thanks for simplifying a technique that’s new to me!
Thanks, Robyn! I was new to this technique, too, so if I can do it, so can you! Happy to be hopping with you again. Happy Spring!
Ok this is the best tutorial! I have always wondered how to do this. Thanks for sharing. Pinned!
Thanks, Kelly! Same here! I was finally determined to try it out, and I’m glad I did. Thanks for pinning!
Hi, Crissy! My mom made a lot of DIY macrame projects when I was growing up, too! I would love to try this project. Thanks for sharing!
Hi Lauren! Yes, my mom couldn’t believe I was making a macrame plant hanger. It’s funny how things come back around, isn’t it? I hope you have fun making one!
Oh my gosh, Crissy. This is so pretty! I love it! So happy to be joining you for this fun DIY hop. Pinned!
Thanks, Jen! And thanks for helping to organize this hop for us! I love the variety of projects everyone shared. There’s so much inspiration to enjoy, and my project list just got longer!
Crissy- your macrame plant holder is so pretty! They are very popular in the decor world right now so great inspo!!!! ☺️
Thanks, Pasha! I had never tried this before, but it’s actually quite relaxing and fun. My niece is very into boho decor right now, so I might make this a gift for her! 🙂
Crissy! You are so talented!! I bought a few of these a while back but was so disappointed because they weren’t exactly what I wanted. THIS IS WHAT I NEEDED!!! Now I can make exactly what I want and need!! I love this DIY! Feels perfect for Spring too!! Thank you so much for joining us on this hop! You truly have no idea how grateful I am that you did!! I’m so glad we’ve become friends!! XoXo
Thanks, Aliya! Once you start, you’ll be hooked! I’m dreaming of other macrame things to make now. Thank you SO much for including me in your hop. I had a great time and loved seeing all the wonderful projects everyone shared. Yes, so glad we became fast friends! xoxo