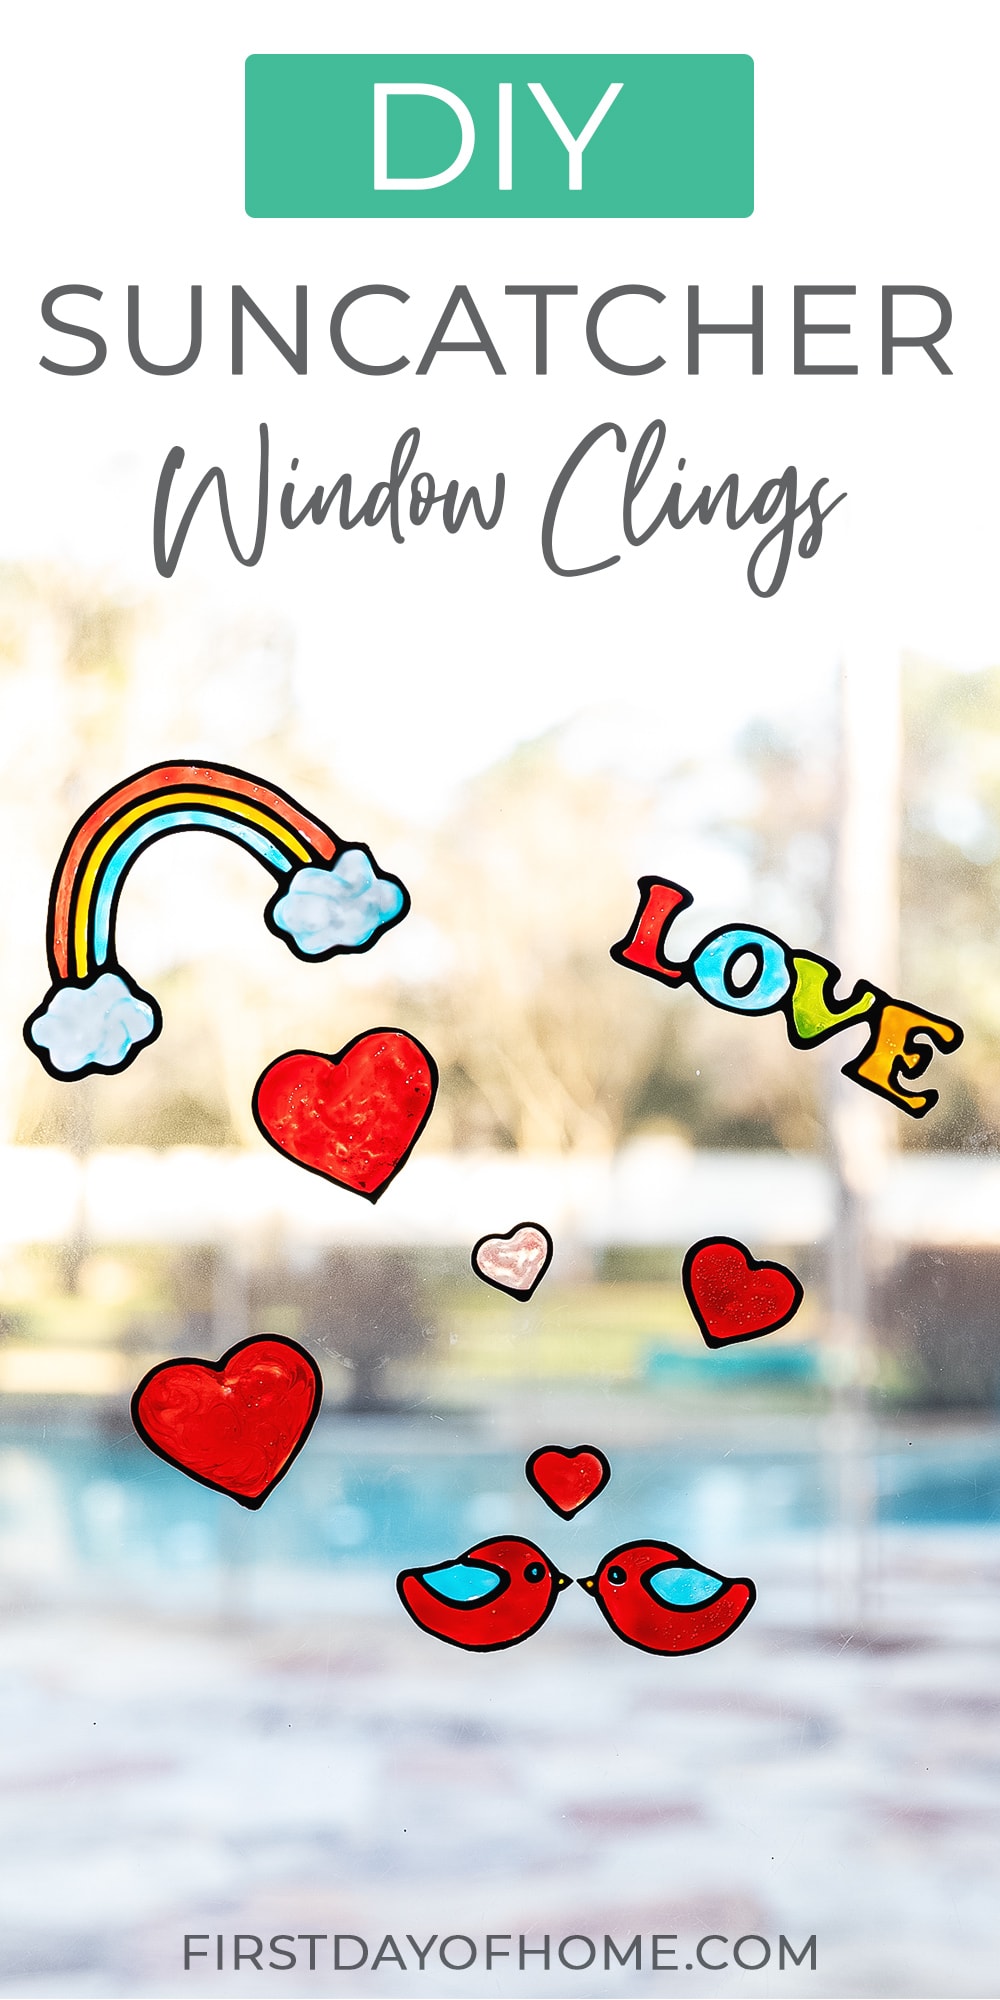
Easy Suncatcher DIY Tutorial (Window Clings)
If you love the look of sunlight streaming through stained glass, this suncatcher DIY project is for you! Learn how to make beautiful window clings that look like faux stained glass, and keep kids of all ages busy bringing their artwork to life. Plus, you can easily store your suncatchers and reuse them each year!
This post contains affiliate links, and I will be compensated if you make a purchase after clicking on my links. For more information, please see my disclosures.
How to Make DIY Suncatchers (Window Clings)
I first stumbled upon this DIY window cling kit a few years ago and thought it would make a fun craft for a rainy day with my twin boys. Unlike other suncatcher DIY crafts, these involve a little more artistic freedom in creating a variety of shapes and sizes.
The great part about these handmade suncatchers is that the paint is non-toxic, and the finished window clings are repositionable. We decided to make some sweet love-themed clings just in time for Valentine’s Day.
You can view the full suncatcher tutorial over on my YouTube channel to see this project in action.
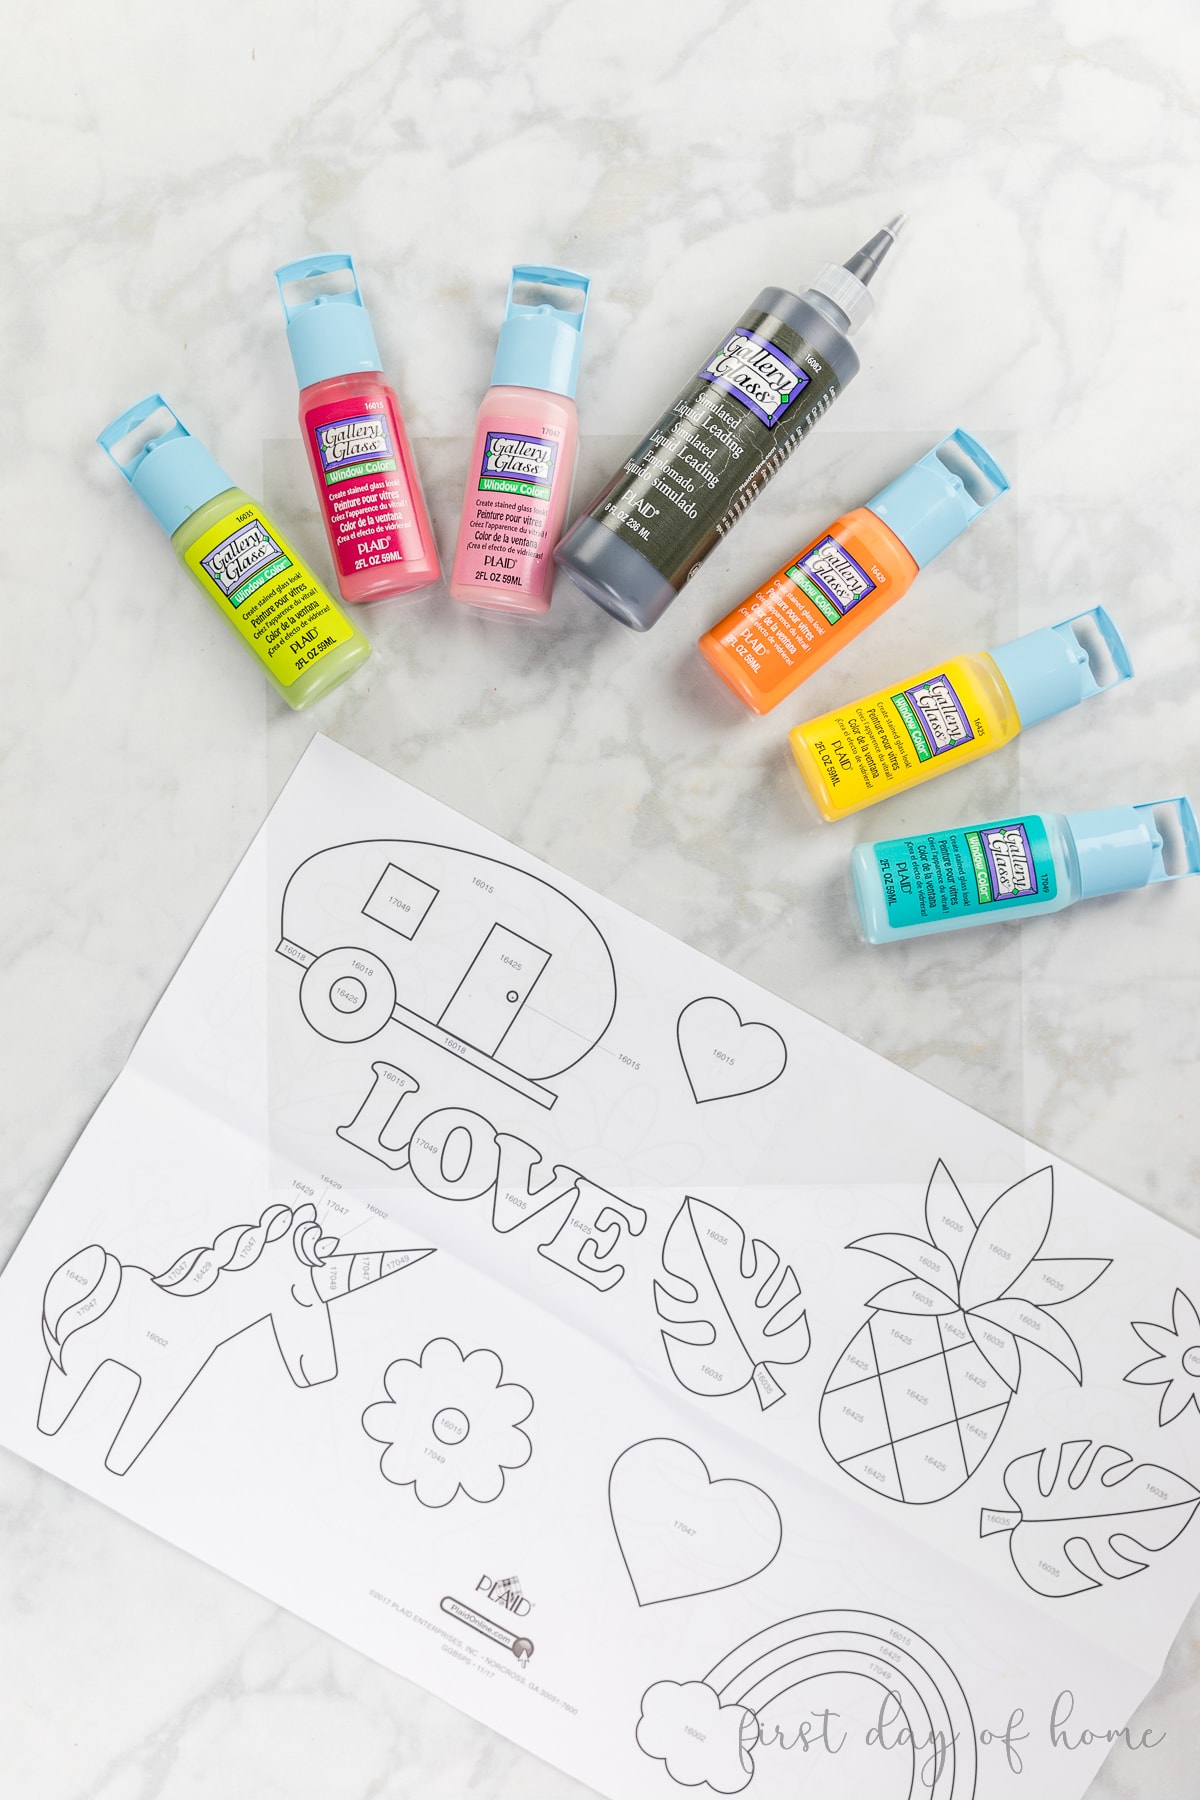
Supplies
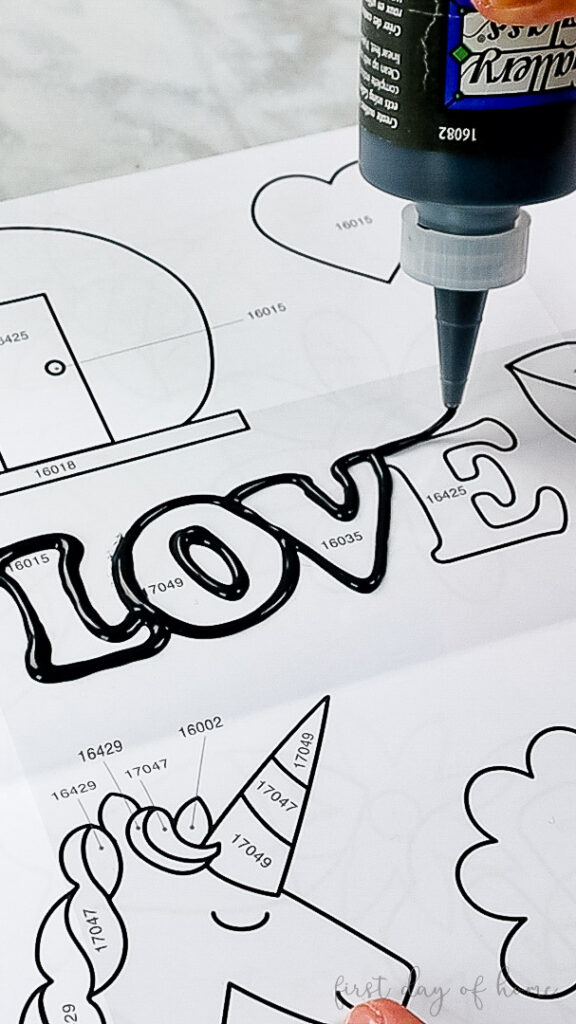
Step 1: Create outlines with liquid leading
If your glass painting kit comes with patterns, you can begin with one of those designs. Otherwise, you can freehand a design or print off any image you like. Coloring books can work well since they usually have black outlines to follow.
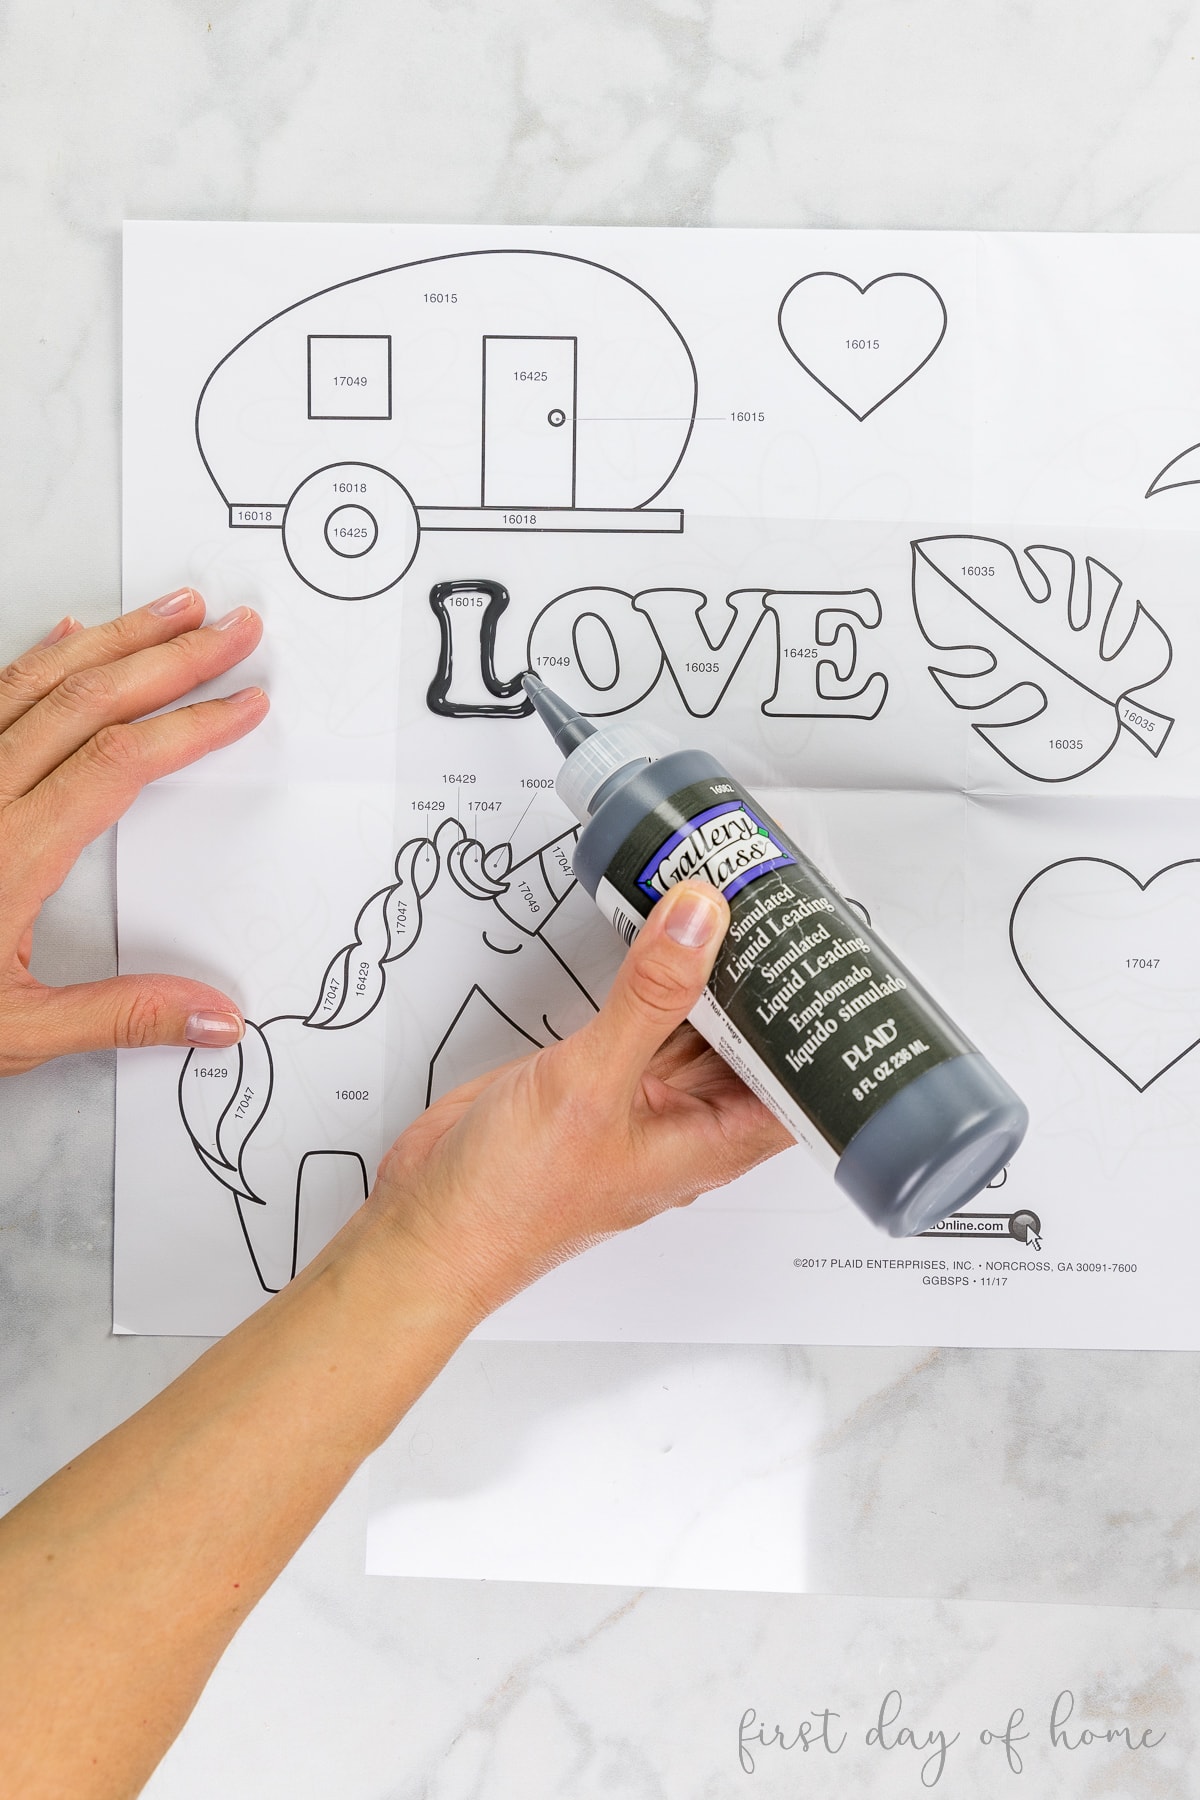
Begin by placing a plastic sheet, cutting board, or glass surface over the design. (This is called the “leading blank.”) Then gently outline the design using the liquid leading paint, which has the consistency of glue. If you’d prefer to apply the paints directly to a window or glass object, you can do that as well.
Tips for Little Ones
Young children like preschoolers may struggle to apply the outlines in this step. Although it’s great for their fine motor skills, you might need to give them a little boost and let them skip to Step 2.
Always test a small spot on your surface and let it dry completely to make sure it will peel off easily. Take it from me, some surfaces don’t release the clings as easily as others. Plexiglass will not work, for example.
Tips for Applying Liquid Leading
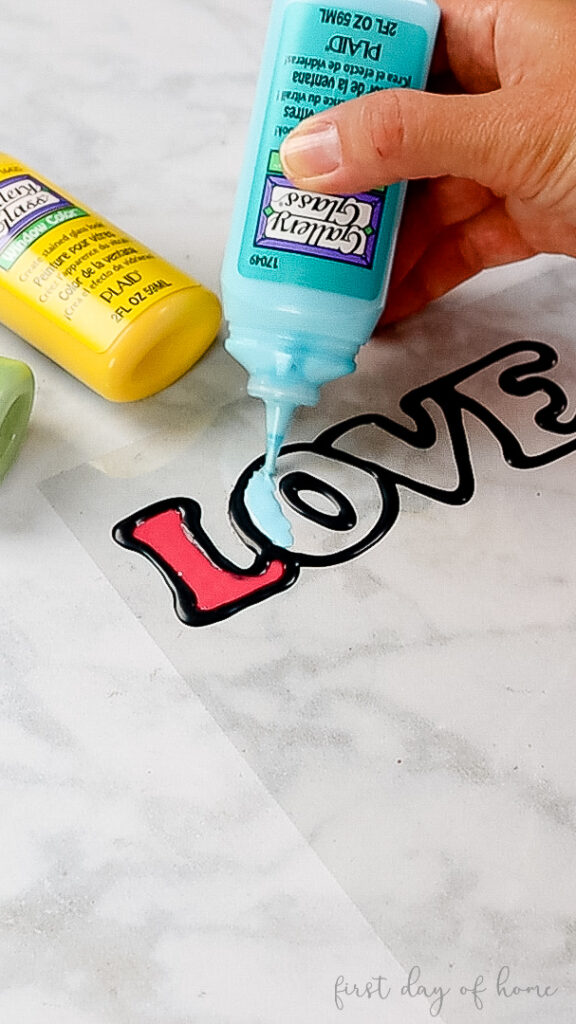
Step 2: Apply the window color
After 8-10 hours, “color in” your designs with the window color paints. Don’t shake the paints before using them. This causes air bubbles, which can ruin the stained glass effect.
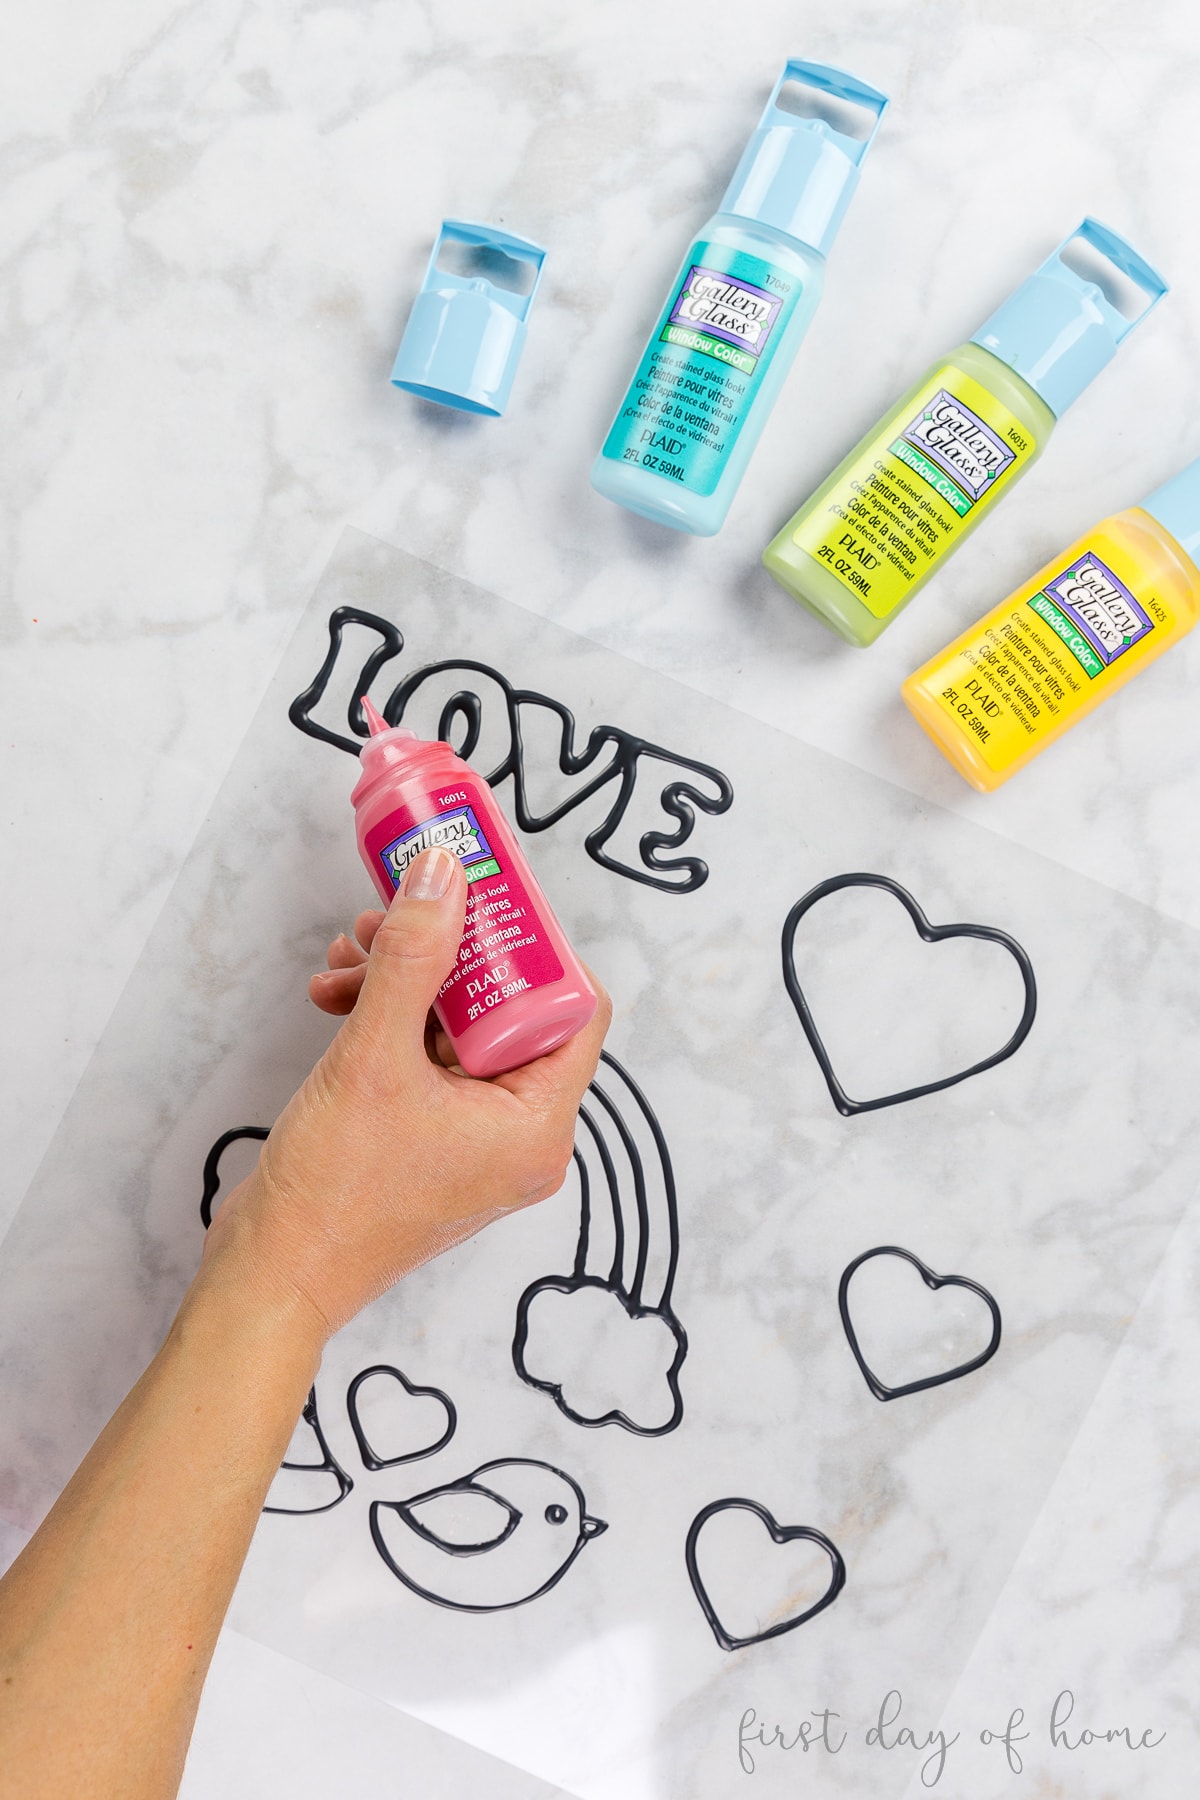
Make sure you completely fill in the space inside the designs so that the colored paint comes in contact with the black outlines. If you leave gaps, your designs might tear easily when you remove them.
 Adding window glass paint
- Removing air bubbles with toothpick
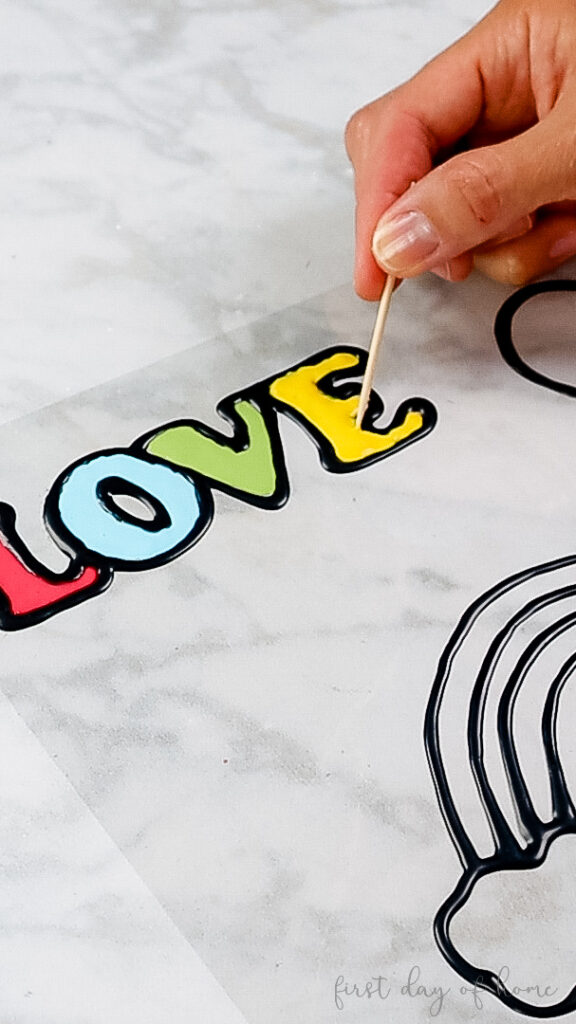
If you see air bubbles, you can smooth them out using a toothpick. Toothpicks also come in handy to clean up any areas where you might’ve painted outside the lines.
Feel free to mix and blend paint colors to create more dimension and texture in your designs. (You’ll notice I did this with the rainbow clouds.) Again, toothpicks are perfect for blending and swirling paint colors together.
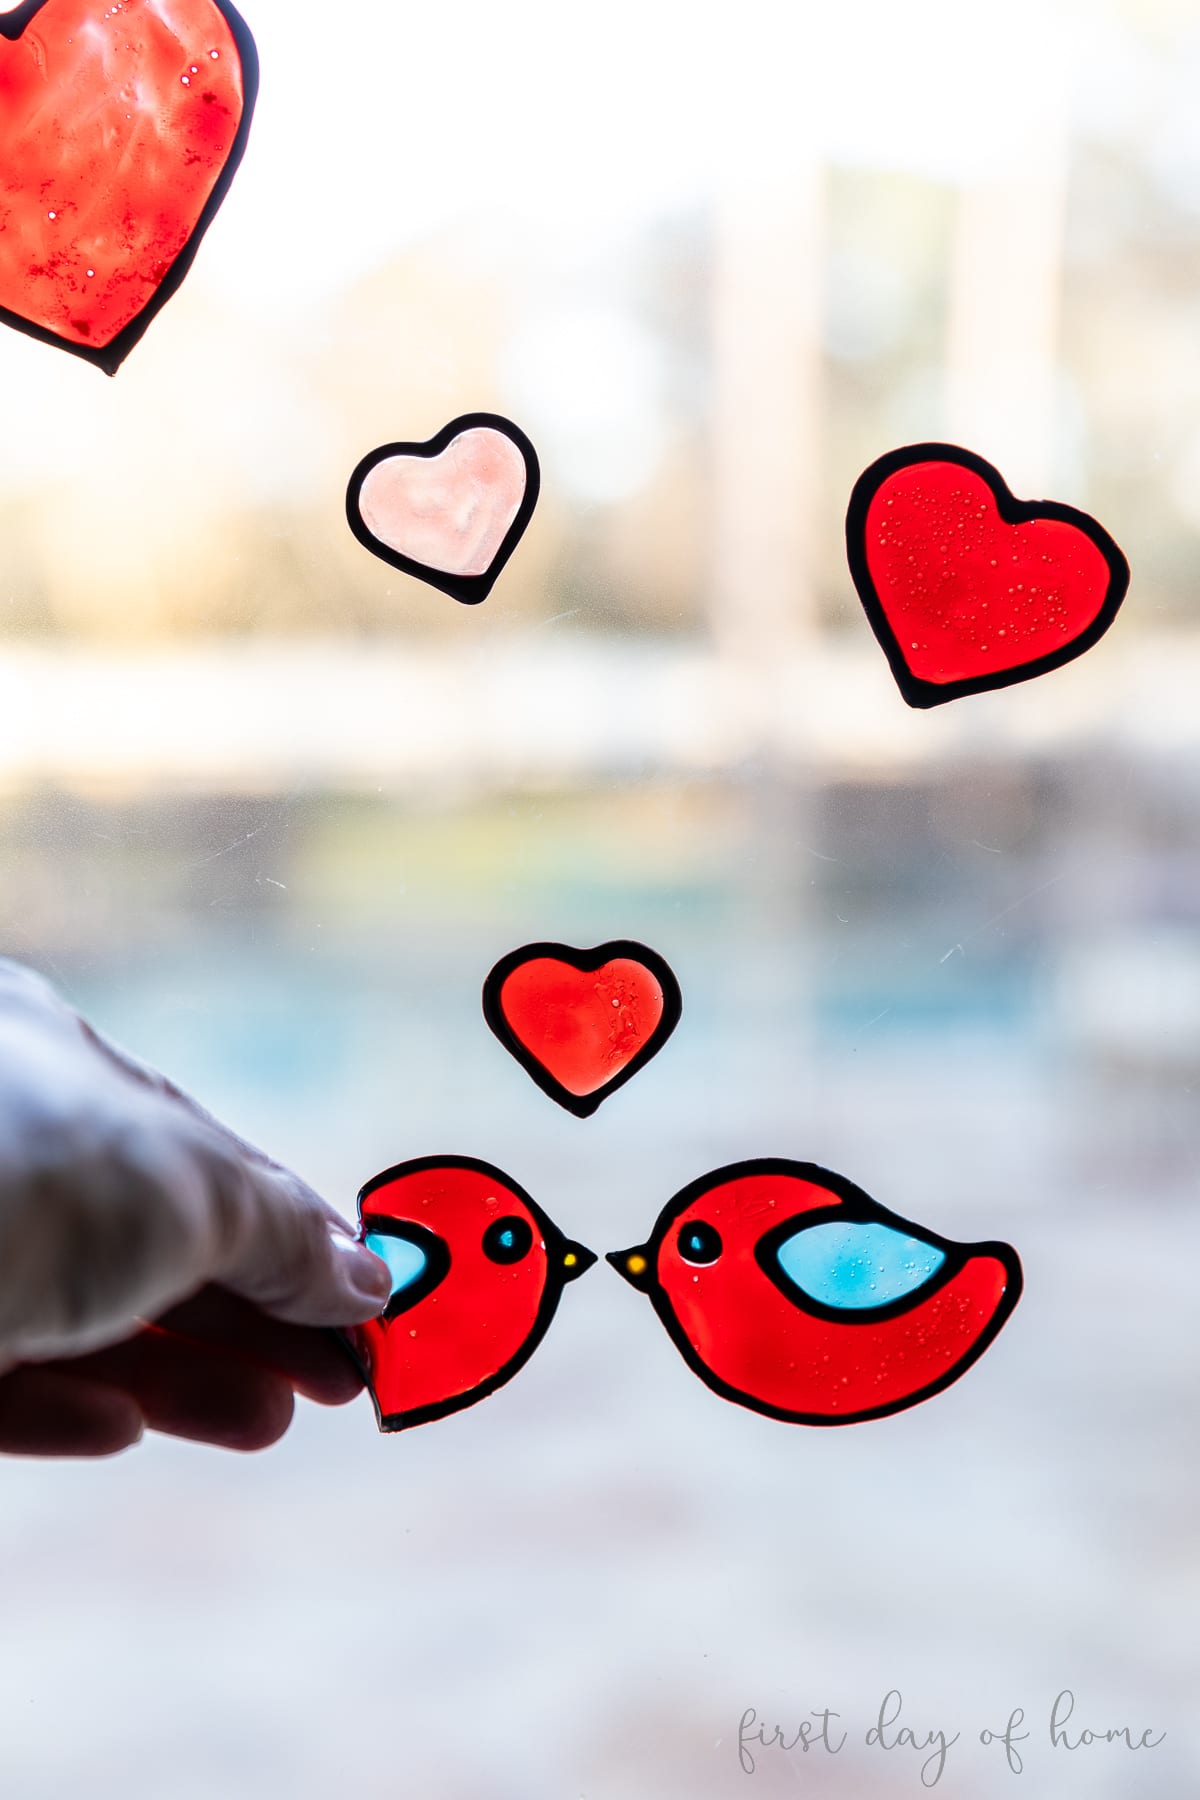
Step 3: Remove the suncatchers
You’ll know your stained glass window cling is dry when it looks transparent.
To remove it from the surface (if desired), gently lift one corner of the design and peel it away. I find that using a scraper or small spatula may help to release the paint. These suncatchers don’t have a sticky side but will cling to a glass surface more easily on the flat side.
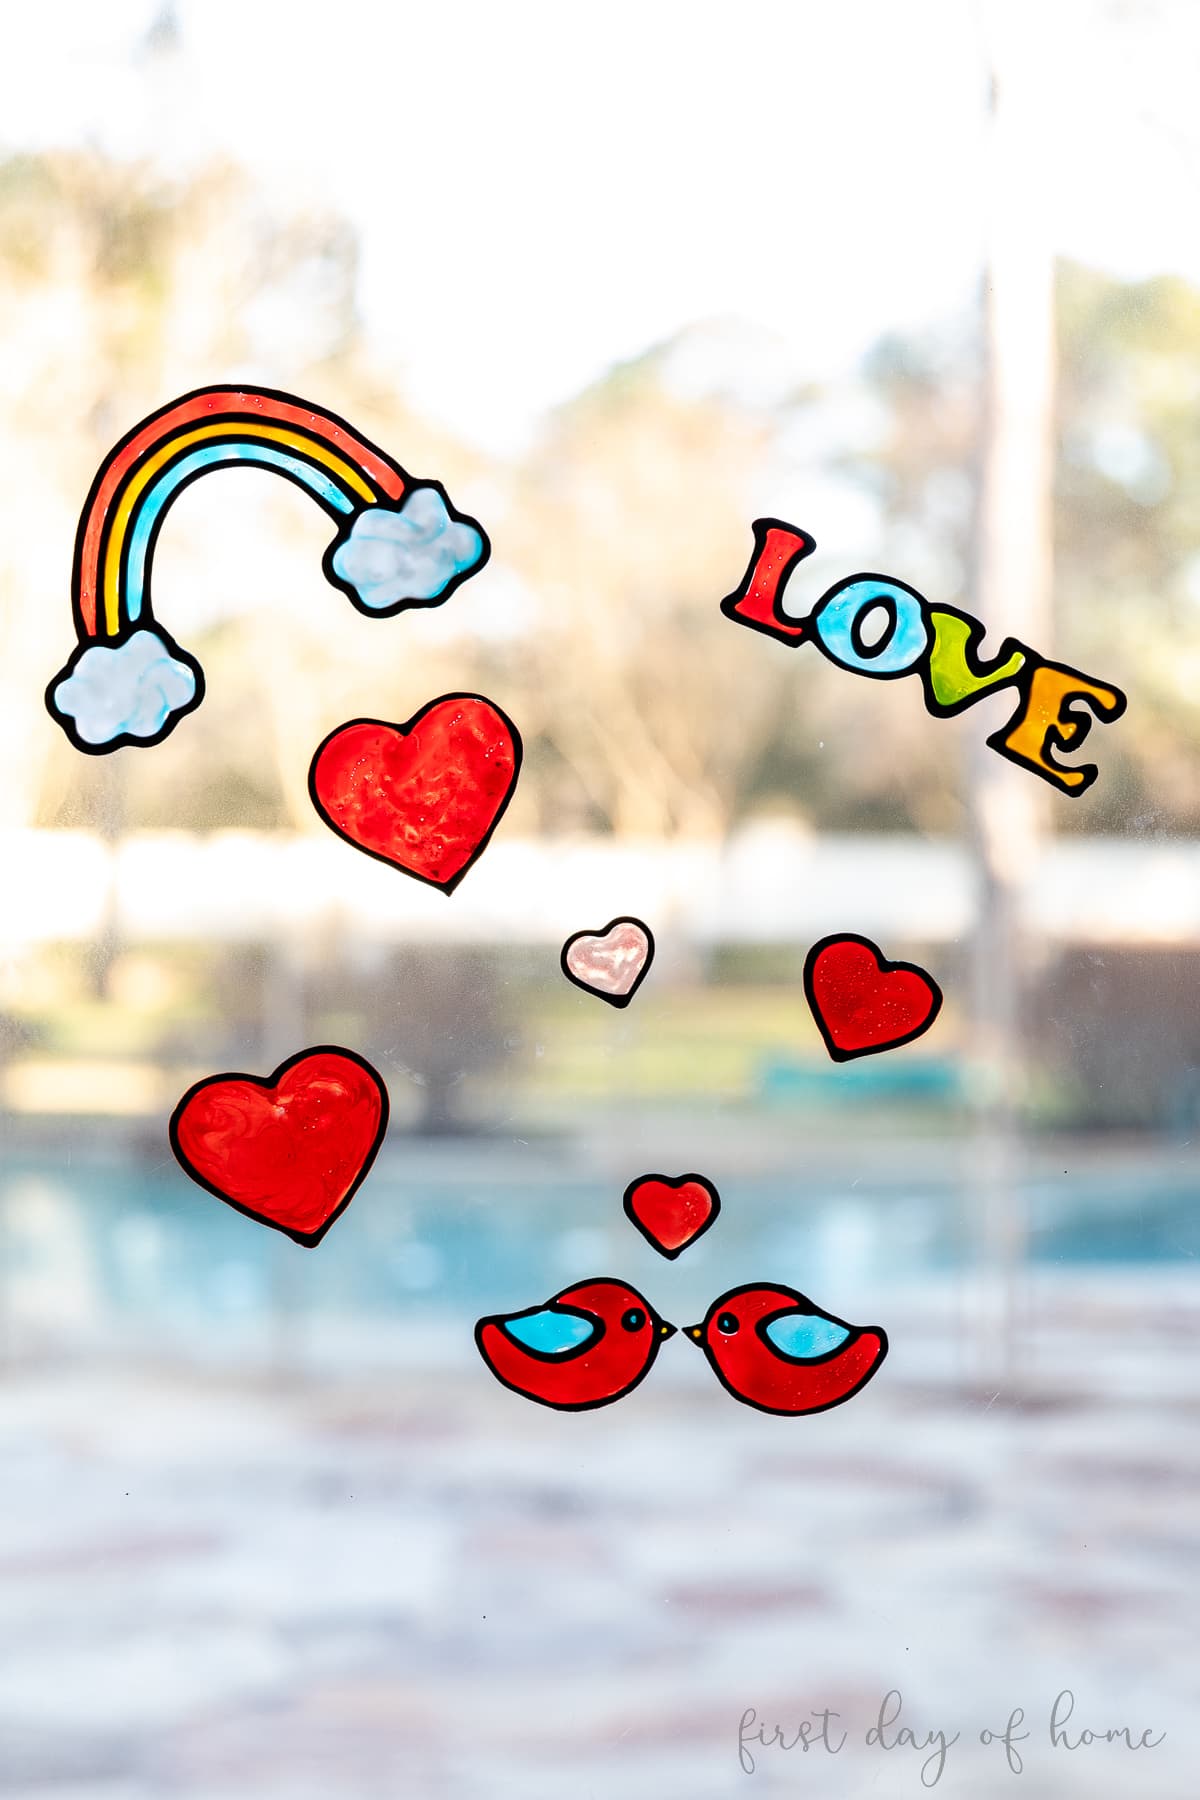
My boys and I chose to hang our suncatchers on a back door so we could enjoy them every morning. When they receive direct sunlight, they truly look beautiful.
The benefit of this faux stained glass suncatcher is that it can be repositioned and stored away for the following year.
How to Store Suncatcher Window Clings
If you want to enjoy your suncatchers in future years, place them on a hard surface (like cardboard) and cover them in plastic wrap. Make sure you place plastic wrap in between layers of window clings so they won’t stick together.
This Gallery Glass product is not intended for outdoor use and works best in dry areas where the temperature is between 45º F and 90º F (7 to 32º C). I recommend placing your suncatchers on a window or using them as a framed piece of art.
I hope you enjoy making your own stained glass-inspired suncatchers. Please share your finished projects with me over on Instagram (@firstdayofhome)! Keep scrolling if you’d like to pin it for later too.
SHOP FOR SUPPLIES

More Suncatcher Ideas
If you want to have more hours of fun making pretty suncatchers, try these ideas:
- Tissue paper suncatchers with glue, wax paper, and construction paper
- Suncatchers with wire and hanging glass beads or crystal beads
- Coffee filter suncatchers
- Suncatchers with melted crayons
For more great kids activities, check out this DIY bird feeder or my summer bucket list for kids.
Pin it for later!