Easy St. Patrick’s Day Gnome Fairy Garden
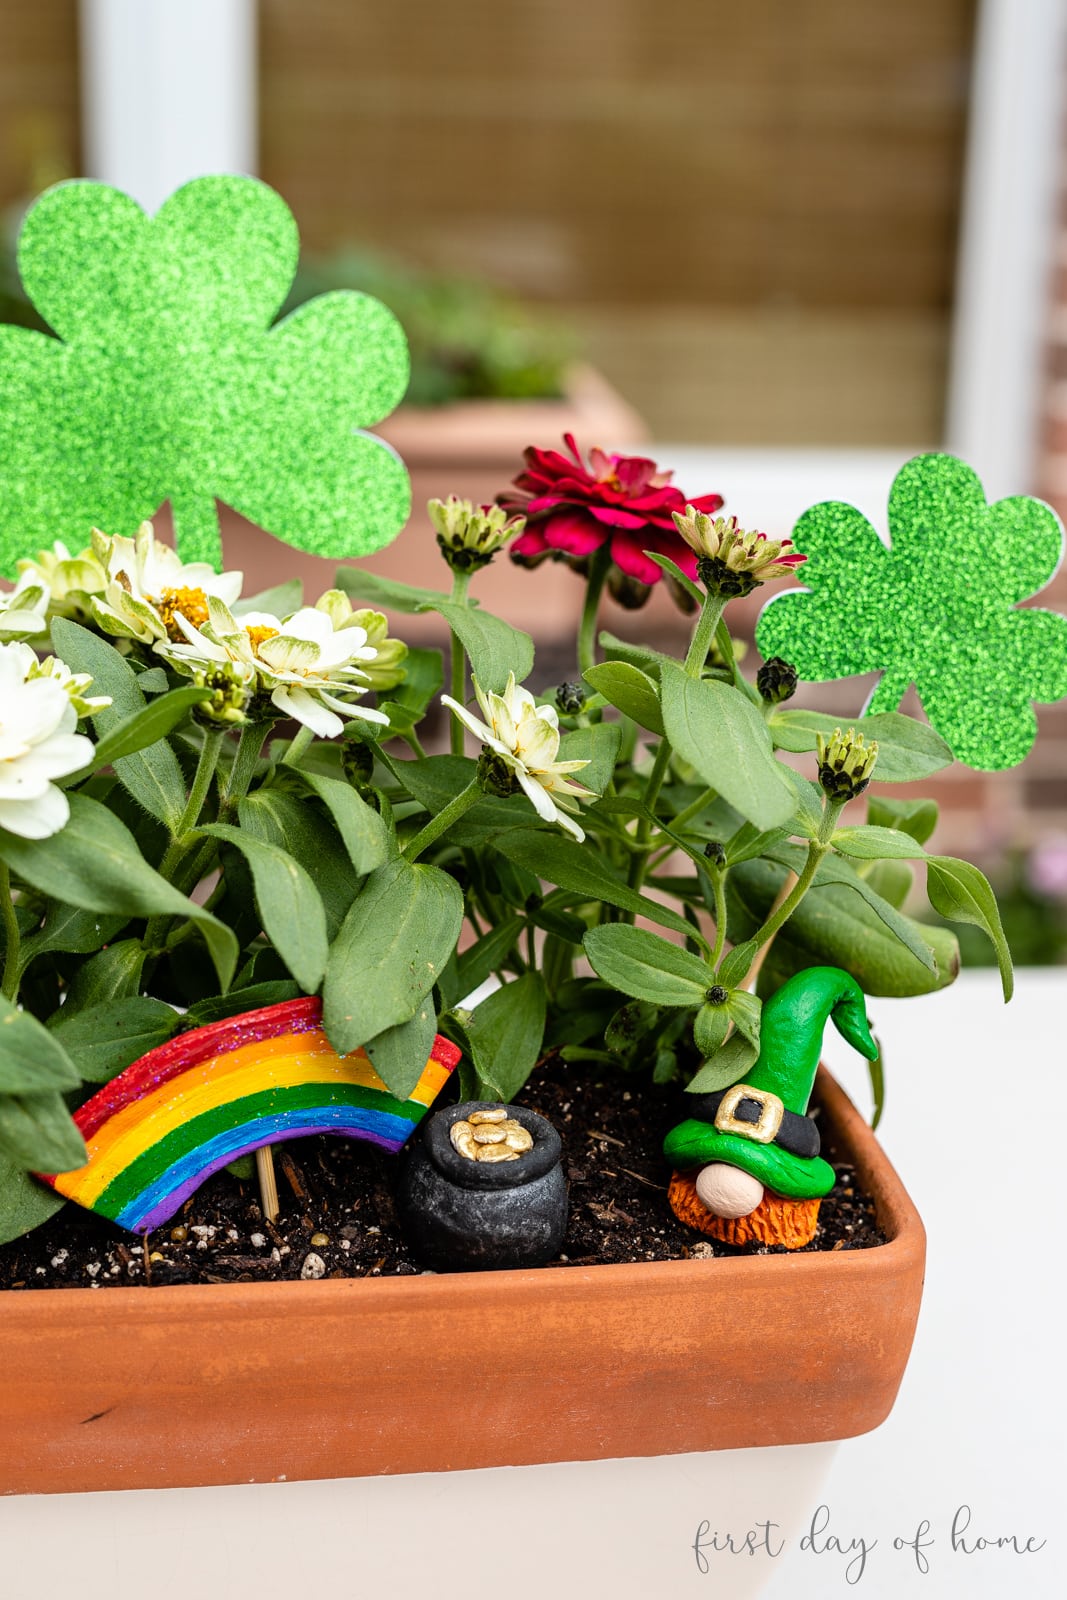
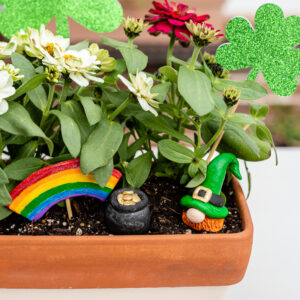
If you’re looking for a crafty way to celebrate the luckiest of holidays, try making this adorable St. Patrick’s Day gnome! It’s the perfect addition to your container garden.
Plus, you’ll learn how to create a whole fairy garden scene with this lucky leprechaun.
This post contains affiliate links, and I will be compensated if you make a purchase after clicking on my links. For more information, please see my disclosures.
How to Make a St. Patrick’s Day Gnome
I put together a quick and easy video to show you how I crafted this DIY gnome out of air-dry clay. This is the short version.
If you want a detailed tutorial on making gnomes, be sure to check out my Valentine gnome tutorial on YouTube. You’ll be a gnome-making machine in no time!
This project does require a little time and patience for the clay to dry. I recommend doing it over the weekend.
For a simpler fairy garden example using store-bought figurines, check out this adorable fall fairy garden.
Notes for Working with Air-Dry Clay
- Have a small dish of water ready to keep the clay moist and smooth as you work.
- After sculpting, let the clay dry completely (24-48 hours), especially if it’s a thick piece of clay.
- If you have trouble adding layers of detail, let the clay dry out a bit. It’s easier to work in stages to add layers unless you need to merge pieces together.
- Use toothpicks or wooden dowels to add stability to small details. For example, I used a toothpick to make sure the gnome’s nose stayed attached. (Ask me how I learned that.)
How to Style Your St. Patrick’s Day Gnome
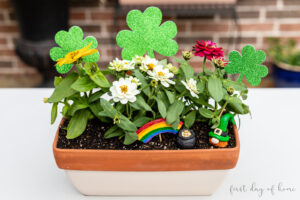
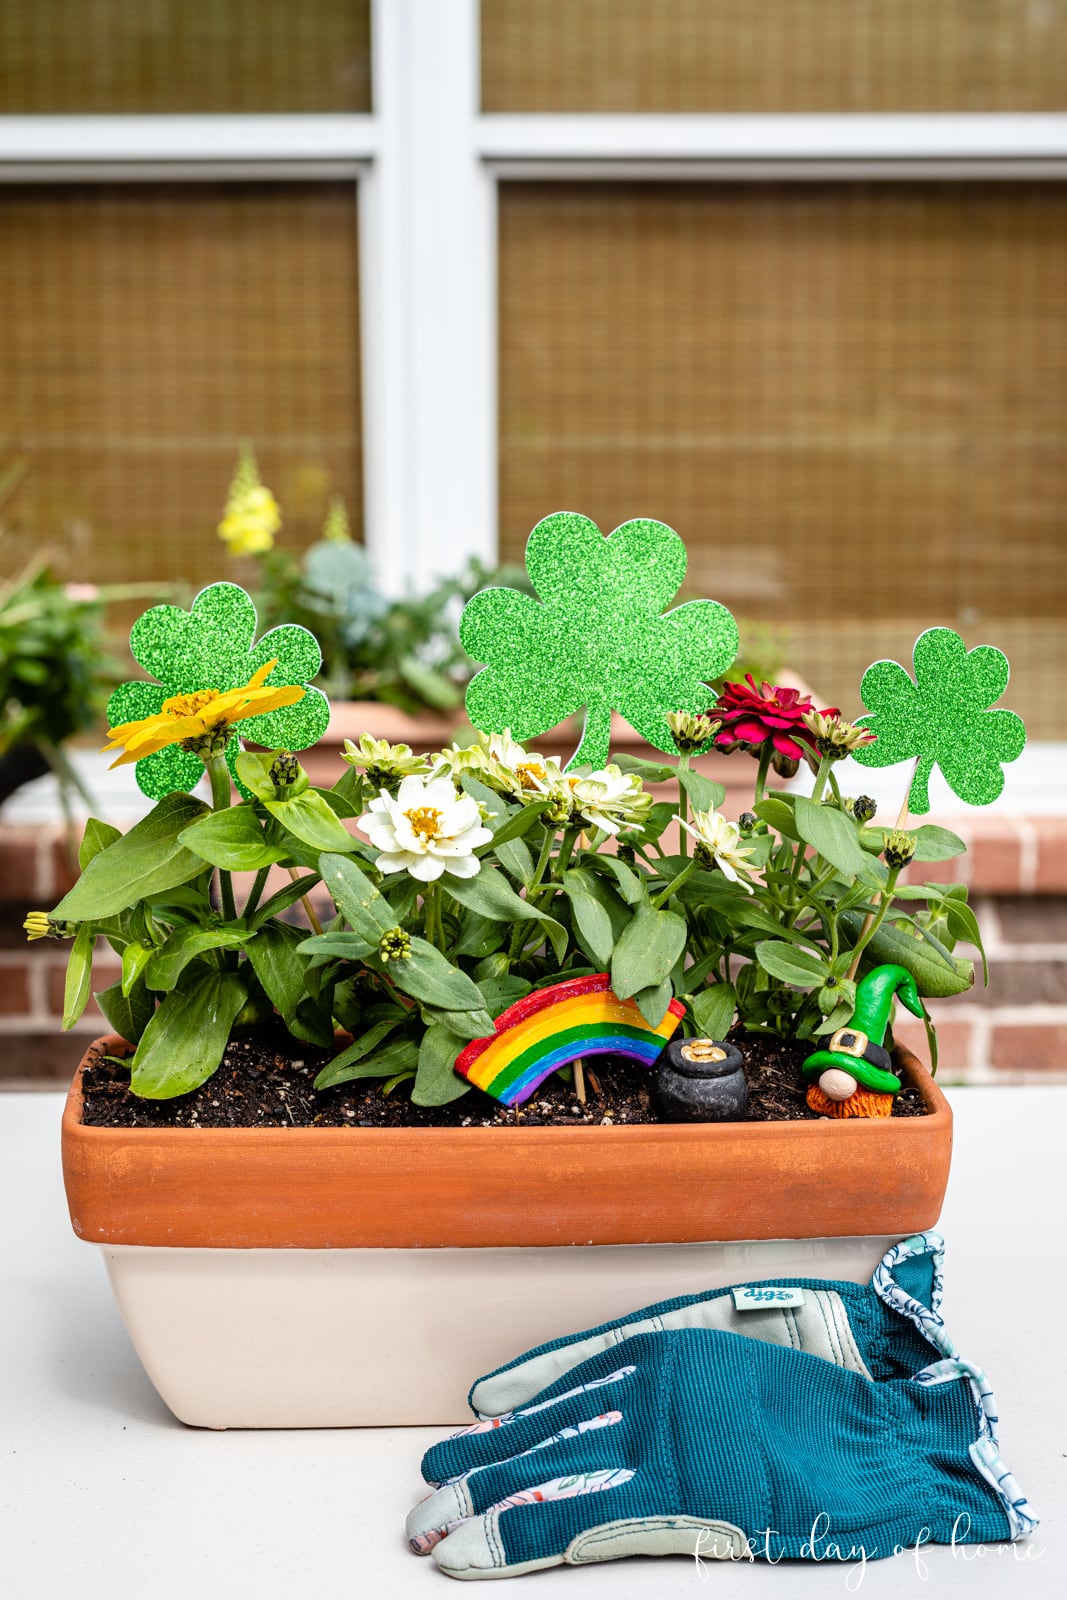
I chose to create a fairy garden scene with my St. Patrick’s Day gnome. For this project, I included some accessories, like a pot of gold (of course) at the end of a rainbow.
Okay, I got a little carried away with this project by making tiny gold coins, too. And some DIY clovers as garden stakes for the finishing touch. (You can easily do this with a Cricut or Cameo machine.)
Read on for a step-by-step tutorial on how to make your own St. Patrick’s Day gnome. Feel free to pause the video to see some of the steps in more detail.
You can also refer to my Valentine Gnomes made from air dry clay or my air dry clay ornaments for more project inspiration.
St. Patrick’s Day Gnome and Fairy Garden
Equipment
- Air dry clay sculpting tools
Supplies
- Air dry clay
- Weather-resistant acrylic paints
- Wooden skewers
- Hot glue
- Planter with drainage holes
- Scrapbook paper or garden stakes
- Mod Podge Sparkle (optional)
Instructions
St. Patrick's Day Gnome
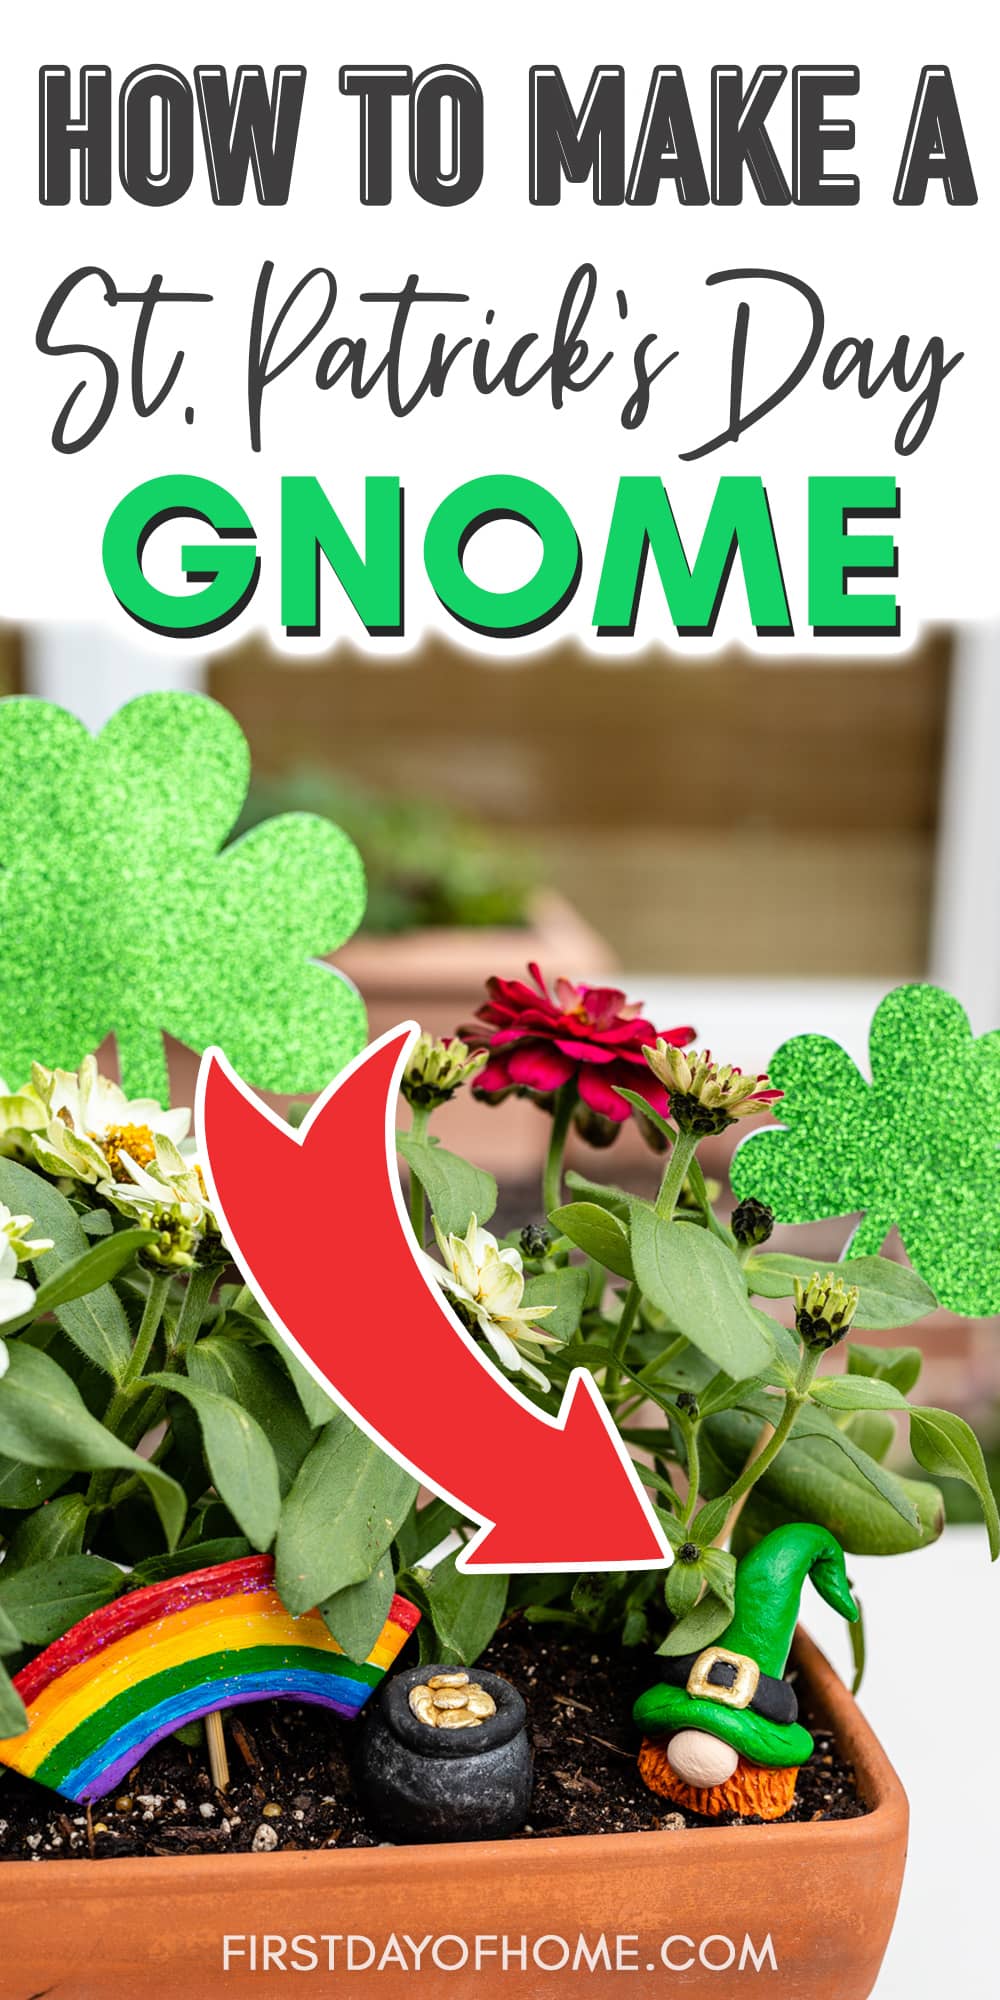
- Using air-dry clay, sculpt a cone shape to create the gnome body.

- Roll a small ball to create a nose. Then, use a toothpick or wooden skewer to attach the nose to the body.
- Roll a piece of clay to form a long skinny coil. Drape the coil over the nose and around the base of the gnome body. This will become the edge of the hood. Blend the coil into the cone shape with your fingers and/or sculpting tools.
- Add any other embellishments, like a belt and buckle around the hood, using a knife or sculpting tools.
- Let the clay air dry for 1-2 days, flipping the gnome over occasionally to dry on all sides.

Pot of Gold
- Start by creating a ball of clay. Then, flatten the ball on the bottom and top slightly.
- Form a rolled piece of clay (coil). Then, slightly moisten the top of the clay pot before attaching the coil to form the lip of the pot. Moistening the clay creates "slip" that will help connect the parts.
- Create small circles of clay and flatten them between your fingers to create the coins.
- Let the clay air dry for 1-2 days, flipping the pot over occasionally to dry on all sides.
Rainbow
- To form a rainbow, simply roll out a piece of clay and form an arch shape. You can cut the arch shape with a knife tool or simply mold it with your fingers. (I recommend using the knife tool for more precise edges.)
- Let the clay air dry for 1-2 days, flipping the piece occasionally to dry on all sides.
Clovers
- Cut out clover shapes from scrapbook paper using a Cricut or Cameo cutting machine or by hand. Be sure to cut two mirrored shapes that you can "sandwich" together.
- Glue the clover shapes around wooden skewers to create your own garden stakes.
- As another option, you can buy pre-made garden stakes.
Painting & Assembling
- Paint the air-dry clay pieces in stages. For the gnome, you can begin with the hat and let it dry completely before painting finer details like the belt buckle.
- For the rainbow, use hot glue or E6000 to attach a wooden skewer to the back. You may need to cut the skewer to reach your desired length.
- For added sparkle, you can apply a coat of Mod Podge Sparkle, which also helps to seal the pieces.
- Once all pieces are dry, assemble your fairy garden with the plants of your choice.