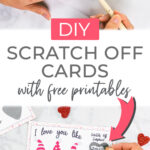
Easy DIY Scratch Off Cards (Free Printables)
With Valentine’s Day around the corner, why not surprise your loved one with the most unique card ever? I’ll show you how to make scratch off cards with free printables to get you started.
This post contains affiliate links, and I will be compensated if you make a purchase after clicking on my links. For more information, please see my disclosures.
Tutorial: How to Make Scratch-Off Cards
Making DIY scratch off cards is easier than you think! You probably own some of the supplies you’ll need already. Plus, I’m giving you free printable cards, which you’ll find below.
Supplies
- Cardstock
- Home printer
- Metallic acrylic paint
- Dish soap
- Paper trimmer (optional)
- Packing tape
- Foam paint brush
- Double-sided tape
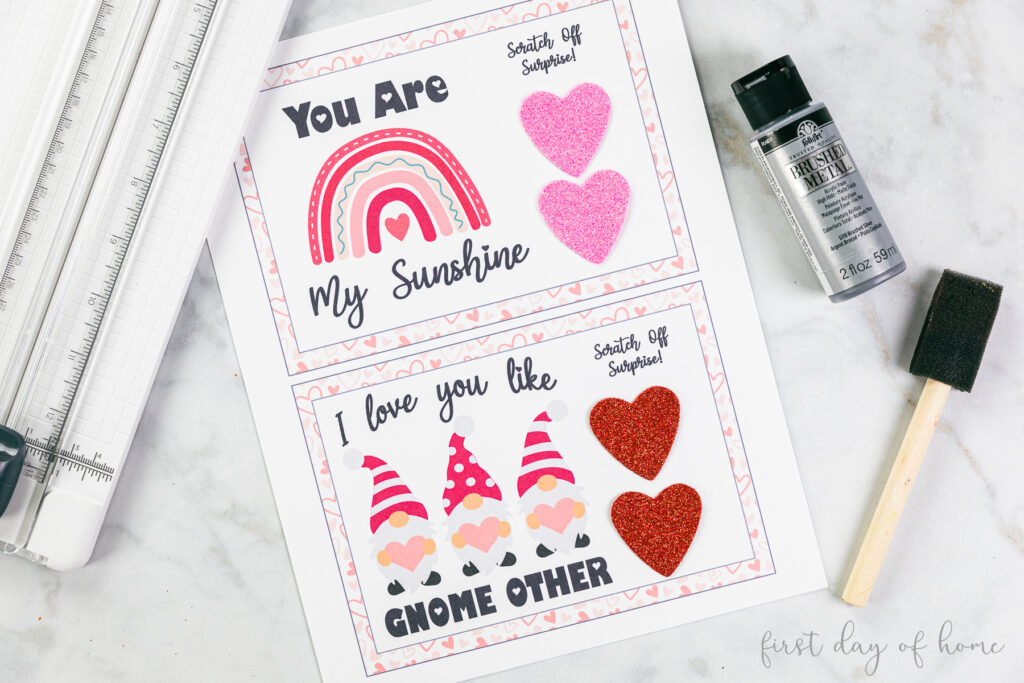
Step 1: Print and cut your design on cardstock
When printing your design, make sure you choose the highest-quality print settings. On my Epson inkjet printer, I select “Best” under the “Media & Quality” menu.
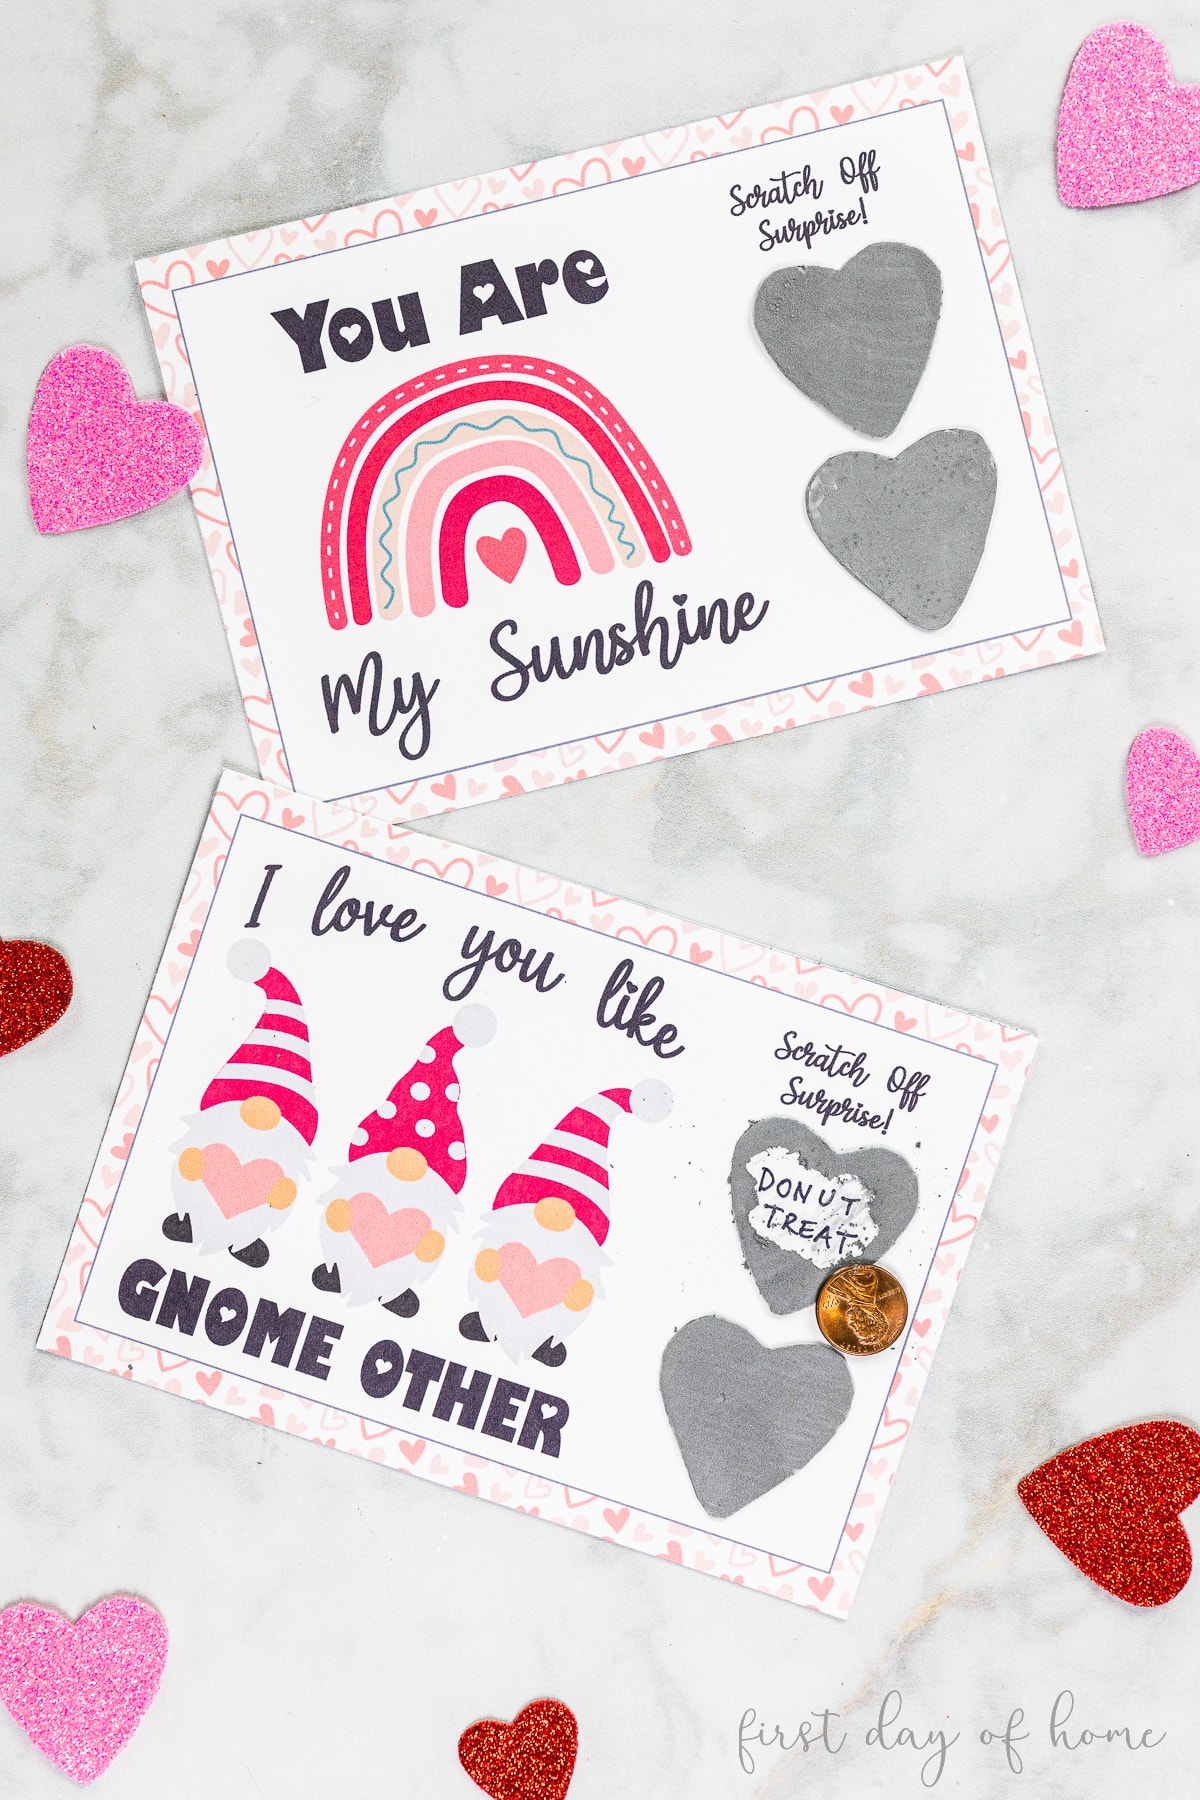
I’ve designed these Valentine’s Day printables with two cards per sheet, and each card measures about 7×5 inches.
Feel free to create your own card designs with cardstock or construction paper and markers. You’ll still follow the same steps below. I do recommend using sturdy cardstock for the actual scratch-off stickers.
Step 2: Cut scratch-off sticker shapes
On cardstock, cut out four scratch-off shapes. (Each card will fit two scratch-off stickers.)

I created heart-shaped scratch-off stickers, but you could also use squares. Since I had some foam hearts handy, I used those as a template to draw my shapes. Each heart was about 1.5×1.5 inches.
You can freehand some hearts and call it a day, too.
Step 3: Write your scratch-off hidden message
Since I made these Valentine’s Day cards for my twin boys, I included some of their favorite treats on my scratch-off stickers, like a Sonic drink and donuts.
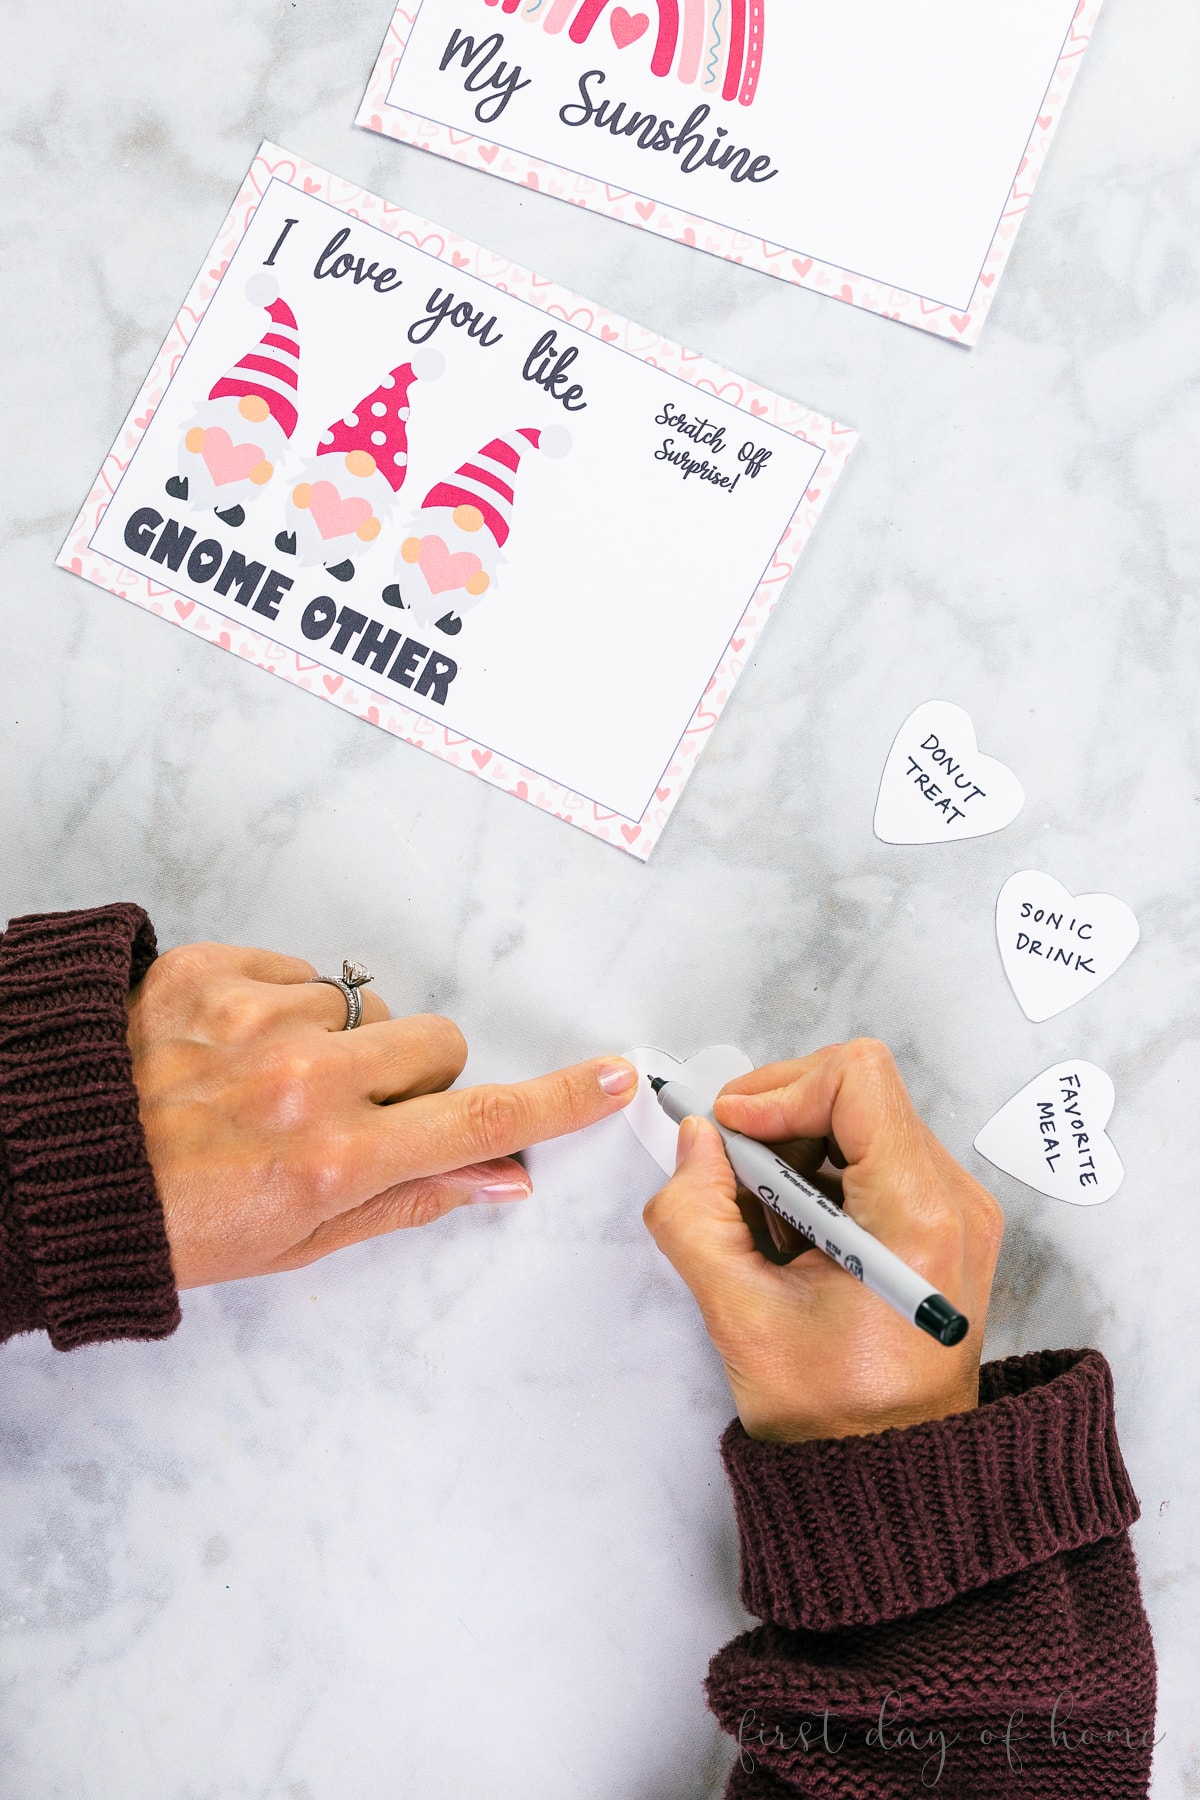
Depending on your recipient, you can personalize your cards with any reward like a car wash, free massage, date night, favorite meal, Starbucks treat, or breakfast in bed.
(I’m wishing someone would make me a scratch-off card with all of the above!)
Step 4: Seal the scratch-off tickets with tape
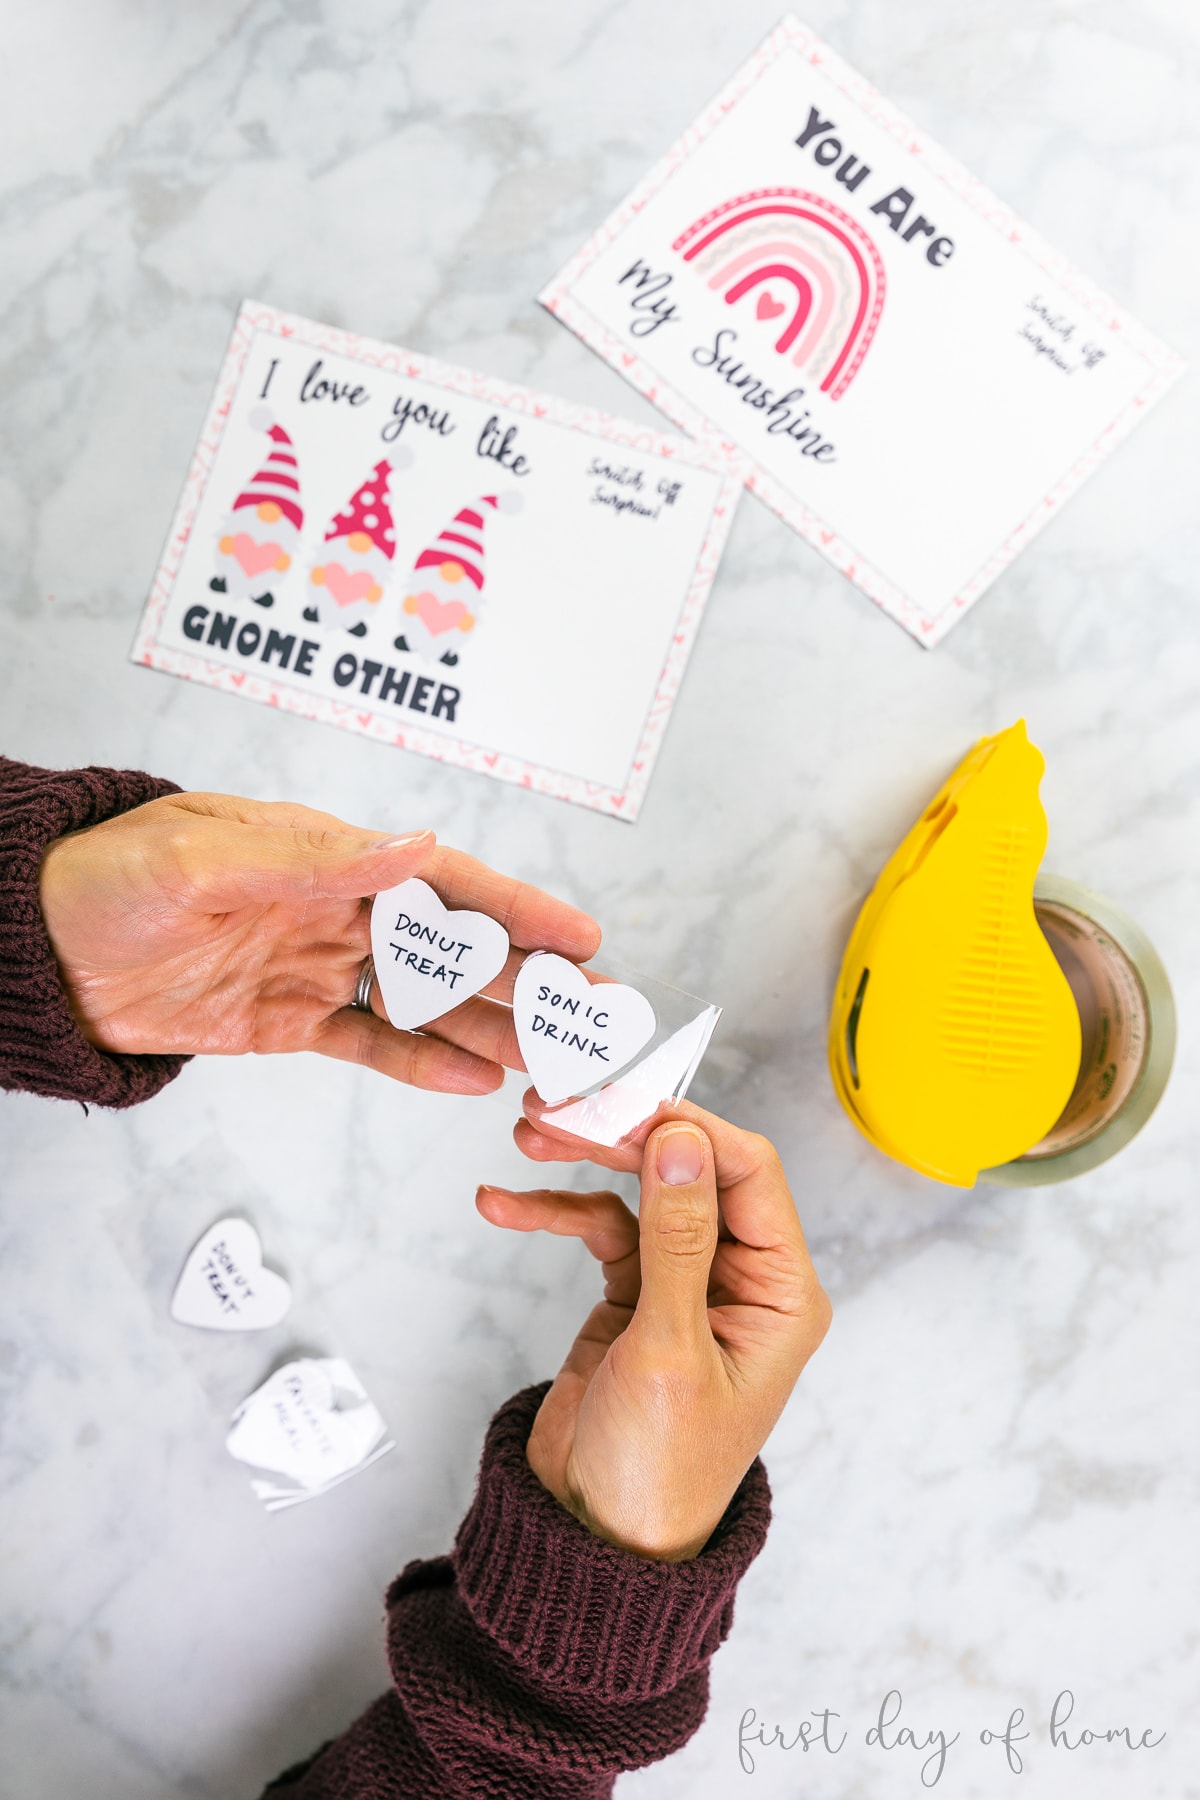
Once you’ve written your treats on the stickers, “laminate” both sides of the shapes using packing tape.
Start by cutting a strip of tape 2.5 times as long as your shapes. Then, place your shapes on one half of the sticky side, and fold the other half over to cover both sides.
If you have a laminating machine or self-laminating sheets, you could also seal a few shapes at once.
After the stickers have their shiny coating, you can cut them into individual shapes or move on to the next step before cutting them. In hindsight, I wish I had painted the strips of tape before cutting out the hearts.
Step 5: Paint the scratch-off stickers
Combine two parts of acrylic paint with one part of dish soap to create your magic scratch-off paint mixture. Then use a foam paintbrush to apply 3-4 coats of paint on your scratch-off areas.
Wait for the paint to completely dry in between coats (about 30-40 minutes). I used a small disposable cup to mix the paint and then covered it with plastic in between coats. This prevents the paint from drying out.
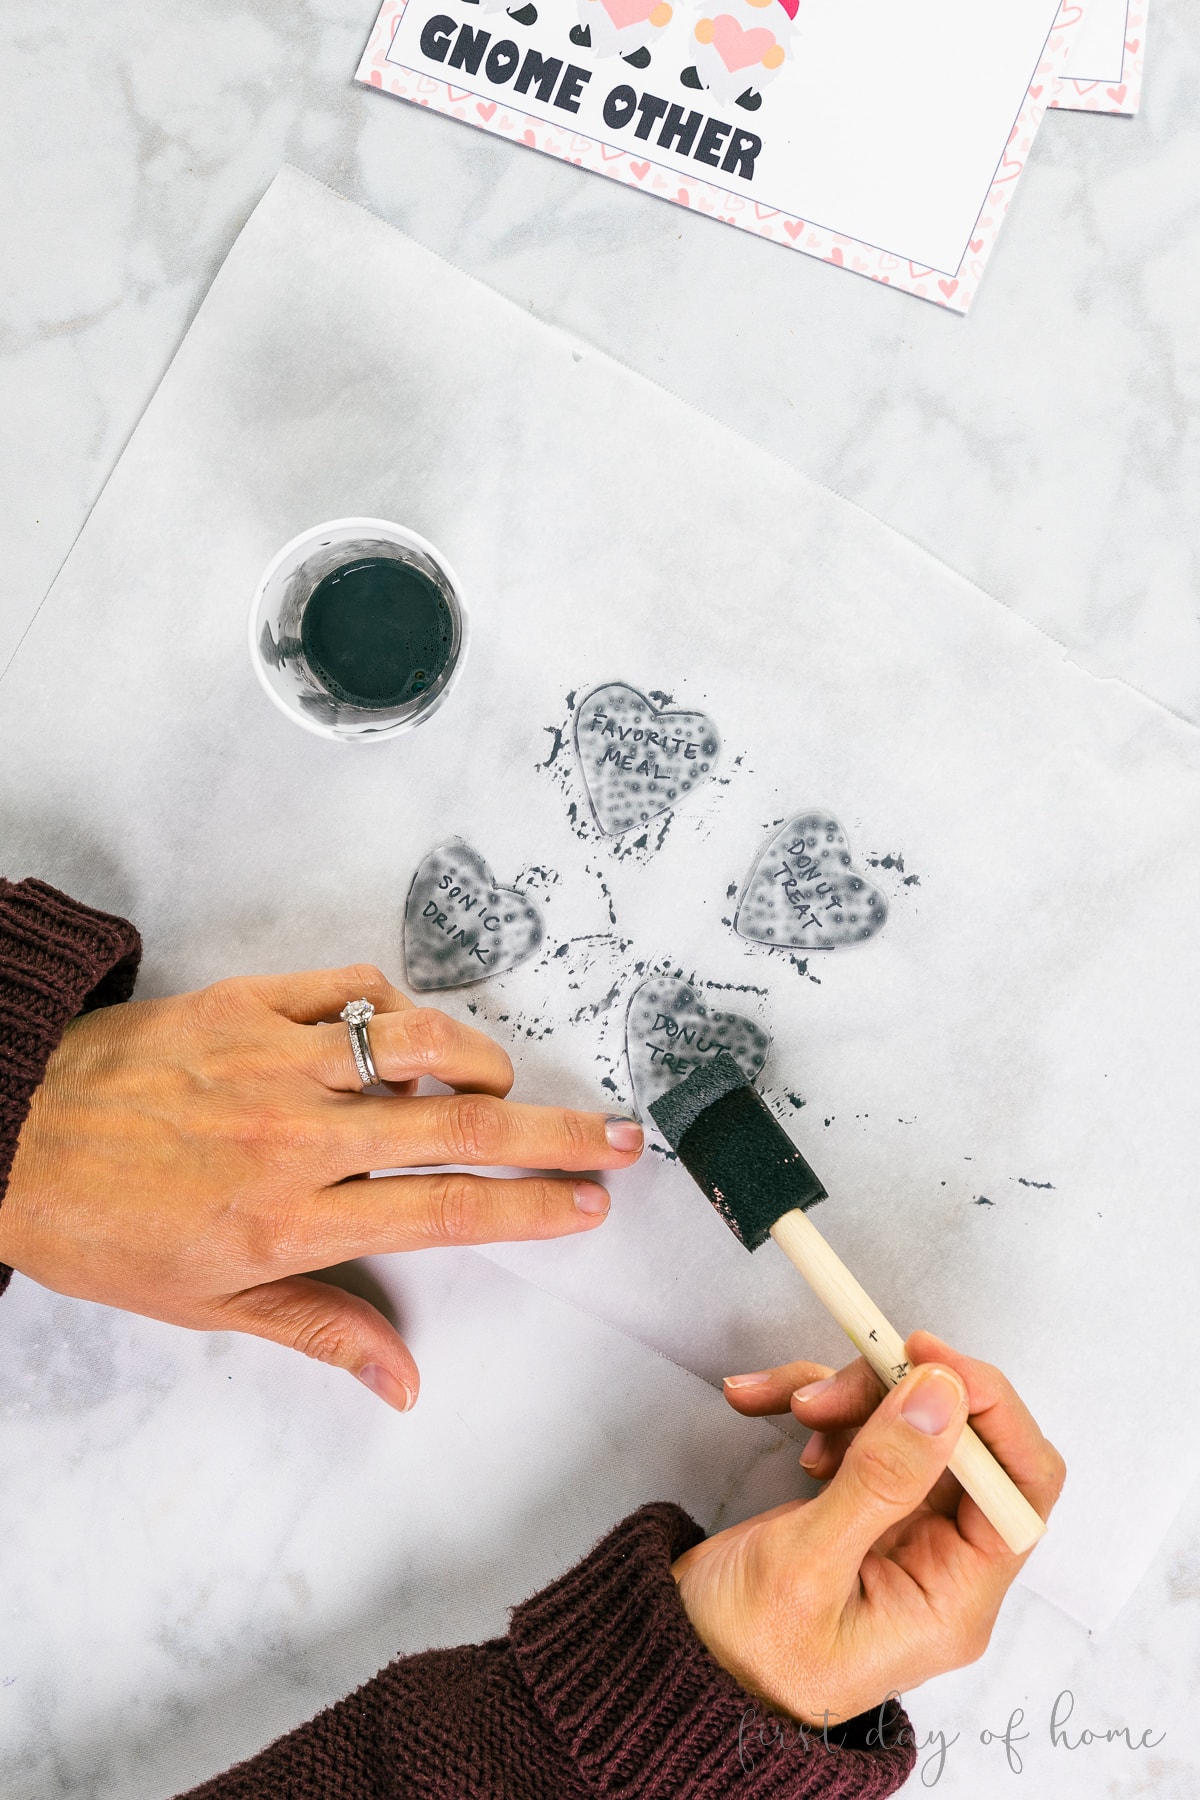
I chose a silver metallic paint, but you could also use gold, copper, or any other paint with a glossy sheen.
Tip: Use a foam brush to apply paint smoothly in thin layers.
Step 6: Attach the scratch-off stickers to the cards
Once your stickers are completely opaque and you can’t read the surprise underneath, it’s time to attach them!
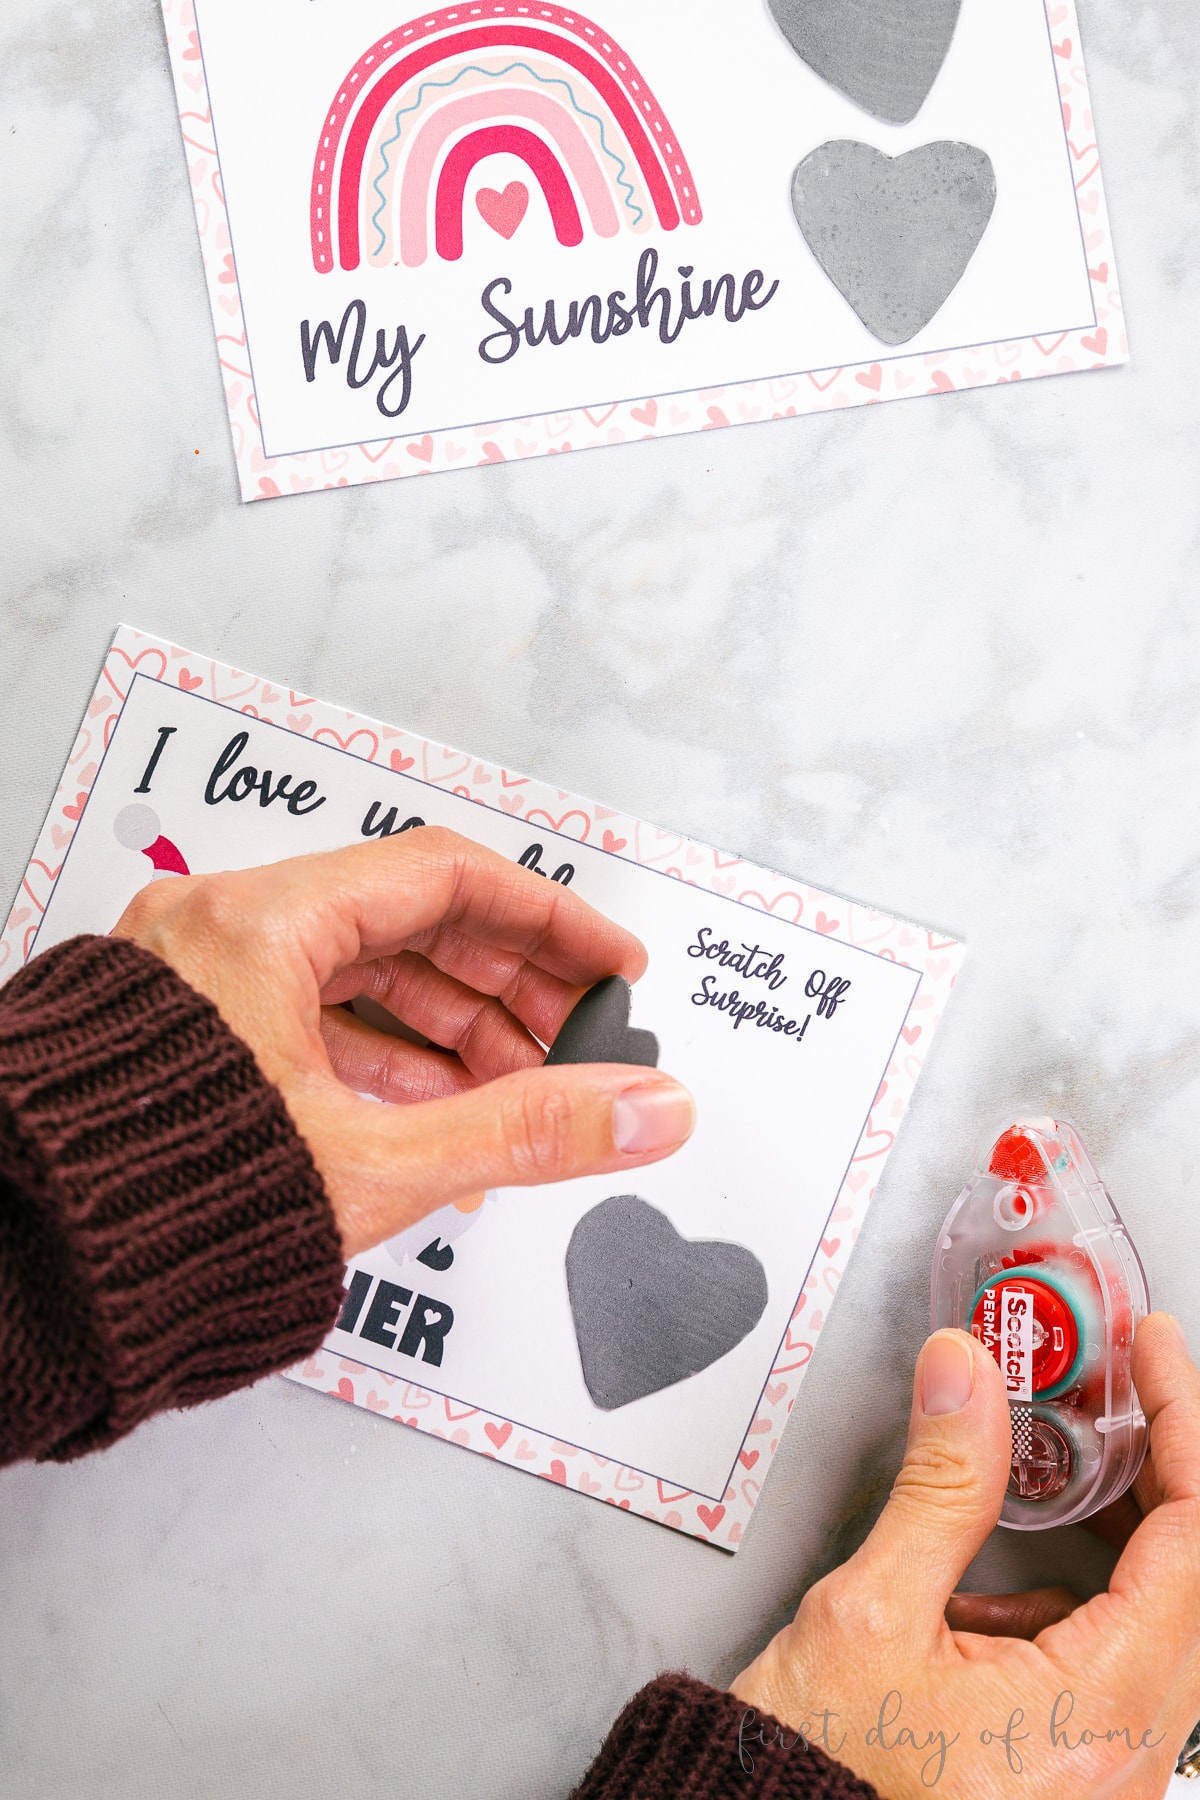
I love using a double-sided roller for card-making projects like this. The glue has a permanent bond, so the sticker won’t fall off when someone scratches it. Just place a small dab on the back of your painted stickers to attach them to the cards.
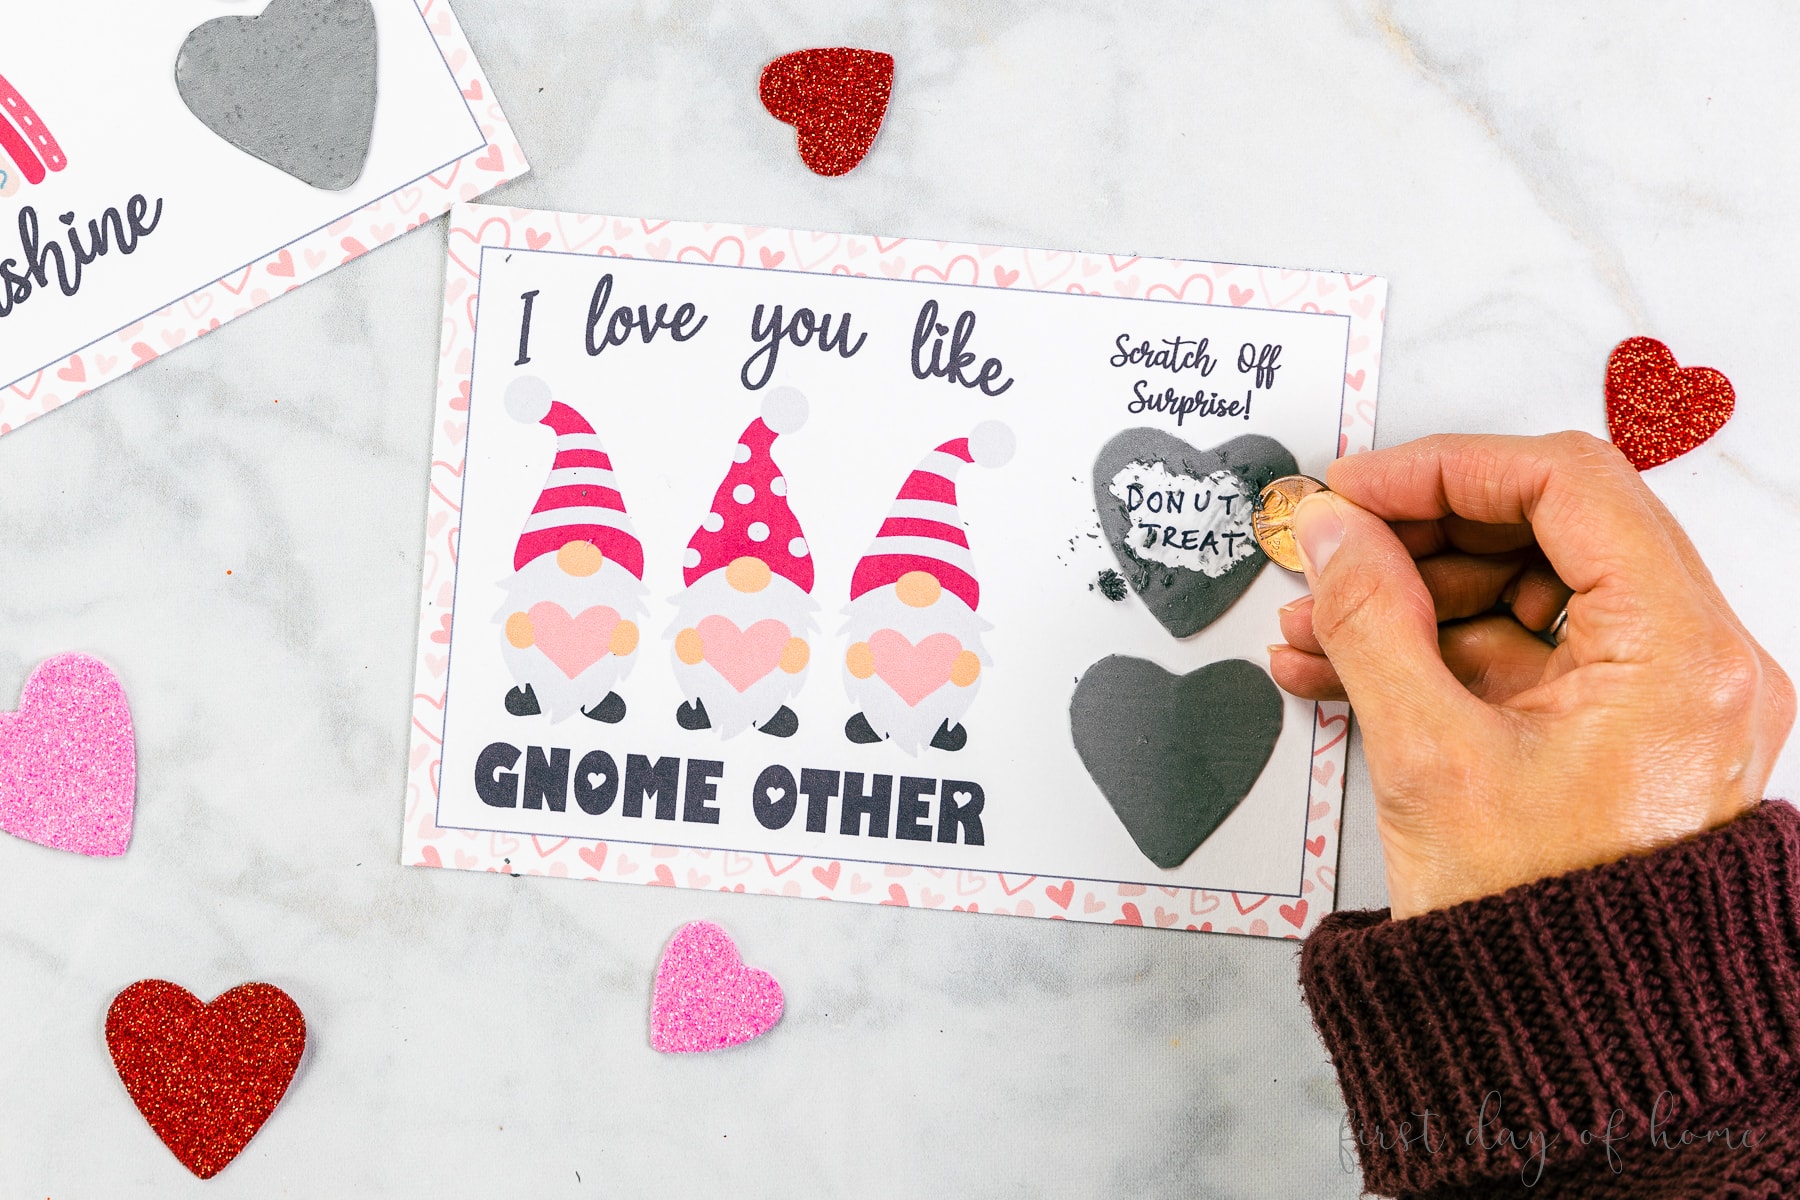
How to Use Scratch-off Cards
To use your awesome scratch-off cards, take a coin or credit card and scrape the paint off. As a thoughtful touch, you could include a coin with the card. (I think a coin would look adorable in the hands of one of these gnomes.)
That’s it! Your gift recipient will be thrilled to find the surprises waiting for them. Wouldn’t these be so cute for a birthday card too?
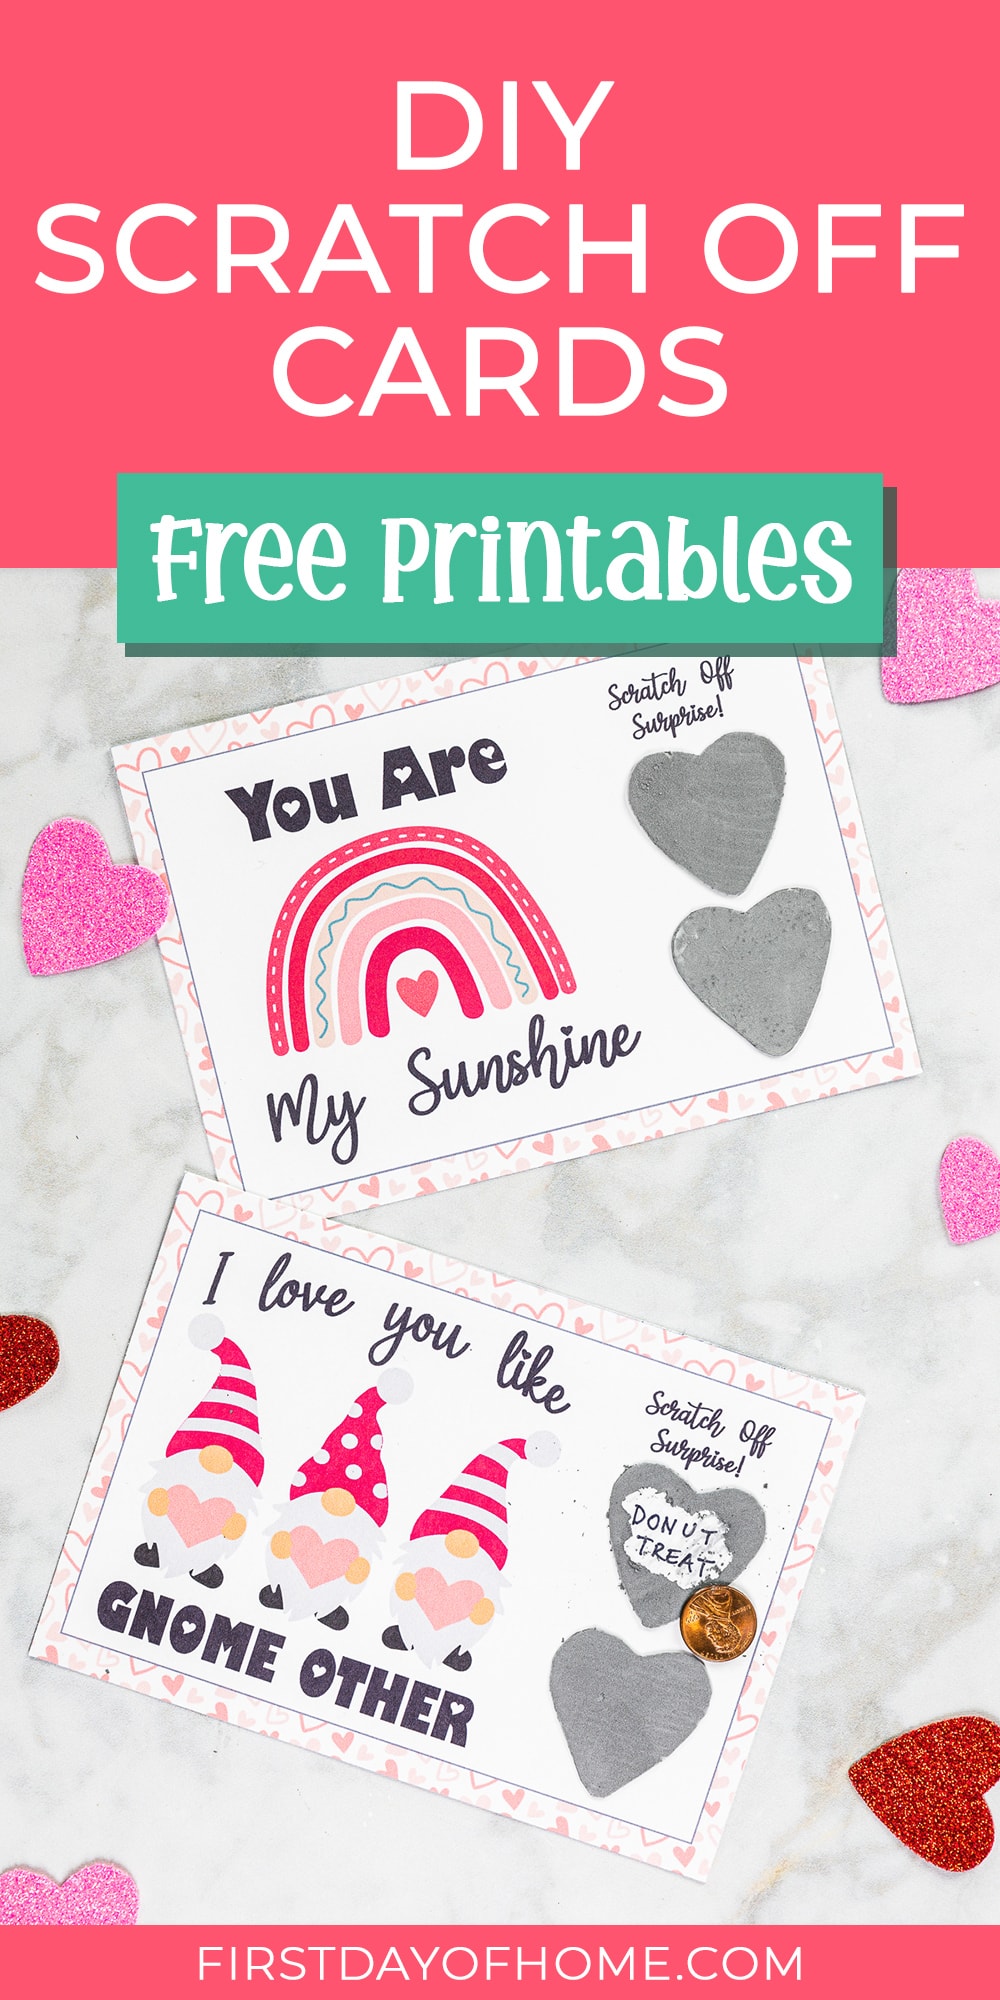
Download Free Printable Valentine’s Day Cards
I created these cards using my collection of free Valentine’s Day fonts and graphics from Creative Fabrica (my favorite place for free art and SVG files). One card design features a rainbow and the phrase “You are my sunshine.” The other has three Valentine’s Day gnomes with the phrase “I love you like gnome other.”
Sign up below to become a VIP member and receive this free download. All files are for personal use only. To view the document, you will need Adobe Acrobat Reader, which you can download for free here.
I hope you enjoy printing your DIY scratch-off cards at home for your special valentine!
Pin it for later!


HI.
LOVE the idea and it’s just what I was looking to do. I always call the clear tape like that “packing tape” instead of duct tape which, to me, always seemed to be opague with color. I use it packing tape to, well, tape packages to be mailed and often spread a slice of tape over the address so it doesn’t get smudged from weather.
question: Wouldn’t it be easier to just print the hearts, with sayings, on the card and then put a slice of packing tape over the entire card. Then add the mixture of paint/soap with a smaller brush? I suppose it may be hard for some to stay within the heart lines while painting. Perhaps, if needed a open heart template to place on top of the other heart so excess goes on that template.
Hi Amy! Thanks for the comment! Yes, you’re totally right about the packing tape. I need to fix that. You could definitely try different approaches to making this craft. To save on tape, I like to only tape the little hearts. It also gives me an opportunity to write something personalized on the cards. There’s no reason you couldn’t print a sheet of hearts with phrases on them already, especially if you’re making a bigger batch of cards. I think that’s a wonderful idea too. Have fun with it!
I don’t understand the use of the duck tape? Can you please explain this further?
Thank you
Yes, the duck tape creates a slick surface (similar to laminating), which makes it easy to scratch off the paint. Without adding the slick layer, it would be difficult to remove the paint. This short video helps demonstrate the process a bit better: https://youtube.com/shorts/RZM45qpMc1U?si=sZxdUTHZWfjP64vA. I hope this answers your question!
I saw these on Facebook and had to pop over to see how you did this and pin it. Amazing!!!!! These are a perfect example of I wish I had thought of it.
Hi Leanna! Thanks so much for the sweet comment! I’m so glad you liked it. It was really fun to put these together. I appreciate you stopping by to say hello. Happy Valentine’s Day!
These are so cool, Crissy!!! Great for any occasion!! It takes the old ‘coupon’ in the card to a whole ‘nother level!! Love it!
Thanks so much, DeeDee! That’s so sweet of you to stop by. My boys loved these cards. It’s a shame the surprise was a bit spoiled because they were snooping around the craft room. Ha! I hope you give the cards a try. Hugs!