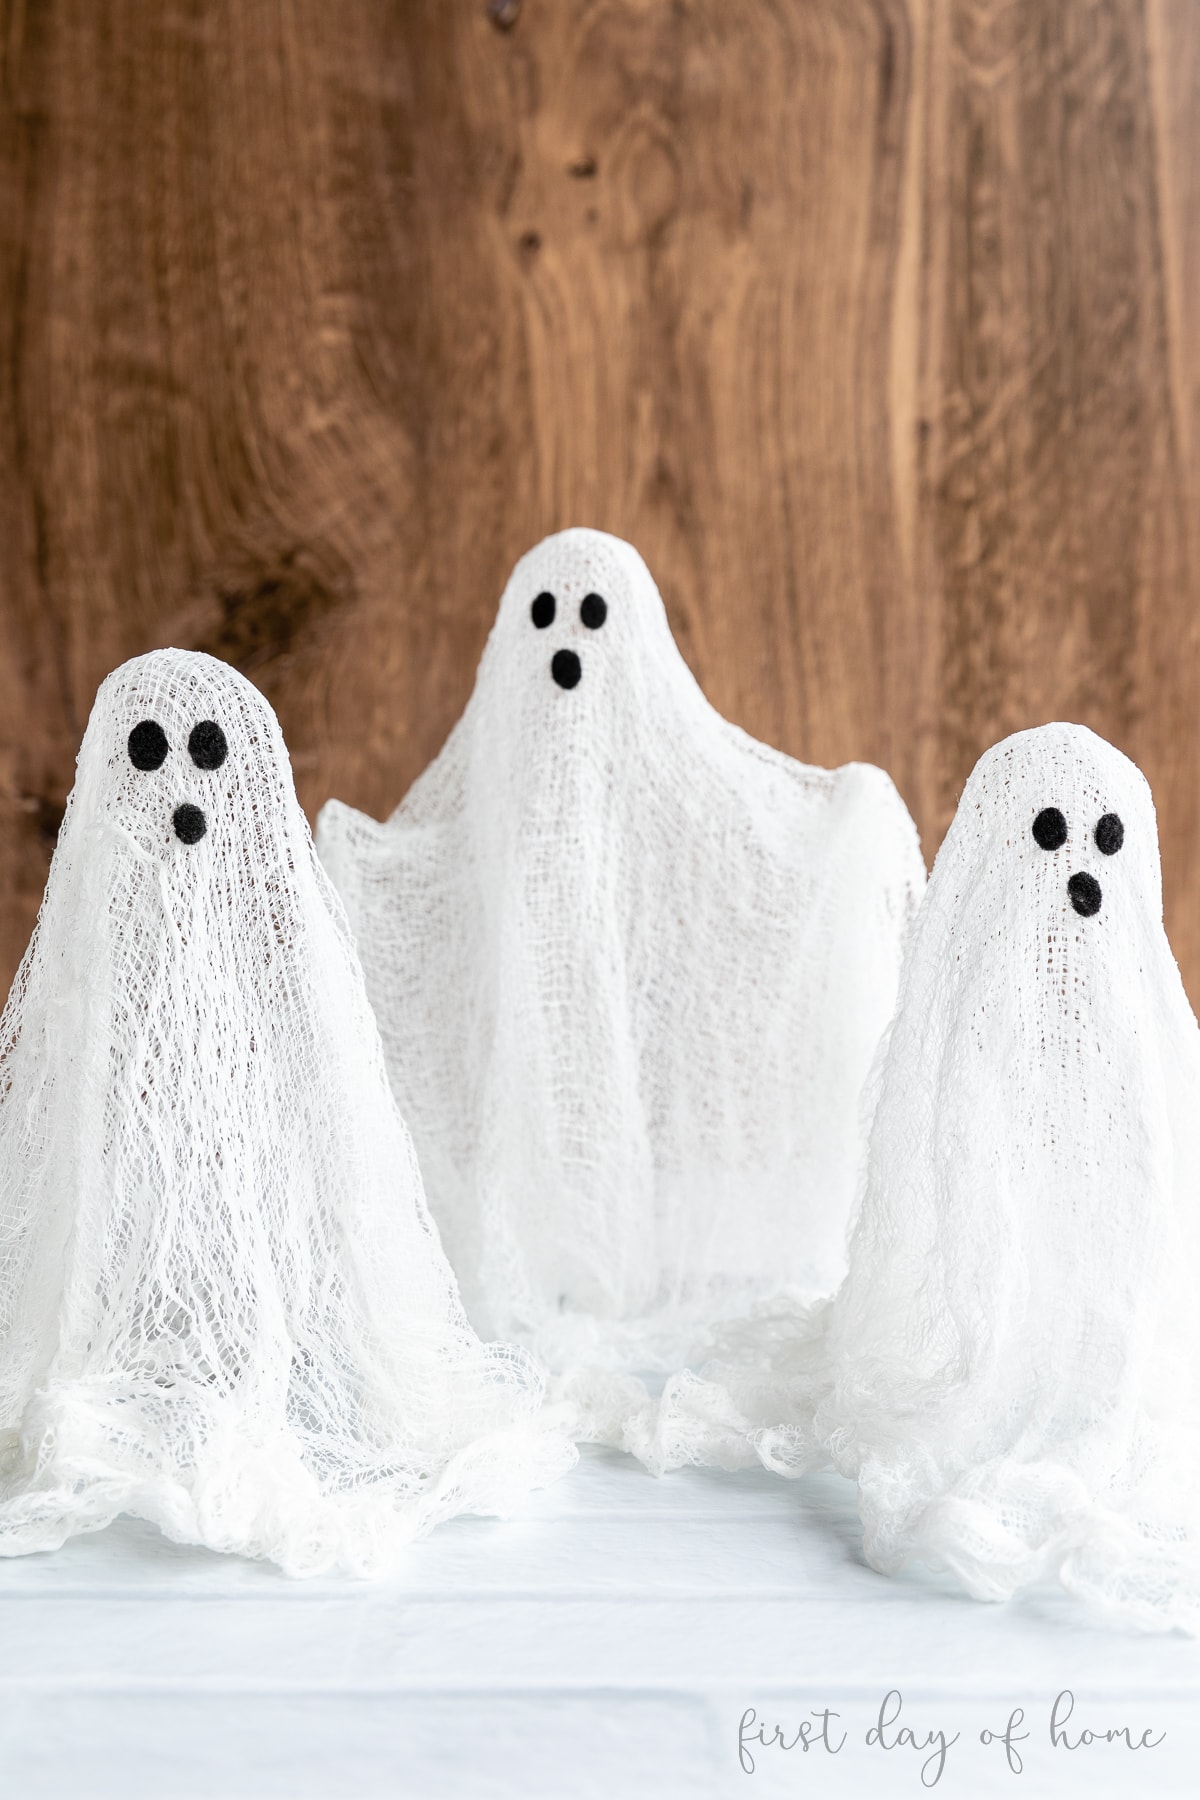
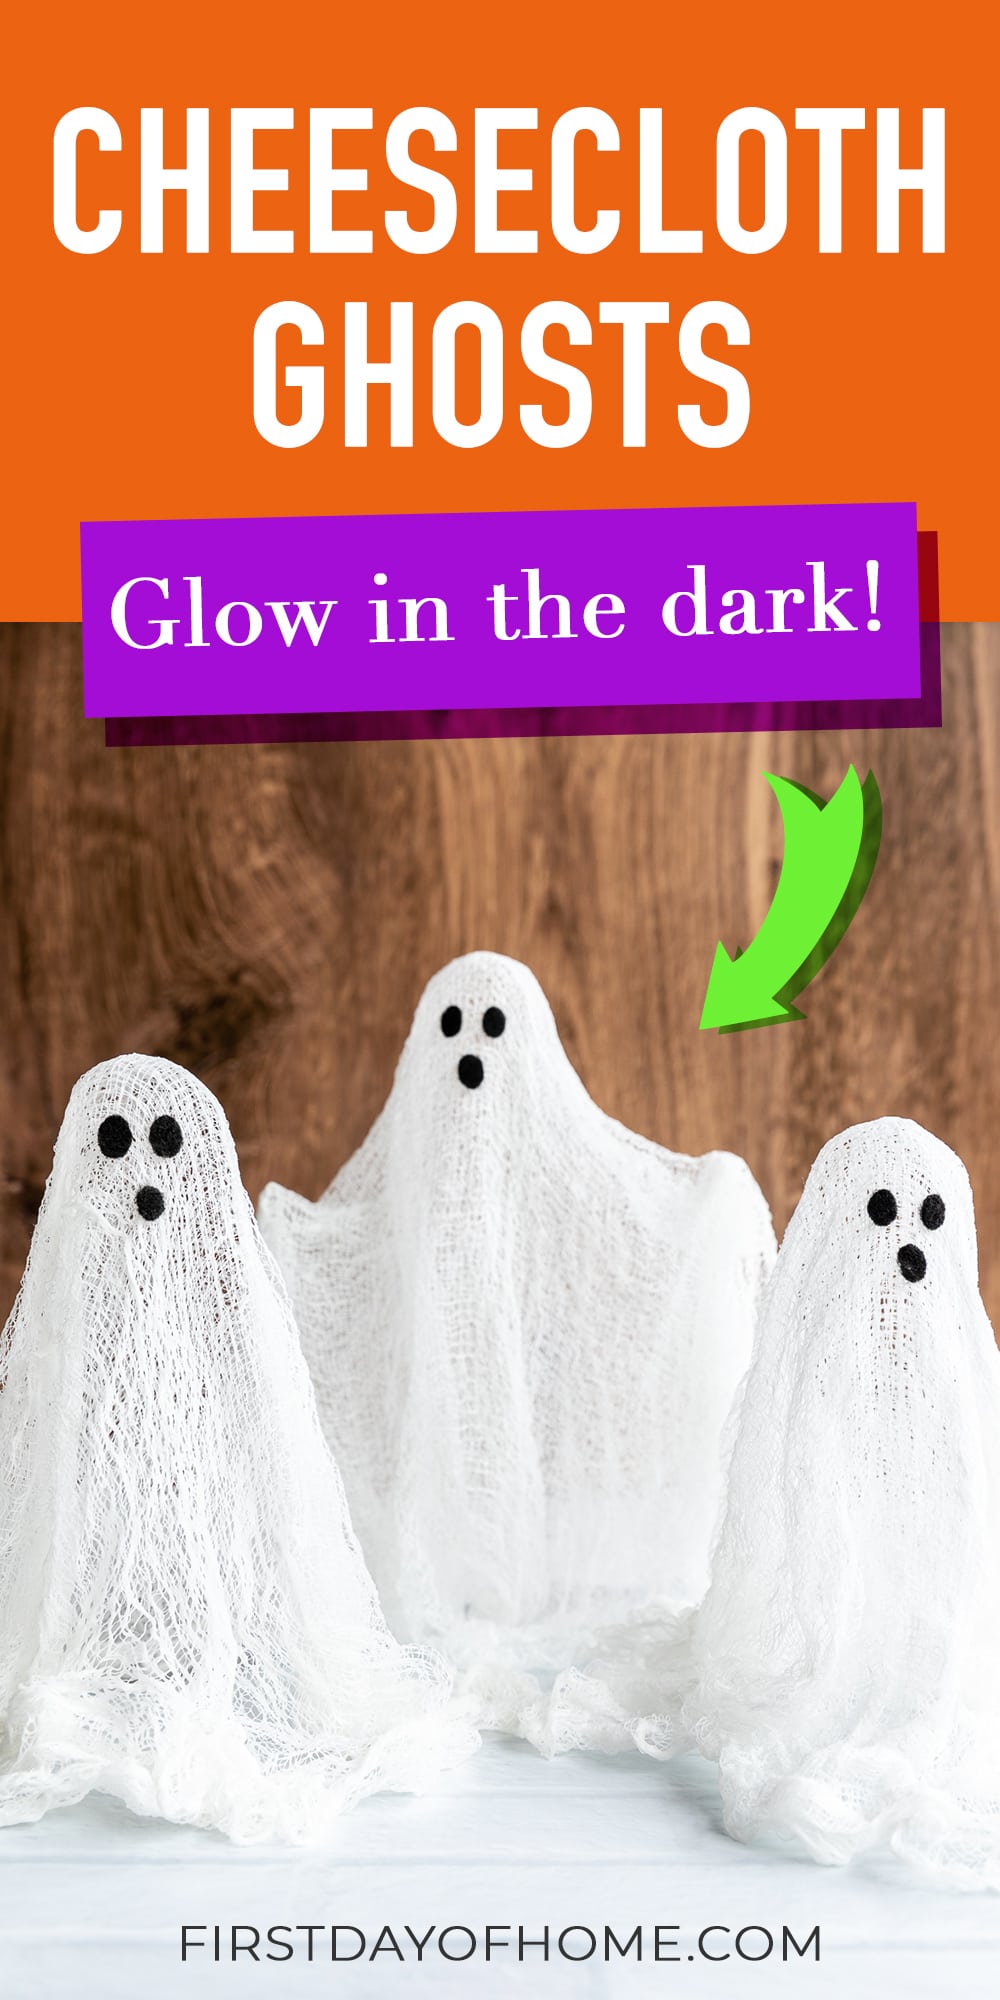
How to Make Easy Cheesecloth Ghosts
To celebrate all things Halloween, I’m sharing my foolproof guide on how to make cheesecloth ghosts. It’s a time-honored tradition that every mom and child should enjoy. Plus, there’s a hot tip at the end to make your ghosts glow in the dark!
This post contains affiliate links, and I will be compensated if you make a purchase after clicking on my links. For more information, please see my disclosures.
Cheesecloth Ghosts: Simple Tutorial
If you grew up in the 80s or 90s, chances are you made cheesecloth ghosts. It’s a Halloween craft I distinctly remember making with my mom as a child. I now feel compelled to pass down the tradition to my twin boys.

You have several options for glue when it comes to keeping your ghosts frozen in time. I’m using Mod Podge for this tutorial because I have copious amounts of the stuff from my various decoupage projects.
Other options for stiffening your cheesecloth include Elmer’s Glue, liquid starch, or a mixture of water and cornstarch.
Supplies

- Cheesecloth
- Mod Podge, Elmer’s Glue, liquid starch, or a cornstarch-water mixture
- Small foam balls or wooden beads
- Wooden skewers
- Plastic wrap
- Styrofoam
- Black felt, acrylic paint, or adhesive vinyl
- Optional: Cricut machine for cutting ghost faces
Watch this on YouTube!
Get a complete tutorial to make these ghosts as well as 9 other Halloween crafts.
Step 1: Prepare ghost structure
For this tutorial, we’ll use a styrofoam base, but you can also use a slender glass bottle and tape your ball or wooden bead to the top.
It’s a good idea to wrap your styrofoam base with foil or a plastic trash bag before you begin adding your ghost structures.

Once the base is prepared, insert wooden skewers into the styrofoam. You can then place a styrofoam ball or wooden bead on top to form the head structure.
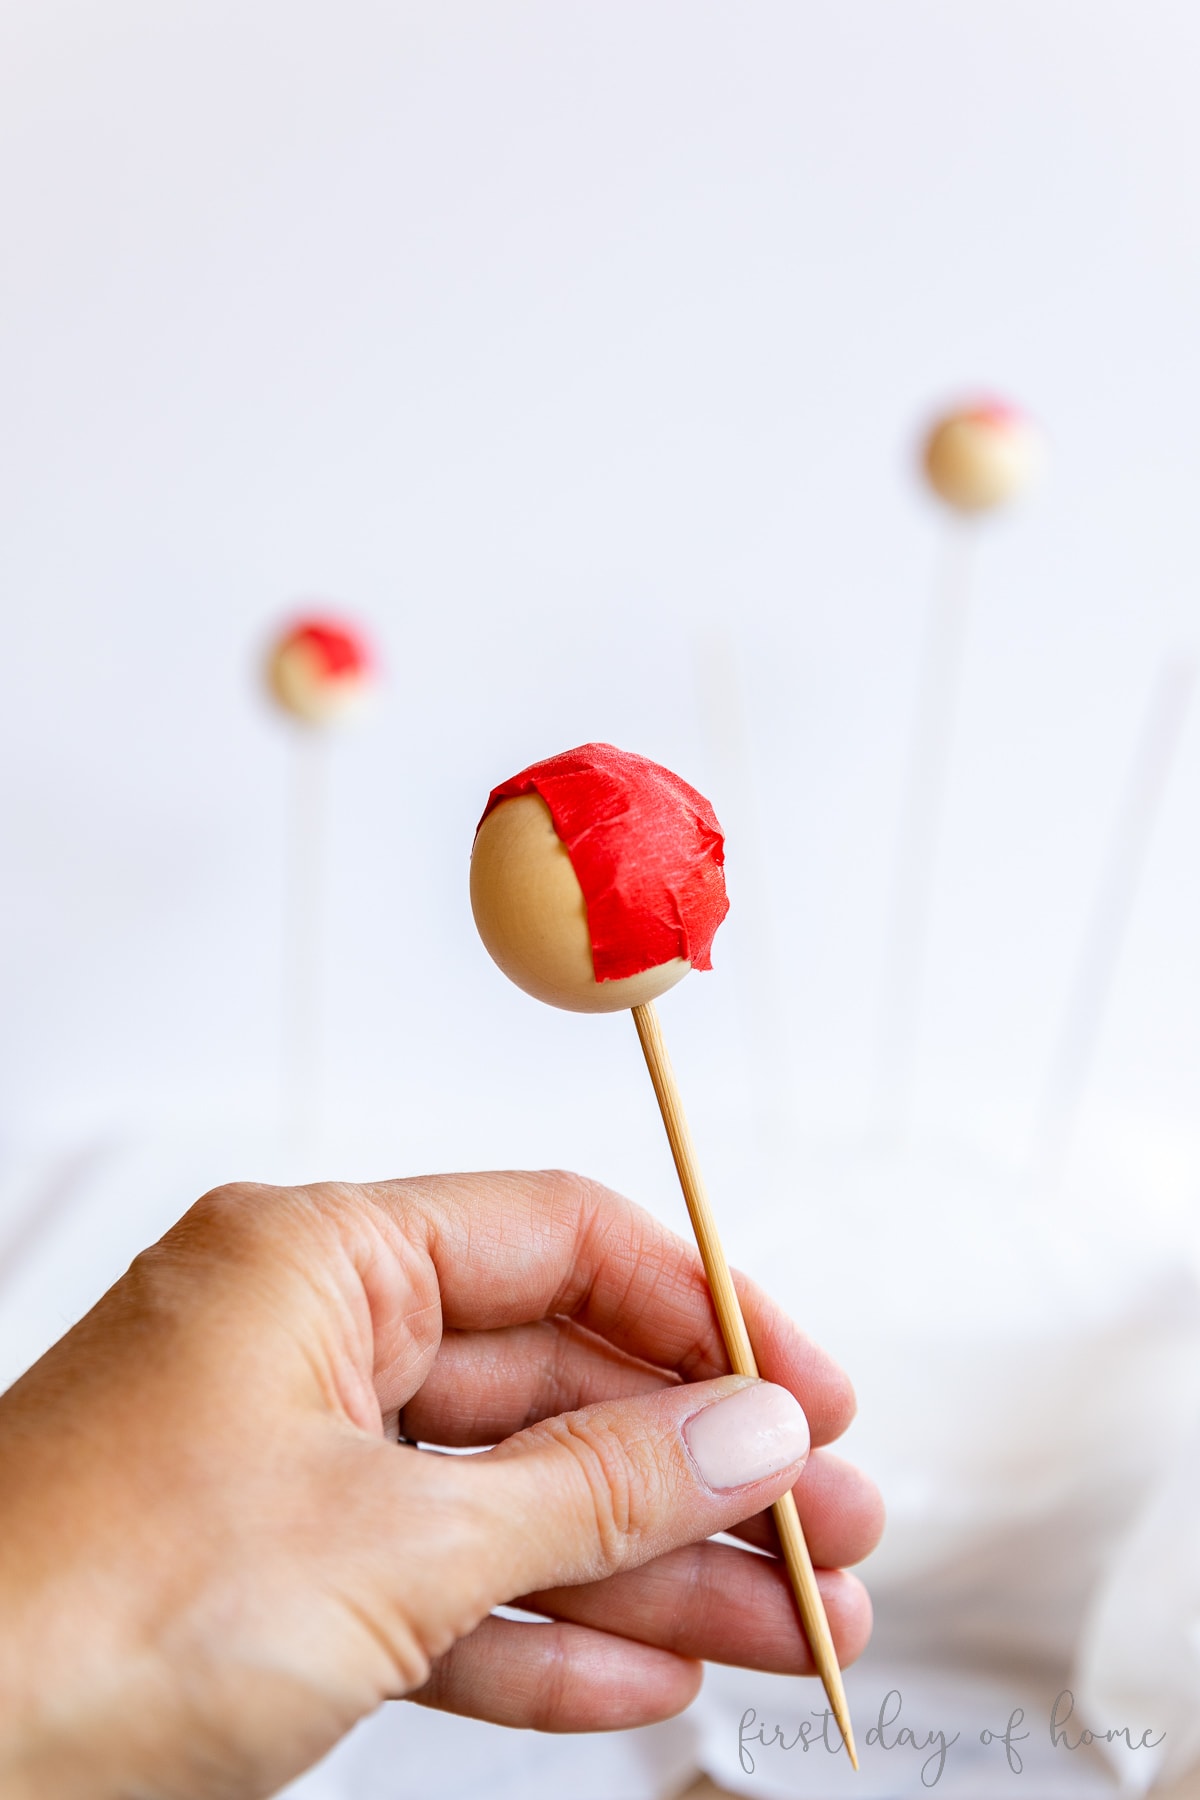
If your bead has holes on both ends, you can use masking tape or painter’s tape to seal one side (see above). I had these beads on hand from my recent DIY bead garland tutorial.
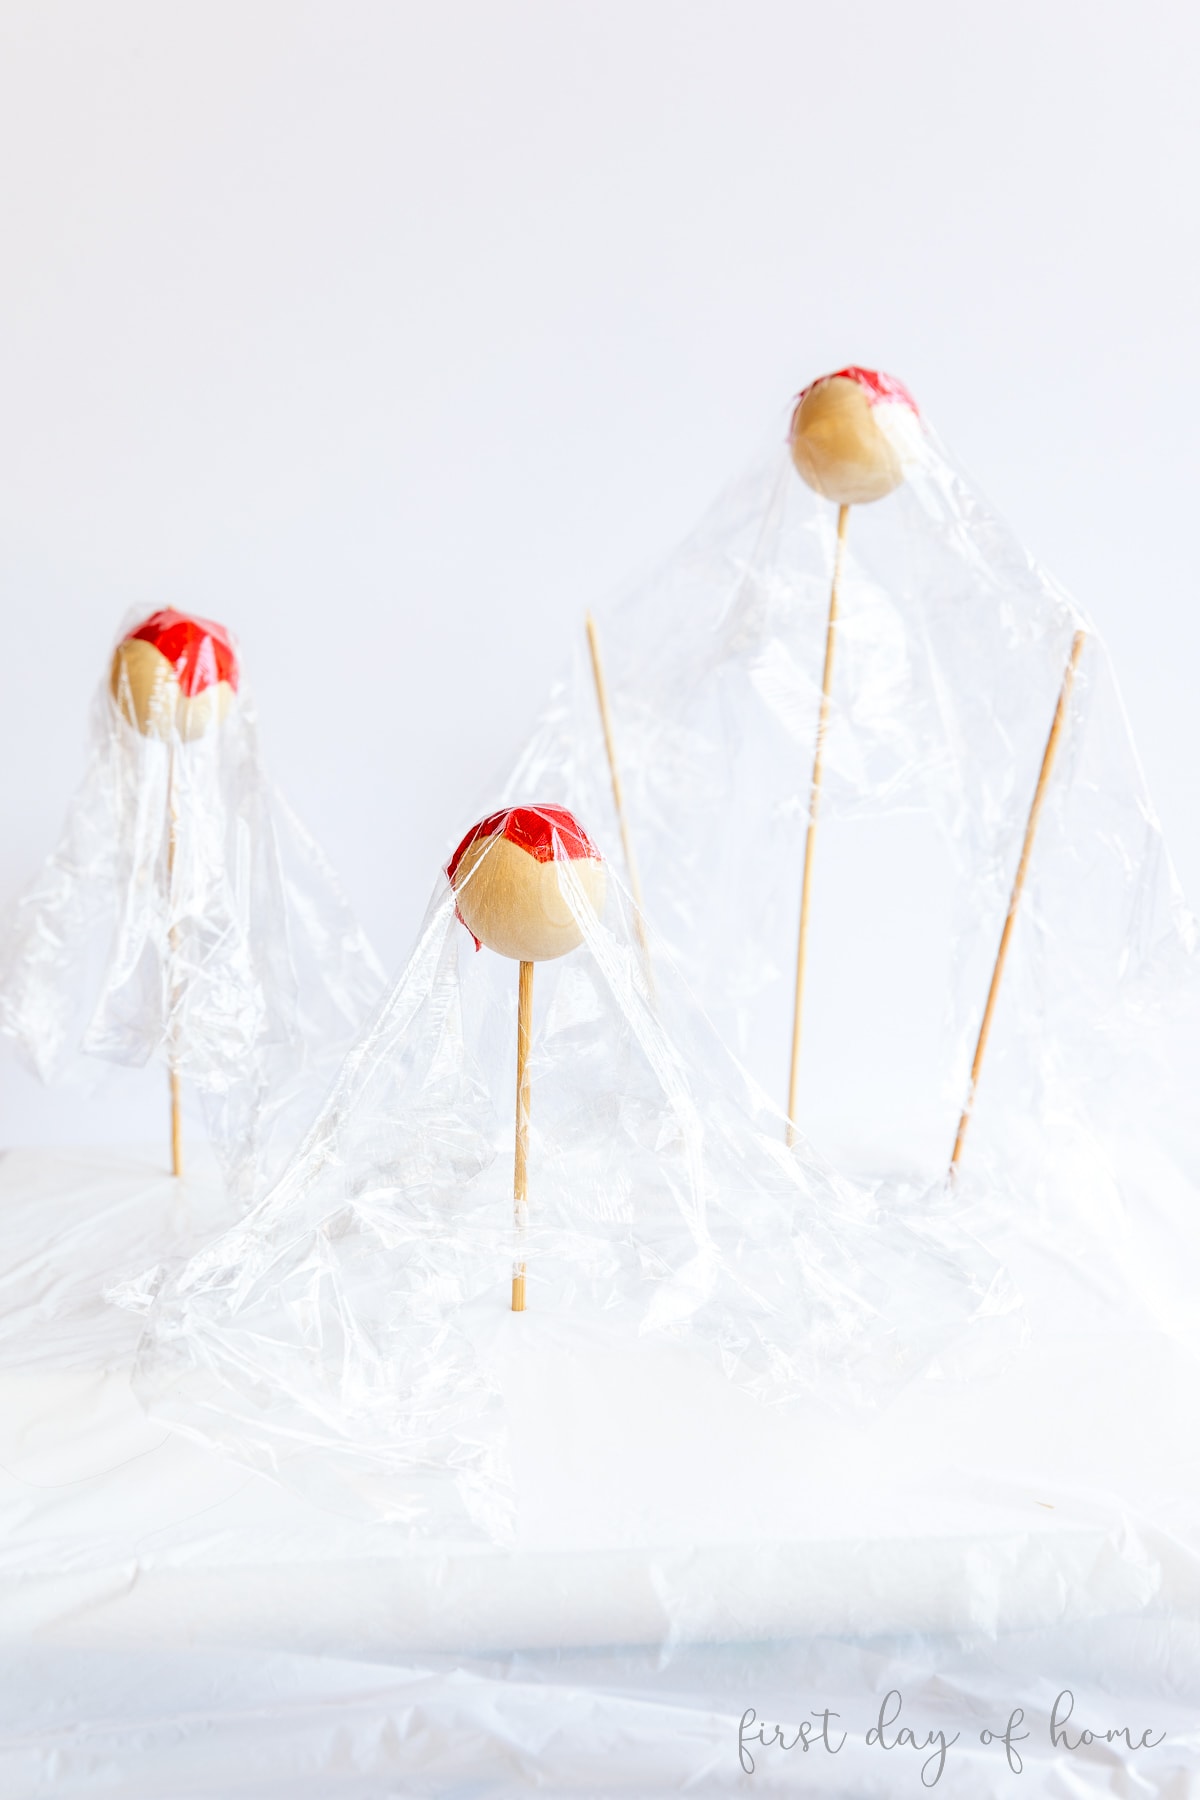
To make the shape of arms, you can simply add more wooden skewers at shorter heights (see the right ghost shape above).
Be sure to cover the “bodies” with plastic wrap so you can reuse the structures to make more batches of cheesecloth ghosts!
Step 2: Prepare the glue mixture
Create a thin glue solution by mixing two parts Mod Podge with one part water. You can add more Mod Podge to the solution if the mixture is too runny. A stir stick or popsicle stick may come in handy to mix the glue.
Another option is mixing Elmer’s Glue and water in the same ratio. Some people also like using liquid starch or even cornstarch diluted with water.

Whichever substance you choose, you’ll want a thin enough consistency where you can wring out the glue but a thick enough blend to have stiffness when it dries.
Pro Tip
If your ghost still seems limp as it starts drying, you can add a Mod Podge fixative spray or hair spray to help maintain its structure.
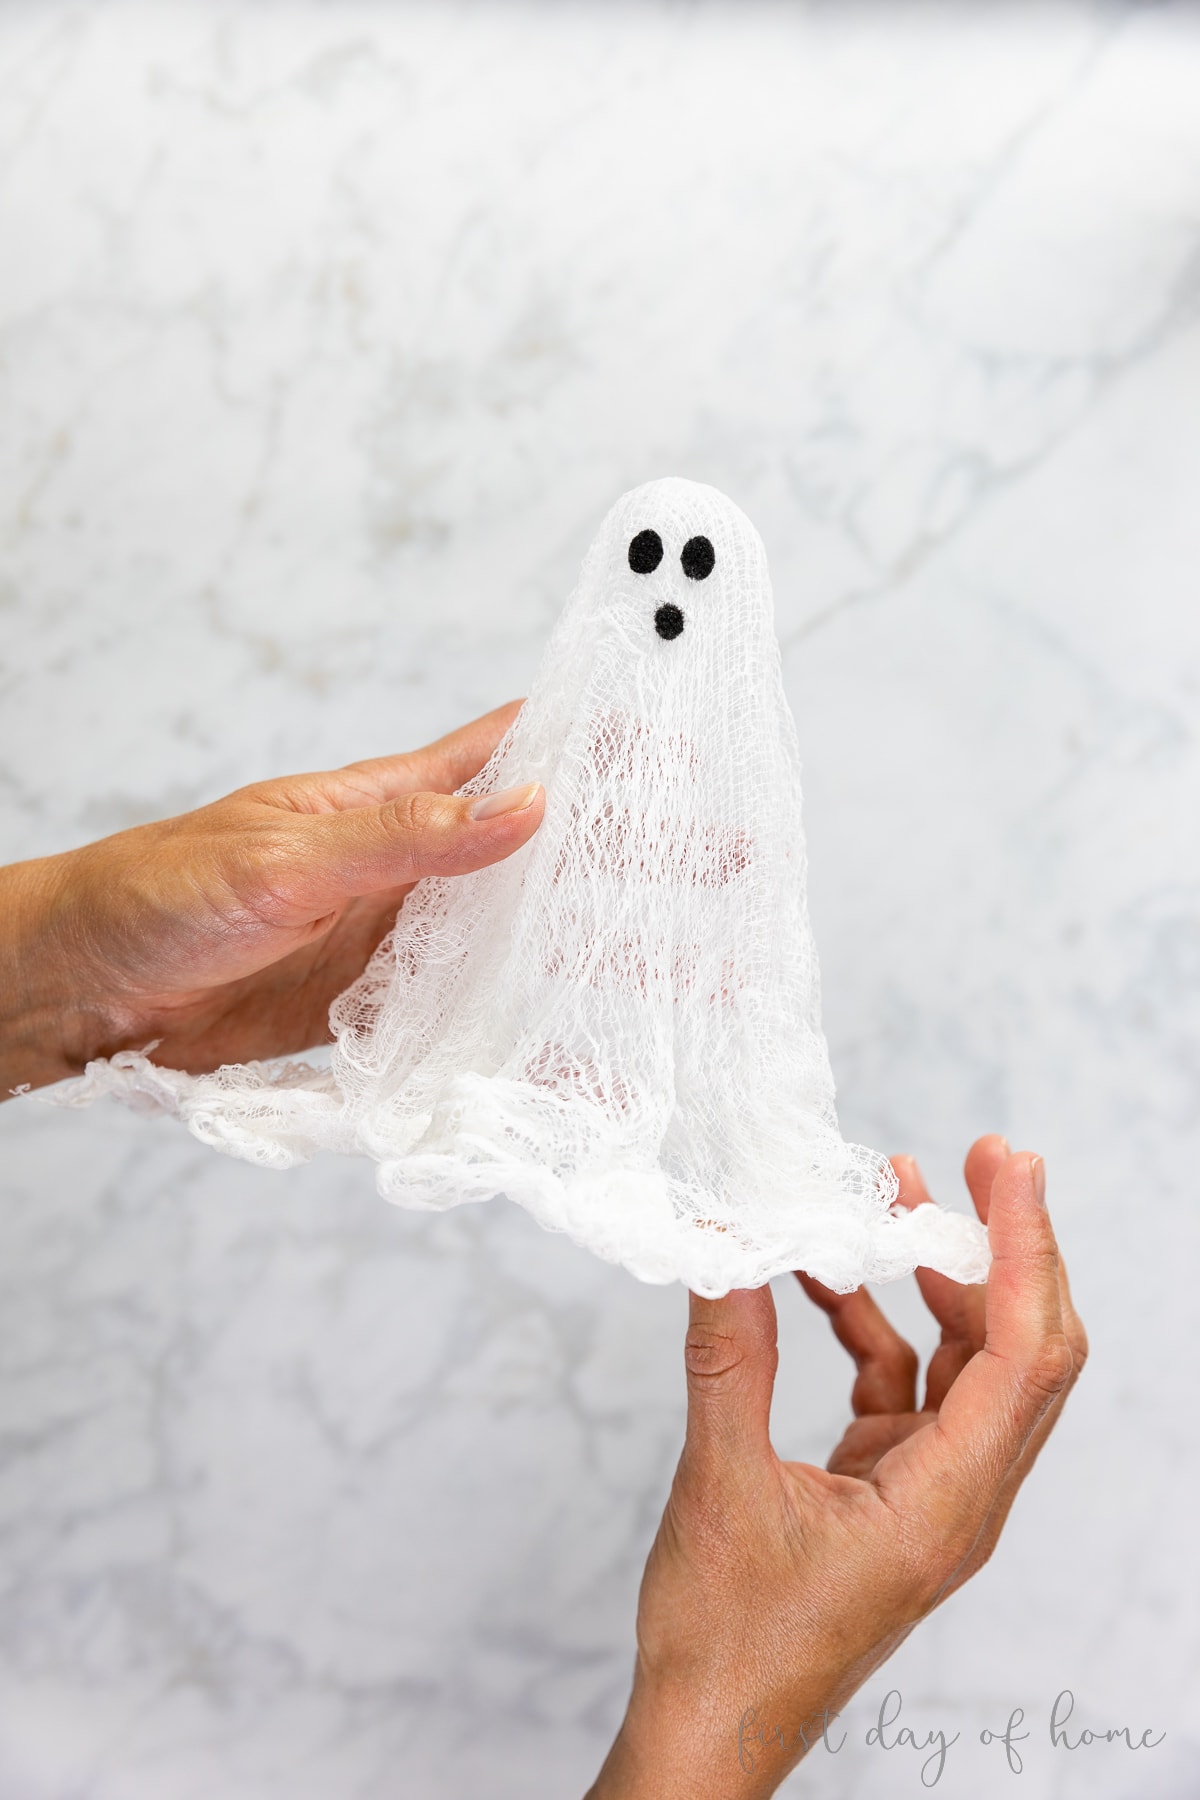
Step 3: Immerse the cheesecloth in glue, drape it, and let it dry
Measure and cut a rectangle of cheesecloth to the length you desire for your ghost structure. Then dredge the fabric in the glue solution until it has fully absorbed the glue. Wring it out completely.
Once you have untangled the cheesecloth and spread it out, drape it gently over the ghost structures. To make sure the ghost will stand upright, gather bunches of cheesecloth where the fabric hits the bottom base.
You may also choose to cut the cheesecloth short enough so that the fabric doesn’t drape. This is perfect if you plan to hang your ghosts and want them to look like they’re floating.
Depending on humidity and the amount of glue in the cheesecloth, the ghosts may take 1-2 days to dry completely.
Step 4: Add eyes to the ghosts with felt, paint, or vinyl

If you’d like your cheesecloth ghosts to express themselves, try adding small felt eyes and a mouth. You can use Tacky Glue or Felt and Foam Glue for this job. Another great alternative is self-adhesive felt sheets.
Cricut owners can also cut small ghost faces out of vinyl in a jiffy, which is what did for my smaller ghosts.
Bonus Tip for Glow-in-the-dark Cheesecloth Ghosts!
Since these cheesecloth ghosts have been around for a while, I thought I’d give them a spooky upgrade for Halloween. When you add this paint to your glue mixture, you’ll get instant glow-in-the-dark cheesecloth ghosts!
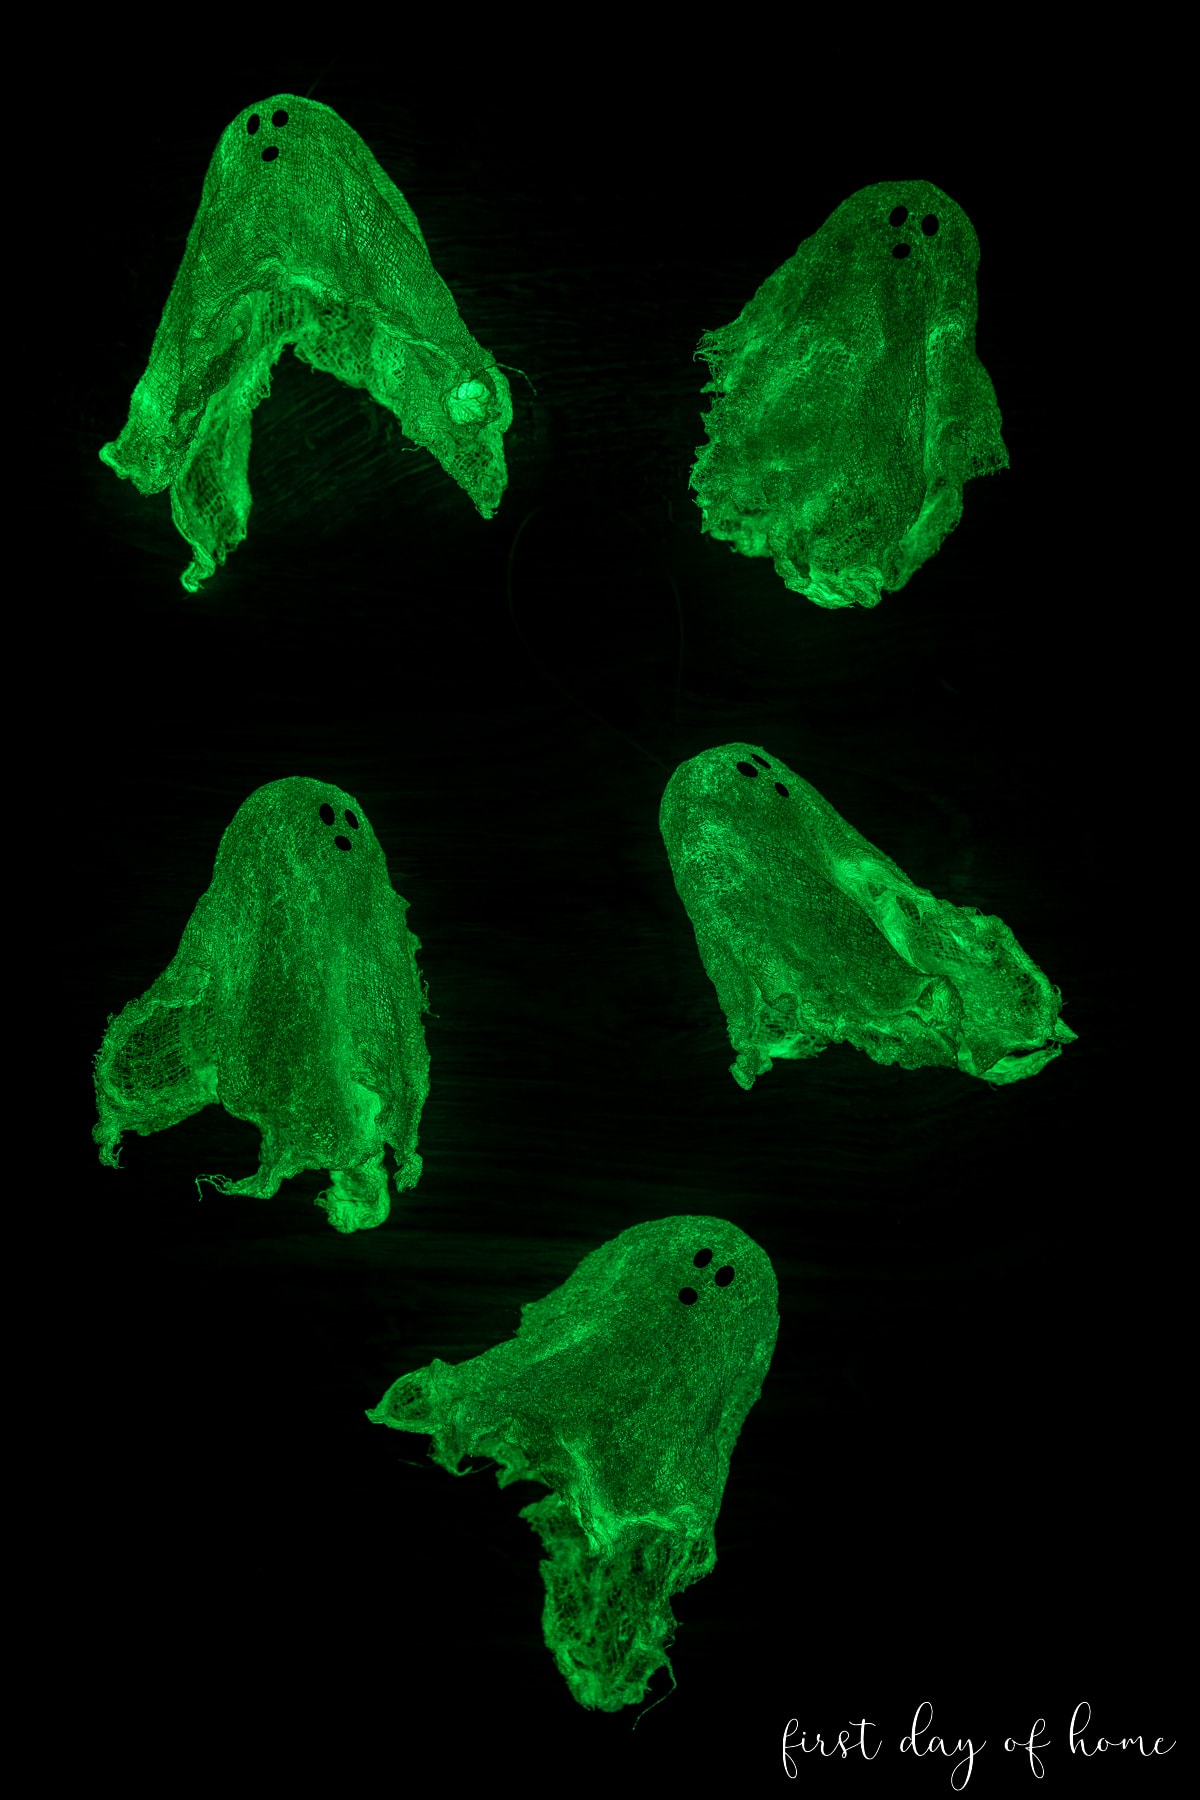
You only need to add a few squirts of this special paint to your glue mixture to get this effect. How cool is that?!
These cheesecloth ghosts made an appearance in my Halloween tree and tiered tray decor this year. I shared more details in this Halloween YouTube video, so be sure to subscribe to see all of the behind-the-scenes footage!
Pin it for later!


Hello,
I am working on this project and have a question! When do you remove the plastic? The plastic has been setting with the glue and I see that you remove it, but I don’t want the ghost to sink either.
Hi Jen! I let the ghosts dry completely on the wooden bead before I remove the plastic wrap. It should peel off pretty easily once you’re done. I hope this helps. Good luck! -Crissy
Super cute!
Thanks so much, Renae!
Crissy, thank you for this! My daughter made me an adorable one back in the 90s when she was in primary school and I’ve continued to take him out and prop him up every Halloween since! I foolishly procrastinated on bringing him back to our climate-controlled storage unit and instead left him in the garage with his storage box open. Then, we endured 21 straight days of rain outside. Sadly, the poor thing wilted from the overall humidity and sunk down into a droopy shape and I’m heartbroken! Do you have any advice for how to bring him back to his original shape and maybe even clean him up a little bit? He’s taken on a slightly yellowish tint over the years and is certainly a bit dirty. Thank you in advance for any good tips!
Hi Michael! I’m picturing your sweet little ghost wilting from the humidity. I can relate because we have a lot of humidity here in Houston! What I would do is place it over a wooden bead or styrofoam ball covered it plastic and then take a spray bottle filled with water and spritz it a bit. You might be able to soften it a bit to the point where you can reshape it and let it dry. Then you could take white paint and gently brush on a fresh coat. I don’t know of another way to bring back the color other than to repaint it. I hope this helps! Good luck!
These look so good! I would love to make several in many sizes to put across my tv console! And the glow in the dark is just too cool. Love it, Crissy!!
Thanks so much, CiCi! I’ll bet that would look adorable! And the glow, while you’re watching TV at night, would be super cute and spooky. Thanks for the sweet comment!
Oh my goodness! These are amazing! We never made these as kids, but they are so smart! And I love your glow in the dark twist! Pinned!
Thanks so much, Julie! I can’t believe you didn’t go through a cheesecloth ghost phase! Ha! We made a bunch one year when I was a kid, and I still love them. Thanks for stopping by! XO