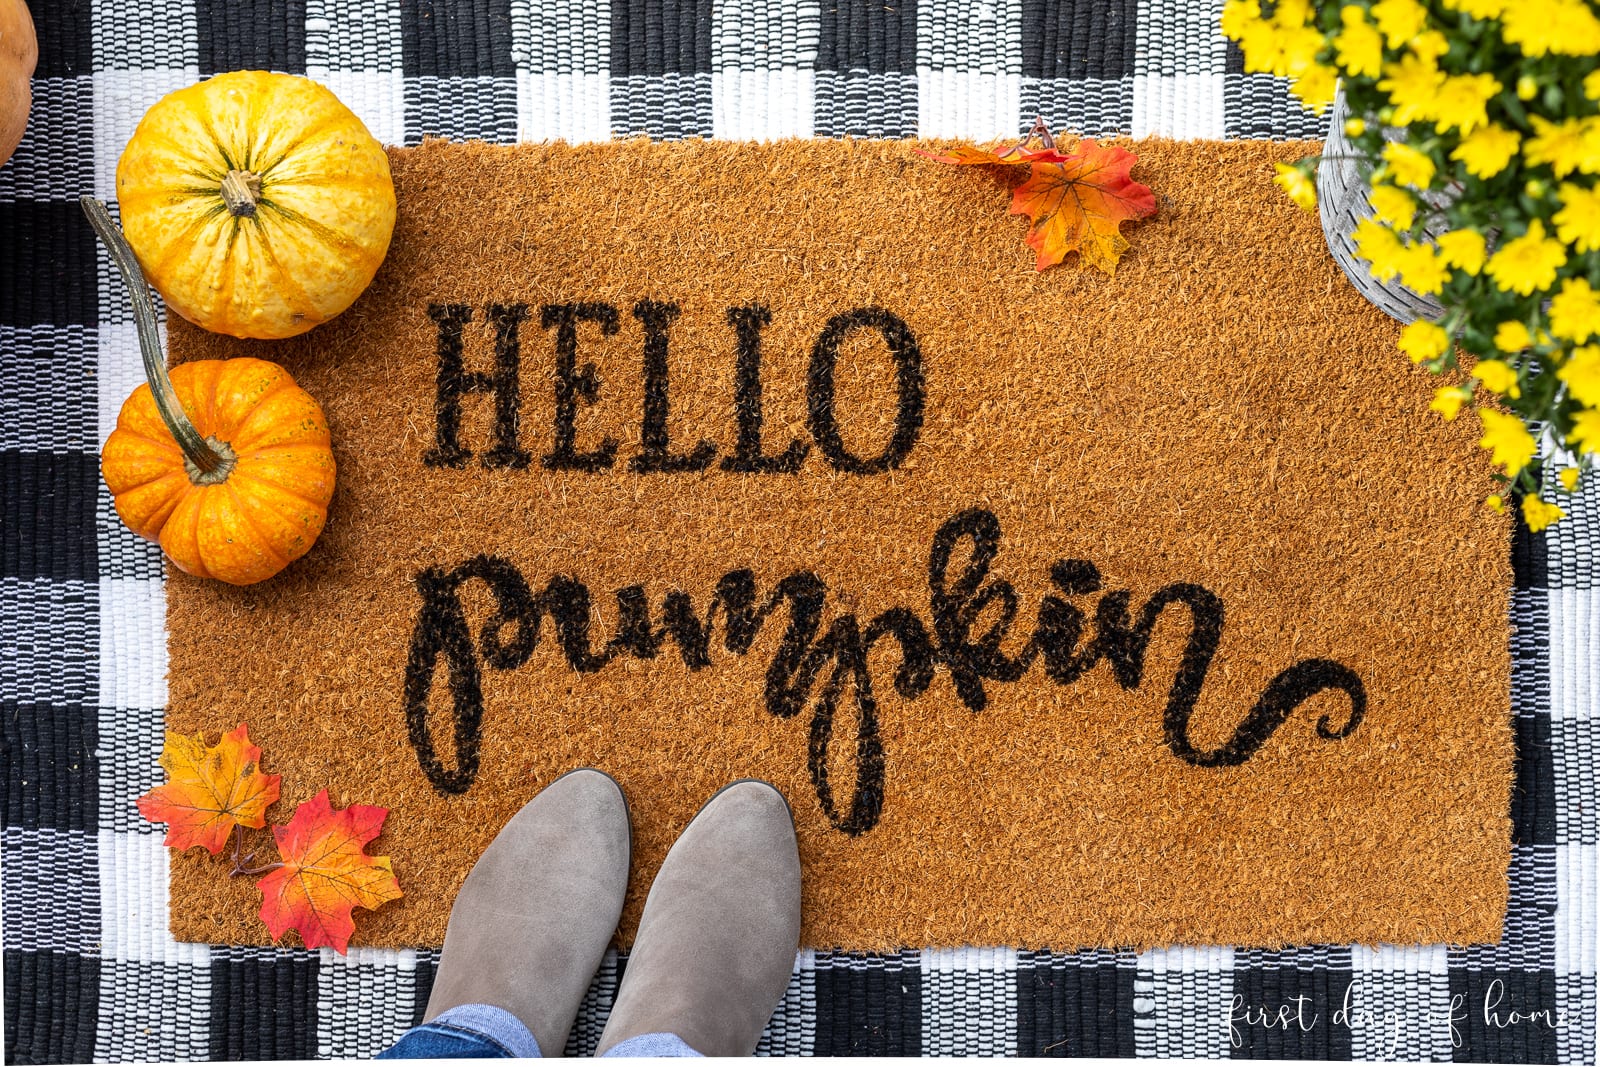
How to Make a DIY Doormat with Cricut
Learn how to get an adorable DIY doormat to create the perfect layered look for your front porch decor. This fall doormat example shows you how easy it is to create your own coco mat using a
This post contains affiliate links, and I will be compensated if you make a purchase after clicking on my links. For more information, please see my disclosures.
What You Need to Make a DIY Doormat
I certainly didn’t invent these cute coconut coir doormats with clever phrases. However, I’ve made it my mission to create an easy DIY tutorial for crafty folks on a budget.
(Hopefully, that’s why you’re here!)
If you want a quick video on making the doormat, check out my YouTube video down below. There’s also plenty of other craft inspiration in there.
Cricut Machine Requirements
To get started, you’ll need a Cricut cutting machine that is capable of cutting larger designs (Explore or Maker).
You’ll also want to download any fall SVG file you’d like for your design. You can always use text and select any fonts of your choice too.
Related: Best Free Cricut Fonts
Before you begin, keep in mind the length and width of the design. In most cases, you’ll need a longer mat (12×24-inches) or Smart Vinyl without a mat to cut bigger images. Smart materials are compatible with Maker 3 and Explore 3 machines.
Another option is cutting your design into pieces that you can reassemble after cutting. This is easier to do with non-script fonts.
Supplies
- Cricut Maker or Explore machine
- Coco coir doormat
- Smart removable vinyl (with Maker 3 or Explore 3) or stencil film
- 12×24-inch cutting mat (for non-smart materials)
- SVG Design
- Acrylic paint
- Stencil paintbrush
- Spray sealer
- Painter’s tape or masking tape
You can order coco coir doormats HERE or find them at your local craft store. You’ll also find a large assortment of fun pre-made stencils at Hobby Lobby if you want to skip the DIY stencil part.
Scroll to the end of this post for more great stencil options and product links!
How to Cut a Stencil for a DIY Doormat
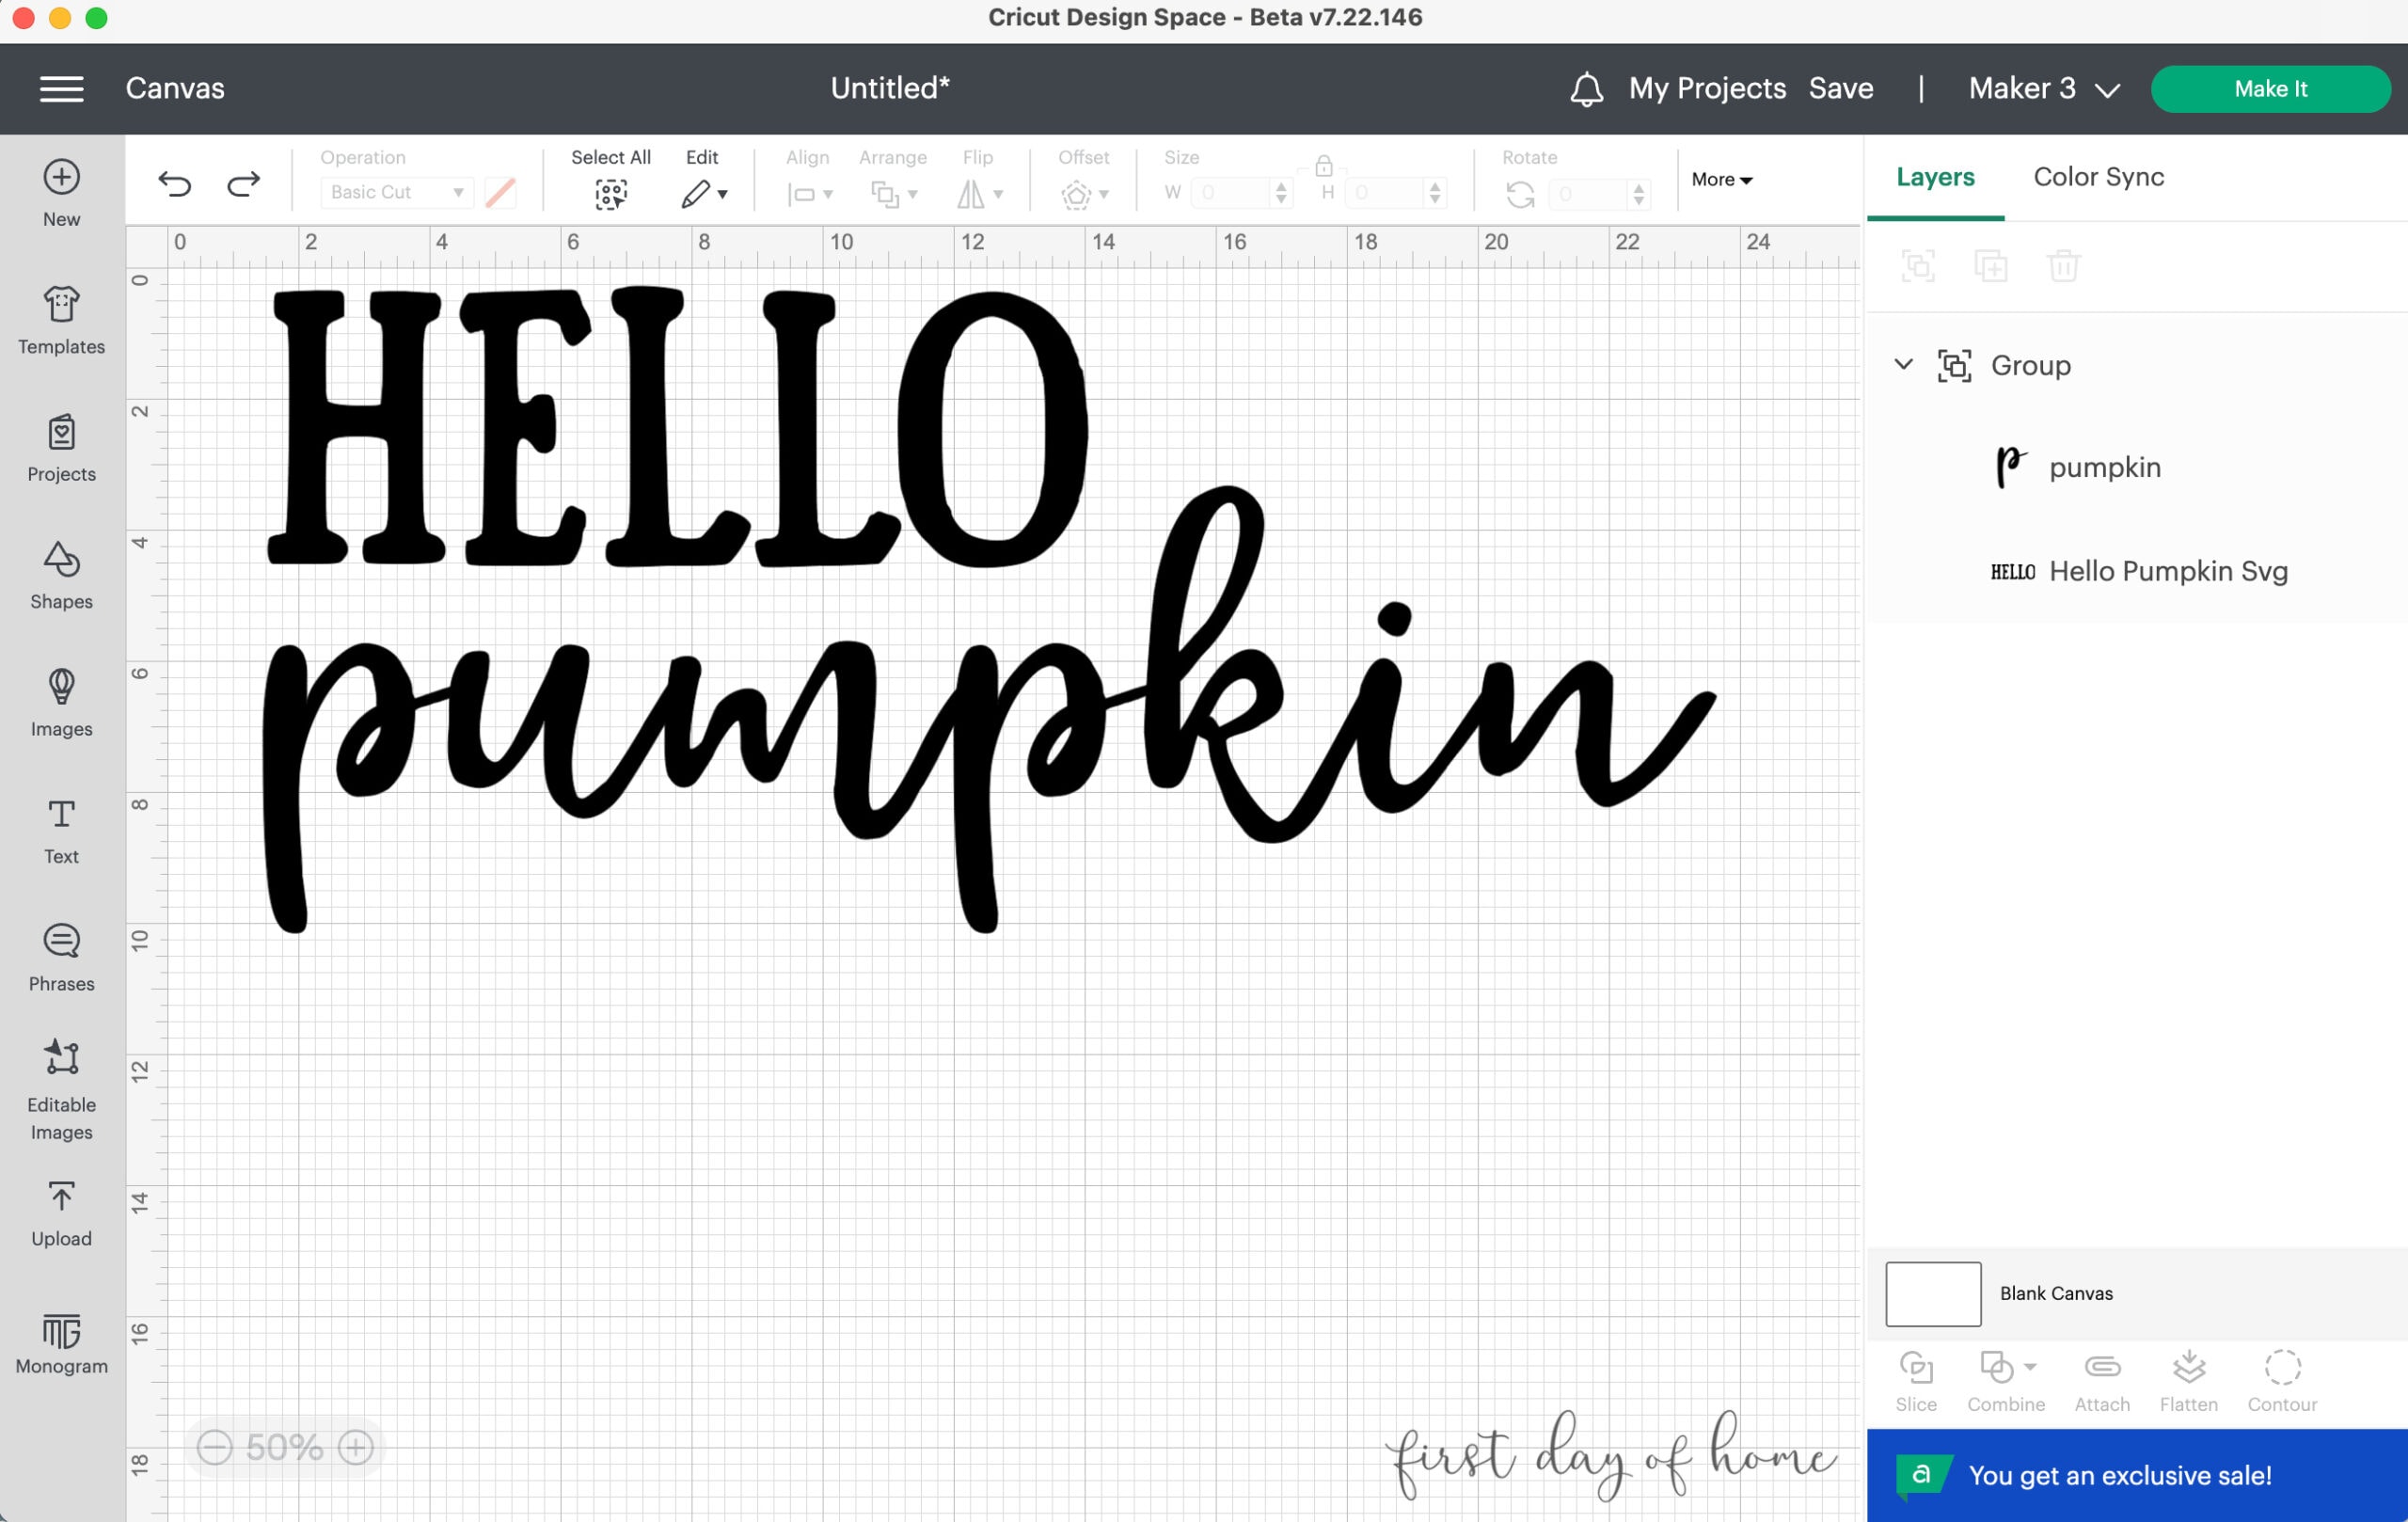
Step 1: Resize your design in Cricut Design Space
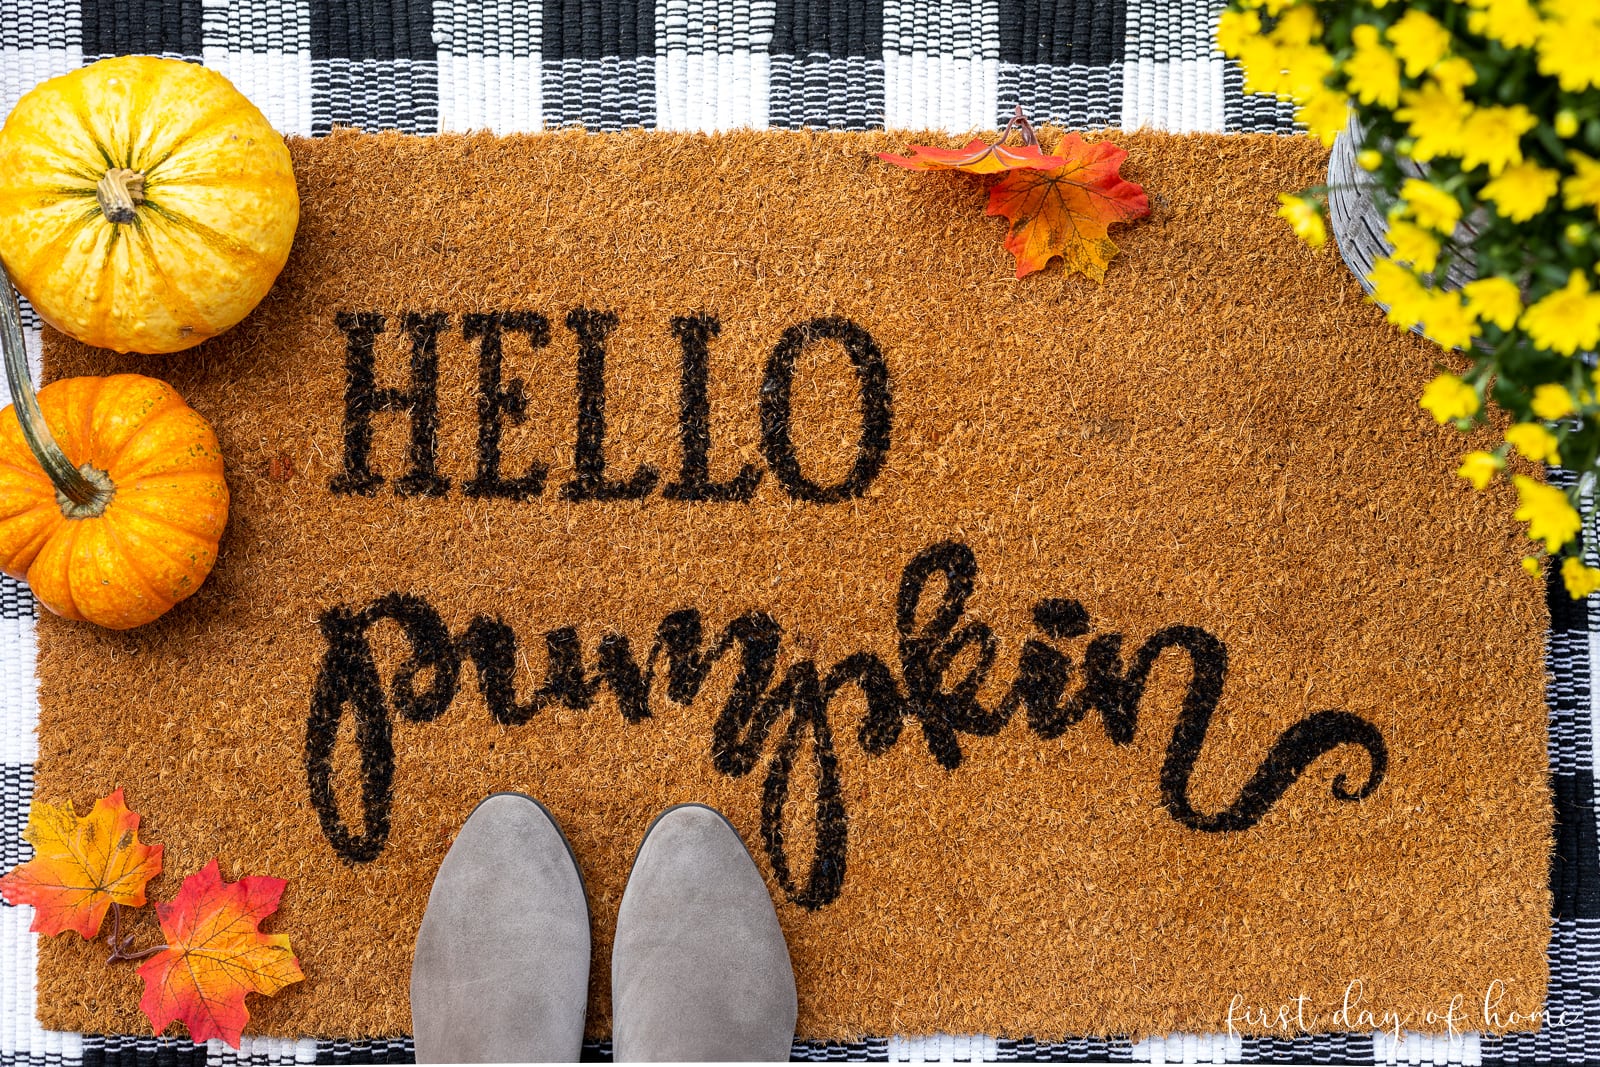
To begin, measure your doormat to figure out how large the lettering or image should be. I sized my phrase “Hello Pumpkin” to be roughly 10 x 22 inches in
(Note: This design is slightly different from the image shown on the finished mat.)
Once the design is sized correctly, select all layers and click “Attach.” This will ensure that your design will be cut as one piece. You’ll see the “Detach” option after you have attached your layers.
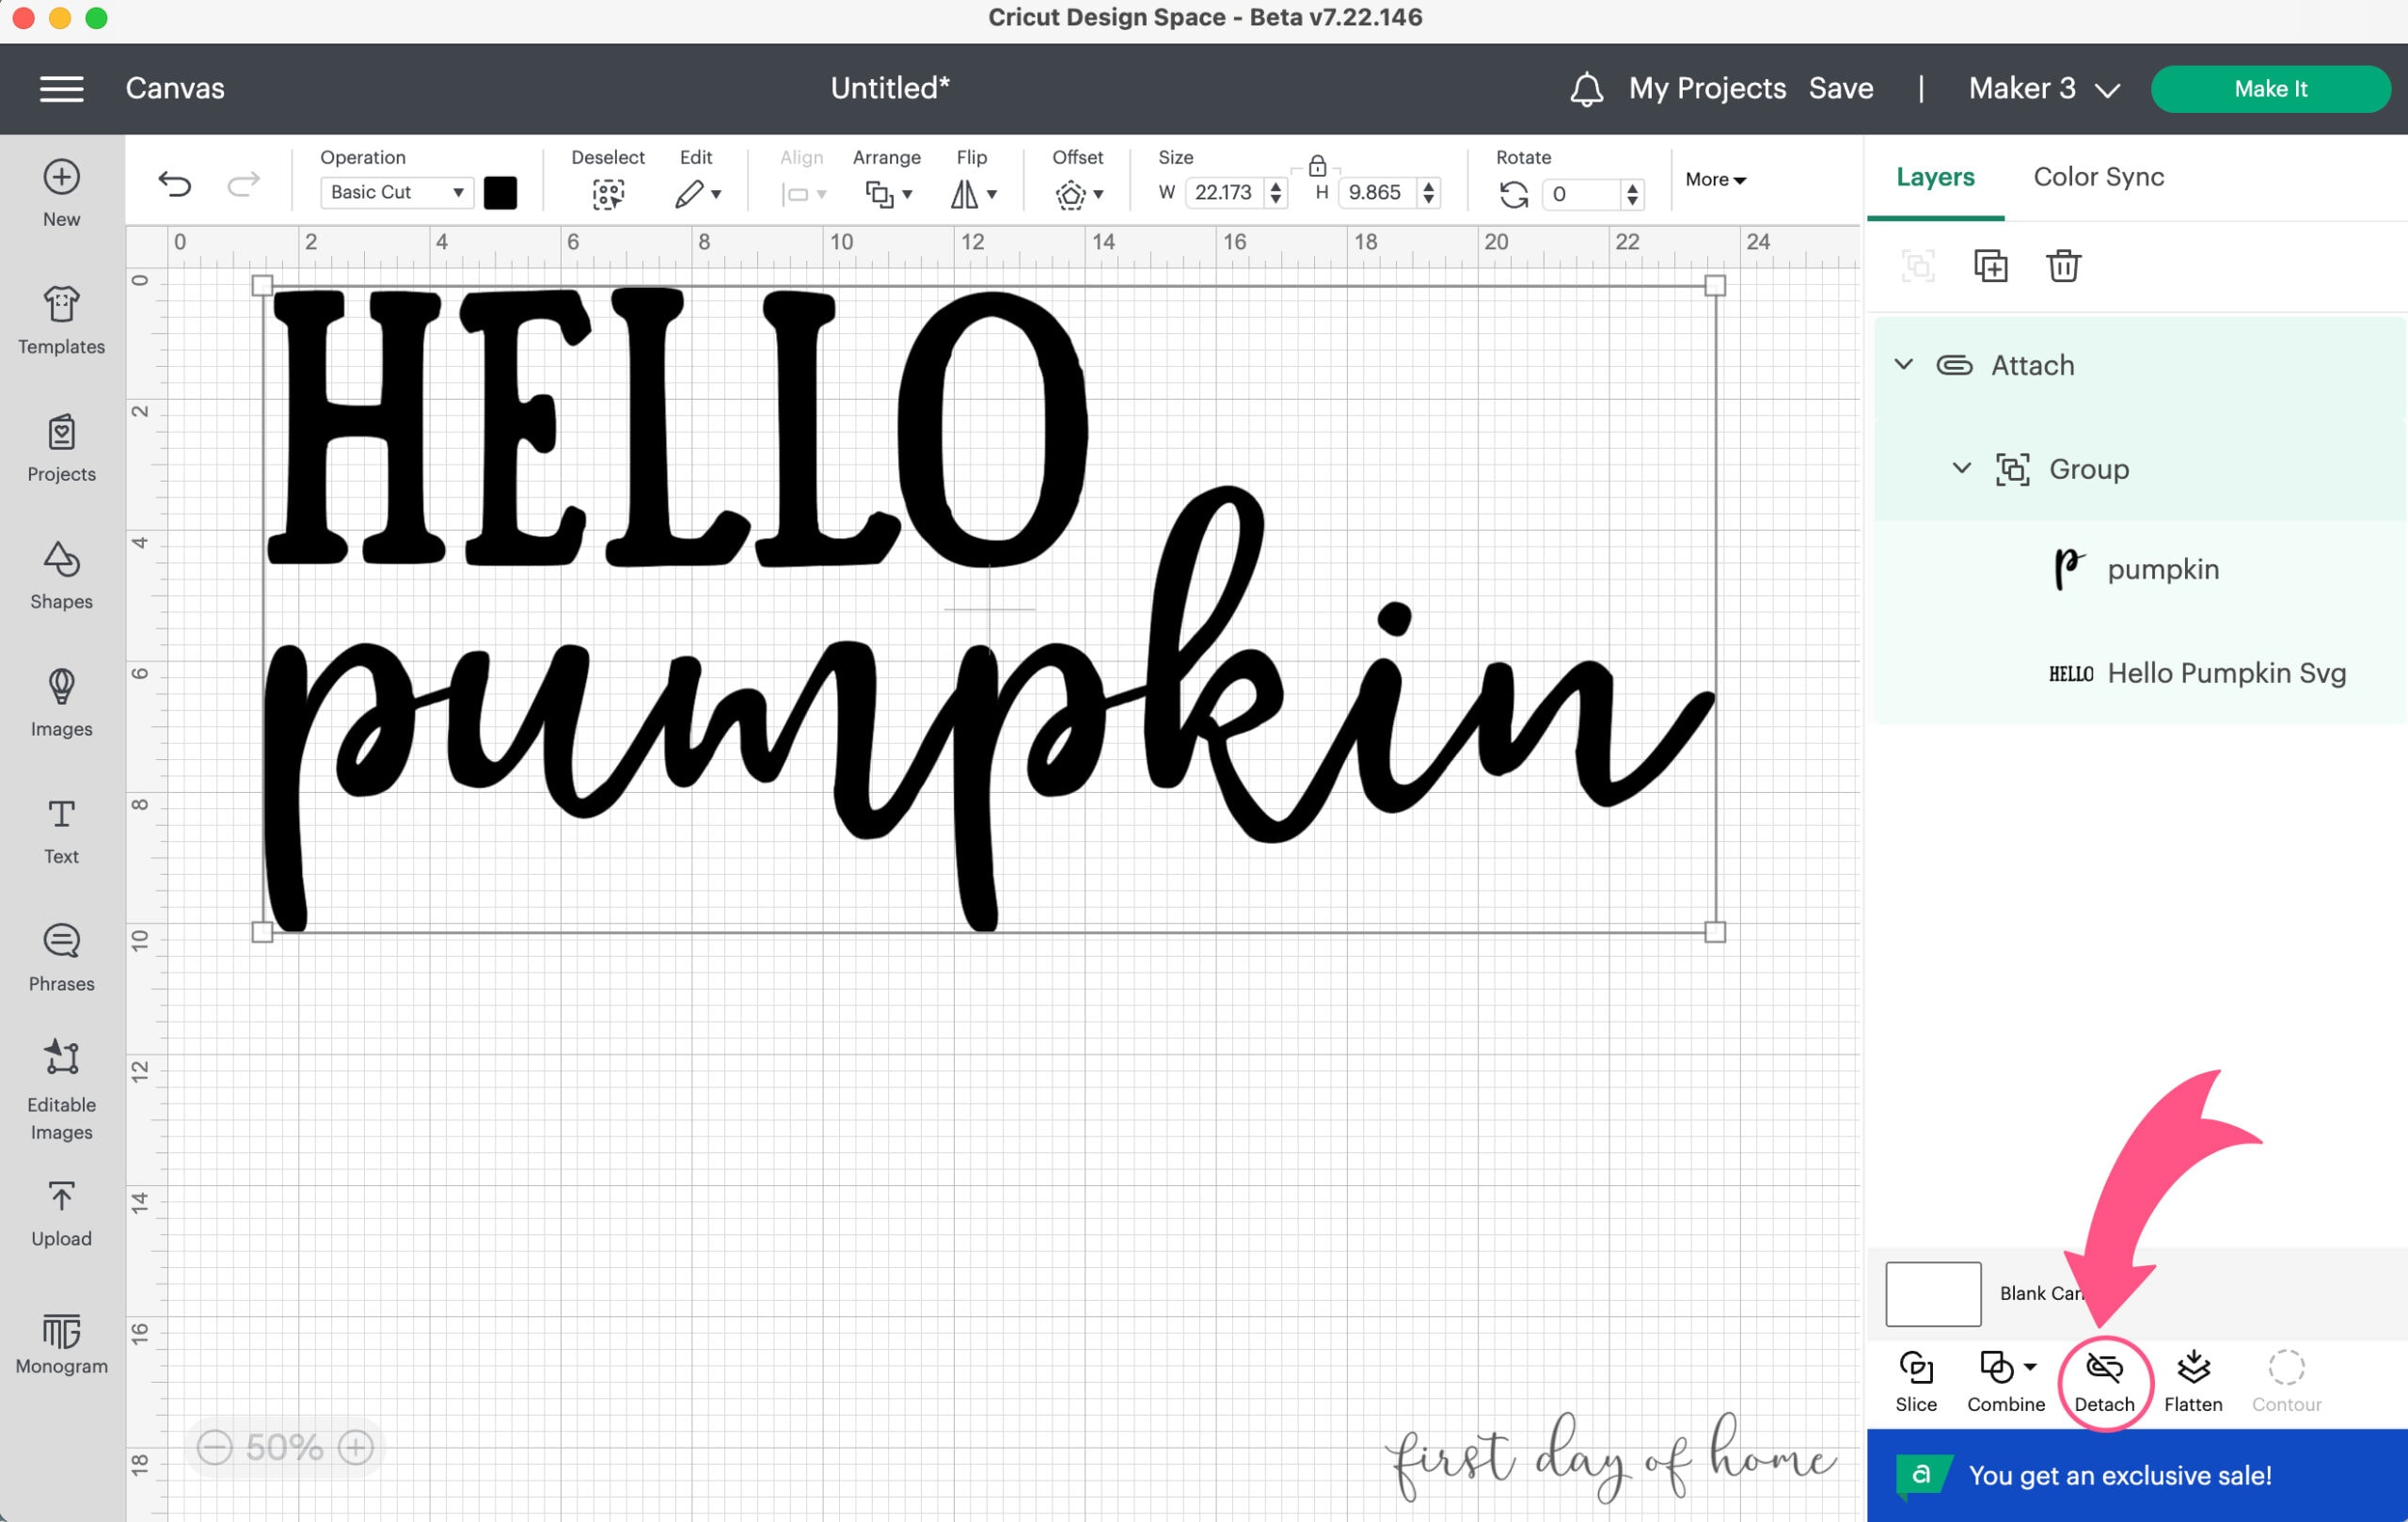
After finalizing the design, click the green “Make it” button in Design Space to send it to your machine.
Step 2: Cut and weed the design
Design Space will prompt you to load materials with or without a mat. It will only give you the larger mat size option if your design is greater than a standard mat. If you choose “without mat” you must use
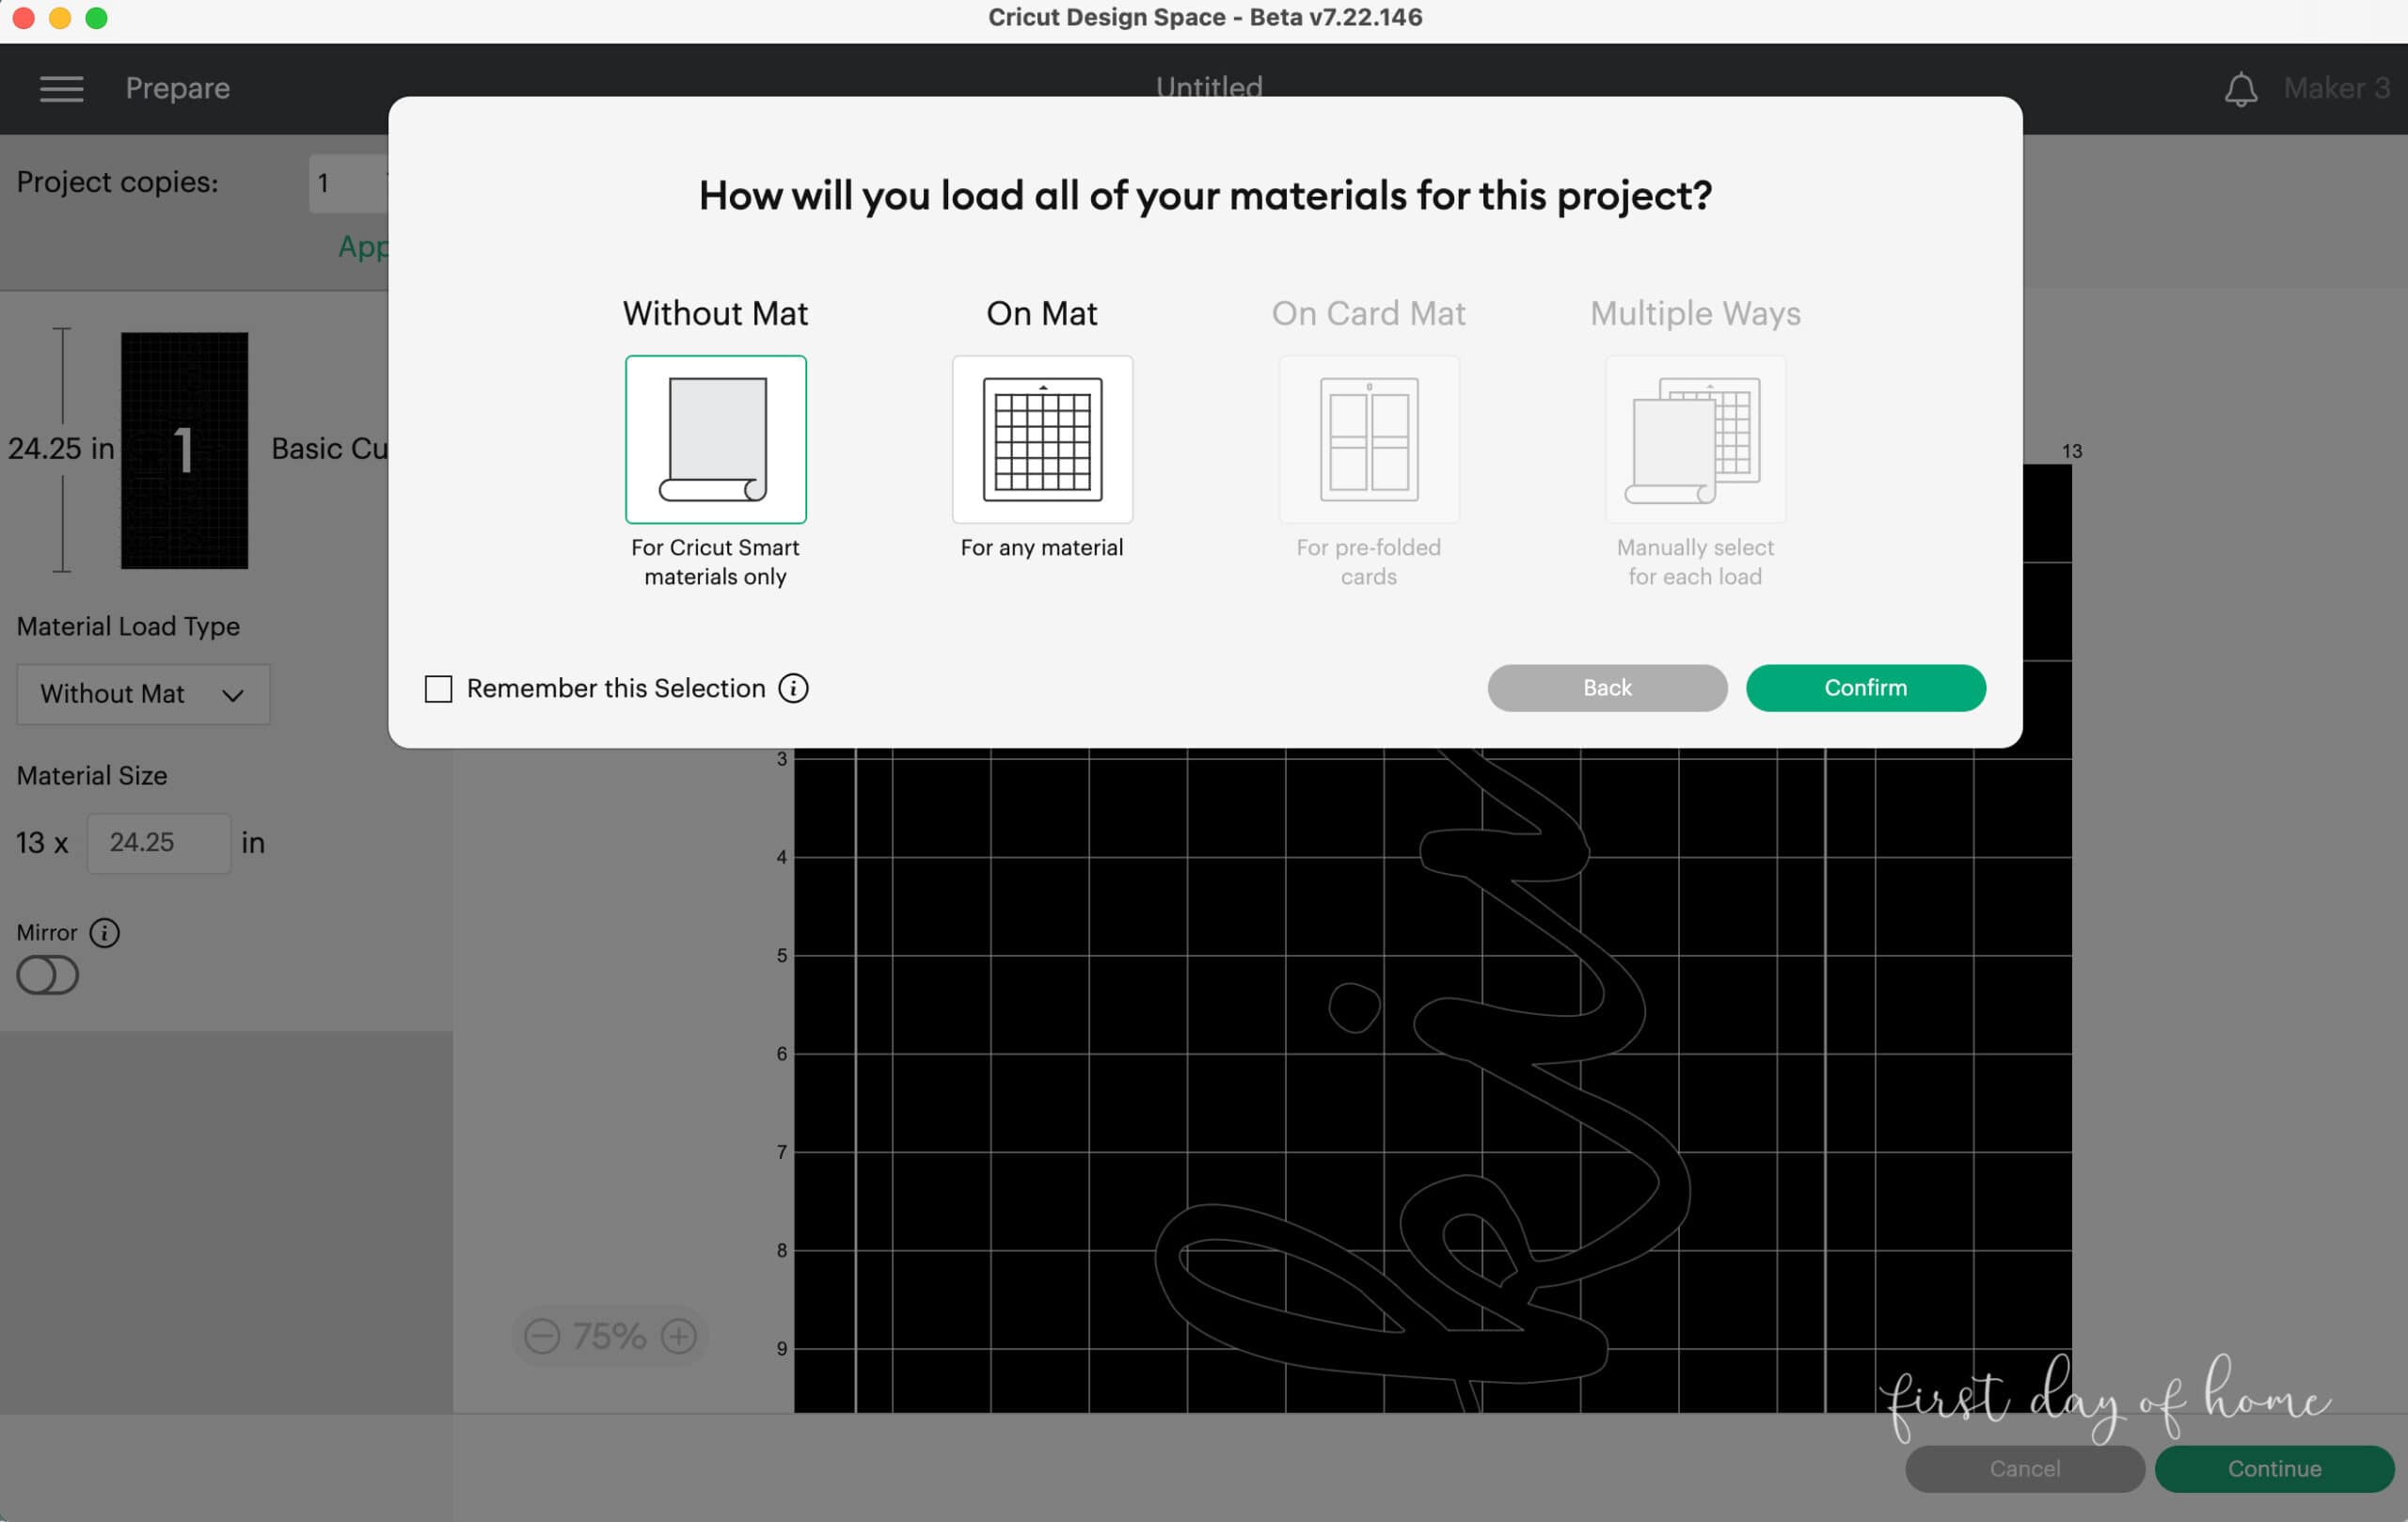
I originally used stencil film on a mat when cutting this design. You can choose smart vinyl (permanent or removable) or smart stencil for this project if you have a compatible machine.
You do not want to mirror the image.
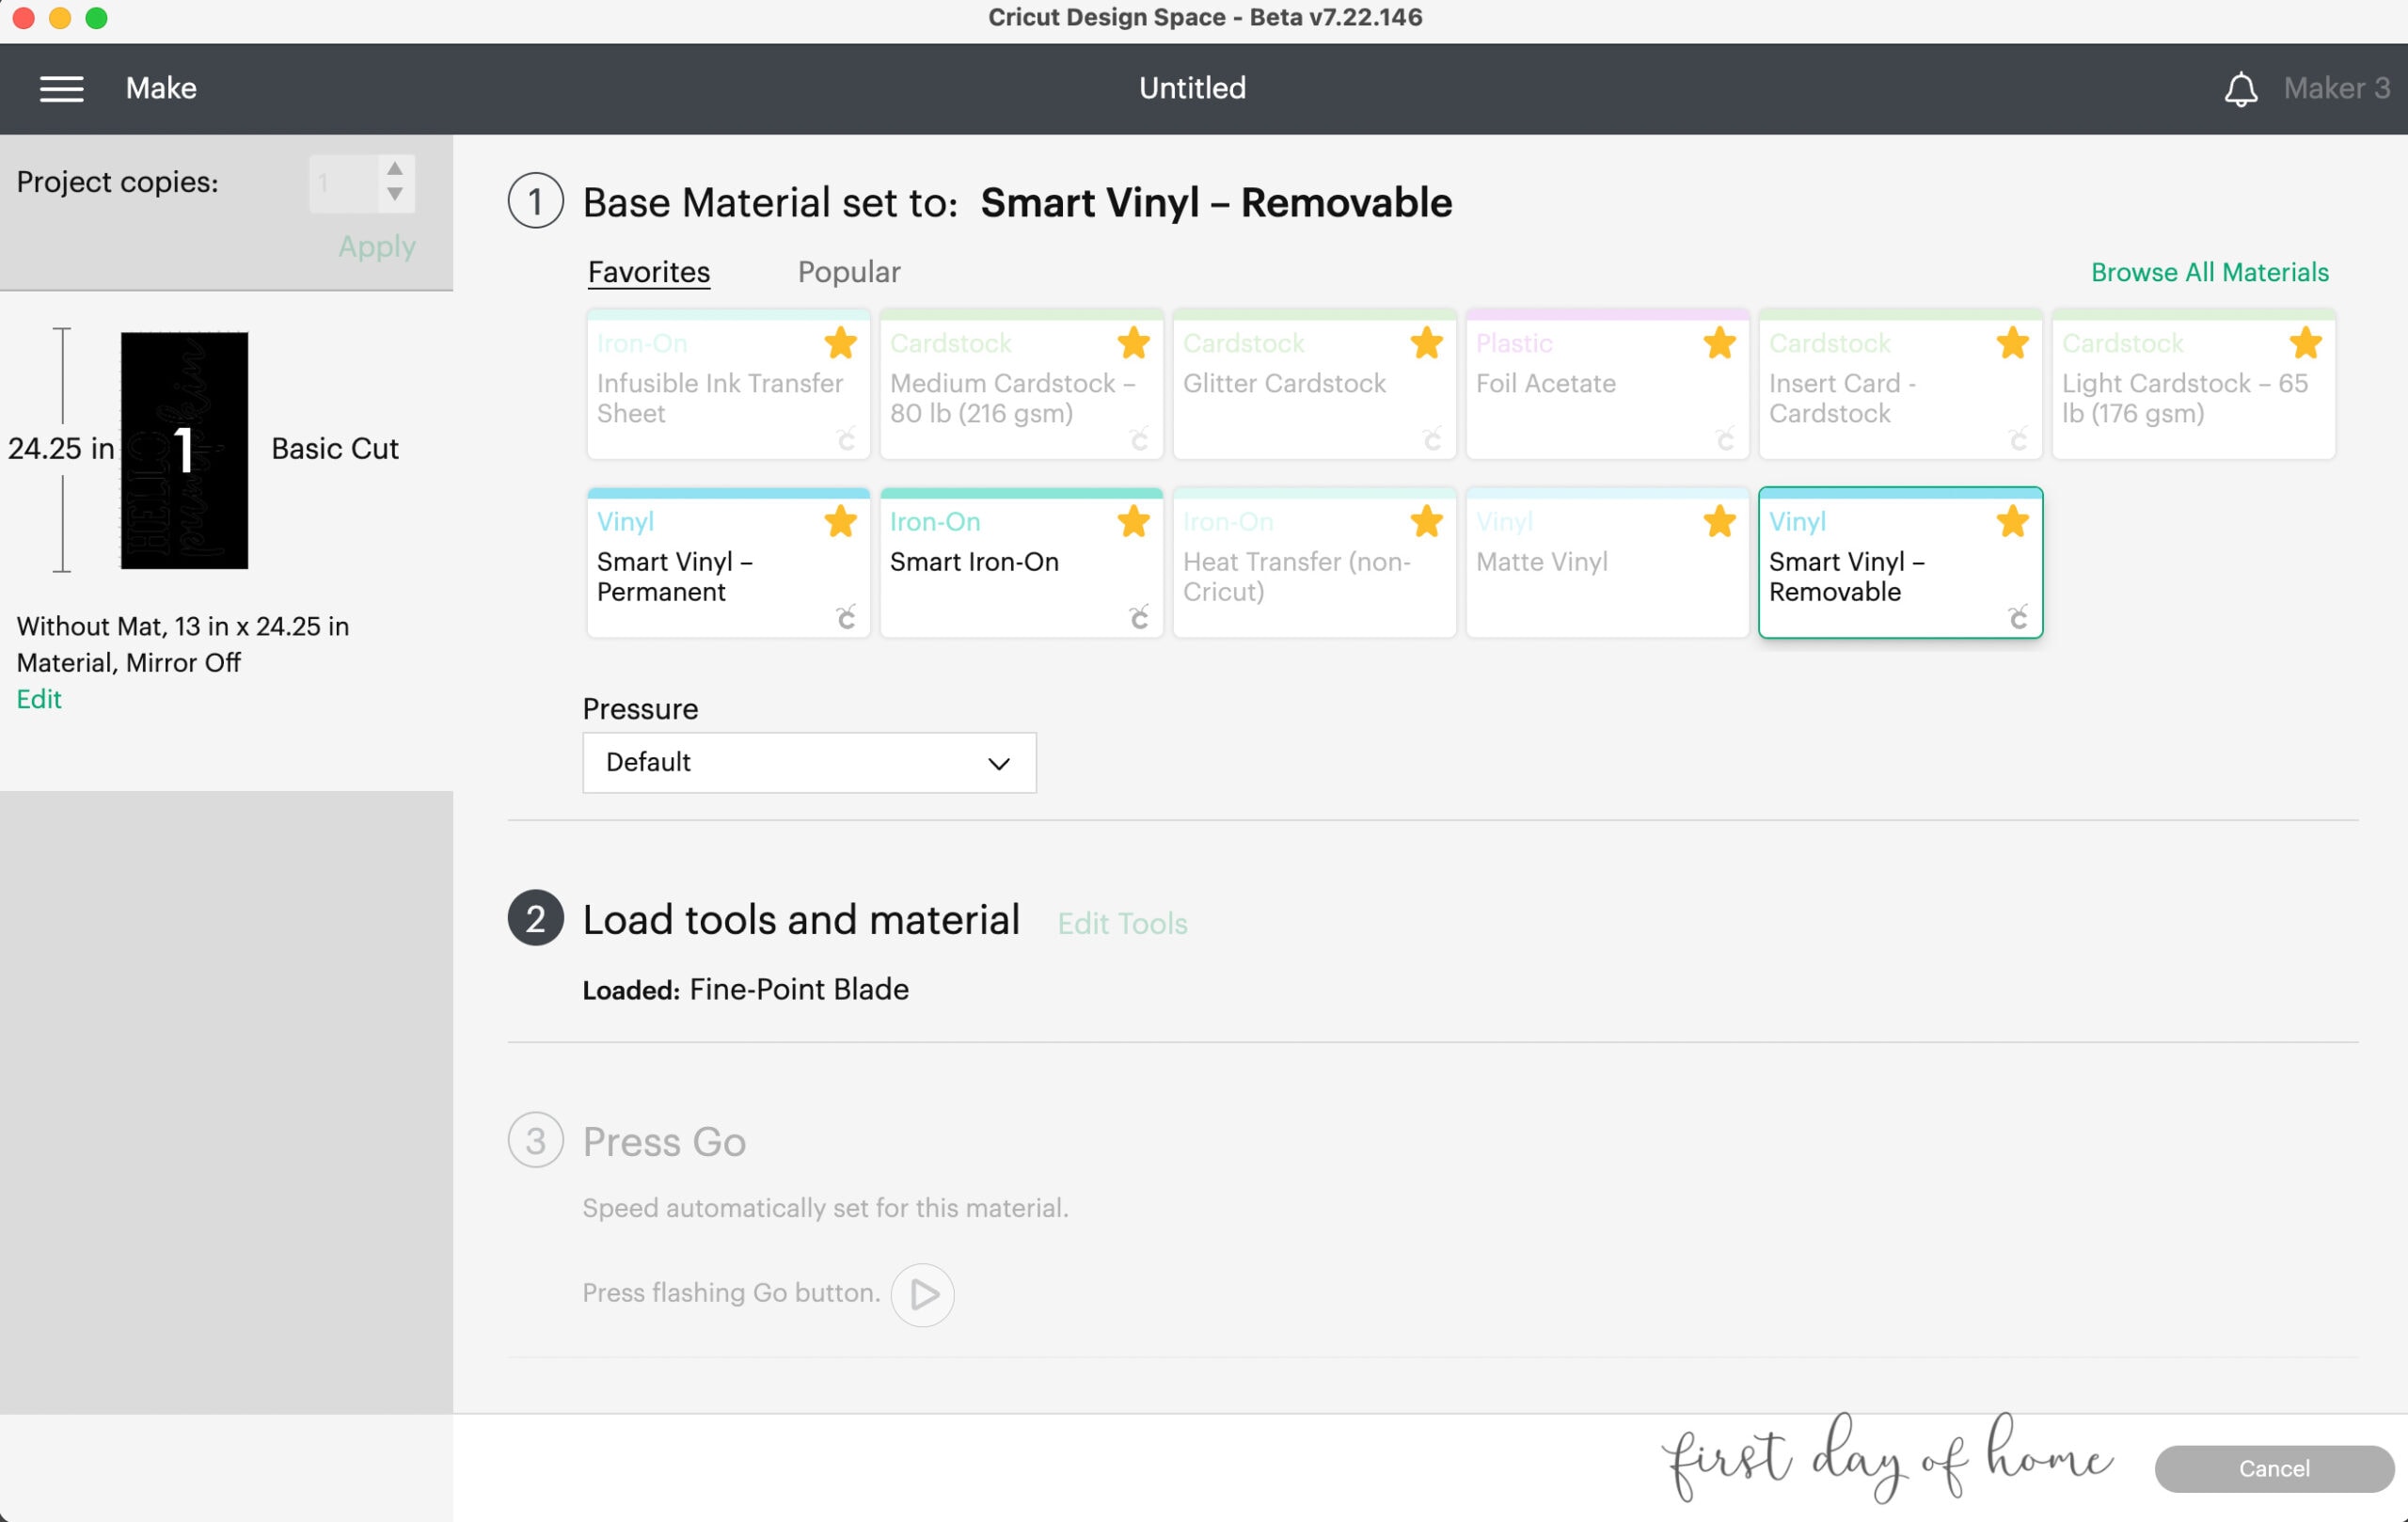
Then it’s simply a matter of following the prompts to load and cut your material.
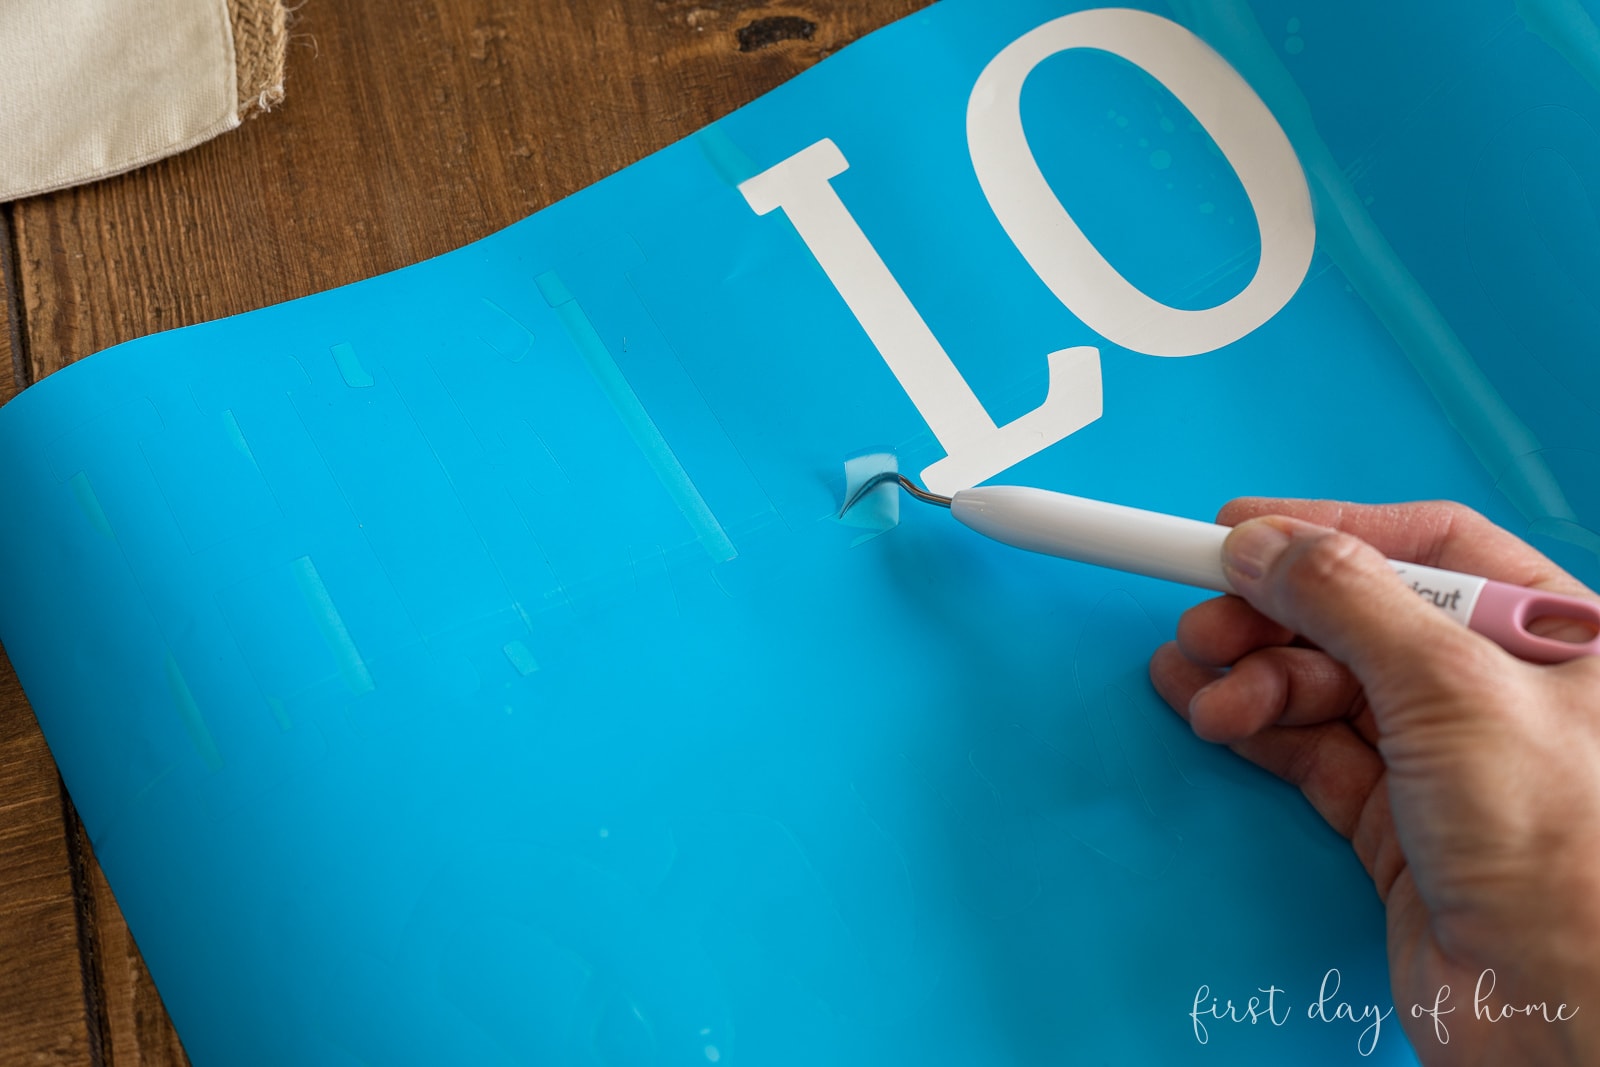
Once your design is nicely cut, weed the letters you plan to transfer (i.e., remove the vinyl letters). Make sure you leave the center part of any letters, like the “o” in “Hello.” Aaaand you’re ready to begin stenciling!
Step 3: Apply the stencil to the doormat
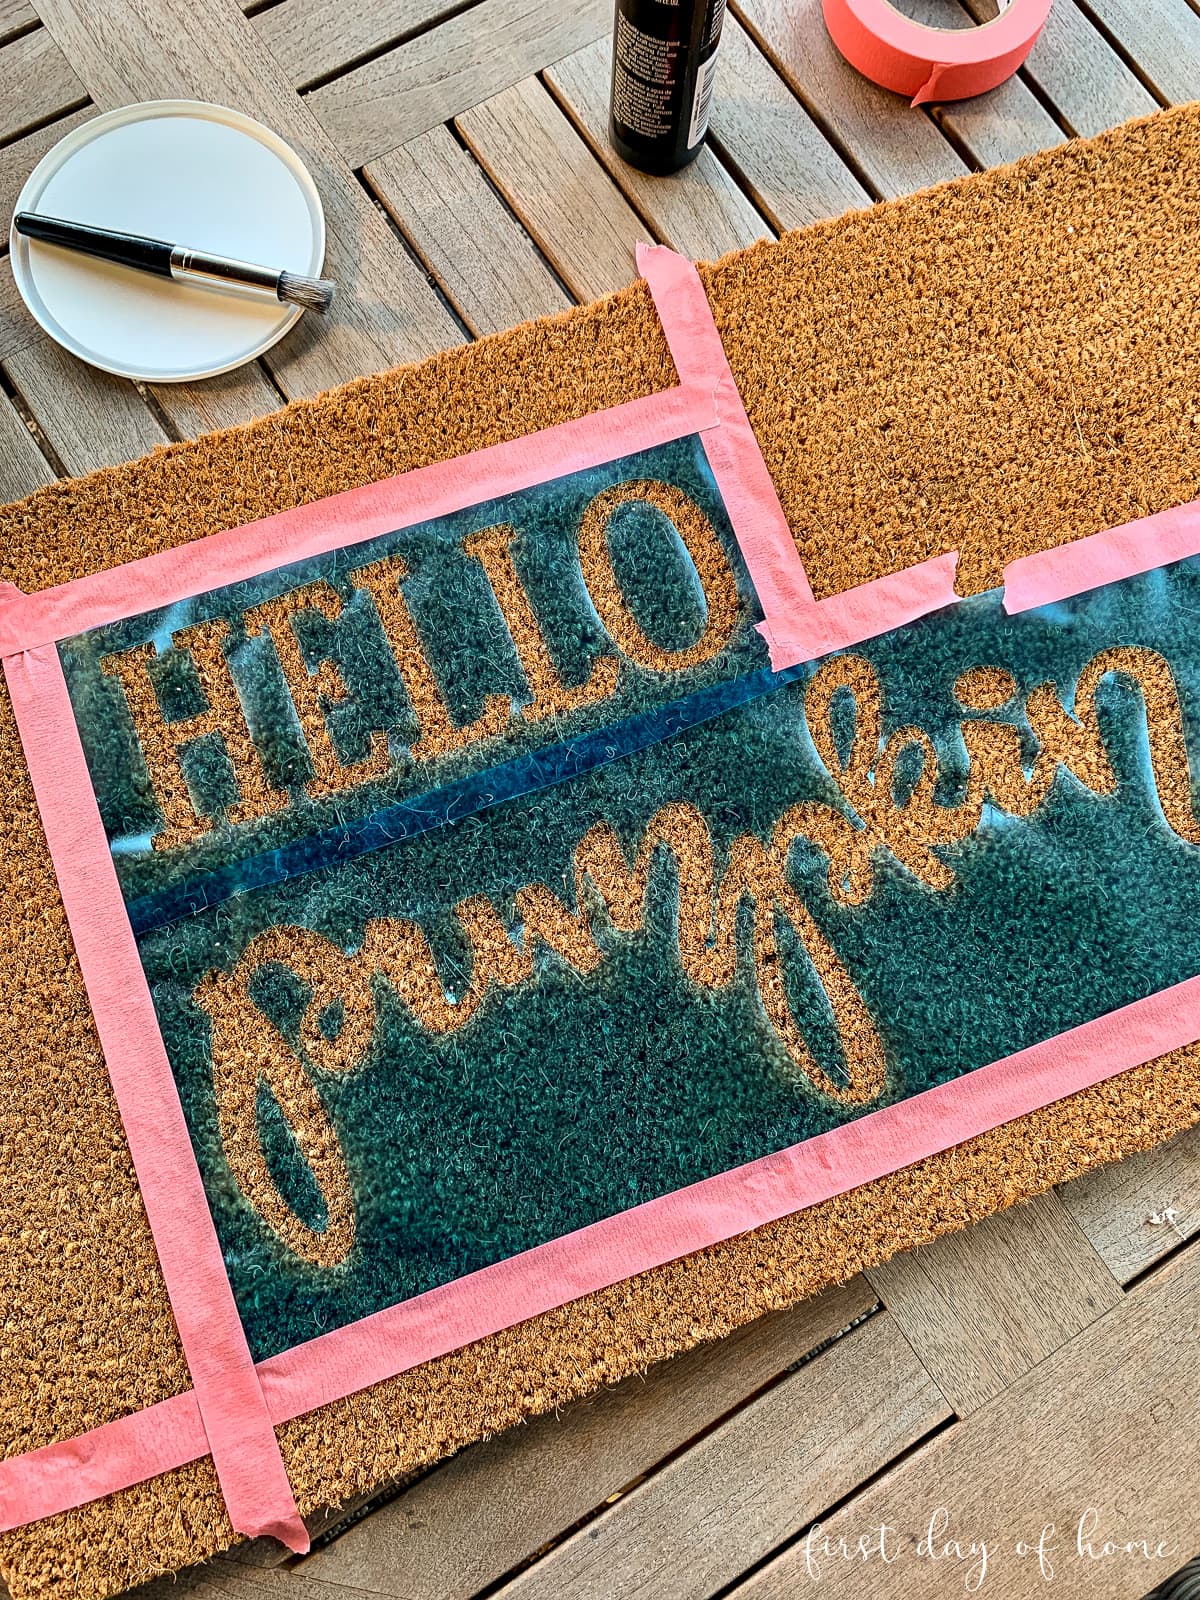
After using the stencil film for this project, I might suggest trying a thicker material for your DIY doormat, like regular permanent vinyl or even heat transfer vinyl.
The reason I suggest a thicker vinyl is because the stencil film doesn’t adhere very easily to the coco fiber. In the end, I used a winning combo of painter’s tape and sewing pins to make sure my stencil stayed put. I’ll show that stencil who’s boss!
Everything turned out just fine. However, I do think applying heat transfer vinyl with a hairdryer (to shrink it to the mat) would help the stencil stay in place.
Another option is making a freezer paper stencil. You would just attach freezer paper to a
Tip: Stencil film works best for projects with a hard, smooth surface like wood, glass, or plastic.
Step 3: Paint 3-4 coats of acrylic paint
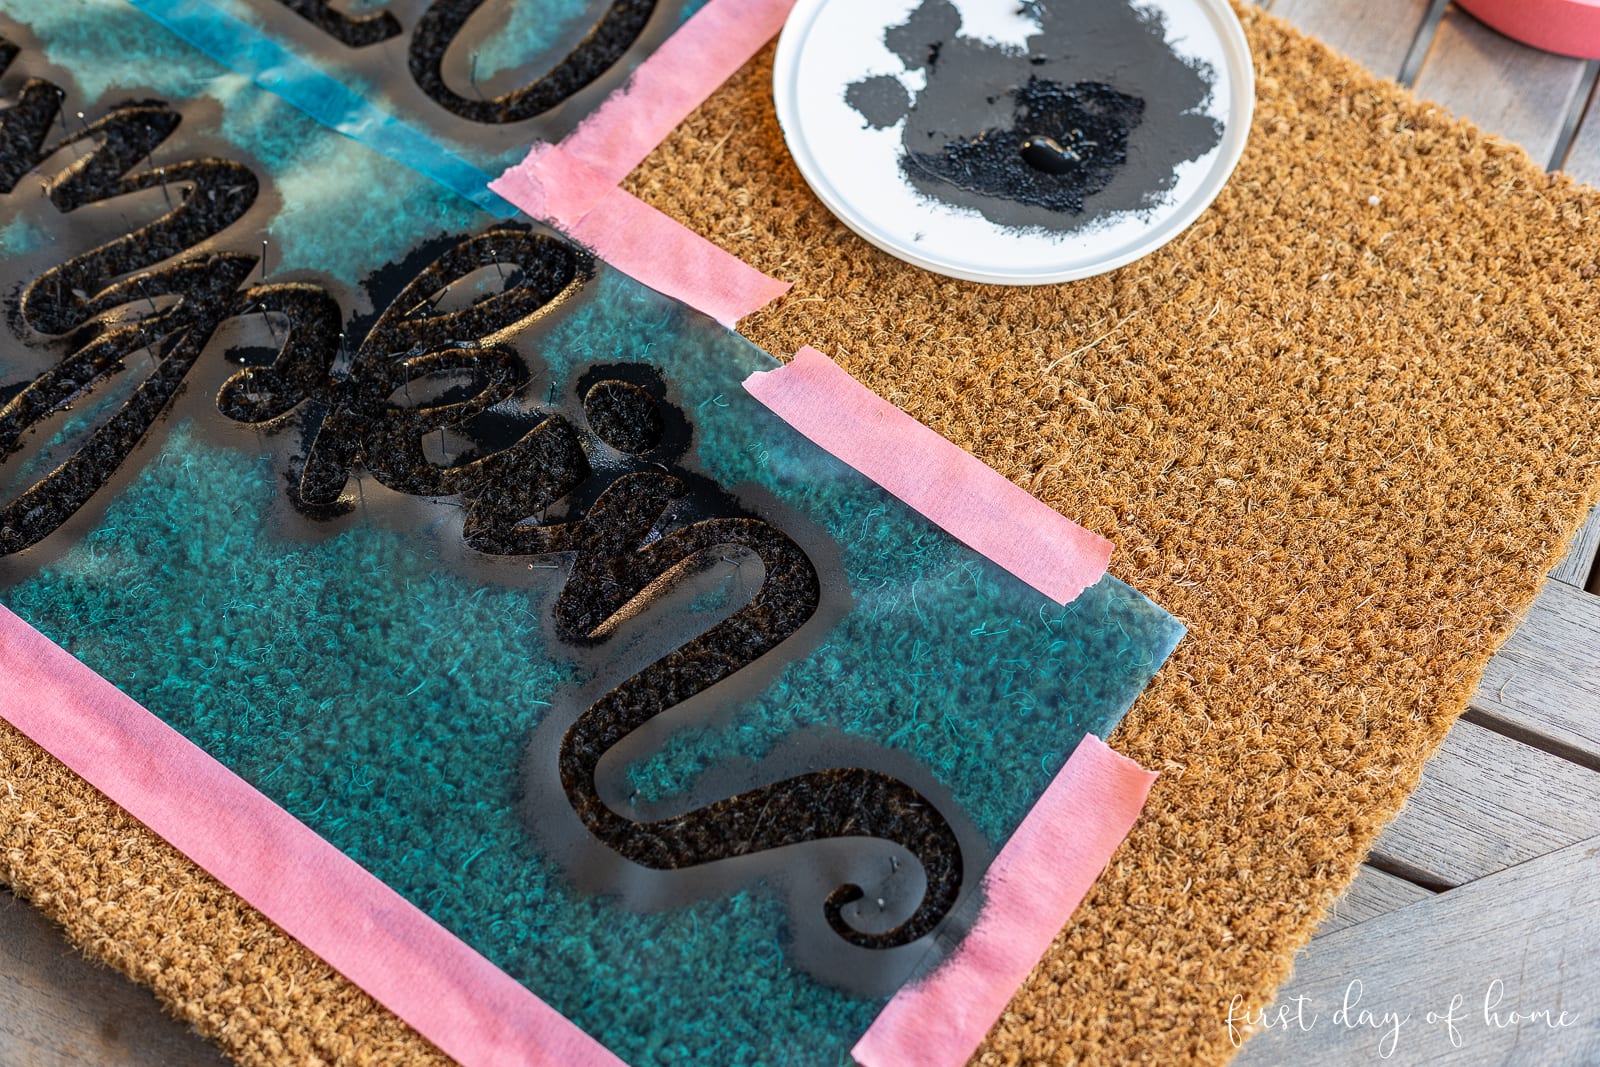
Here’s the fun part! Using a very hard bristle paint brush dipped in acrylic paint, pounce the stencil gently in a vertical motion. Make sure you don’t disturb the lettering. I strategically placed my pins to avoid pulling up the stencil.
Tip: Dab off any excess paint before pouncing to prevent the paint from bleeding.
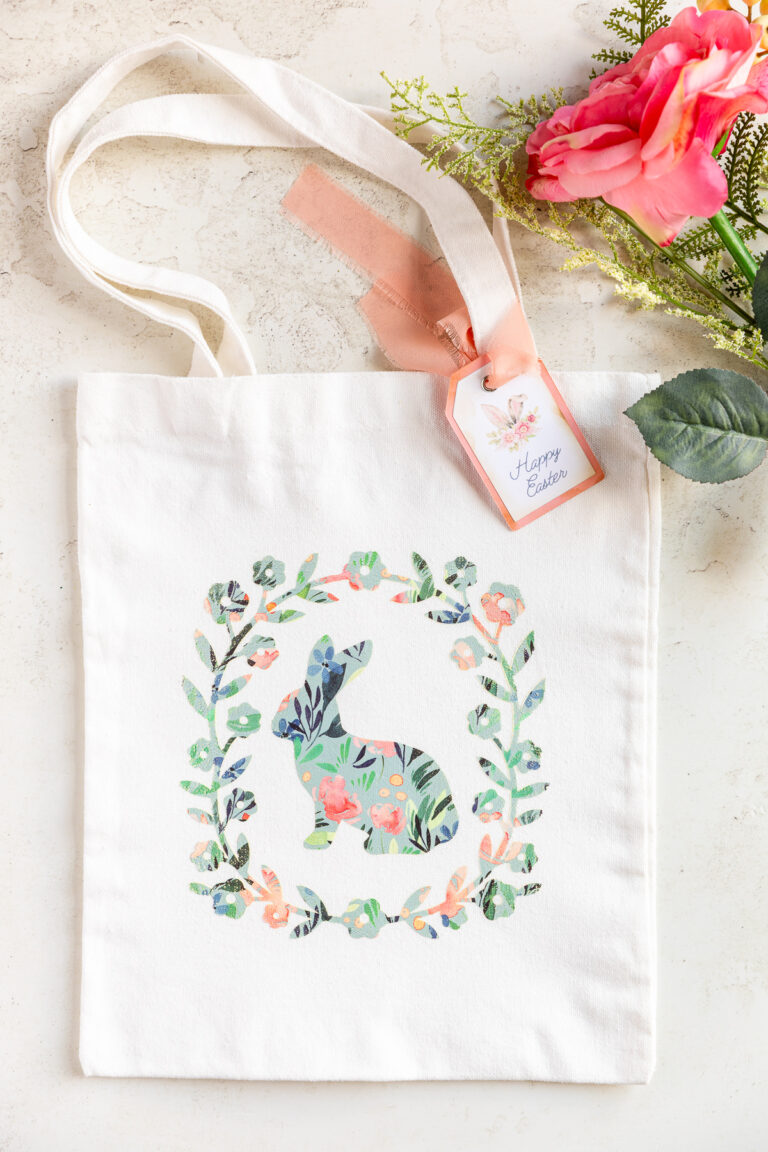
The technique is very similar to the one I used to create DIY flour sack towels and a painted tote bag.
Once you’ve applied 3-4 coats of paint, let the mat dry for 1-2 hours before removing the stencil. Then it’s time to admire your handiwork!
See the FAQs below for more details on other paint options.
Step 4: Remove the stencil and apply sealer
Once you’ve removed your stencil, you’ll want to seal the mat. This helps weatherproof the doormat a bit and prevent the paint from wearing off too quickly.
I used this shellac for the job. It’s a great option for many craft projects. Just make sure you use it in a well-ventilated area and wear a mask if necessary.

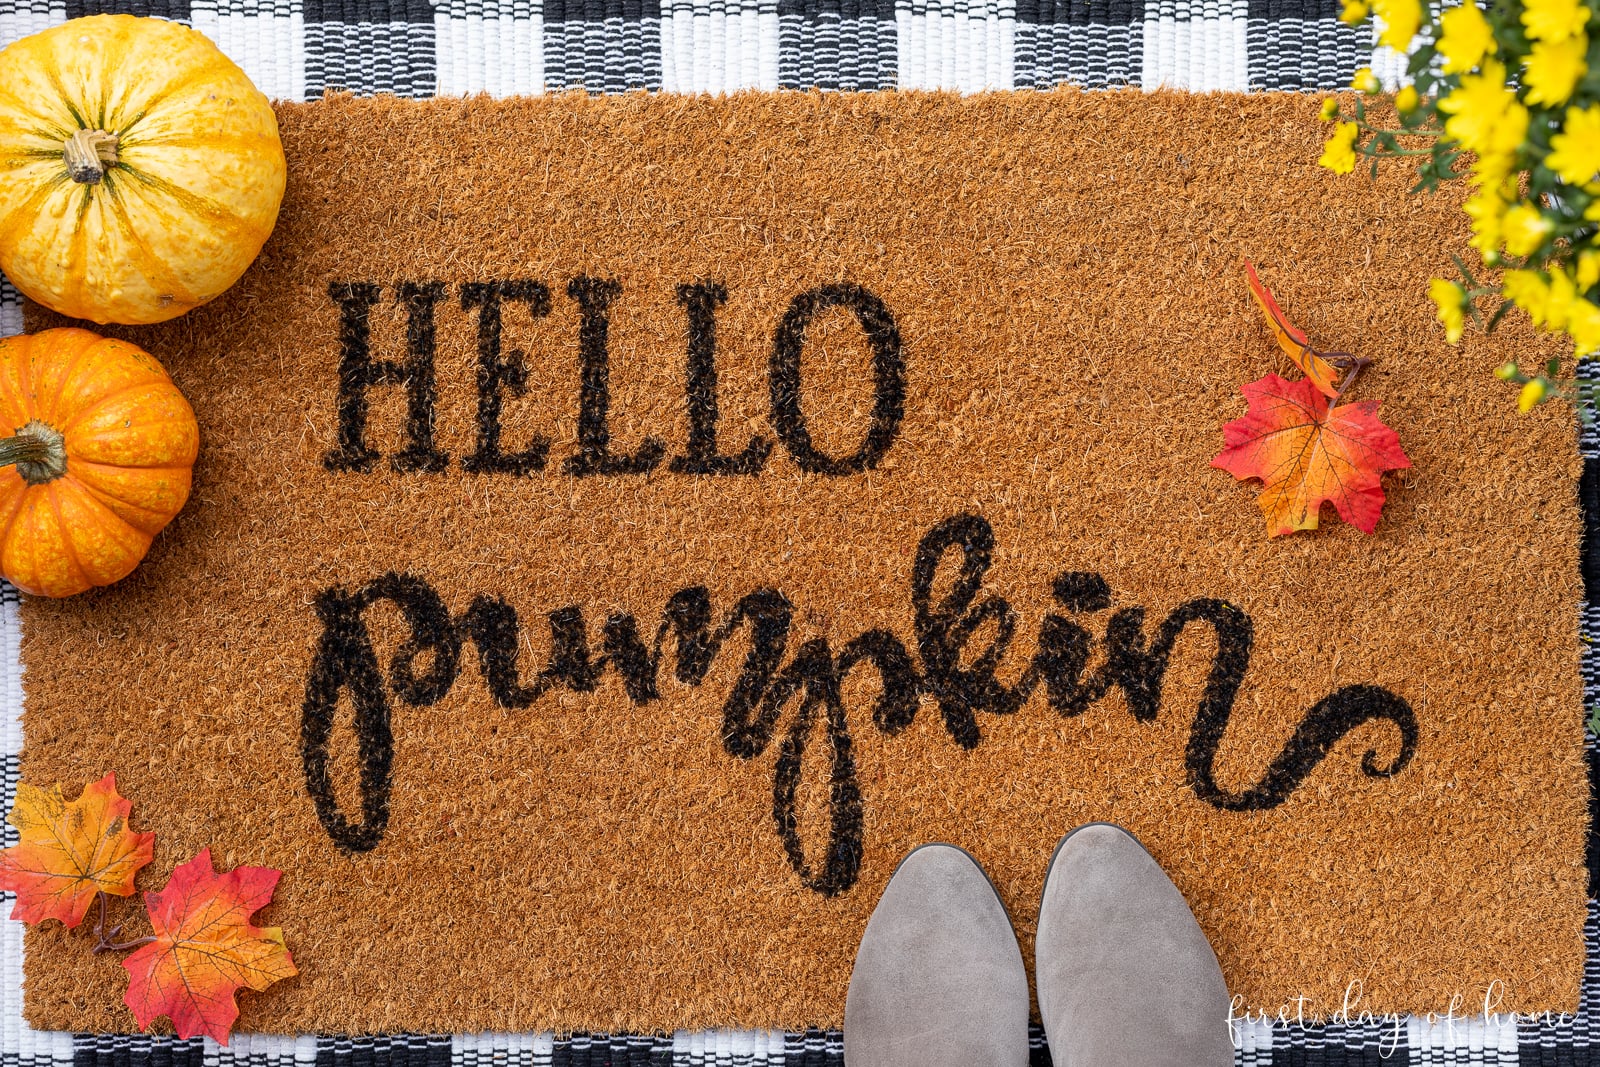
After about 30 minutes, you’ll be ready to start welcoming your guests with a brand-spanking-new doormat!
I love how this project turned out. The mat adds such character to my front door. I hope you make one and love it, too! Feel free to tag me on Instagram @firstdayofhome to share your creations!
Pin it for later!

Shop the Post
No time to DIY? Shop these doormats!
FAQs: DIY Doormat
-
How long will the doormat last?
Like most coco mats, a DIY painted doormat may last 12-24 months with regular use. It can last a lot longer if you only use it only seasonally, especially on a covered porch. A doormat’s durability will depend on how much traffic it sees and how exposed it is to sunlight and rain.
Using outdoor acrylic paint can also help the mat last longer and withstand the elements.
You can always try touching up the paint as it fades and then sealing it again to extend its useful life. -
Can you use spray paint instead?
Yes! You can absolutely use spray paint for coco coir mats as well. Choose one that is appropriate for outdoor use, and make sure the non-stenciled part of the mat is well-covered before you spray.
-
Can you use polyurethane as a sealer?
Polyurethane spray is a good option for sealing a coir mat. However, many sealers are formulated for wood primarily. Make sure you choose one that is appropriate for various crafting projects.
Also, sealing the project is completely optional. It just helps protect a DIY doormat from wear and tear.
As always, leave a comment if you have any questions or just want to say hello!


Crissy, I love that you re-used one of your designs for this adorable door mat! Your Cricut posts and videos is spurring me on towards practicing with my Cricut! Pinned 🥰
Aw, thanks, Cindy! You would have a blast making Cricut projects, and I could see you doing some amazing things with decals on furniture and wood items. Thanks for pinning!
This is so darn cute, Crissy. I love it! I’m going to share your doormat with my readers on Sunday for my week in rewind post. I know they’ll love it too!
Thanks so much, Jen! That’s so kind. I can’t wait to see the post. I’m loving your new weekly series. Happy Fall!