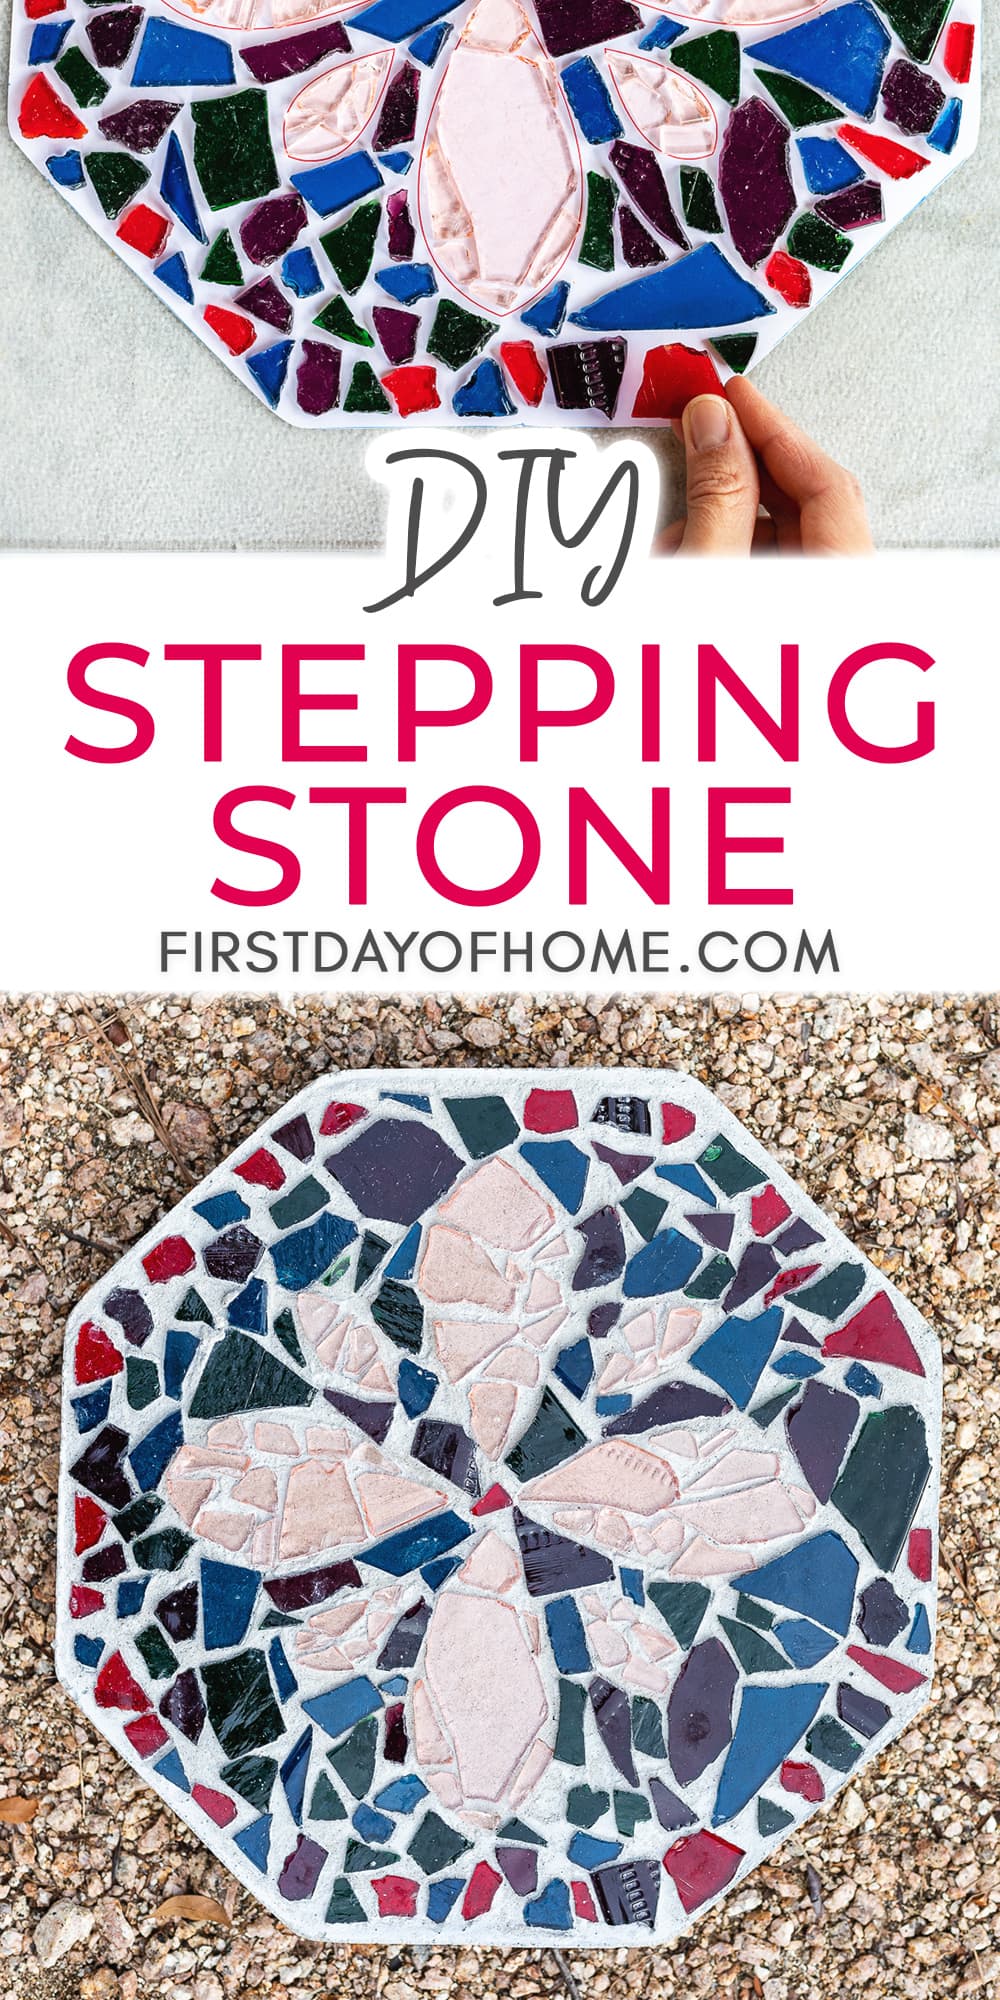
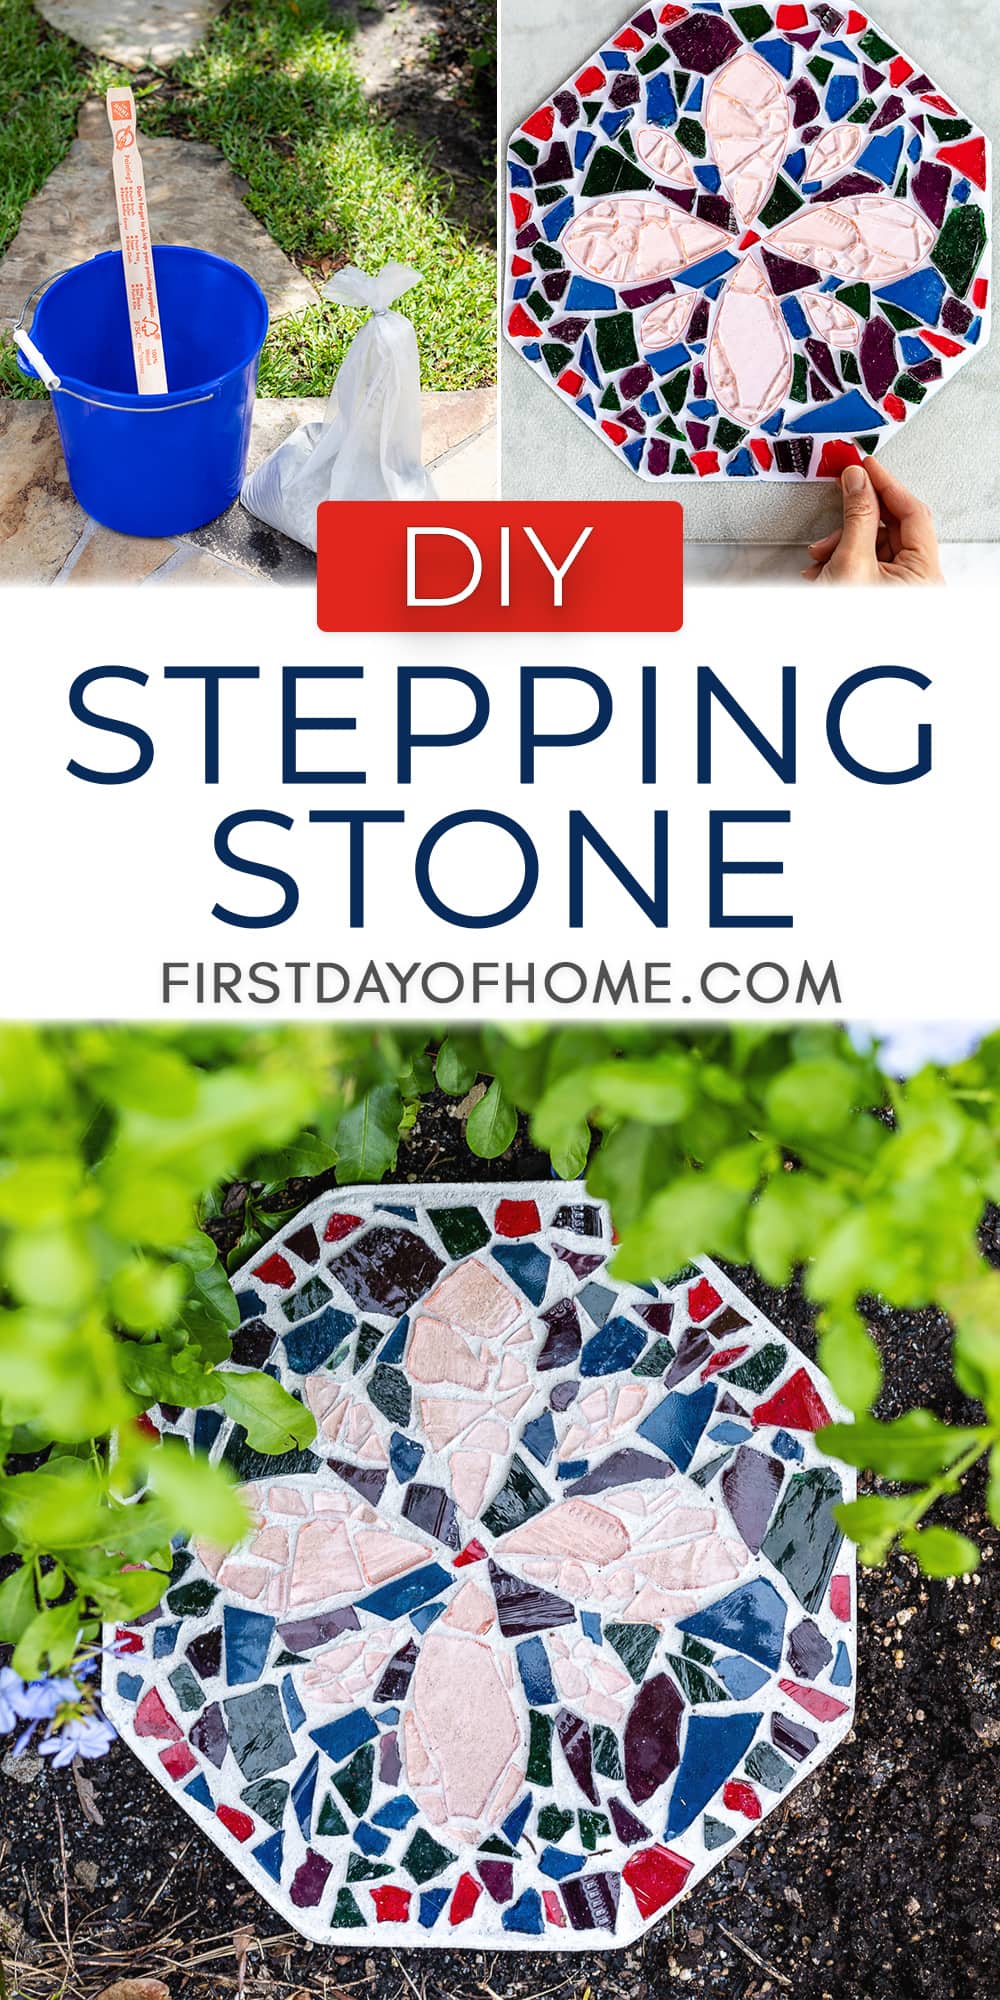
How to Make DIY Mosaic Stepping Stones
Creating your own DIY mosaic stepping stones is a great way to add a touch of beauty and whimsy to a garden! Plus, it’s easier than you think. The trick is having the right supplies and a good plan. This fun craft will make your garden our outdoor space look gorgeous just in time for summer.
This post contains affiliate links, and I will be compensated if you make a purchase after clicking on my links. For more information, please see my disclosures.
Project Overview
DIFFICULTY: Easy/beginner
TIME REQUIRED: 1-2 days
RECOMMENDED AGES: 5 years and up (with adult supervision)
COST: $10-15 USD if buying a kit
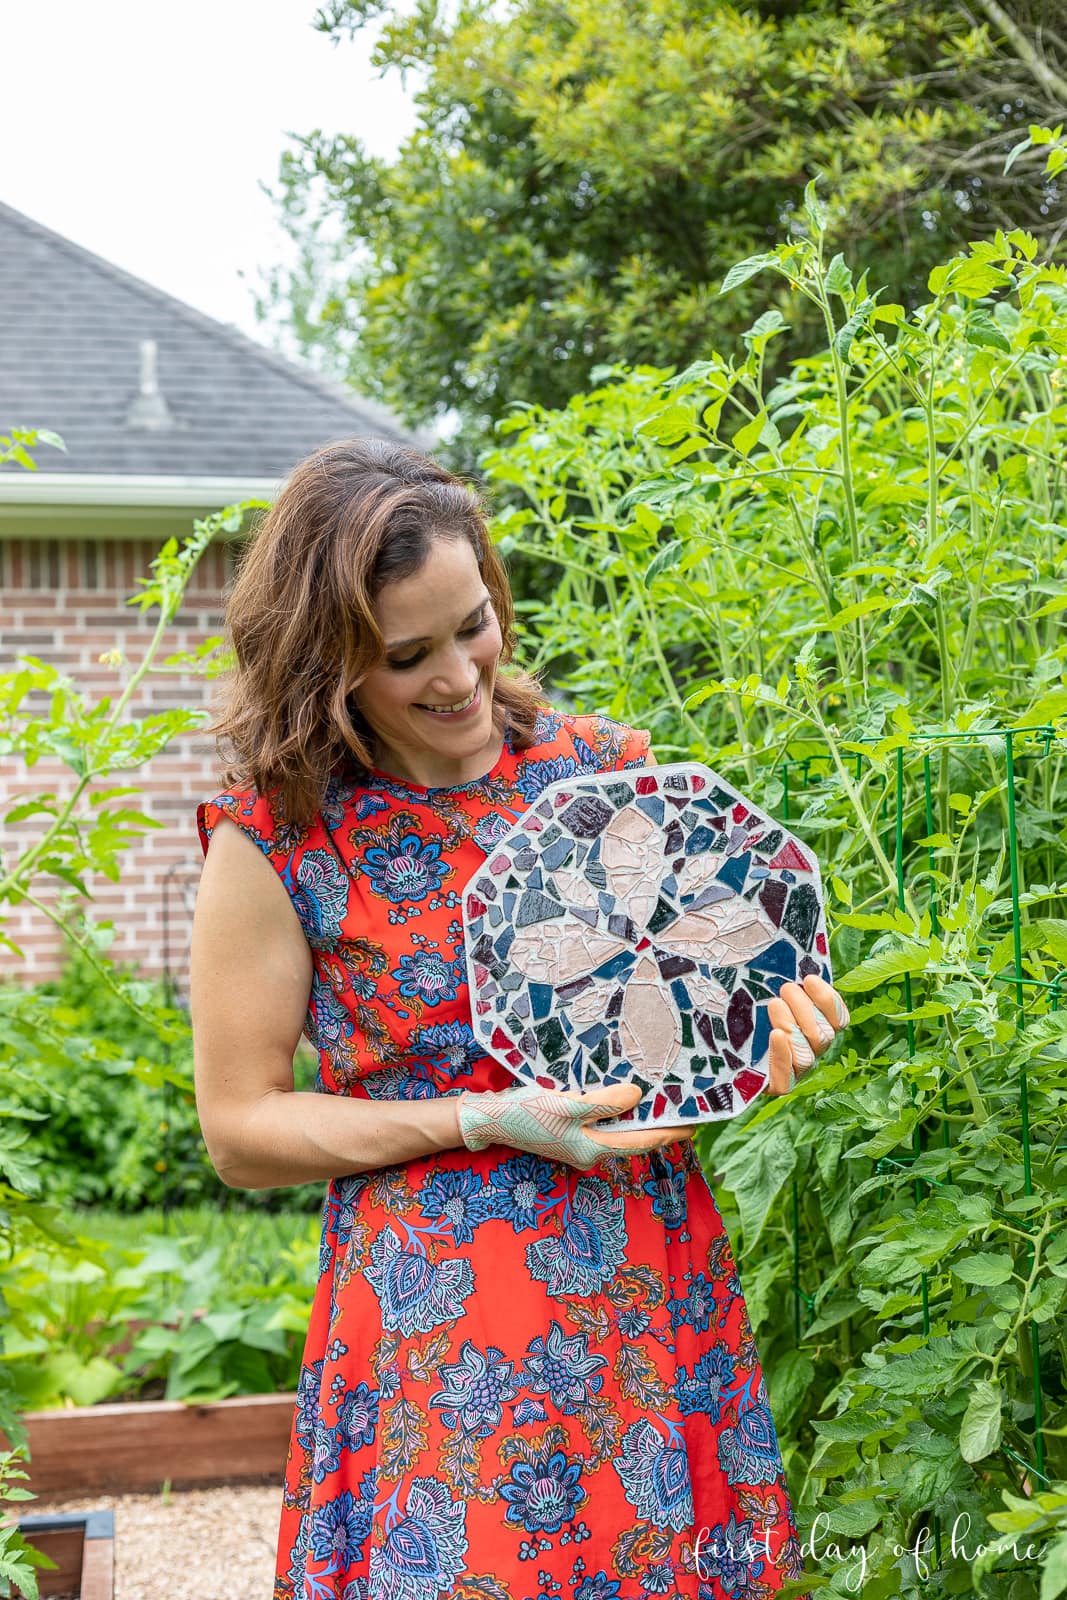
DIY Mosaic Stepping Stones
After making DIY mosaic flower pots, I have to admit I’m on a mosaic kick! I feel like I’m seeing the world through stained-glass-colored glasses now.
Unlike my prior mosaic project, there’s no need for tile nippers or grout for this craft. All you need is a good mold, the right concrete mix, and some pretty tiles.
Two Options for Making Mosaic Stepping Stones
There’s more than one way to make a DIY stepping stone. We’ll be following option #2 below.
- You can buy a concrete paver from a home improvement store and add your tiles on top with thin-set mortar, followed by grout, or by pouring a layer of cement on top and embedding the tiles in the wet cement. (I used an adhesive and grout for my mosaic flower pots if you’d like to see what that looks like.)
- You can also use a stepping stone mold to cast your own base. After pouring the concrete into the mold, you can place your mosaic pattern in the wet concrete. Alternatively, you can use a piece of contact paper to set your mosaic pattern inside the mold and pour the concrete on top.
Many stores sell a complete stepping stone kit that comes with pre-printed designs. This is the easiest option if working with young children.
Supplies
- Stepping stone mold
- Stepping stone mix or sand-mix concrete
- Mosaic pattern or sketch
- Mosaic tiles, stained glass, marbles, or broken china
- Dropcloth or cardboard for work surface
- Protective mask, safety glasses, and protective gloves
- Bucket
- Paint stir stick
- Putty knife or wooden craft stick
- Toothbrush or soft bristle brush
Safety Tips for Making DIY Stepping Stones
- Work in a well-ventilated area, preferably outdoors. This will prevent you from inhaling any dust from the stepping stone mix particles.
- Always use protective gear when mixing concrete, including a face mask and nitrile gloves. You want to avoid skin contact with the concrete mix.
- Adult supervision is required for this project. Kids can definitely help with placing the mosaic tiles, but an adult should always supervise this activity.
Step 1: Design your Mosaic Pattern
If you own a Cricut or Silhouette Cameo cutting machine, I highly recommend using it to print and cut your pattern beforehand. It’s a big time-saver!
Otherwise, you can cut basic shapes out of cardstock paper or use a freehand pattern. Common designs include floral patterns, monograms, pet names, astrological signs, or themes from nature. I’d love to make one with a monarch butterfly or dragonfly pattern someday since I attract those insects near my vegetable garden.
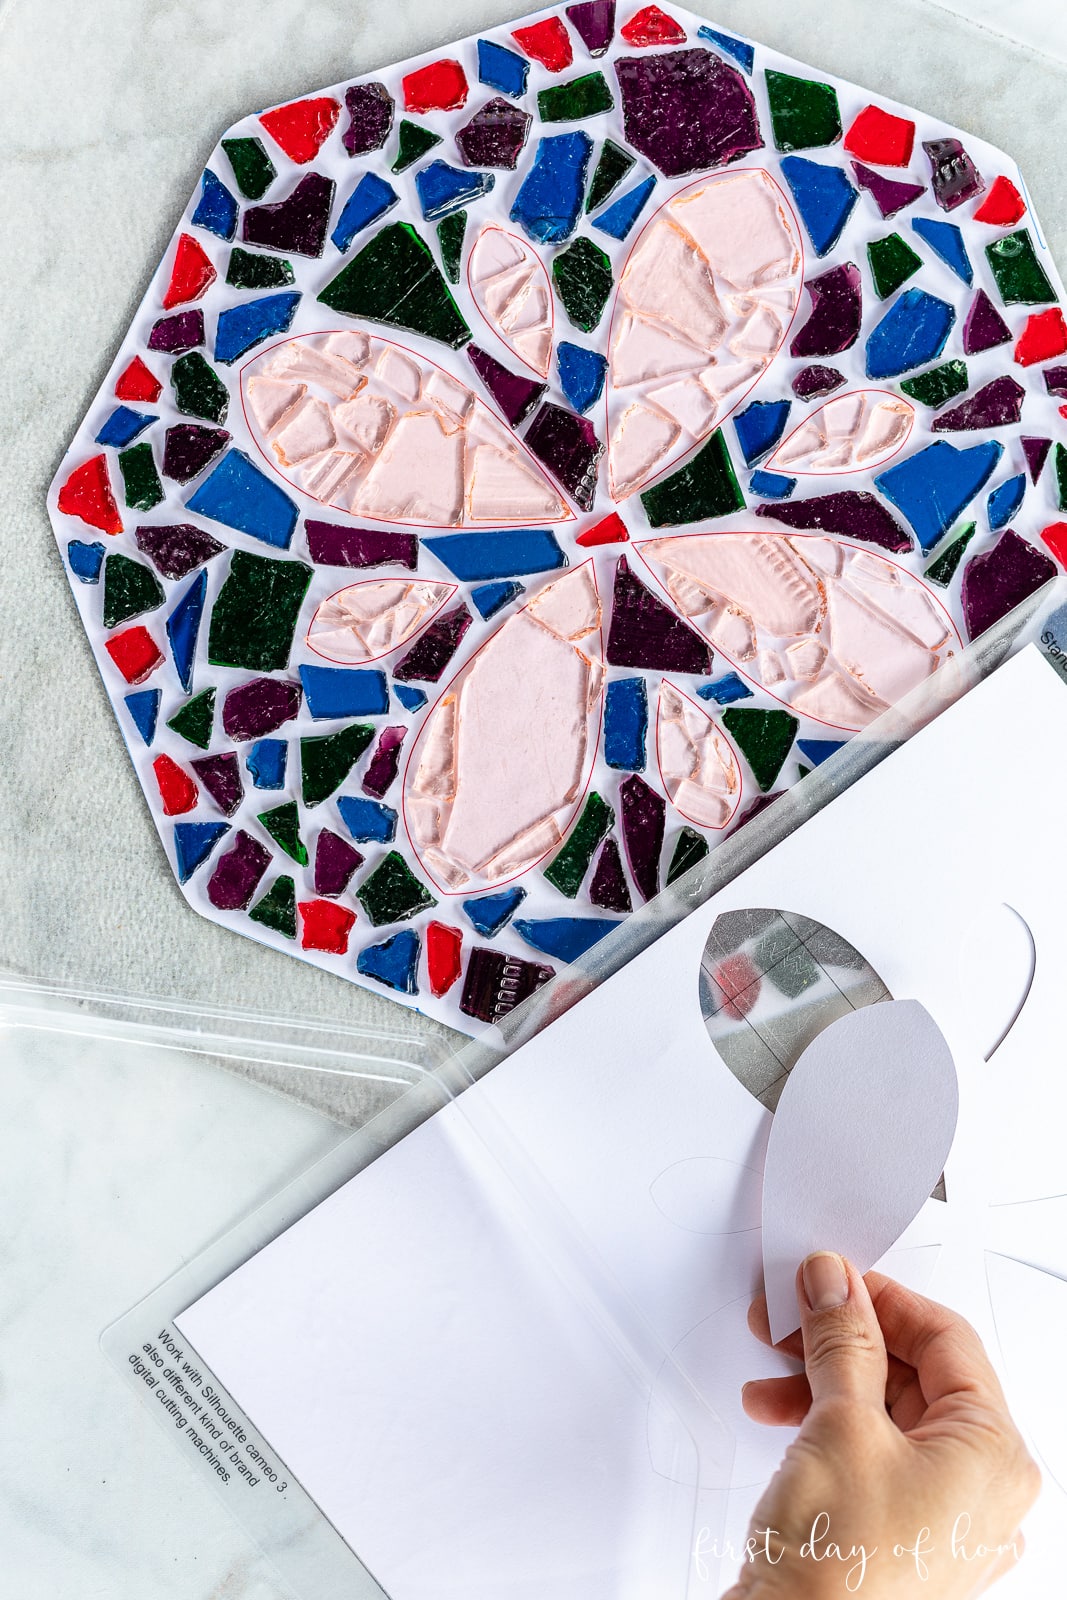
If you’re using a specific design, it’s helpful to trace the shape of your stepping stone mold onto the design. Then, you arrange your tiles beforehand, as shown above. It helps to sort pieces by color, shapes and sizes, separating large pieces from smaller pieces to create a cohesive pattern.
Many stepping stone kits will come with patterns included, so that’s another benefit of purchasing a kit if you’re just starting out.
Step 2: Mix the Concrete and Pour into Mold
Once you have your tiles ready, mix the concrete or stepping stone mix according to the manufacturer’s instructions. Always wear a mask and gloves for this part, and keep children away at a safe distance.
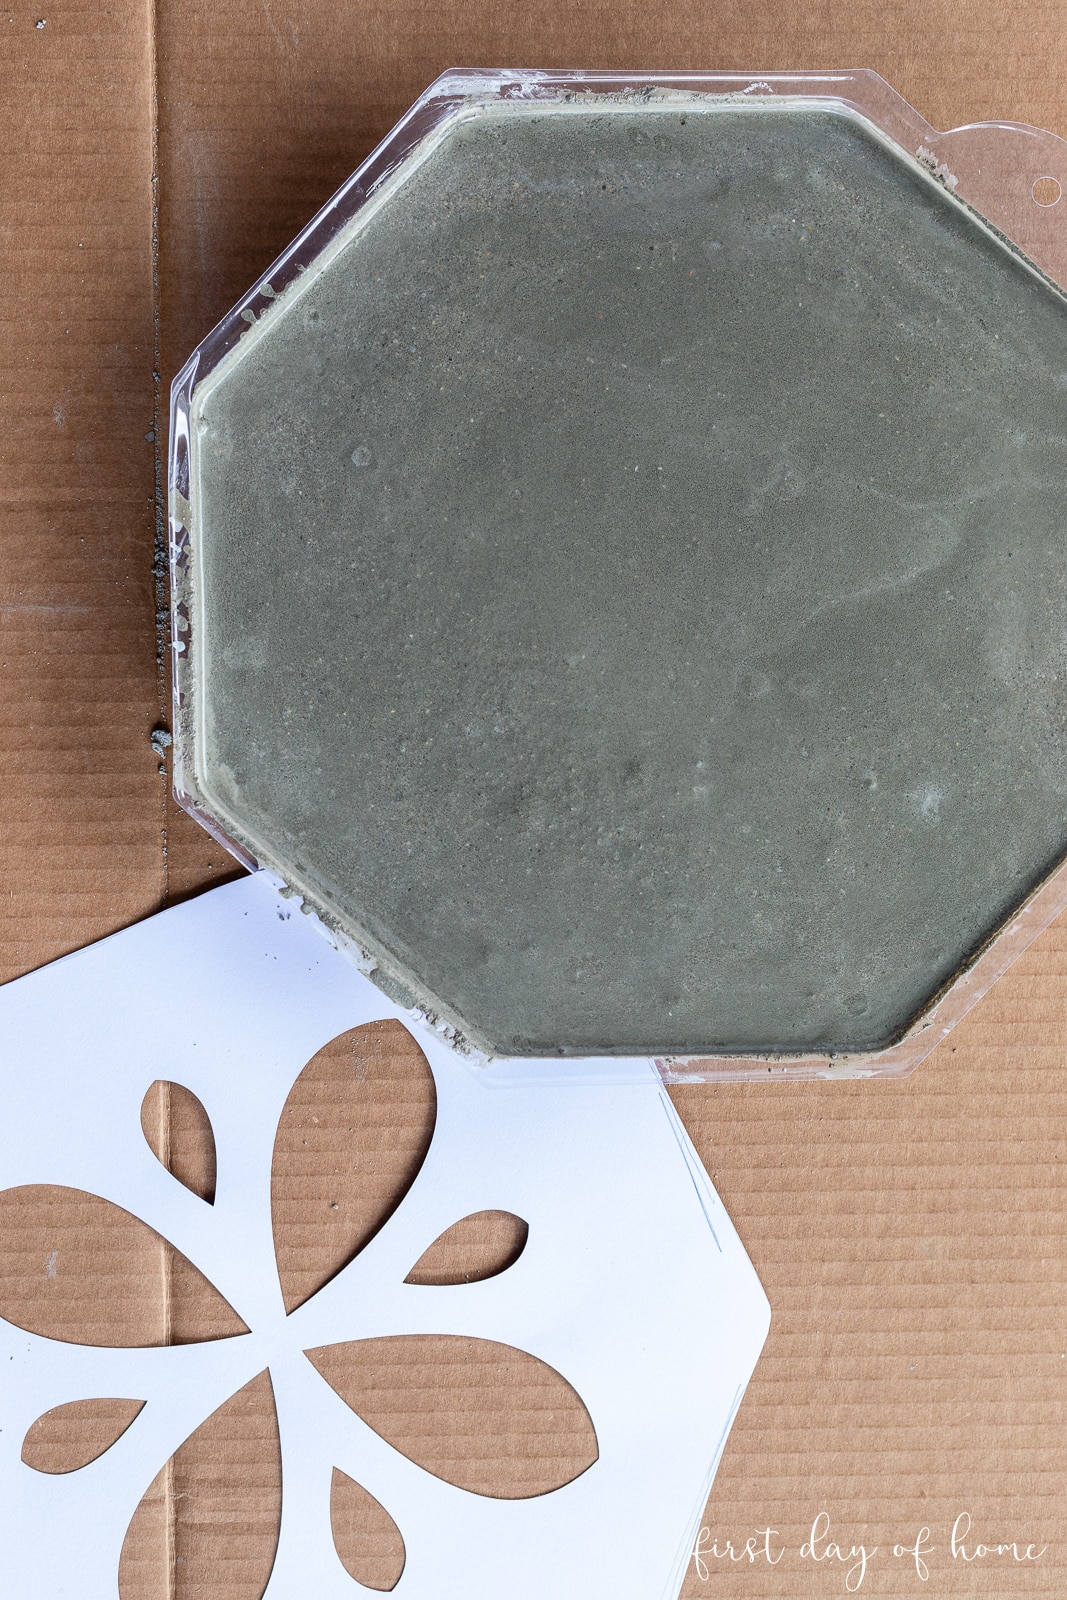
Once the mix reaches a cookie batter consistency, you can pour it into your mold.
Use a putty knife to smooth the surface of the concrete. Then, gently tap the edges of the mold to release any air bubbles.
Step 3: Apply Mosaic Tiles to the Stone
After about 10 minutes, you can begin placing your tiles onto the concrete mix.

It helps to place the paper pattern onto the mold first. Then you can outline the pattern with tiles before placing the main pattern tiles.
Make sure the mosaic pieces are firmly set into the concrete so they won’t fall out later.
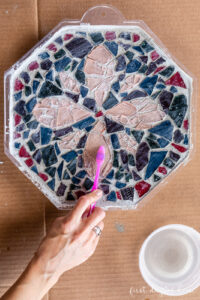
Step 4: Polish the Mosaic Stone
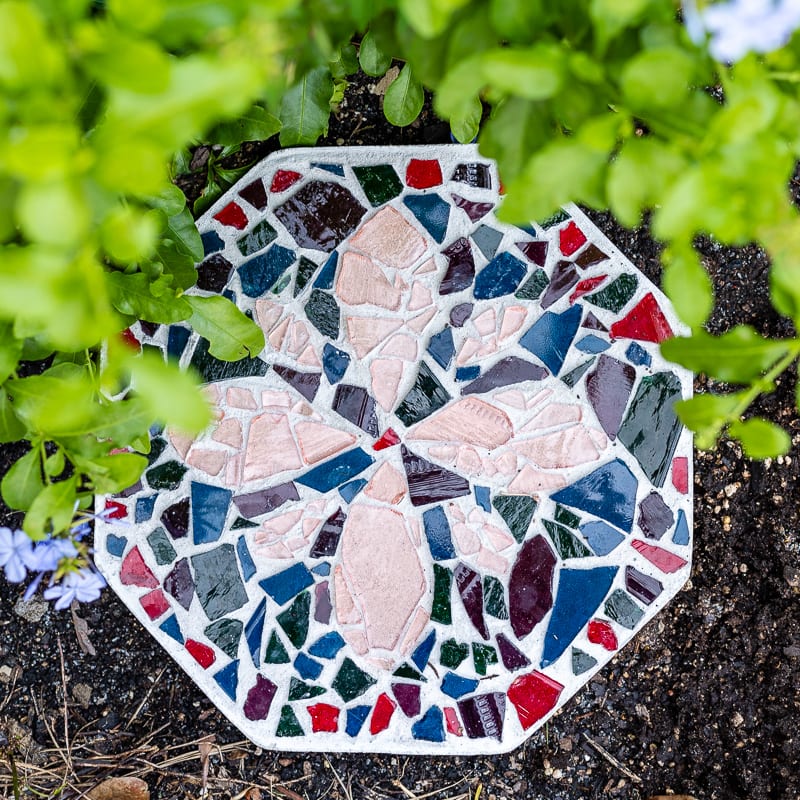
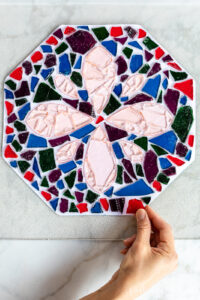
After 24 hours, polish the mosaic tiles with a wet toothbrush or damp sponge. Then remove the stone from the mold.
You can continue polishing the stone with a soft cloth and use sandpaper to file any sharp edges.
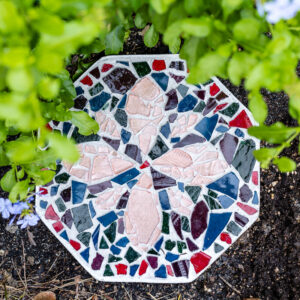
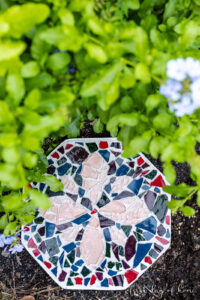
Now you’re ready to decorate your garden or outdoor patio space with DIY mosaic art!
Wait 7-10 days before applying pressure to the stepping stone.
5 Tips for Getting the Best Results
Before you begin prepping your materials to create DIY mosaic stepping stones, here are a few tips to keep in mind.
- The temperature and humidity may affect drying times for your concrete mix. Ideally, make your stepping stones on a day with lower humidity and moderate temperatures (around 60-70°F).
- Add water very gradually when stirring your concrete. A little water goes a long way!
- Dab off any excess water on the surface of your mix with a paper towel before applying your design.
- Be sure to press the tiles in place gently so the concrete rises slightly between the tiles.
- If any tiles do not adhere after the stone has dried, you can always secure them in place with E6000 or mosaic tile adhesive.
If you have questions or tips to share, leave a comment below!
Pin it for later!
How to Make DIY Mosaic Stepping Stones
Equipment
- Bucket
- Paint stir stick
- Putty knife or wooden craft stick
- Toothbrush or soft bristle brush
Supplies
- Stepping stone mold
- Stepping stone mix or sand-mix concrete
- Precut mosaic pattern
- Mosaic tiles of stained glass
- Dropcloth or cardboard for work surface
- Protective mask, safety glasses, and gloves
Instructions
- Create your mosaic design to fit the size of your stepping stone mold. You can use a pattern from a stepping stone kit or create your own pattern. You also have the option to create a freestyle design without a pattern.
- If using a specific pattern, print one copy of the pattern, and cut out a separate copy. (You can use a Cricut or Silhouette Cameo cutting machine for this step, if available.)

- Arrange the mosaic tiles on the printout of your pattern. This helps to ensure you have enough tiles for your design and makes it easier to place the tiles later.
- Wearing gloves, safety glasses, and a mask, mix 2 cups of water per 7 lbs of stone mix. Add more water (if needed) until the mix is the consistency of cookie batter.
- Pour the mix into your mold. Use a putty knife or wooden craft stick to smooth the surface of the mix.
- Let the stone mix dry slightly (about 10 minutes). Then, apply your cut paper design on top if using a pattern. Add mosaic tiles around the main pattern.
- Remove the paper pattern, and add the remaining tiles.
- After placing all the tiles, gently push the tiles down into the concrete mix to ensure they are secure.
- Let the stone dry 24 hours. Then, use a toothbrush and water to clean the tiles.
- Carefully remove the stone from the mold, and polish it with a soft cloth.
- Wait 7-10 days before applying pressure to the stone.


Notes
You Might Also Like…

Hi, this looks awesome. I have a question about DIY mosaics, using stepping stones I already have. We have some standard, grey, square stepping stones that will make a great base. I have all the supplies to get started. Do I need to treat the stepping stone somehow first, or just wash it, then apply the thin mortar? I know yours is done straight onto the concrete, but maybe you know about a way to prepare an existing stepping stone?
Thanks,
Katy
Hi Katy! I’m glad you’ve giving this a try. After you wash the stepping stone, I would consider using an adhesive glue like this one: https://amzn.to/3QyyMB8. Then you can apply your mortar as normal. This will just give the mosaic tiles a little more durability and prevent them from shifting when you pour the mortar. I hope this helps! -Crissy
Wow! Your stepping stone is truly the prettiest one that I’ve ever seen. I love the pattern and the colors you use to make this.
What a compliment, Paula. Thank you! I think I’m going to buy more of the concrete mix to make a few more. It was a lot easier than I thought it would be.