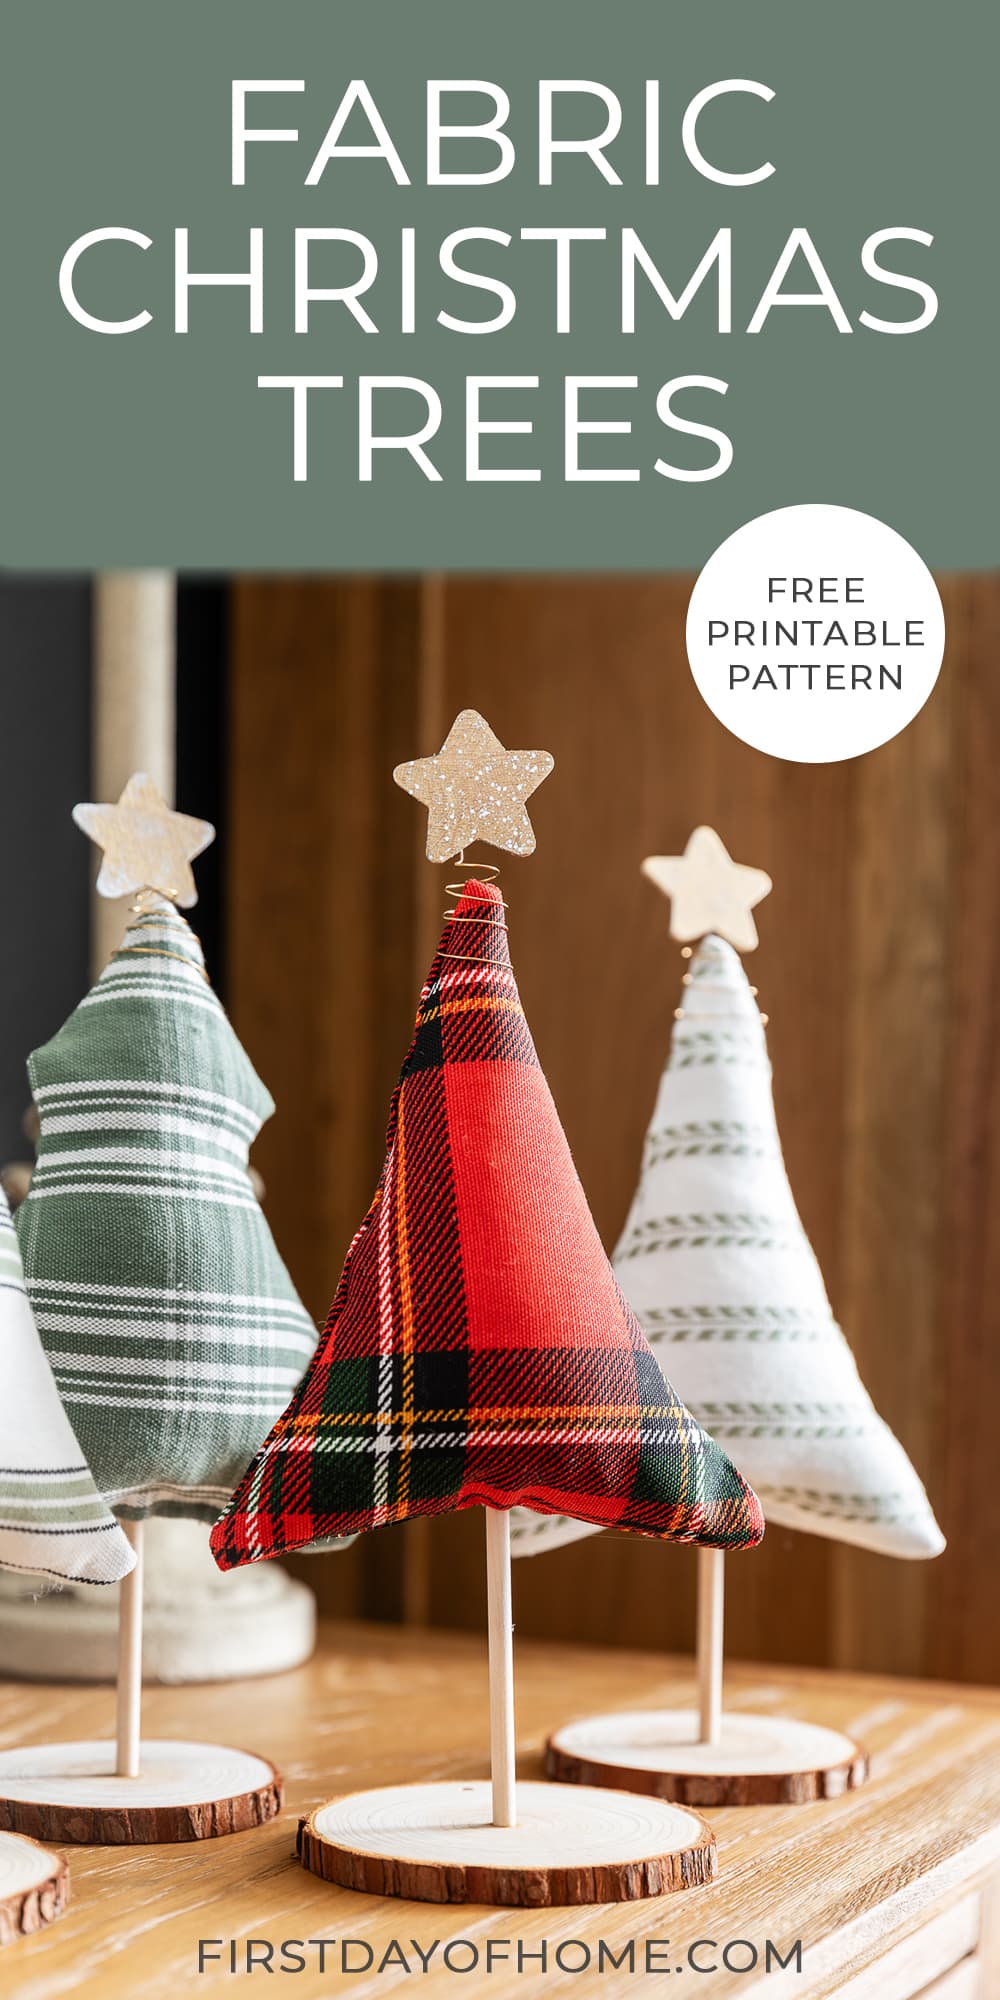
No-Sew Fabric Christmas Trees (Free Pattern)
If you’re wondering what to do with a stash of fabric scraps, this project is for you. Fabric Christmas trees make a big statement, but you won’t need a lot of fabric to create them. They make great DIY gifts and look charming as Christmas decor too.
This post contains affiliate links, and I will be compensated if you make a purchase after clicking on my links. For more information, please see my disclosures.
Easy Fabric Christmas Trees Tutorial
Every year, I try to come up with a featured craft that I know I’ll cherish for many years to come. One year, I made DIY wooden houses. Another year, we created made salt dough ornaments as a family.
This year, I had my heart set on making fabric Christmas trees. I have waaaay too many scraps of fabric hanging around, begging for a second chance. I also had wood slices left over from my wood slice ornaments craft.
Hence these fabric trees were born. Wouldn’t they look cute on a Christmas mantel?
To encourage you to make your own set of Christmas trees, I’m offering a free printable pattern at the end of this post. You can either use a sewing machine or take the easy route with fabric glue instead.
Supplies

- Fabric scraps or fat quarters (two pieces about 7×9 inches per tree)
- Wooden dowels
- Wood slices
- Miter shears
- Fiber fill
- Wood glue
- Fabric glue
- Hot glue gun (optional)
- Wooden stars (optional)
- Acrylic paint (optional)
- Jewelry wire (optional)
Step 1: Trim dowel rods and attach them to wood slices
Most dowel rods will come a bit larger than you need unless you’re going for extra tall Christmas trees. To easily trim the dowels, I used a pair of miter shears. They are a handy tool any time you need to trim small pieces of wood.
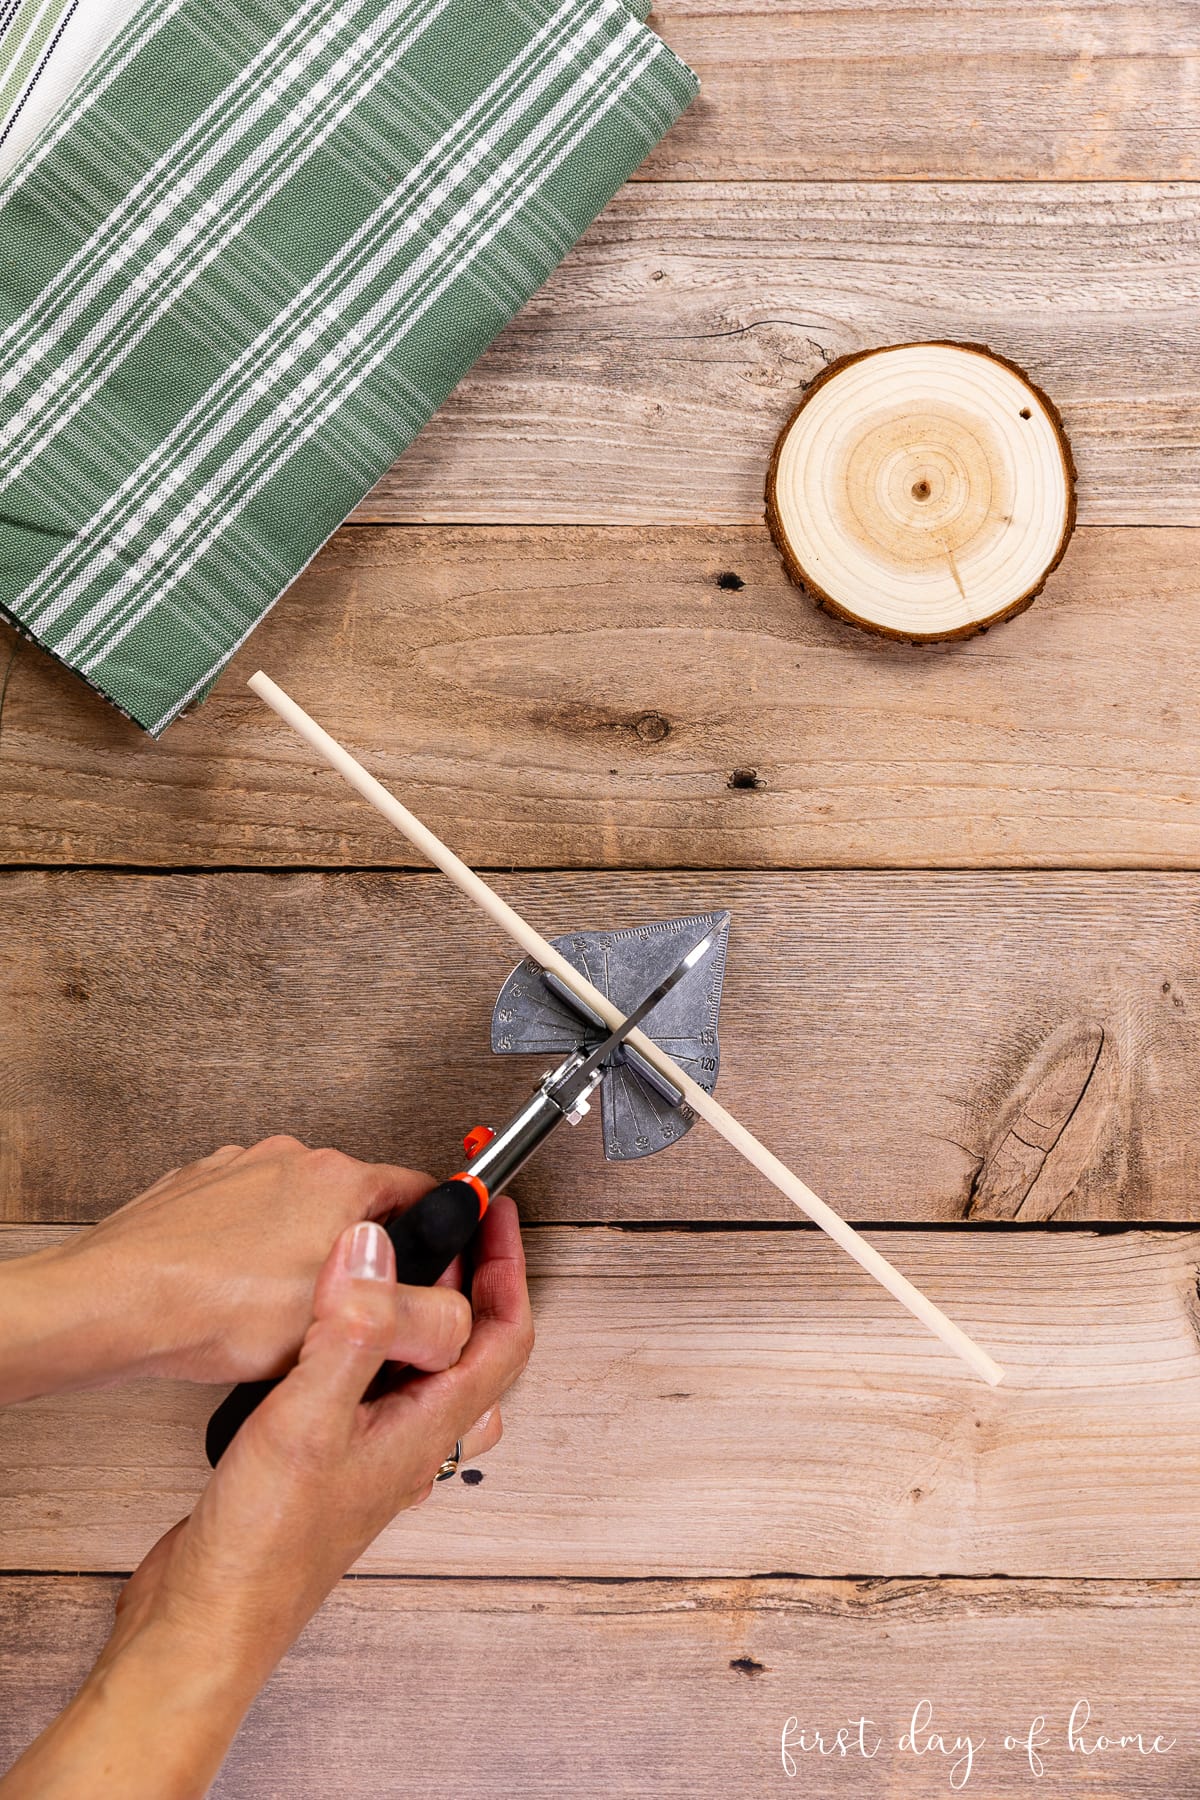
I reused wood slice ornaments I already had on hand, but you can buy wood slices without any holes in them for crafts like this.
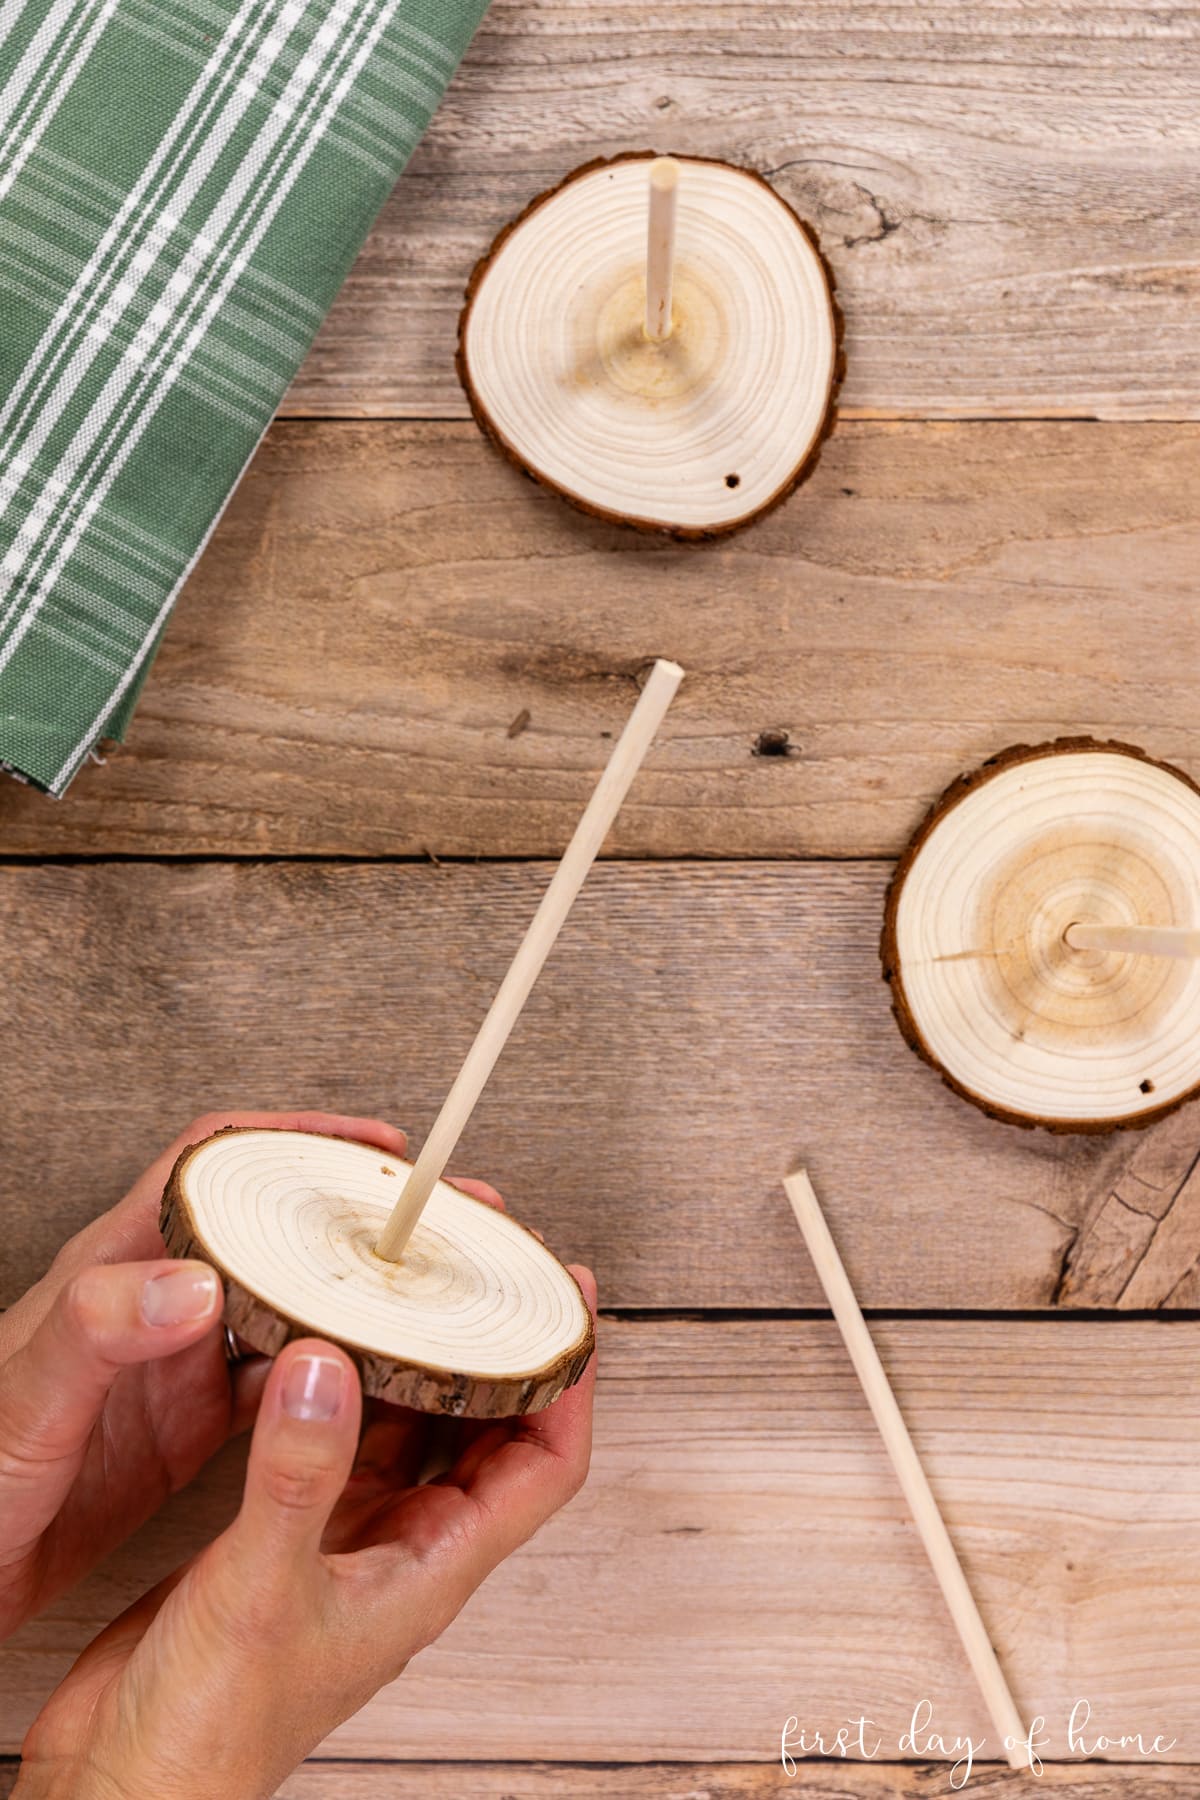
I pre-drilled a small hole in the center to insert the dowel more securely, though you can skip this step if you don’t own a drill. (Match the size of the drill bit to your wooden dowl diameter.)
Apply a small dab of wood glue to the tip of the dowel to attach it to the wood slice and let it dry completely (at least 30 minutes).
Step 2: Print and cut the fabric Christmas tree patterns
I’m happy to offer a free pattern with two Christmas tree shapes down below. Once you print and cut the pattern, you can easily trace the pattern onto your fabric.
I suggest you fold the pattern and fabric in half to save some time and effort when cutting with scissors.

Step 3: Glue the edges of the Christmas trees
As with a typical fabric craft, you’ll want to attach the right sides of your fabric together, leaving a small opening at the bottom, as indicated in the printable pattern.
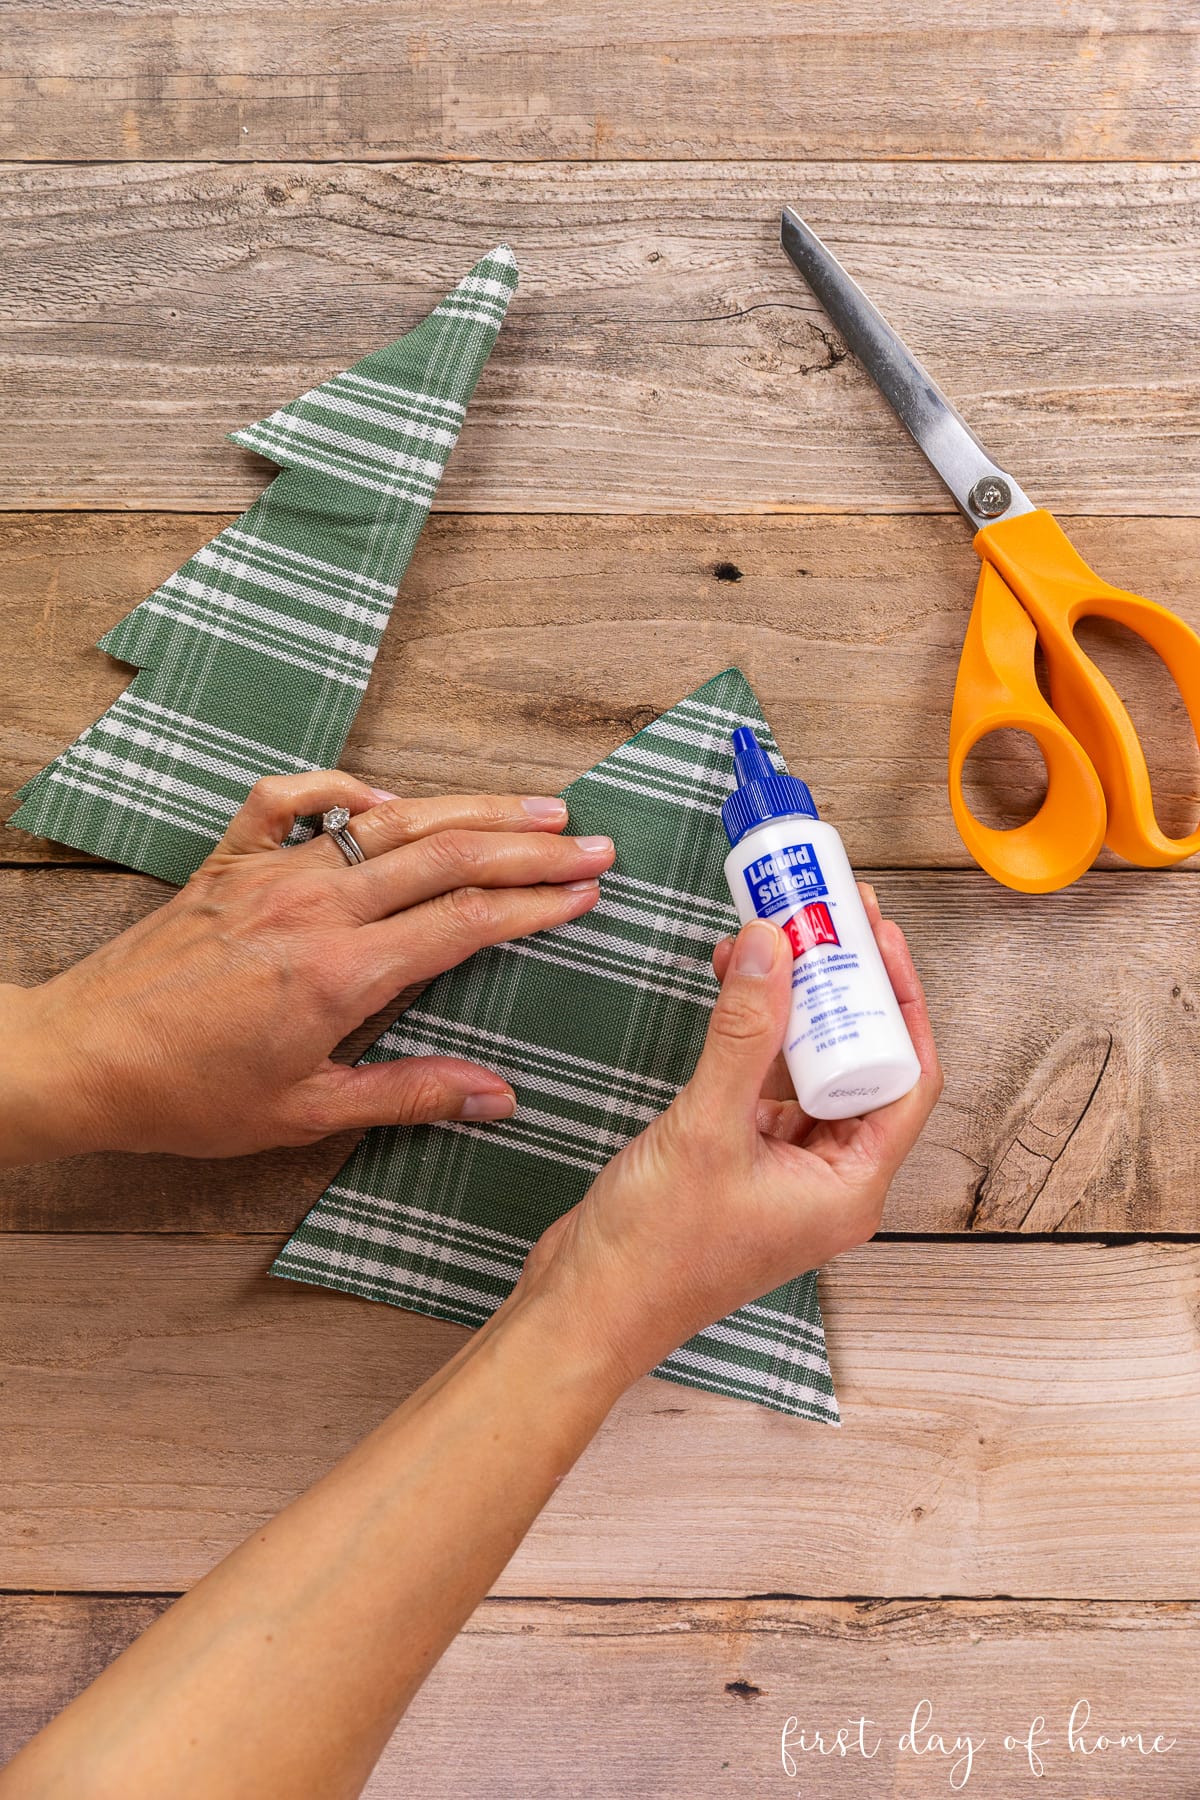
You always have the option to sew the edges along the dotted line (seam allowance) indicated in the pattern. For a quick shortcut, I highly recommend using this fabric glue instead. It creates a permanent bond, and it’s much easier to handle than hot glue.
Allow the glue to fully dry (about 30 minutes) before proceeding to the next step.
Step 4: Turn the Christmas trees right side out and fill
Once the fabric glue has dried, turn the tree right side out by pushing the inside of the tree through the small opening you left in the bottom. You may need to use a leftover wooden dowel to push out the corners of the Christmas tree.

Next begin filling the tree with fiber fill until it reaches your desired level of plumpness. I always suggest stuffing more than you think you’ll need. Make sure you stuff all corners and tips of the tree.
Step 5: Glue the trees closed and attach them to dowels
After stuffing the tree, you can seal the bottom edge closed with more fabric glue or hot glue.

Hot glue works well to seal the fabric Christmas tree to the wooden dowel and prevent shifting.
Another option is to skip the wood slice stand and create Christmas ornaments instead. By adding a small ribbon at the top, you can convert these small fabric Christmas trees into Christmas tree decorations.
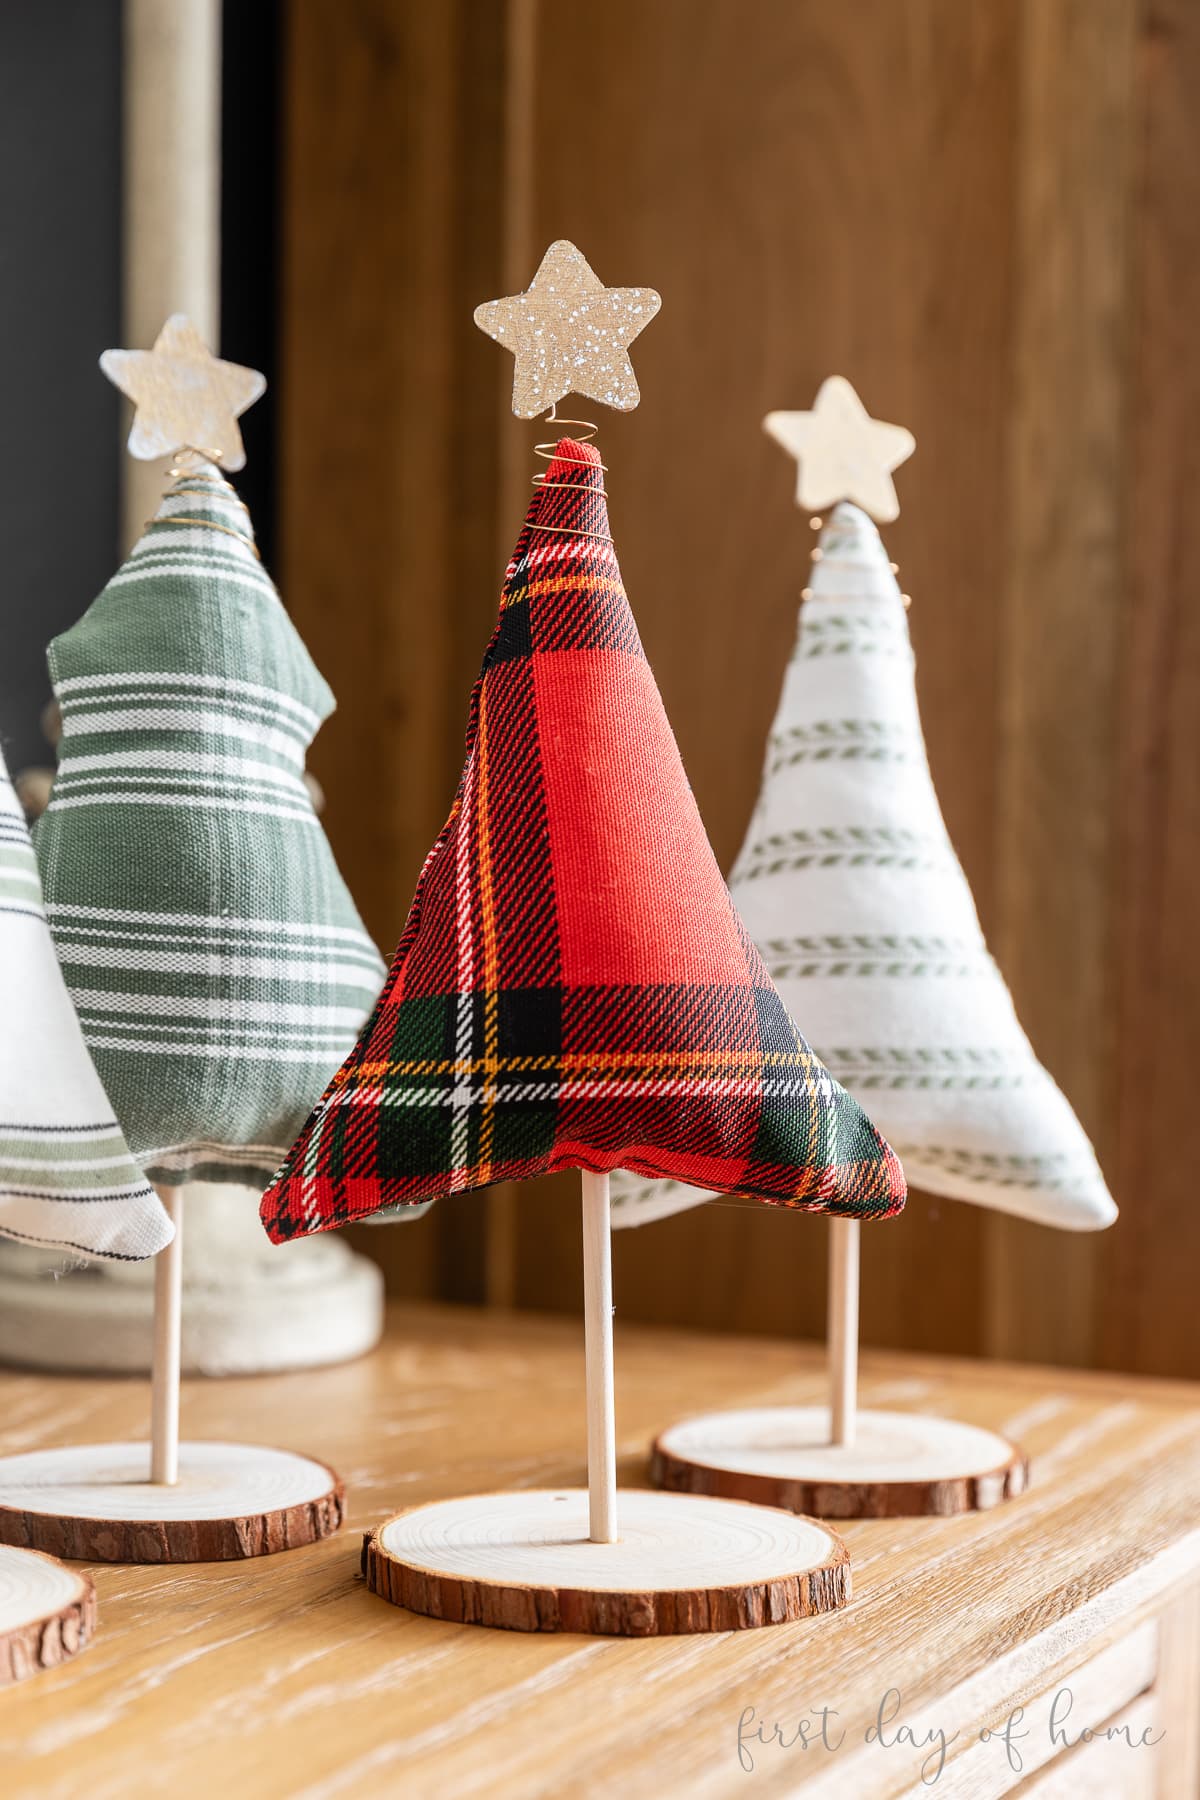
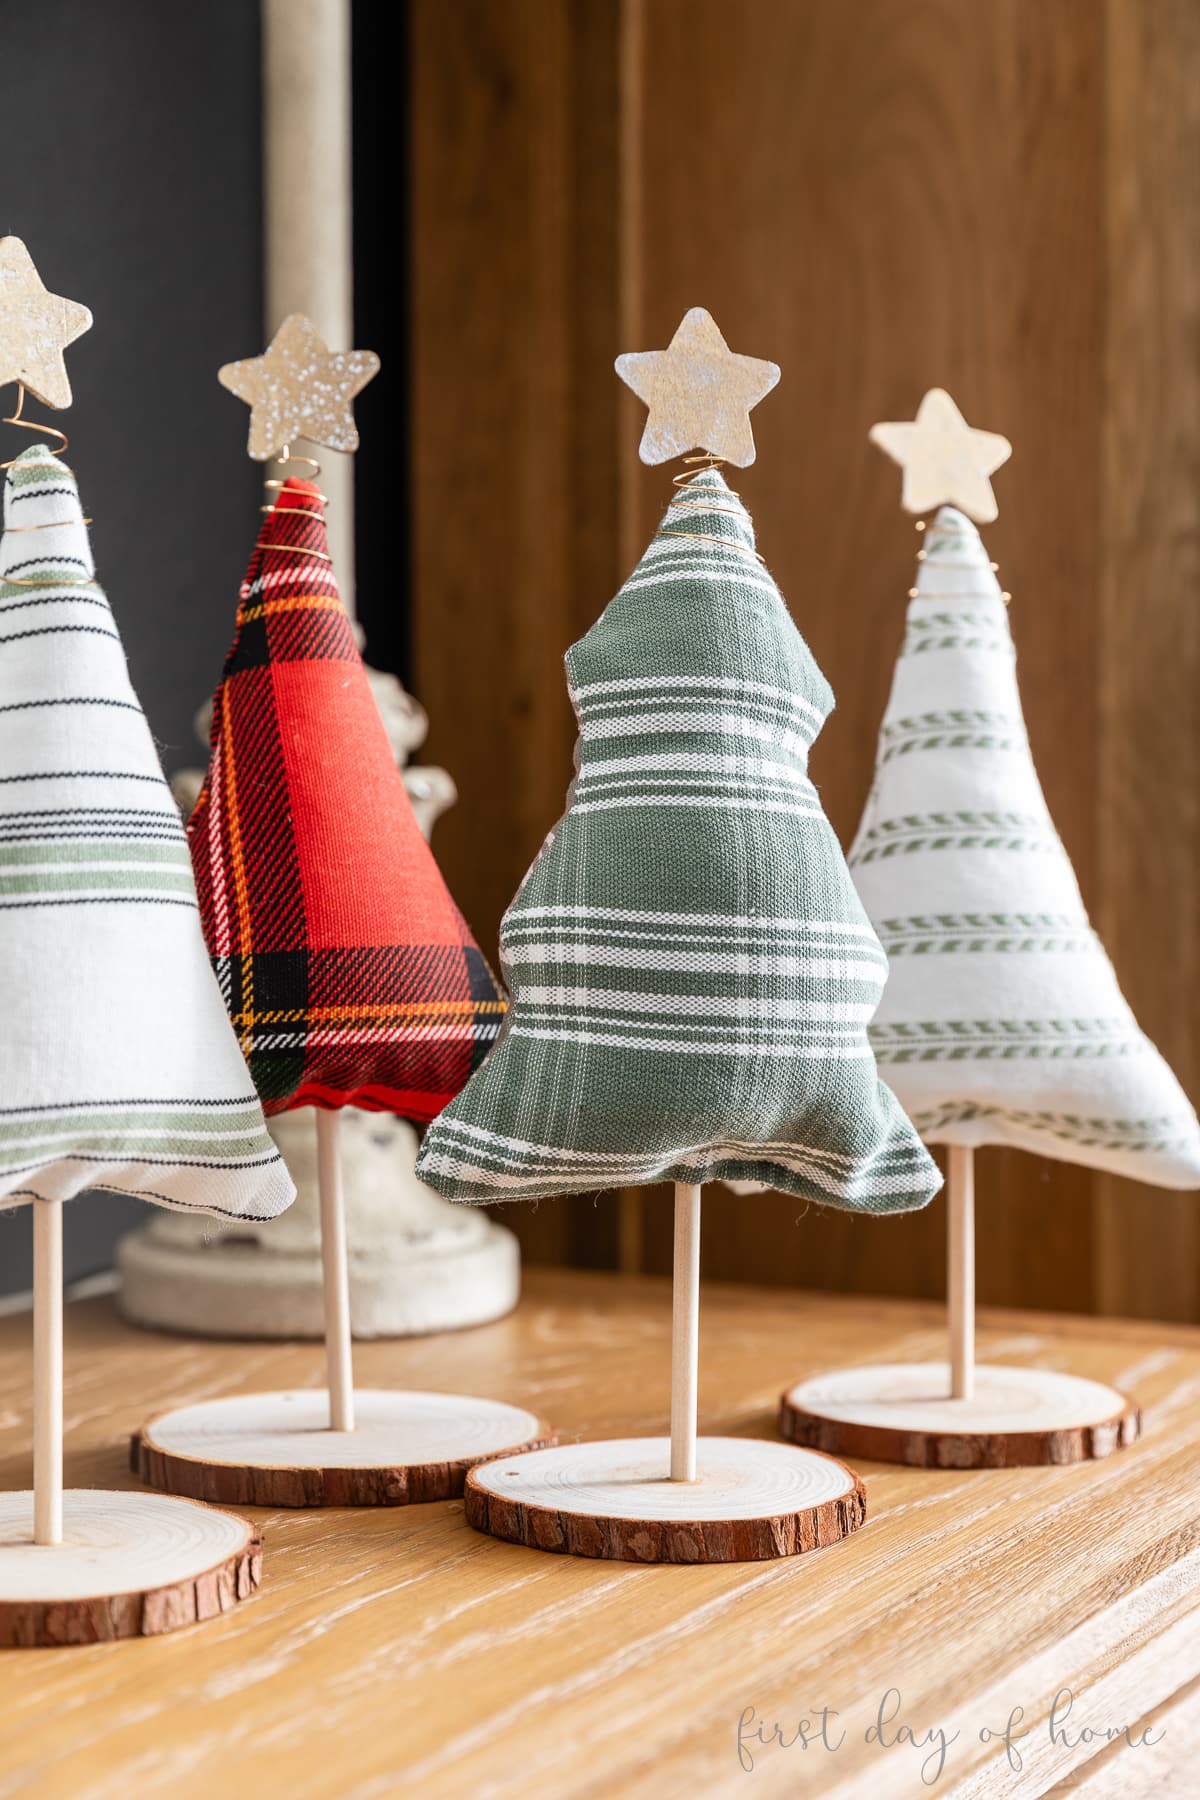
Step 6: Add star tree toppers (optional)
These fabric Christmas felt like they needed a little something “extra” so I opted to paint a few wooden stars that I had in my craft room. I used my favorite gold acrylic paint on some of the stars and applied white and gold paint to other stars using crackle paint.
To create a tree topper effect, I shaped some jewelry wire around a cone and attached it to the stars with hot glue.

I also used Mod Podge Extreme Glitter to add a sparkly touch to some of my wooden stars. This is completely optional, but I think it adds a little magic to these trees.
You can have some fun personalizing your trees with glitter, buttons, ribbon, bows, sequins, or any embellishments you desire. Use whatever matches your home decor for the holiday season.
Are you ready to make your own? Keep scrolling to grab the free printable patterns.
Pin it for later!
Download the Free Patterns
I’m happy to offer my email subscribers a free pattern to make these fabric Christmas trees at home. Instructions come included, but it’s as simple as printing the files, cutting the patterns, and tracing them onto your fabric.
To get the patterns delivered straight to your inbox, sign up below!