How to Make Salt Dough Ornaments with Your Kids


For many families, making salt dough ornaments is a long-standing tradition. There’s nothing better than using your creativity to decorate the Christmas tree or make DIY gifts for the grandparents. Best of all, with only 3 ingredients, this salt dough ornament recipe is easy enough for the kids to make!

This post contains affiliate links, and I will be compensated if you make a purchase after clicking on my links. For more information, please see my disclosures.
Why Make Salt Dough Ornaments?
With salt dough ornaments, the kids will have many hours of entertainment, and they’ll think you are the Greatest [Mom/Dad/Teacher] Ever!
Beyond that, here are my top 3 reasons to make salt dough ornaments:
- Easy. You probably have all of the ingredients (flour, salt, and water) in your pantry or kitchen. (When does THAT ever happen with a recipe?)
- Sturdy. The finished ornaments are rigid and easy to personalize with handprints, fingerprints, stamps, glitter, and just about anything else you can imagine!
- Enduring. The ornaments last a long time, so you can easily store them and look back on your fond memories for years to come.
I’ve created a salt dough ornament video to walk you through all the steps in this Christmas craft. It’s one of my most popular videos to date since you can craft along with me as I decorate each of the ornaments.
For more easy crafting tutorials like this, you can hit the YouTube subscribe button below.
Salt Dough Recipe Ingredients & Supplies

This recipe makes about 15-20 ornaments, which is sufficient for the average family. You can always double the ingredients or make a small-batch salt dough recipe, if desired. See the end of this post for a printable recipe card.
Kids as young as toddlers can participate, and many readers have written to me about making ornaments with their grandchildren. I think the grownups are having fun too.
Ingredients
- 2 cups all-purpose flour
- 1 cup salt
- 3/4 cup lukewarm water
Additional Supplies
- Rolling pin
- Cookie cutters
- Straw or wooden dowel/skewer
- Baking sheet
- Ribbon or twine for hanging
- Optional: paint brushes, acrylic paint, glitter, stamps or other embellishments
If you want your salt dough ornaments to smell as good as they look, try this cinnamon salt dough recipe variation.
Fun fact: The salt acts as a preservative to prevent the finished “cookie” from becoming moldy over time.
How to Make Salt Dough Ornaments
Because this recipe only requires three ingredients, I encourage you to make it a kids craft (with adult supervision)! My twin boys had a blast with it, and we included it in our ultimate summer bucket list!
Warning: Although salt dough ornaments look like cookies, the dough and finished ornaments are not safe to eat.
Step 1: Combine all ingredients
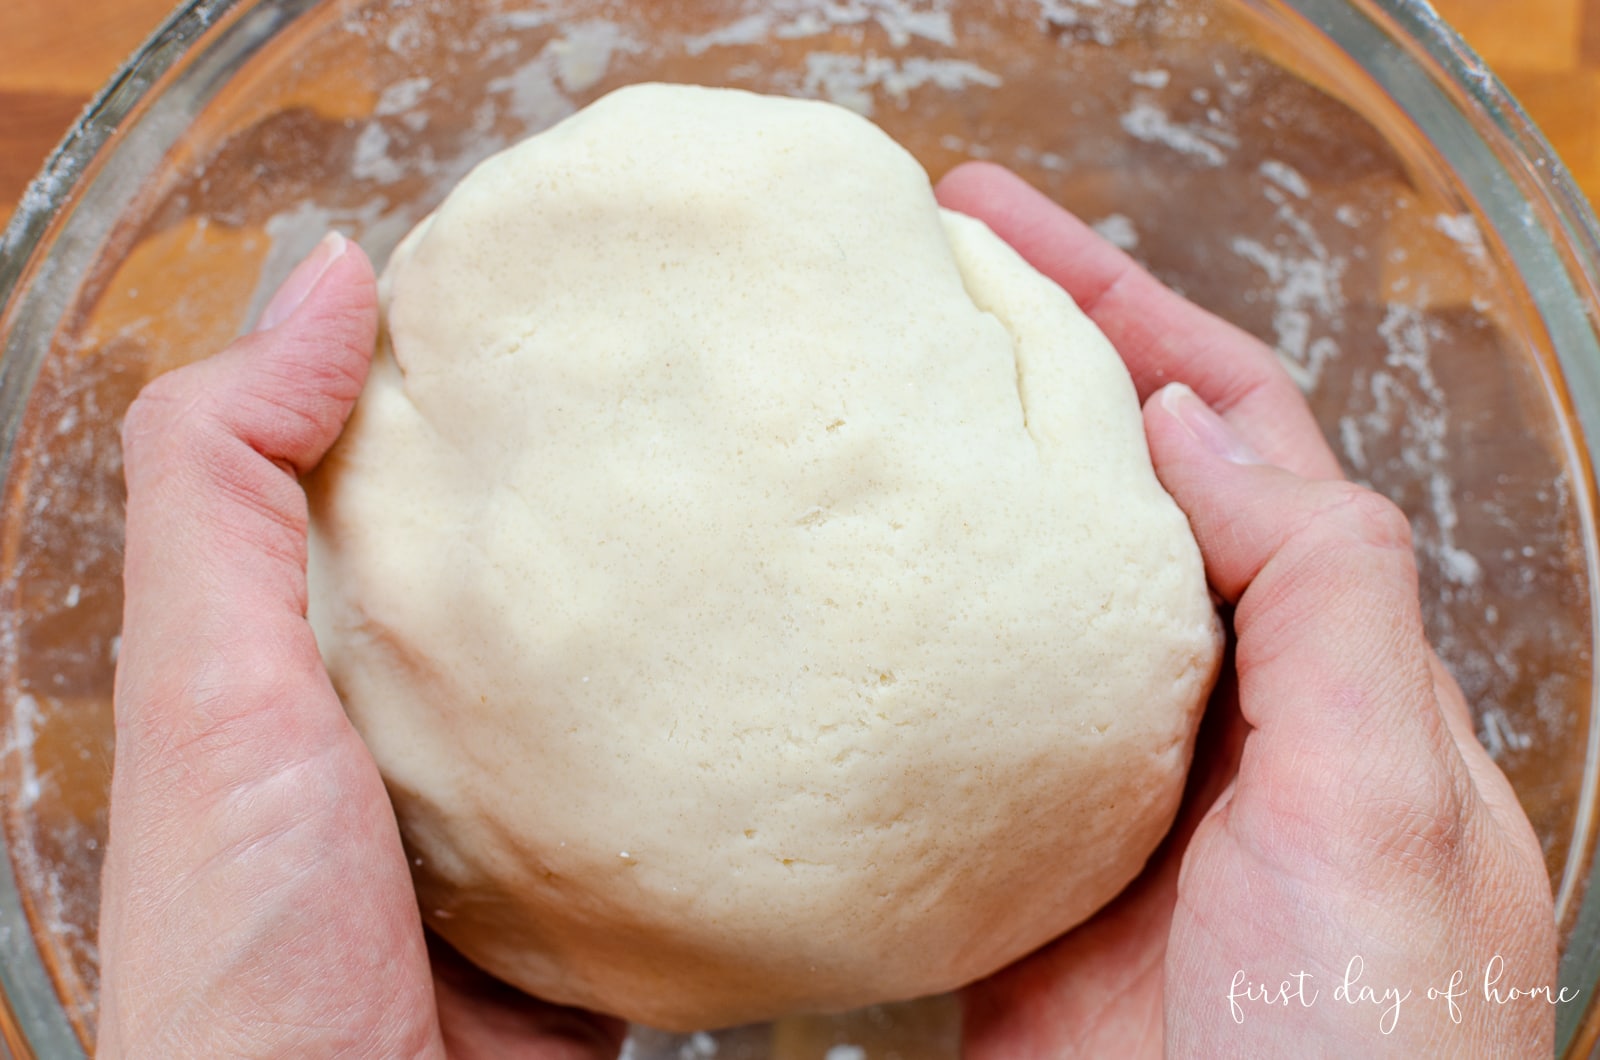
Before you begin, preheat the oven to 250˚F (121˚C). Then, blend the table salt and flour in a large mixing bowl. Gradually add a bit of water and stir the mixture together. Once blended, continue to knead the dough with your hands until it reaches your desired texture.
The dough should feel smooth and consistent. If the dough feels too sticky, add more flour. If it’s too dry, you can gradually add more water.
Make Salt Dough Ahead of Time
You have the option of storing the dough in the refrigerator for 1-2 days. Simply wrap the dough in plastic and place it in a ziplock or airtight container.
2. Roll out the salt dough
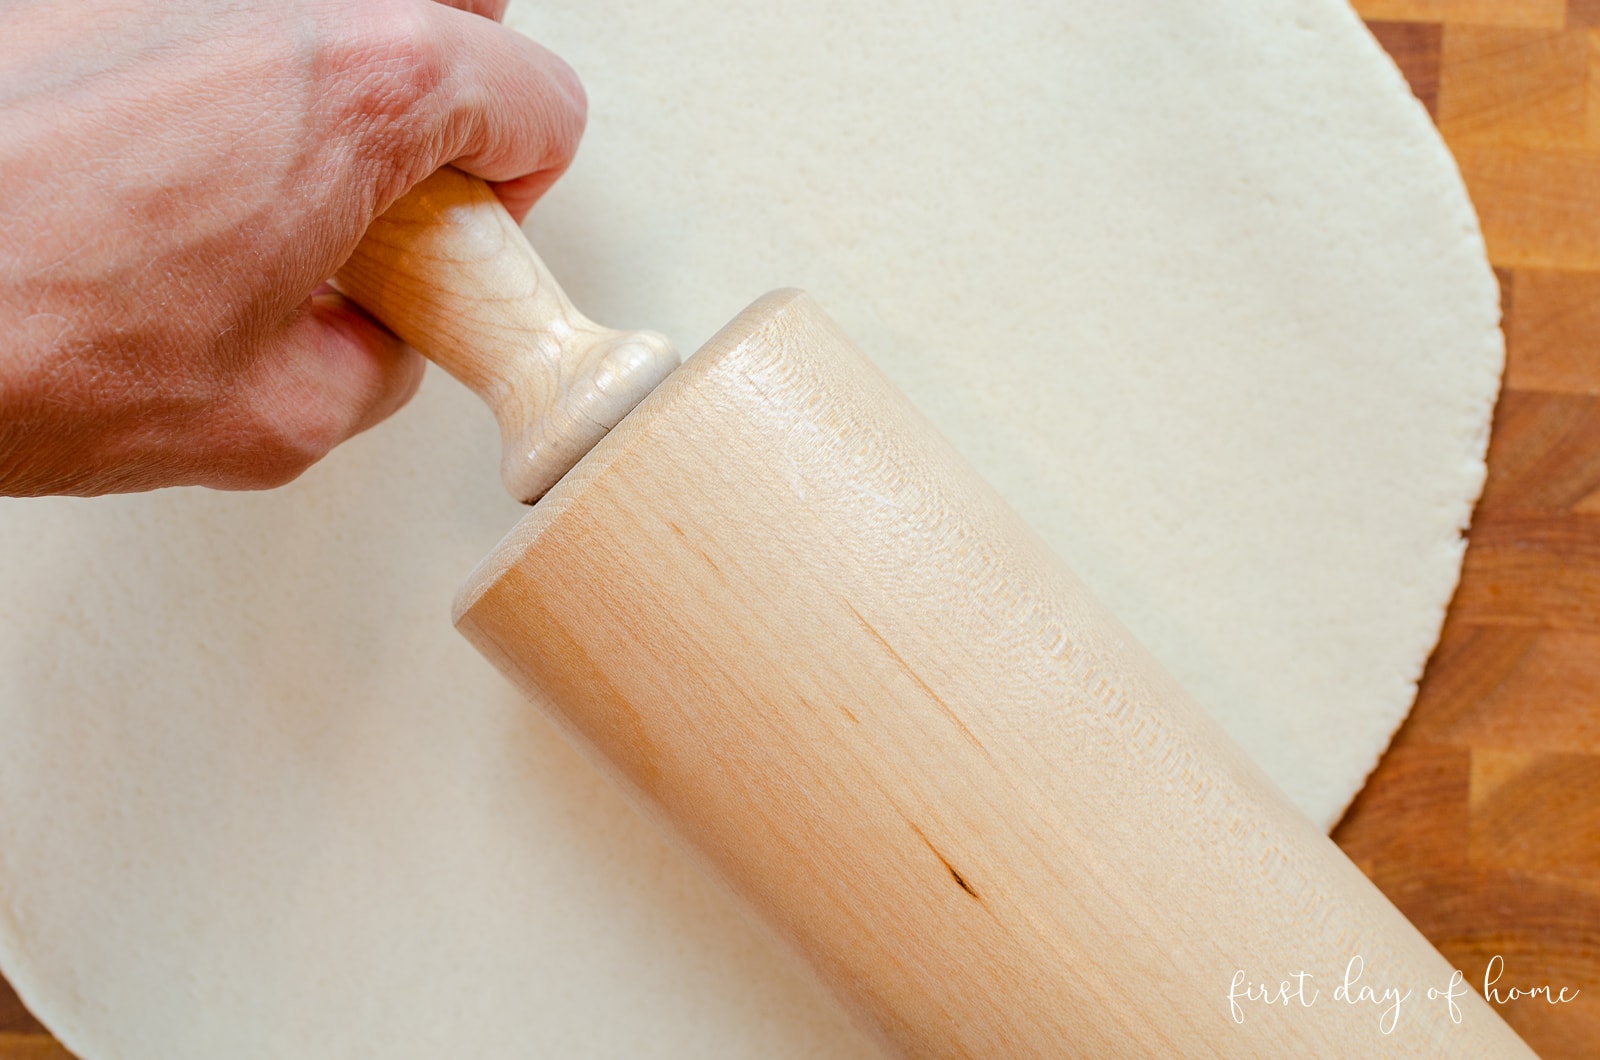
Roll dough into a thin layer about 1/4 inch thick, or sculpt into the desired shape. (I created my own stems for my painted foam pumpkin tutorial.)
Some salt dough ornament recipes mention using parchment paper to roll out the dough. I usually find the dough thick and moist enough that all I need is a cutting board and rolling pin.
3. Cut shapes in the salt dough using cookie cutters
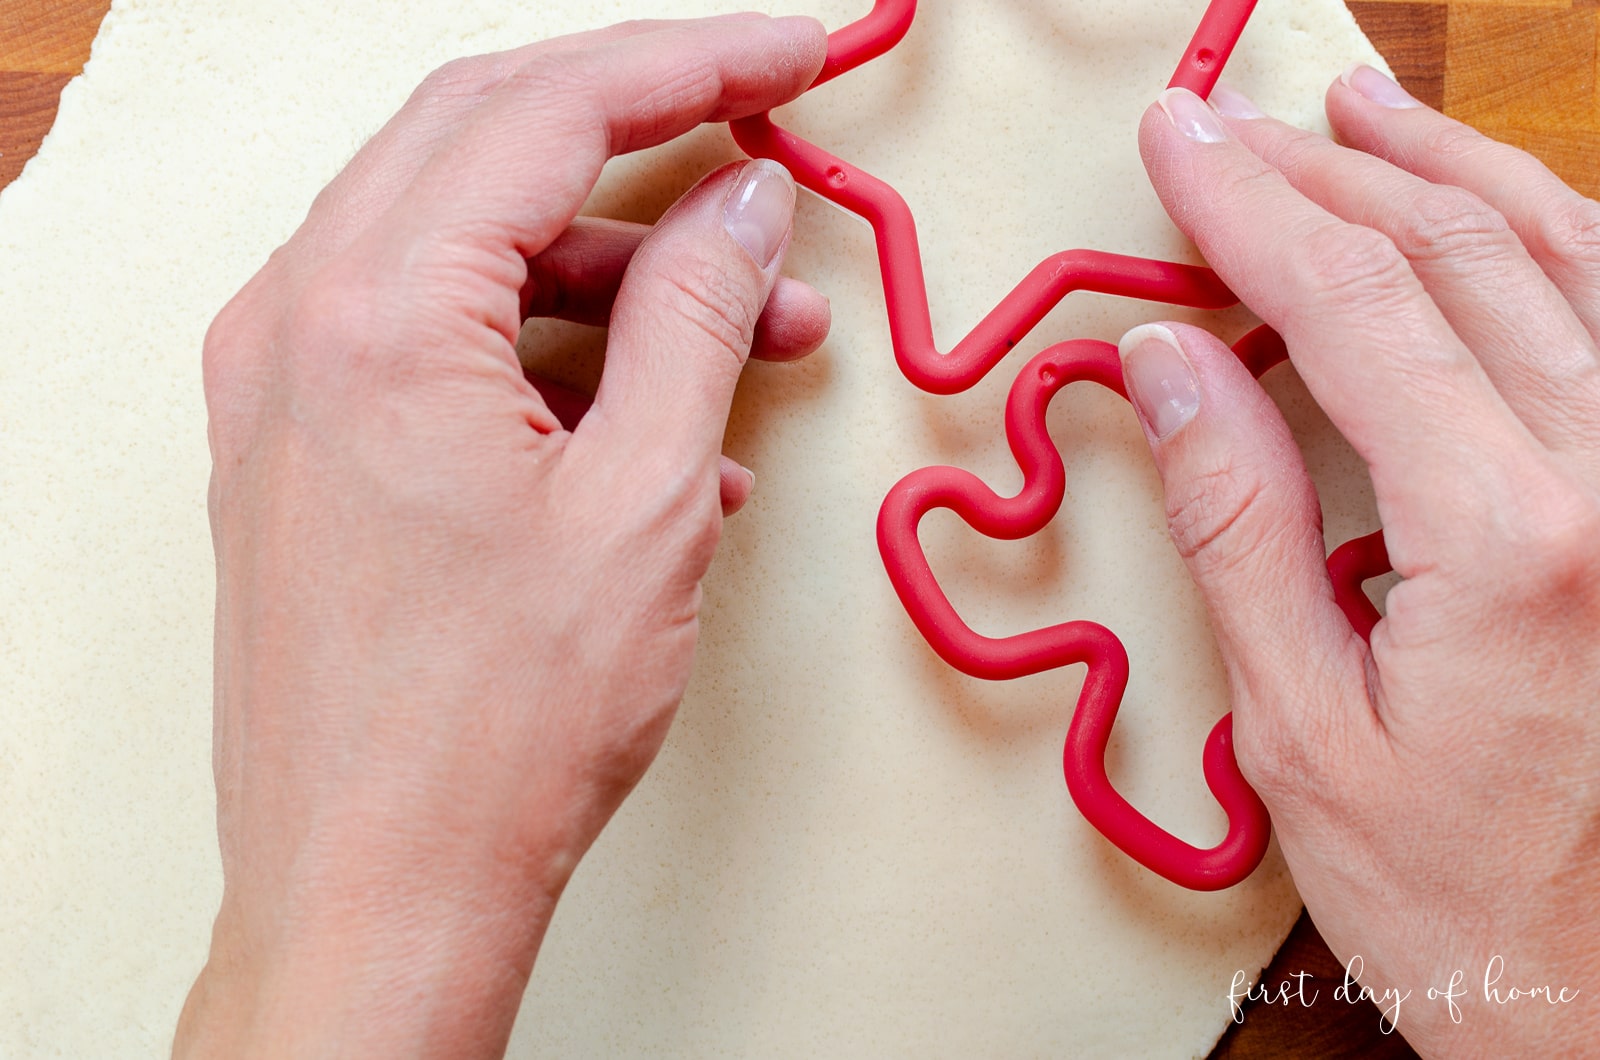
I happened to find a great set of Christmas cookie cutters at Dollar Tree, but you can find a similar set here.
Tip: At this point, you can also have the kids place a hand in the dough or add a thumbprint. Nothing says “Christmas” like handprint ornaments!
4. Make small holes in the ornaments
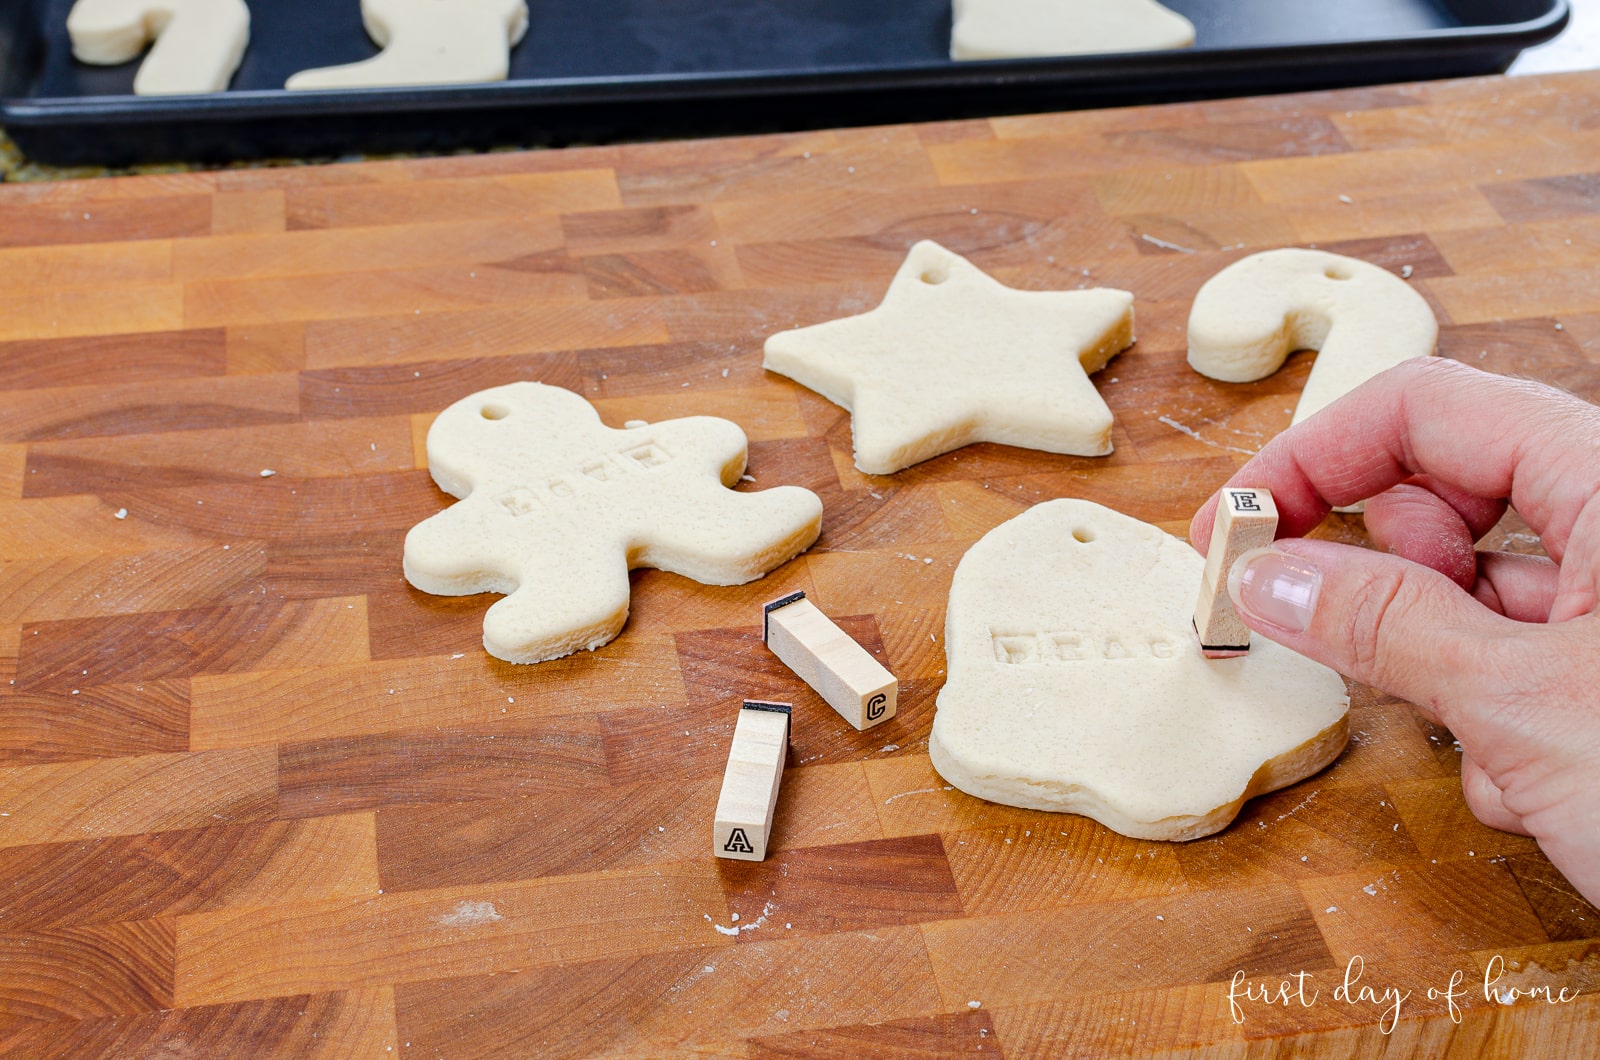
Using a regular drinking straw or dowel, make a small hole in the top of each ornament. You can also choose to add other details, like stamped words with press-in letters.
5. Bake the ornaments or let them air dry (no-bake option)
Bake the salt dough ornaments in the oven at 250°F for 1.5 to 2 hours until the dough is completely dried.
For those with more patience, you can also air-dry salt dough ornaments. If you choose the no-bake method, make sure your ornaments are very thin, and allow for 4-7 days for the ornaments to dry completely.
Some readers have asked if it’s better to bake or air dry salt dough. Air drying can sometimes yield better results, but you run the risk of decorating the ornaments before they have fully dried. I have never had an issue with baking the ornaments using the ingredient ratio outlined above.
6. Paint and decorate your salt dough Christmas ornaments!
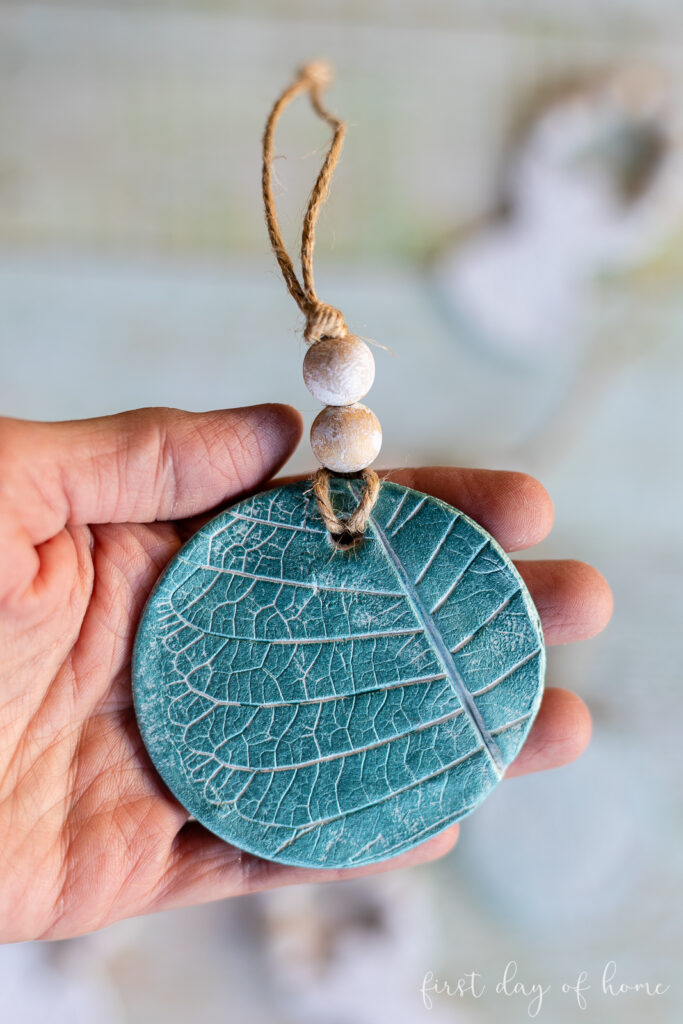
You have unlimited options to decorate your ornaments once they have cooled completely. I recommend using acrylic paint, glitter, pom-poms, ribbon, fabric, or anything else your kids might enjoy.
In my related video, you’ll see we had some fun with it!

I found a GORGEOUS gold leaf paint that I used for the salt dough Christmas ornaments shaped like bells (shown above). However, I don’t recommend using this paint around small children, since the fumes are stronger than normal acrylics.
Tip: For ornaments that sparkle, apply glitter while the paint is wet, or use Mod Podge before/after applying glitter. (See FAQs below.)
After the paint has dried, you can attach ribbons and have fun hanging your ornaments on the Christmas tree or gifting them to friends and family. They make adorable keepsakes that many will cherish over the years.
I’m also now offering free printable Christmas gift tags to use with your ornaments.
How to Preserve Salt Dough Ornaments
When stored properly, salt dough ornaments will last many years. The salt itself acts as a preservative.
To preserve your salt dough ornaments properly, make sure you have fully dried the ornaments (at least one week if air-drying). Then, wrap them in tissue paper or packing paper before storing them in a low-humidity location.
For good measure, you can always apply a sealer like Mod Podge or polyurethane spray See the FAQs below for more details.
Salt Dough Ornament Ideas
Making salt dough decorations has become my latest obsession! After making these ornaments, we created another batch for a custom salt dough Christmas card holder.
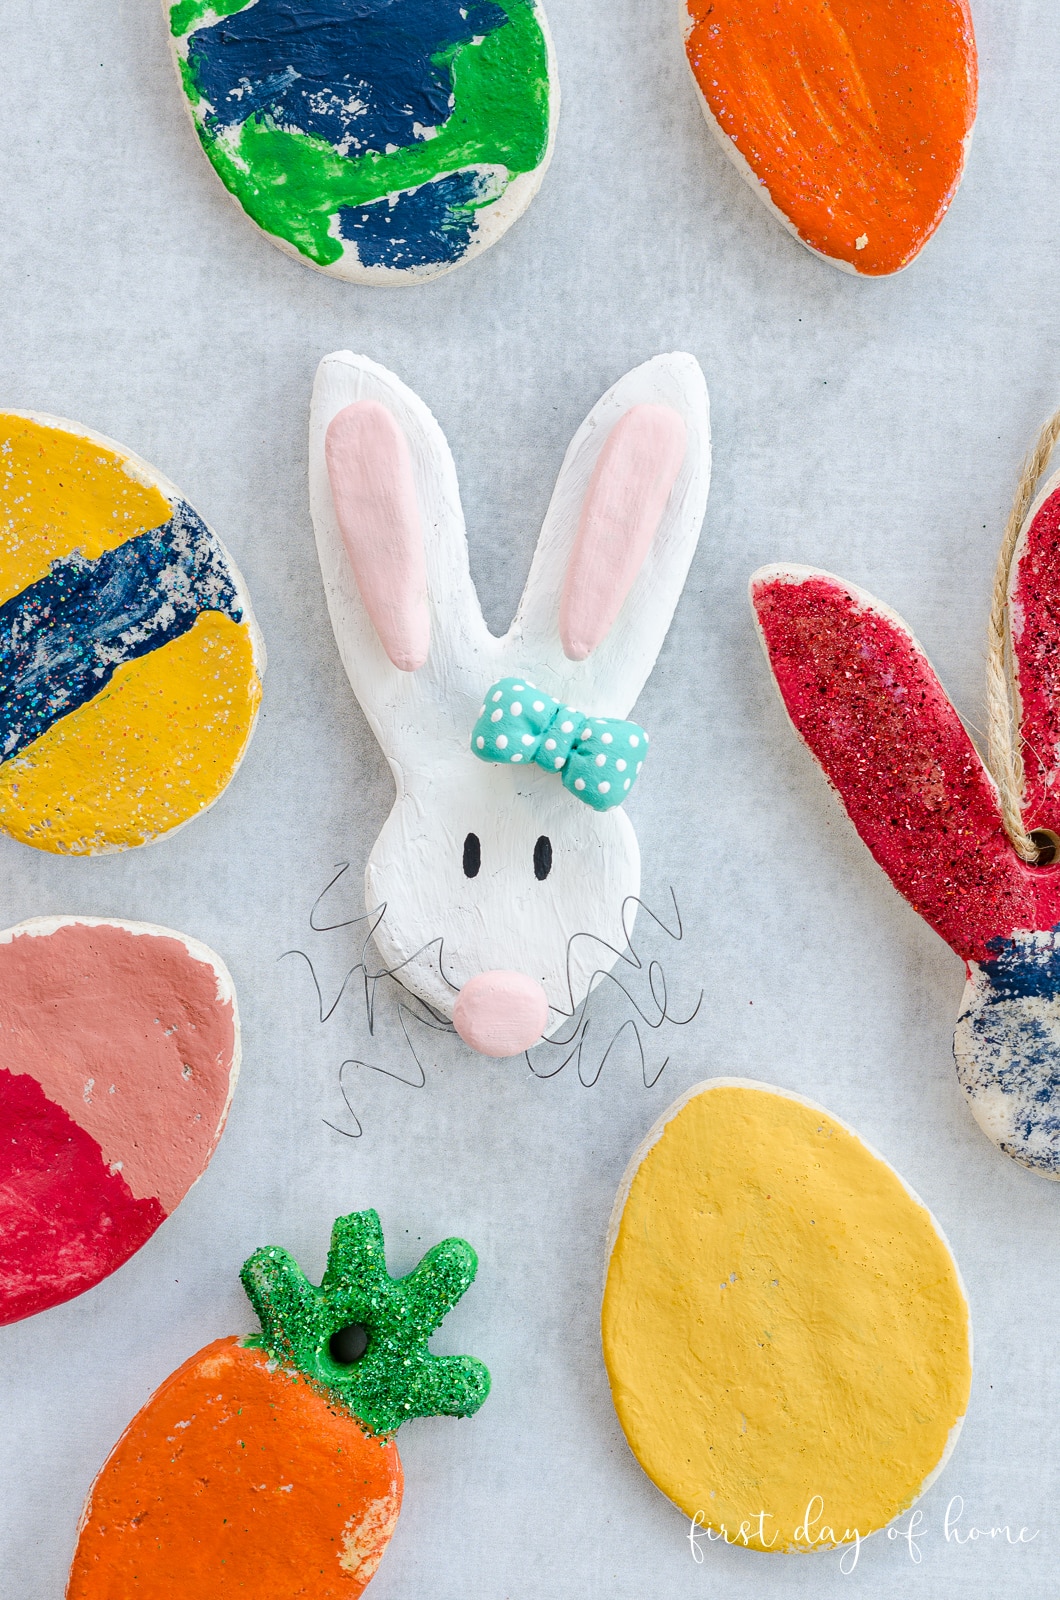
The kids also enjoyed helping me cut salt dough shapes for my Halloween mantel decor, and around Easter, we used a small batch salt dough recipe for the ornaments below.
For more inspiration, be sure to check out these 29 salt dough crafts that you can make nearly any time of year. You’ll find ideas for Valentine’s Day, Earth Day, Father’s Day, Halloween, and more. You are only limited by your imagination.
Pin it for later!

I’d love to see YOUR photos, so please feel free to share on Instagram and tag me at @firstdayofhome!

Salt Dough Ornaments
Equipment
- Drinking straw or dowel
- Ribbon or twine for hanging
- Optional: acrylic paint, glitter, or stamps
Supplies
- 2 cups all-purpose flour
- 1 cup salt
- ¾ cup water
Instructions
- If baking, pre-heat the oven to 250°F.
- Blend salt and flour in a large bowl. Then gradually add water and knead the dough with your hands until it reaches your desired texture. If the dough feels too sticky, add more flour. If it’s too dry, you can gradually add more water.
- Roll dough out until 1/4 inch thick or less, depending on desired thickness.
- Cut dough into shapes with cookie cutters, or sculpt into desired shape. Press handprint or stamps into soft dough if desired.
- Using a drinking straw or dowel, make small holes in the ornaments to hang them later.
- Let salt dough ornaments air dry for 4-7 days (no-bake option), or bake on cookie sheet at 250°F for 1.5 to 2 hours or until all moisture is gone.
- Decorate salt dough ornaments with acrylic paint, glitter or other decorations of your choosing. Hang with ribbon or twine.
- Optional: Seal the ornaments with acrylic spray sealer or polyurethane sealer, if desired.
Notes
F.A.Q.s
-
What do you seal salt dough ornaments with?
The simplest way to seal your ornaments is with Mod Podge. Apply 1-2 coats of Mod Podge and wait 24 hours for it to set completely. You can choose a glossy, sparkle, glitter or matte finish depending on your level of desired shine. I especially find this technique useful when applying glitter.
-
How do you make salt dough ornaments shiny?
Some recipes suggest using a polyurethane spray to seal ornaments, but I prefer Mod Podge Clear Acrylic Sealer for sealing non-glittered ornaments.
If you want to seal ornaments with glitter, I recommend using 1-2 coats of Mod Podge Gloss Finish. -
Can you use Kosher salt to make salt dough ornaments?
Yes, you can use Kosher salt to make this salt dough ornament recipe, but the flour and salt will not blend as evenly, resulting in a rougher texture. I highly recommend sticking with table salt.
-
How long do salt dough ornaments last?
If you store your finished salt dough ornaments in a cool, dry place, they can last for decades. One friend commented that her salt dough ornaments have lasted nearly 50 years!


Hi! I am making these with my students for the holidays. I decided to bake them and noticed that some of them have a large bubble or are puffing up in the middle(for last of better way of describing) in them? Do you know how to prevent this? Thanks so much!
Hi Emily. I’m glad you’re giving this a try! Usually salt dough ornaments will puff up if they are too thick or air bubbles are present. Letting them air dry may help if you have the time, or you could also try baking them at a lower temperature. Having thinner ornaments will definitely help. Good luck, and have fun!
If children mold their own ornaments is there a way to attach dough to dough? For example; three circles to make a snowman?
Hi Patt. Yes, you can mold anything you like with this dough, just like you would with Play-Doh. I suggest having the kids make three circles and then squeeze them together to form a snowman before baking the ornaments or letting them air dry. I hope this helps!
Can you add fragrance oil to this recipe?
Hi Sandra. Sure, you can add fragrance oil either when the dough is done drying or when it is still soft. The only issue with adding it when soft is that you may get the fragrance on your hands and cutting board as you knead the dough and spread it. In my experience, fragrance oils can be very potent. You might try diluting some of the oil in equal parts water and witch hazel. Witch hazel helps the oil to blend with the water. Then you can just spritz the ornaments with your fragrance (and also use the fragrance in your home as a room spray).
Thanks for sharing! Do they last long?
Hi Vanessa! Yes, the ornaments can last decades because the salt acts as a preservative. I hope you enjoy making some!
This looks so fun! What a great activitiy to make with kids so they can give to grandparents!
Thanks so much, Suzanne! The kids do have a great time with this.
I baked these last night and realized this morning that some of them were still a little soft. Is it okay to bake them again or will they eventually air dry?
Hi Chelsey! Yes, you can definitely just let them air dry, but there’s no harm in baking them some more either. I would just pop them into the oven when you turn it on so they can warm up with the oven. (If you’re not in a rush, I’d probably just let them air dry.) Have fun decorating them! Best, Crissy
This easy recipe works like a charm every time. It’s so simple, and I’ve had good luck halving or doubling the recipe as needed.
This looks so easy and fun! Your ornaments are adorable, Crissy!
Thank you so much, CiCi! The boys had a great time decorating theirs and putting them on a mini tree. I hope you enjoy it! Happy Holidays!
These are adorable, Crissy!
A long time ago I had a student in a wheelchair with a childhood disease that left him unable to walk and with very limited use of his hands. His mom came to school with him every single day and was his aide. I loved having both of them in my classroom. At Christmas Joseph and his mom made three salt dough ornaments for me and they’ve been on my tree every single year since I received them. Joseph’s disease killed him when he was in high school, so the ornaments that he helped to make are extra special.
Oh, Paula, that’s such a special story. One of the things I love about pulling out ornaments each year is being reminded of special times or special people that came into my life. It is so tragic when a life is taken so soon, but I’m glad you have that keepsake from your time with him. I’ll bet his mom would be so touched to know that you still have those ornaments. I always love reading your posts because of the many items you share that have stories to tell. Thanks for sharing that one with me.
Ryker would LOVE making these salt dough ornaments, and they would be great to add to a wood bead garland!
Oh, I’ll bet he would love it! I love the idea of adding them to a wood bead garland, too! That would look so pretty. Thanks for stopping by, dear Julie!