• Home
  • The Blog
    • Crafts
      • Floral
      • Paper
      • Sewing
      • Seasonal Crafts
    • Home & Garden
      • Everyday Decor
      • Seasonal Decor
      • Garden
      • Parties
    • Recipes
    • Free Printables
    • Gift guides
  • About
    • About Crissy
    • VIP Newsletter
    • Disclosure
  • Contact

First Day of Home

Crafts - Decor - Inspired Living

  • Home
  • Crafts
    • Floral
    • Paper
    • Sewing
    • Seasonal
  • Home & Garden
    • Everyday Decor
    • Seasonal Decor
    • Garden
    • Parties
  • Recipes
  • Free Printables
  • Become a VIP
  • About
    • About Crissy
    • Disclosure
    • Contact

Last updated: February 29, 2020 in Arts & Crafts· Paper· Parties & Events

How to Make DIY Tissue Paper Pom-Poms (Multicolor Tutorial)

Jump to How-To
Please support this site by sharing!
  • 1K
    Shares

DIY Multicolor Tissue Paper Pom Pom Easy Tutorial
Tissue paper pom pom tutorial
DIY tissue paper pom poms
Tissue paper pom poms complete guide and tutorial
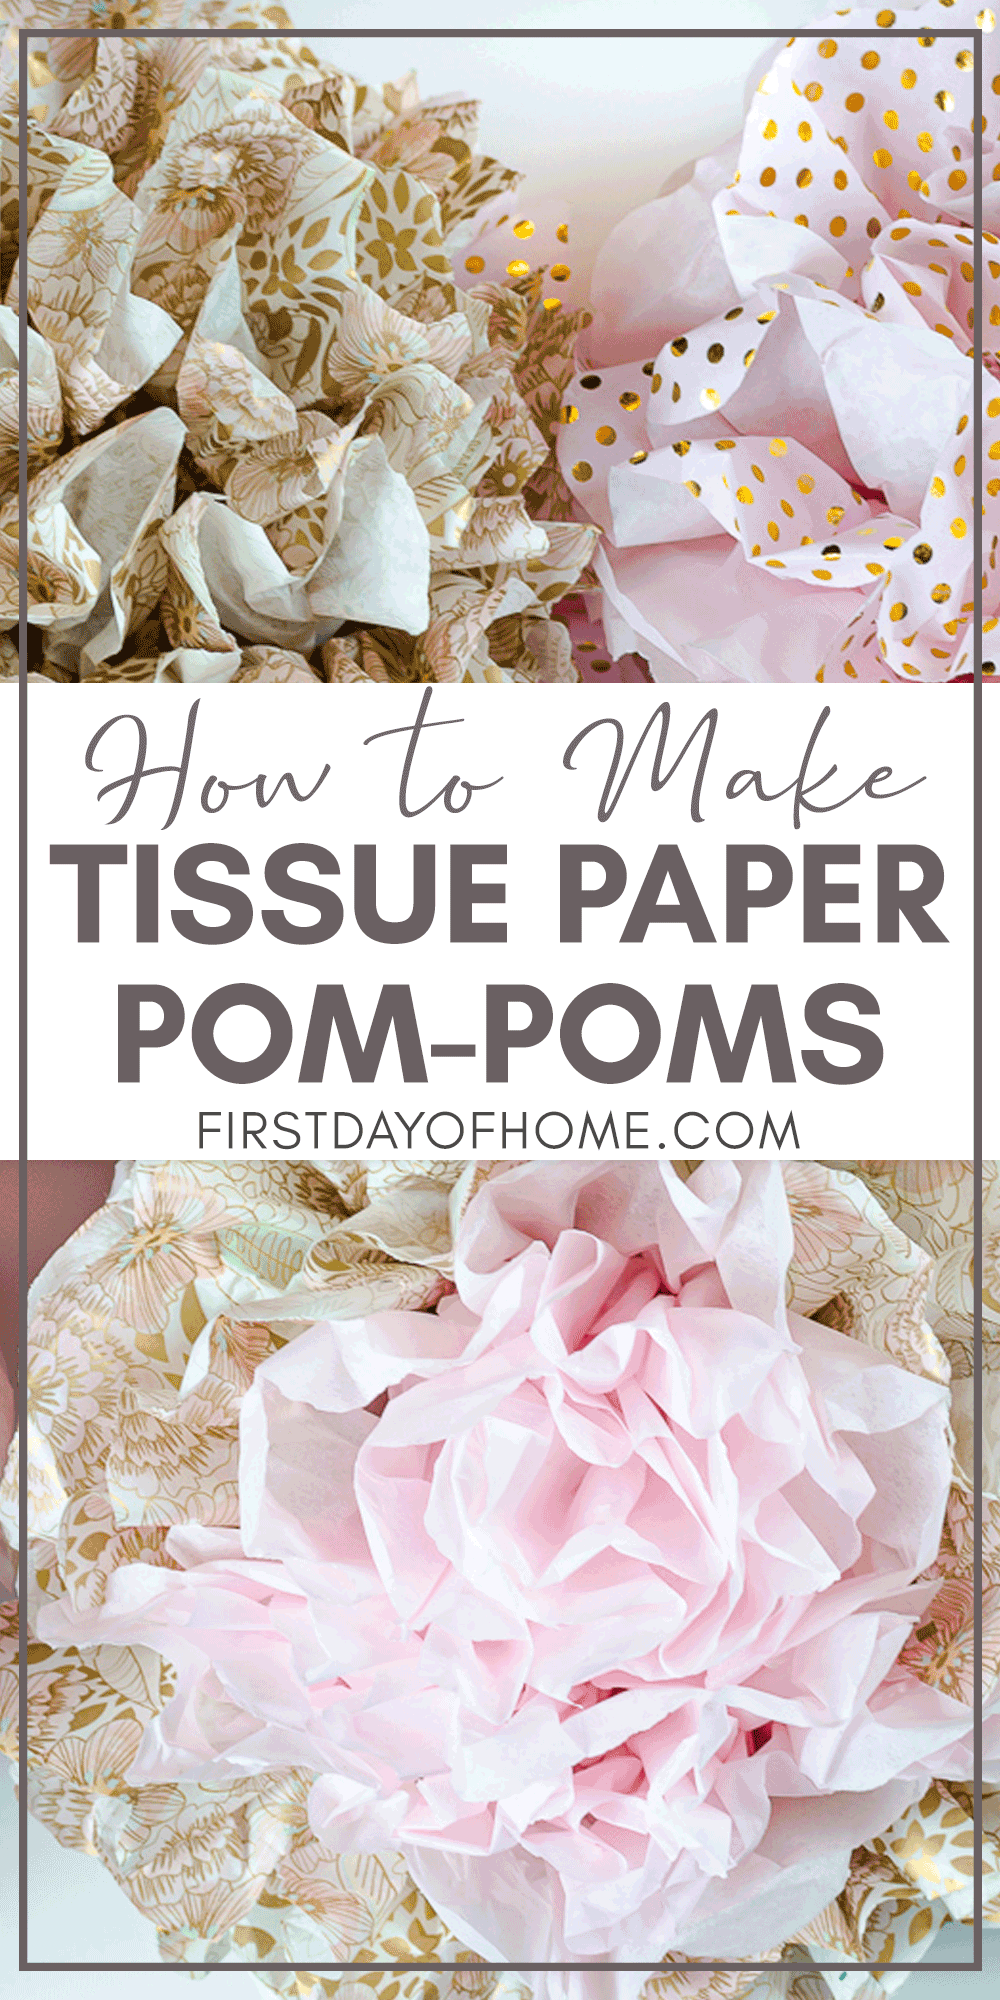
DIY tissue paper pom poms (paper flowers) you can make in multiple colors

Have you ever wanted to make your own pretty tissue paper balls to hang for party decor? Today, I’m bringing you my special tutorial to make DIY tissue paper pom-poms with multiple colors that look like flowers. Creating these beauties is easier than you think!
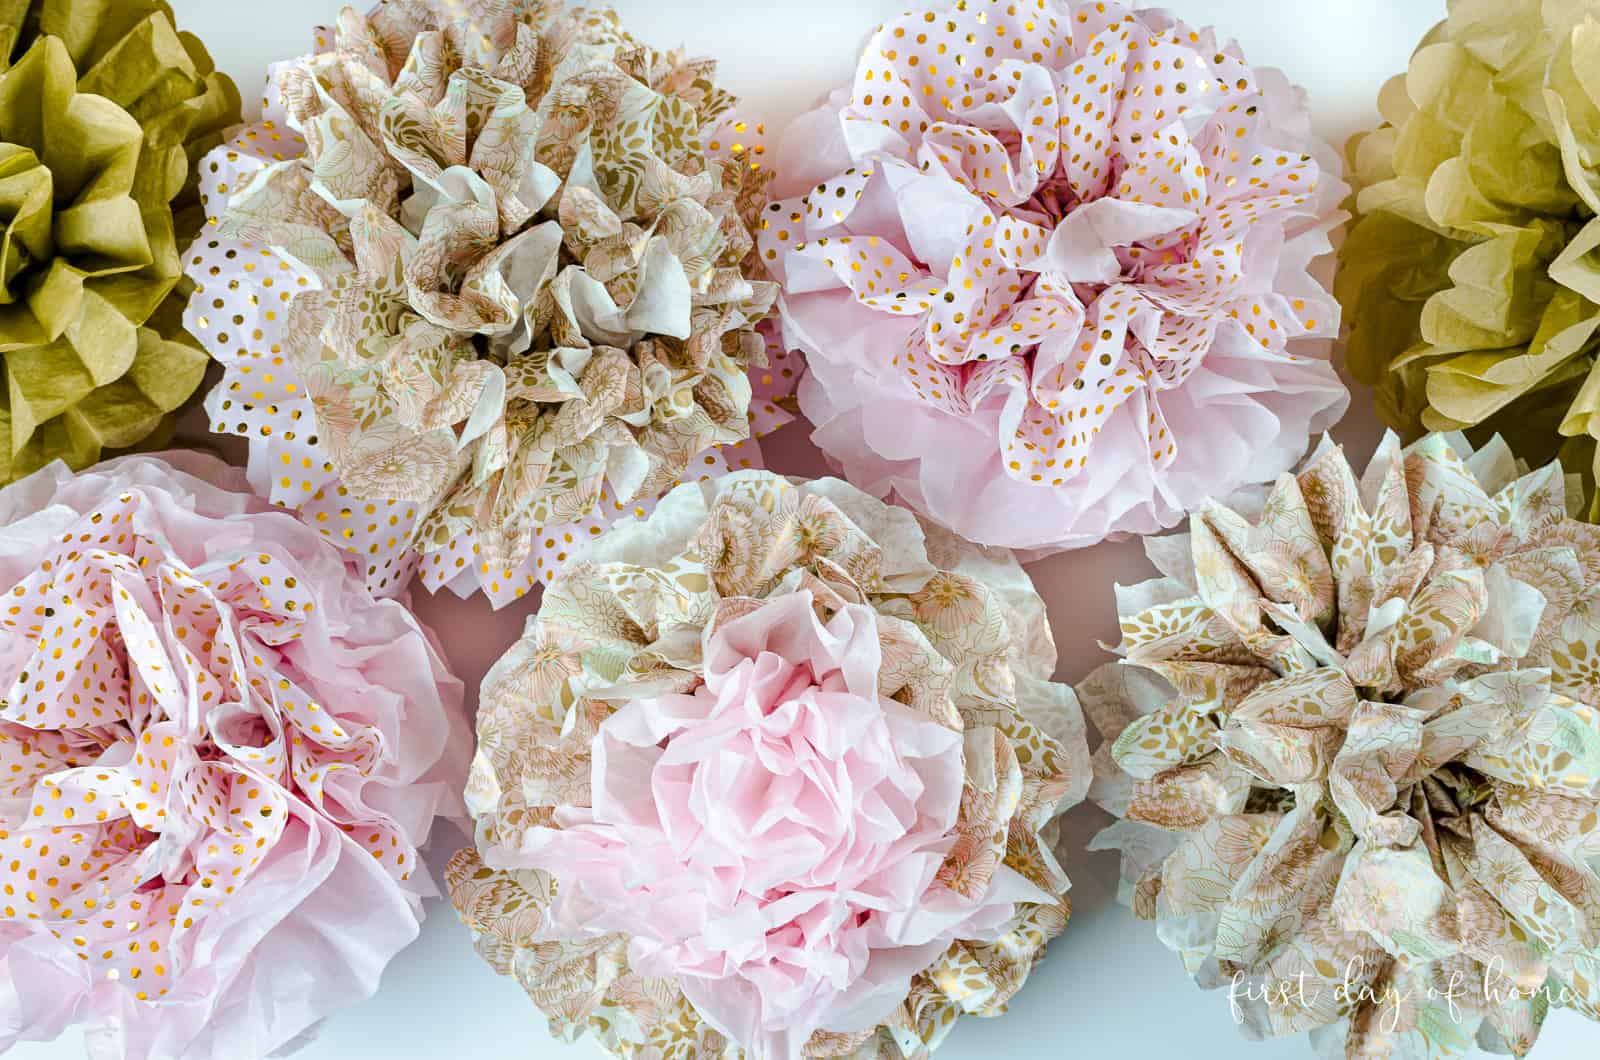
Multicolored tissue paper pom poms in pink and floral patterns

Multicolored DIY tissue paper pom poms

This post contains affiliate links, and I will be compensated if you make a purchase after clicking on my links. For more information, please see my disclosures.

I recently posted my free party-planning printables to help you organize your next event, and I devoted one section to party decor. Pom-poms always make the decor list when I’m hosting birthdays, showers or special events.

When I threw a bridal shower for my niece, I included pom-poms as part of my decorations for the fireplace mantel and cake table. I also added some to my mimosa bar, which you’ll see later in this post.
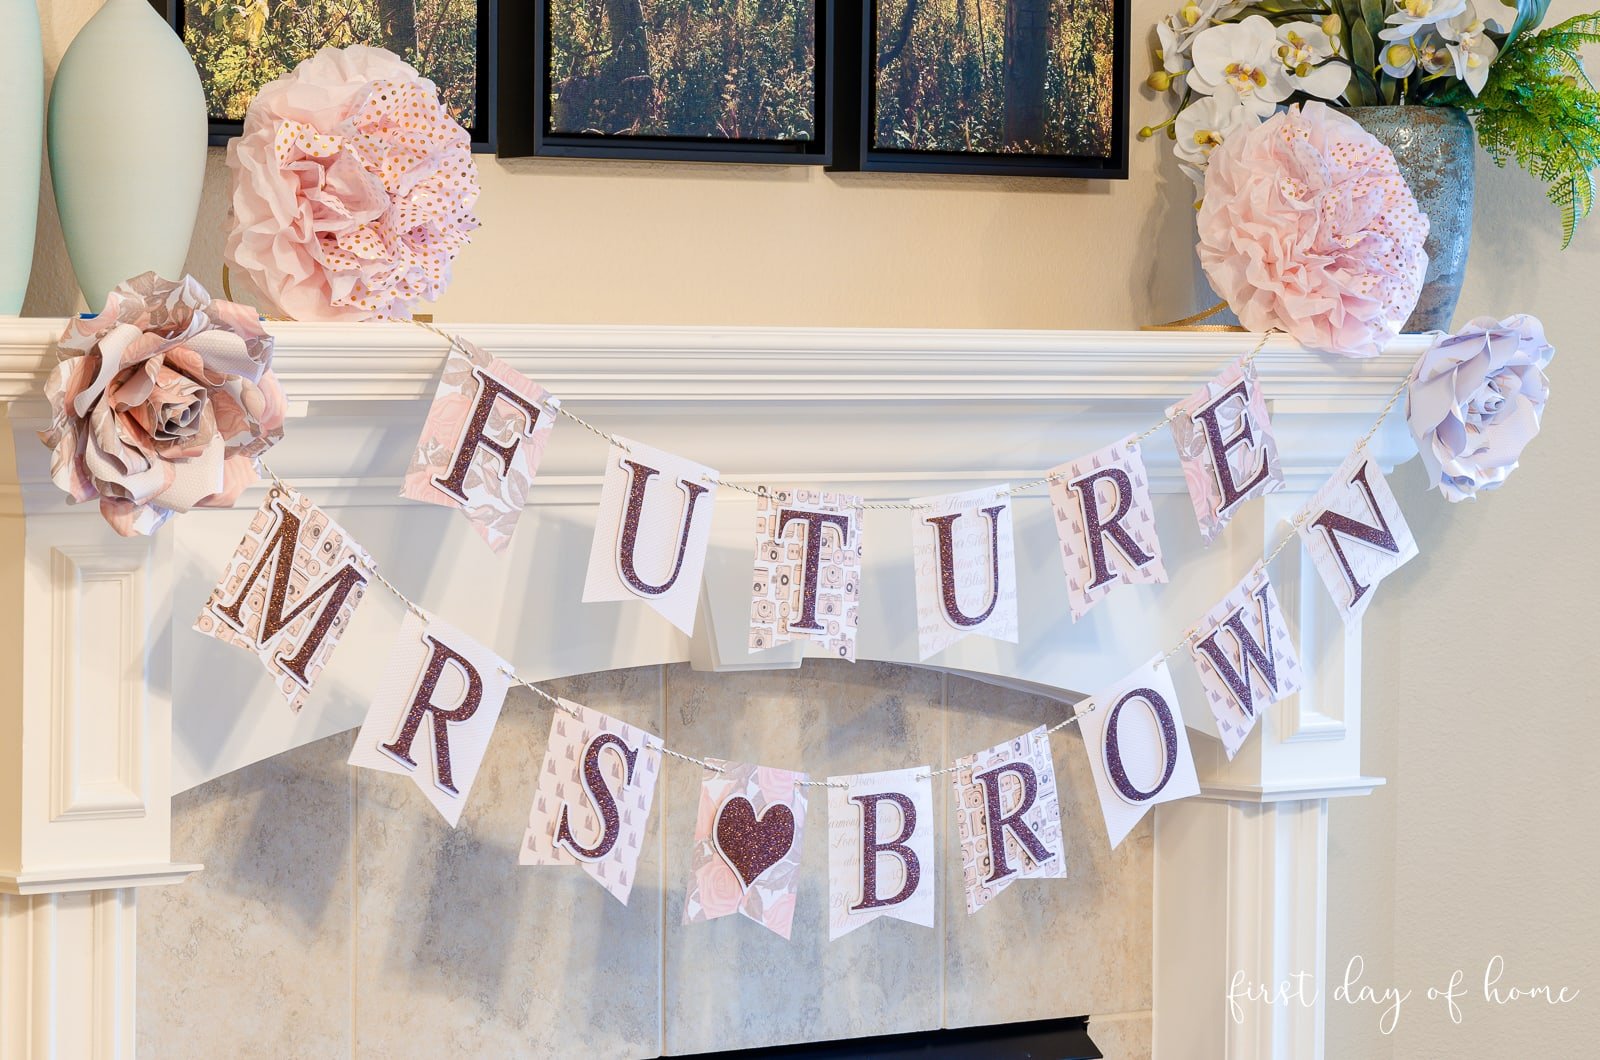
Bridal shower banner decorations saying "Future Mrs."

Supplies for Multicolor Tissue Paper Pom-Poms

These tissue paper pom-poms require only four items. How easy is that?

  • Tissue paper (8 sheets per pom-pom)
  • Scissors
  • Ribbon (alternative: floral wire)
  • Measuring tape or ruler (optional)
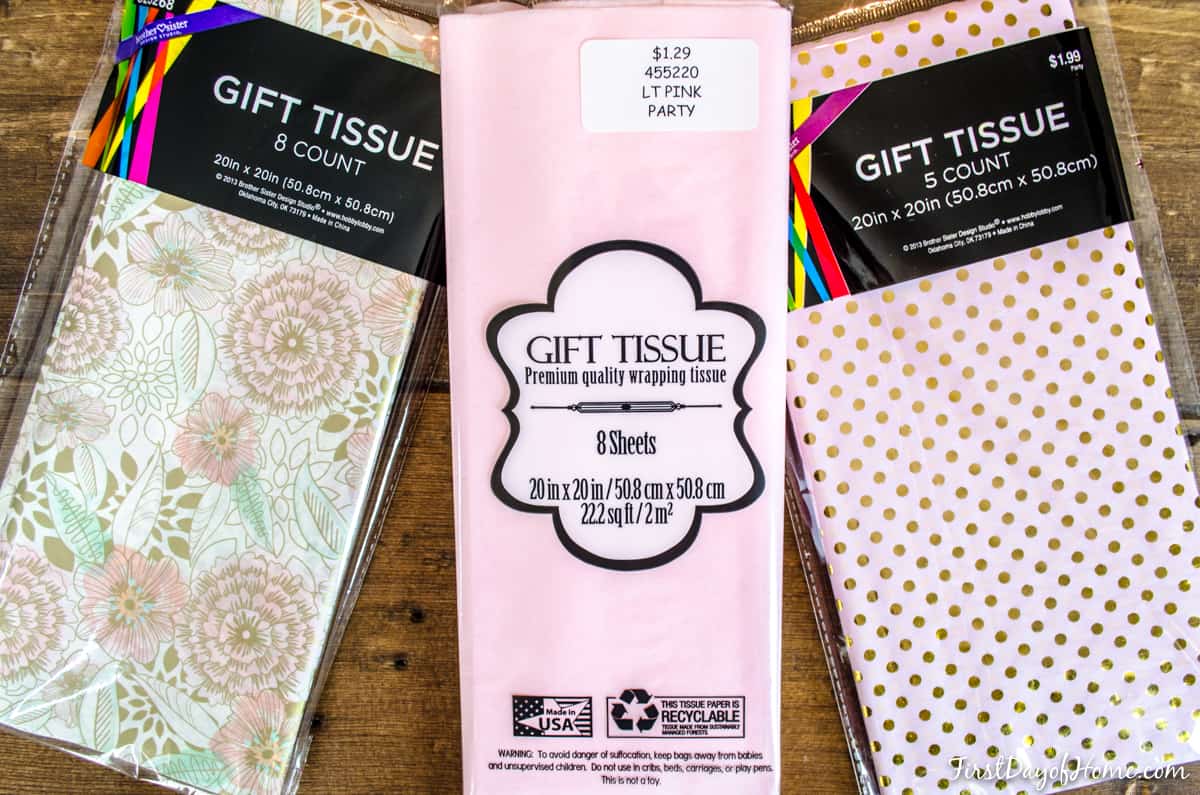
Tissue paper used in tutorial on how to make tissue paper poms

Tissue paper for multicolor pom-poms

If you’re looking for a great collection of coordinating tissue paper, I love this combo you can purchase on Amazon. Often, this is the best option for getting tissue paper quickly and at an affordable price.

Pink and green multi colored tissue paper pack for paper pom pom tutorial

Pink and green patterned tissue paper combination pack 

Steps for Multicolor Tissue Paper Pom-Poms
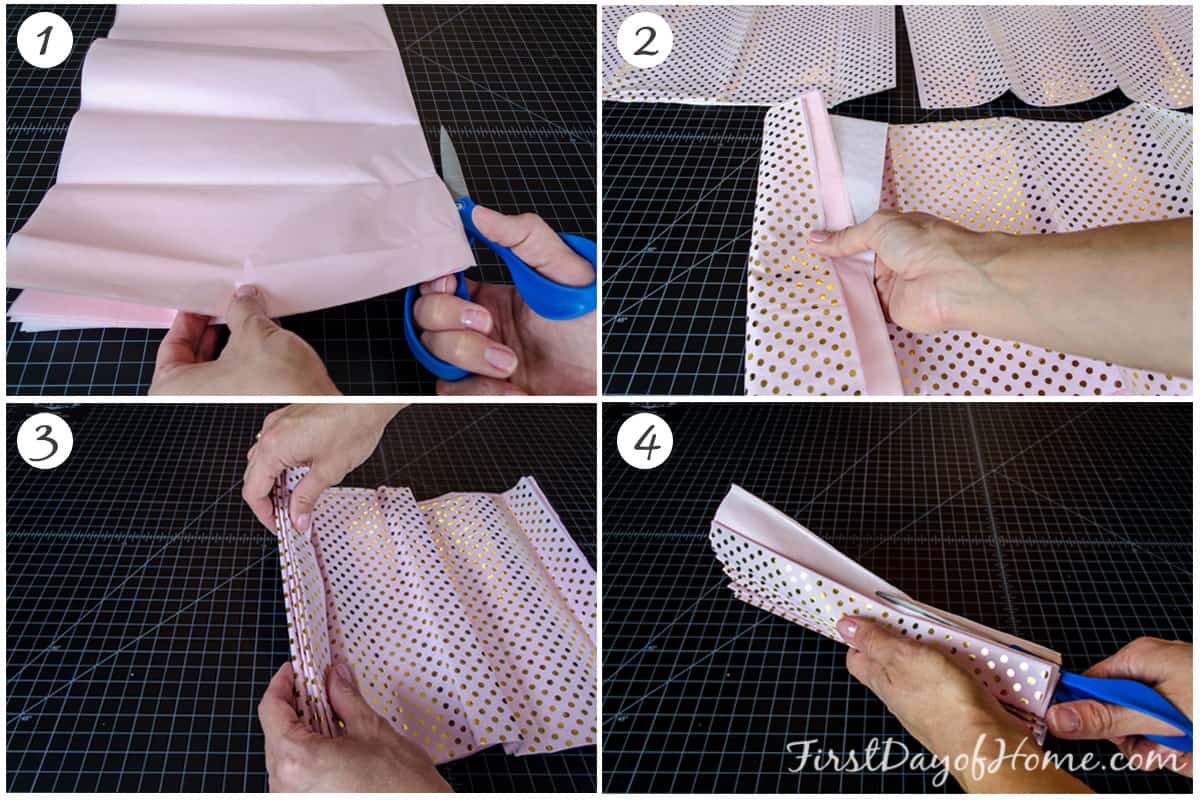
First four steps in making multi coloured paper pom poms

  1. To begin, cut your tissue paper in half along the shortest edge. For example, my tissue paper package contained eight sheets each measuring 20 x 20.5 inches, so I cut through all eight layers to form two stacks of 10 x 20.5 inches.
  2. For multicolor pom-poms, you will replace 1-2 sheets of tissue paper with an alternate color on both the top and bottom layers. Make sure any patterned tissue paper faces right-side-out on both sides.
  3. Accordion fold the layers of tissue paper, in one-inch segments.
  4. Once you’re done folding, cut off any excess tissue paper that might stick out unevenly.
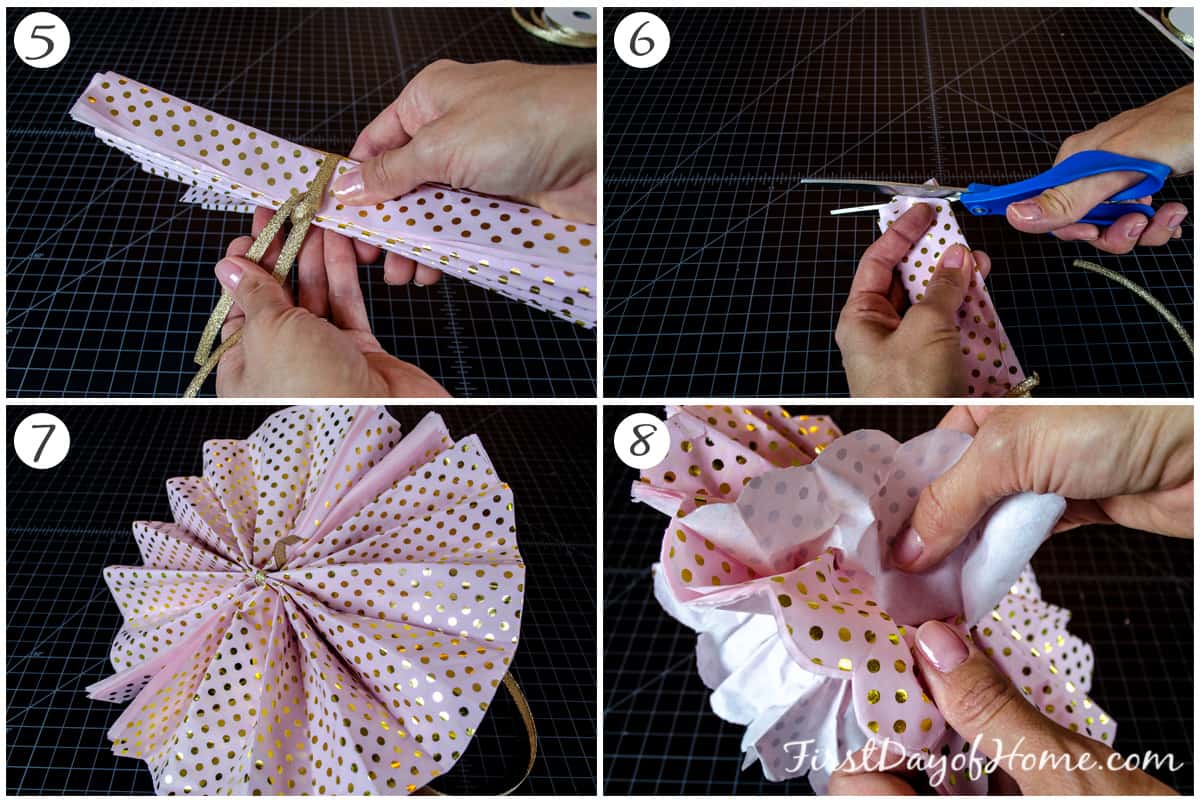
Final steps in tissue paper pom poms tutorial

  1. Use either a piece of ribbon or a piece of floral wire to secure the center of the pom-pom. If you plan to hang your multicolored pom-poms, make sure the ribbon is long enough (see my favorite ribbons below).
  2. Trim each end of your folded pom-pom in a curved shape, if desired.
  3. Open the pom-pom in a fan shape before you begin peeling back each layer.
  4. Gently pull each layer of tissue paper up toward the center ribbon on each side. Eventually, your pom-pom should start to look like a sphere.

For added texture, you can experiment with making a point at the end of the pom-poms instead of a rounded curve.
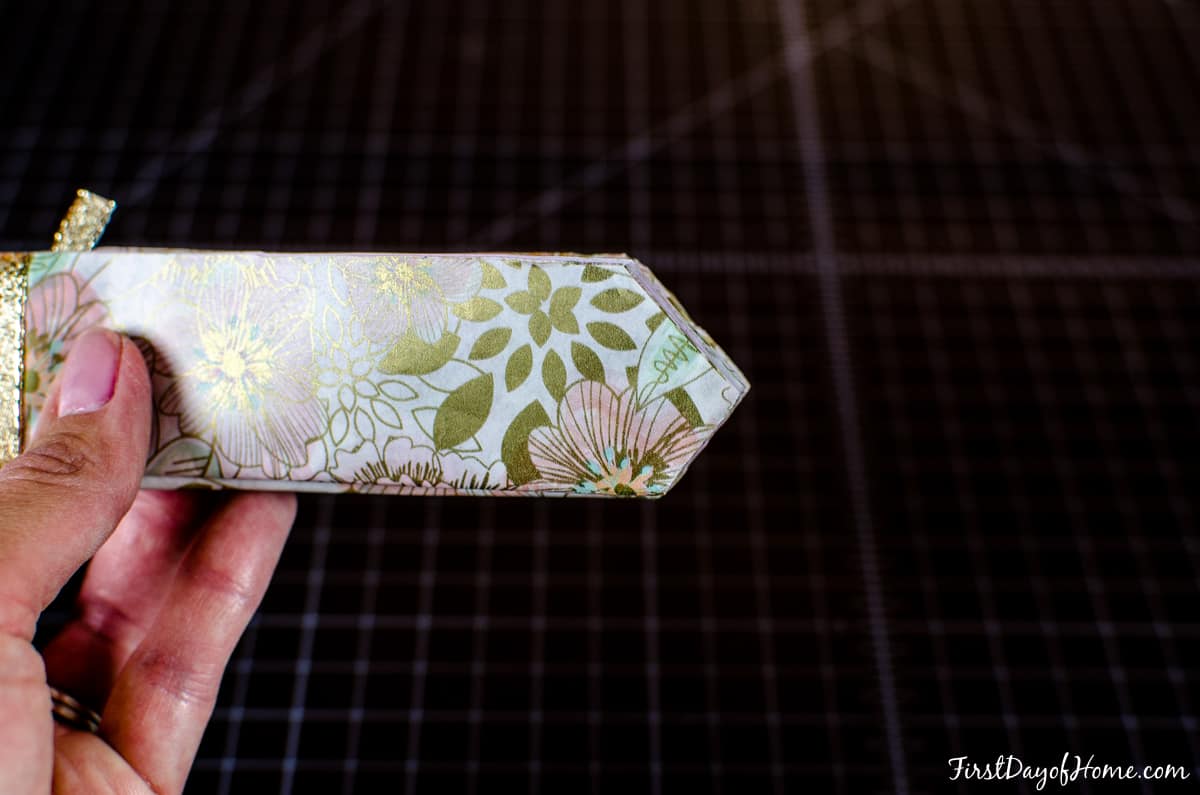
Make tissue multi coloured pom poms with peaks or rounded ends

If you’re planning a party away from home, I suggest waiting to open your pom-poms at the venue. This will prevent them from getting crushed before they have a chance to wow your crowds.

Final Look at Paper Pom-Poms

The finished pom-poms will look like the image below.
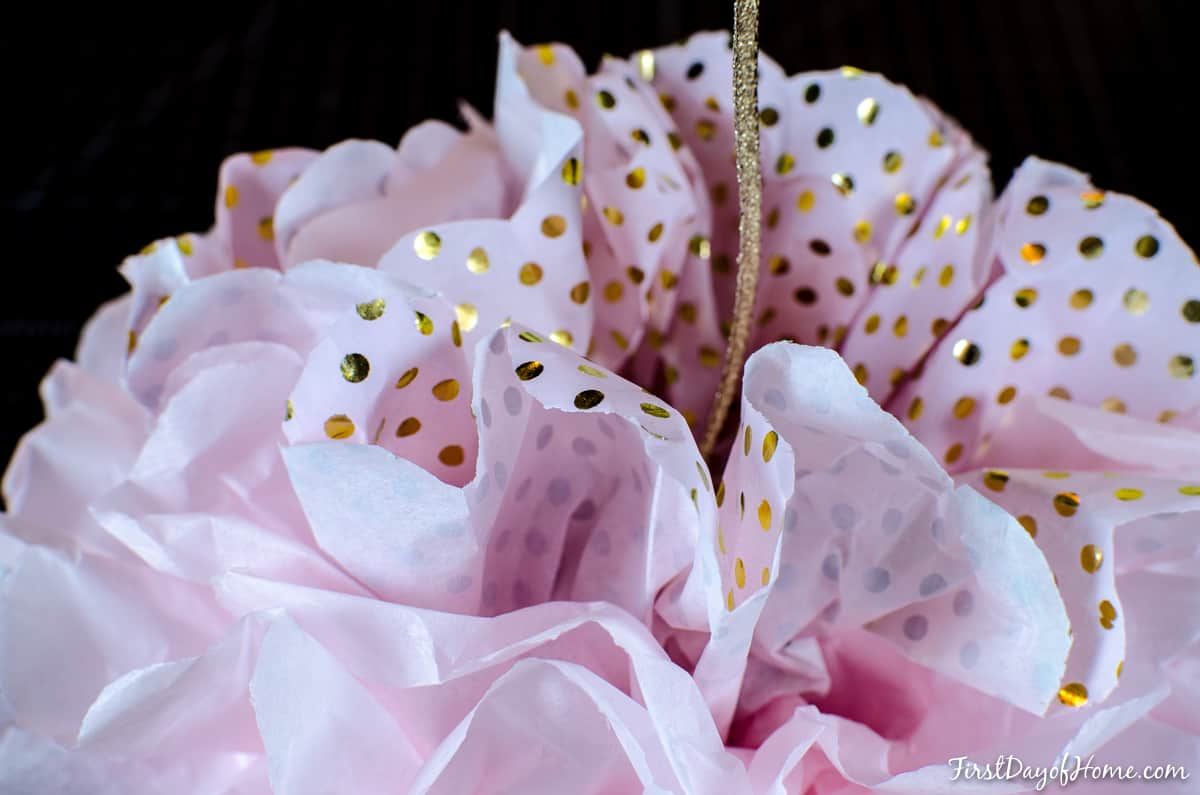
DIY multi coloured paper pom poms

I love having the ability to tie in my color scheme, especially with this multicolor version of tissue paper pom-poms. If you’re more into yarn pom-poms, you can also find a tutorial in my Valentine garland tutorial.

Now that you know how to make multi-colored tissue paper pom-poms, you can customize them for any birthday, bridal shower, baby shower or other special occasions! I hope you enjoy unleashing your creativity with this DIY party decor.

You can see how these pom poms created a fun garland with other paper flowers for a mimosa bar bridal shower.

Mimosa bar sign with tissue paper pom poms and paper flowers on lattice behind DIY mimosa bar with fruit juices, champagne and garnishes

For another fun paper craft, try making these DIY paper flowers, too!
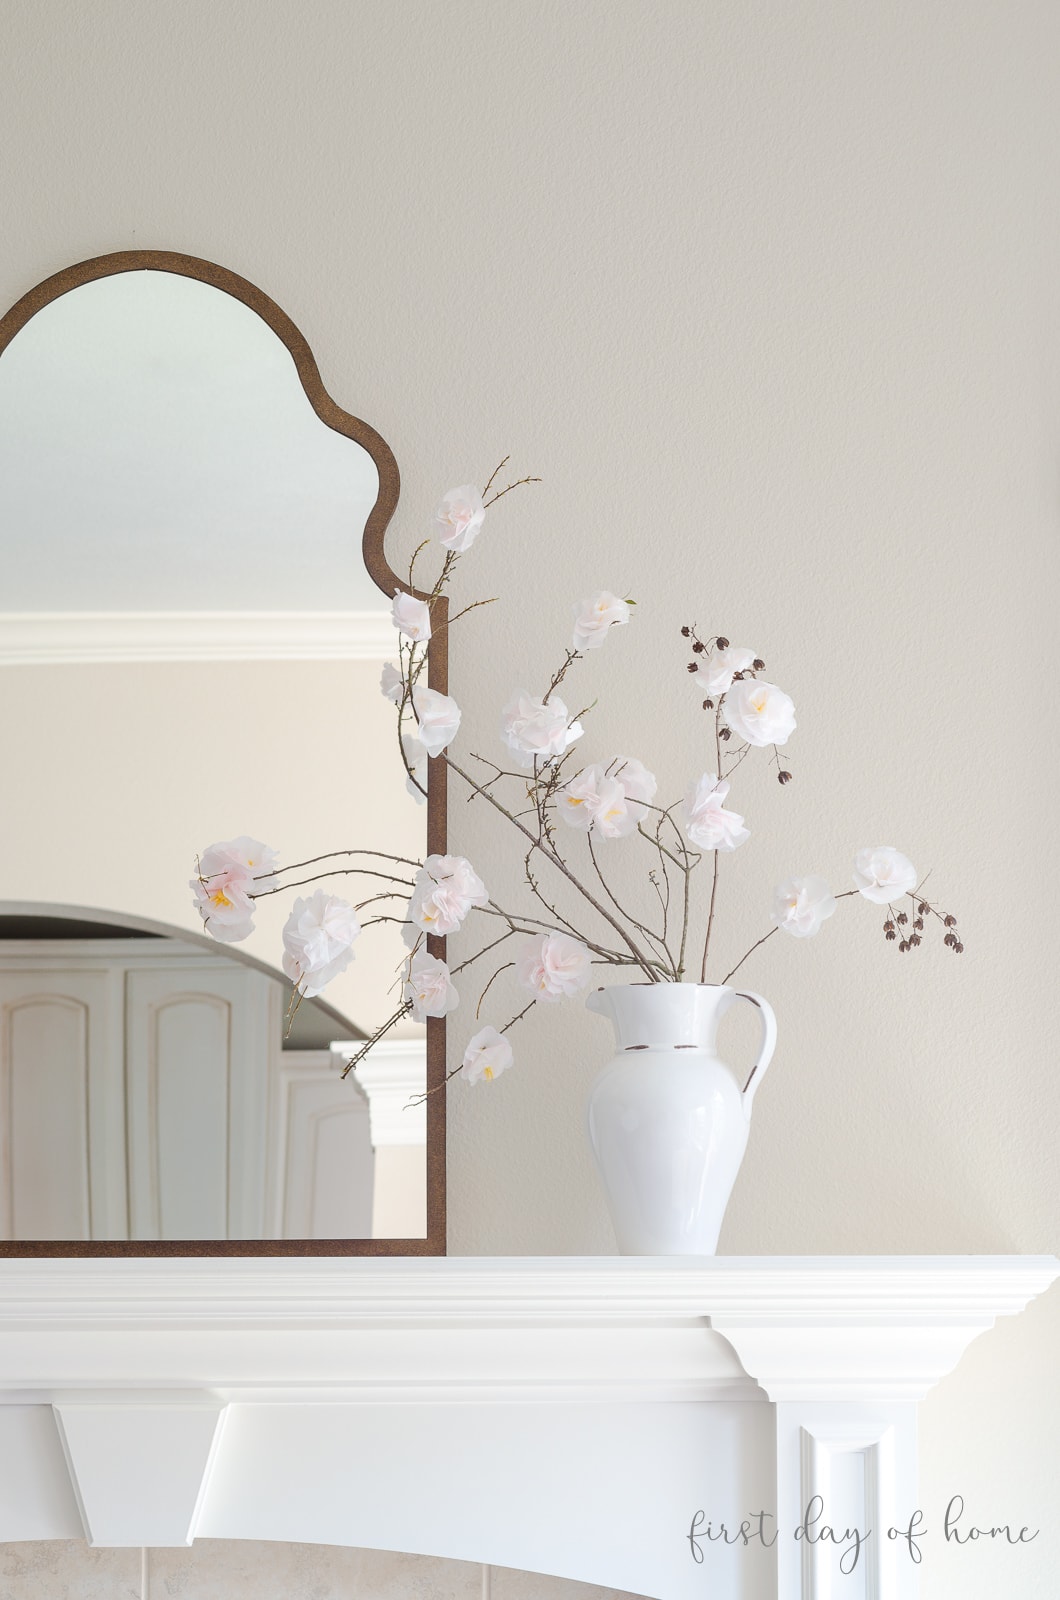
Mirror on fireplace mantel

Shop the Post

Here are a few of my favorite picks to make your own DIY tissue paper pom poms.

Great pink patterned bundle to follow tissue paper pom poms tutorial  Pink watercolor tissue paper perfect for making multi coloured pom poms Graduation tissue paper for making tissue paper pom poms
Gold patterned tissue paper pack for making making tissue paper pom poms Gold ribbon for multicolor pom poms Solid satin ivory ribbon for making DIY tissue paper pom poms
You might also like:

DIY Valentine's Day garland tutorial  Free printable wedding advice cards and bridal shower advice cards Bridal shower table decorations and DIY decorating ideas - photo of formal dining room tablescape for bridal shower Mimosa bar ideas pin with paper flower decor, pom poms and fruit juices

Don’t forget to pin it for later so you don’t forget it!

DIY tissue paper pom poms (paper flowers) you can make in multiple colors

Continue to Content
DIY tissue paper flowers

How to Make DIY Tissue Paper Pom-Poms (Multicolor)

Yield: 1
Prep Time: 5 minutes
Active Time: 5 minutes
Total Time: 10 minutes
Difficulty: Easy
Estimated Cost: $5

Learn how to make these multi-color tissue paper pom-poms that look like flowers! These are gorgeous for bridal showers, baby showers, weddings, birthday parties, graduations and other special events.

It's so easy to make these pom-poms, and they make the perfect DIY party decor.

Materials

  • Tissue paper
  • Scissors
  • Ribbon

Instructions

  1. To begin, cut your tissue paper in half along the shortest edge. For example, my tissue paper package contained eight sheets each measuring 20 x 20.5 inches, so I cut through all eight layers to form two stacks of 10 x 20.5 inches.
  2. For multicolor pom-poms, you will replace 1-2 sheets of tissue paper with an alternate color on both the top and bottom layers. Make sure any patterned tissue paper faces right-side-out on both sides.
  3. Accordion-fold the layers of tissue paper, in one-inch segments.
  4. Once you’re done folding, cut off any excess tissue paper that might stick out unevenly.
  5. Use either a piece of ribbon or a piece of floral wire to secure the center of the pom-pom. If you plan to hang your multicolored pom-poms, make sure the ribbon is long enough (see my favorite ribbons below).
  6. Trim each end of your folded pom-pom in a curved shape, if desired.
  7. Open the pom-pom in a fan shape before you begin peeling back each layer.
  8. Gently pull each layer of tissue paper up toward the center ribbon on each side. Eventually, your pom-pom should start to look like a sphere.

Notes

For added texture, you can experiment with making a point at the end of the pom-poms instead of a rounded curve.

Recommended Products

As an Amazon Associate and member of other affiliate programs, I earn from qualifying purchases.

  • Solid Satin Ribbon, Ivory, 5/8" x 100 yd
    Solid Satin Ribbon, Ivory, 5/8" x 100 yd
  • Metallic Ribbons for Crafters 
    Metallic Ribbons for Crafters 
  • Note Card Cafe Premium Tissue Paper Set | 120 Gift Wrapping Sheets 
    Note Card Cafe Premium Tissue Paper Set | 120 Gift Wrapping Sheets 
  • Note Card Cafe Premium Tissue Paper Set
    Note Card Cafe Premium Tissue Paper Set
© firstdayofhome.com
Project Type: Paper crafts / Category: Arts & Crafts

Please support this site by sharing!
  • 1K
    Shares
  • 1K
    Shares

First published: July 28, 2018

Previous Post: « Party Planning Printables You Need in Your Life (Free)
Next Post: Free Printable Wedding Advice Cards (Instant Download) »

Reader Interactions

Comments

  1. Cindy says

    July 12, 2019 at 6:45 pm

    So precious! I needed to know how to make these for my girls when they were younger1 . O well, maybe for grandchildren one day! Thanks for sharing!

    Reply
    • Crissy says

      July 12, 2019 at 10:41 pm

      Thank you, Cindy! I made them for my niece’s bridal shower, but many friends have said they would enjoy making these with kids. I seem to recall my mom making something like this when I was a child. Thanks for stopping by, my friend!

      Reply
  2. Janet Lorusso says

    July 9, 2019 at 5:27 pm

    A fun project to do with kids too! And the scalloped edges are the perfect touch!

    Reply
    • Crissy says

      July 9, 2019 at 11:36 pm

      Hi Janet! Thanks so much. Yes, my kids are always by my side trying to help, and this is one project where they can actually join in the fun!

      Reply
  3. CiCi says

    July 28, 2018 at 10:02 am

    Adorable! My girls would enjoy making these with me, too 🙂

    Reply
    • Crissy says

      July 28, 2018 at 10:21 am

      Thanks, CiCi! Yes, the kids would love making these!

      Reply
  4. NC says

    July 28, 2018 at 8:45 am

    Blown away by the beauty and creativity of your latest post!! A masterful job!

    Reply
    • Crissy says

      July 28, 2018 at 9:32 am

      Thanks so much! I had fun making them!

      Reply

Leave a Reply Cancel reply

Your email address will not be published. Required fields are marked *

Primary Sidebar

Meet crissy

Welcome to my blog! I'm so glad you're here. Crafting, decorating and DIY projects are my jam, and I love collecting new hobbies like nobody's business. If this sounds like you, pour yourself some coffee...you've come to the right place! Read More…

let’s connect

  • Email
  • Facebook
  • Instagram
  • Pinterest
  • Twitter

Trending Posts

Valentine garland with felt hearts and pom poms

Valentine Felt Garland Craft

Love SVG file with phrase Love Conquers All

Free Heart File for Cricut/Cameo

Red burlap wreath with bunting and striped black and white bow

How to Make a Burlap Wreath

Categories

Looking for something?

Feminine WordPress Themes using the Genesis Framework by Restored 316

Copyright Notice

We love it when you pin content from this site or share it on social media! However, please be aware that all images and text are the property of firstdayofhome.com and may not be reproduced, edited or altered without express permission. If you would like to feature our content, please contact us here.

  • Facebook
  • Instagram
  • Pinterest
  • Twitter
  • Email

Footer

More about Crissy

Welcome to my blog! I'm so glad you're here. Crafting, decorating and DIY projects are my jam, and I love collecting new hobbies like nobody's business. Read More…

Let’s Connect

  • Email
  • Facebook
  • Instagram
  • Pinterest
  • Twitter

Looking for something?

First Day of Home participates in the Amazon Services LLC Associates Program. See disclosures for details.

Copyright © 2021 · Market Theme · Disclosure

This website uses cookies to improve your experience. By continuing to use this site, we'll assume you consent.Accept
Privacy & Cookies Policy

Privacy Overview

This website uses cookies to improve your experience while you navigate through the website. Out of these cookies, the cookies that are categorized as necessary are stored on your browser as they are as essential for the working of basic functionalities of the website. We also use third-party cookies that help us analyze and understand how you use this website. These cookies will be stored in your browser only with your consent. You also have the option to opt-out of these cookies. But opting out of some of these cookies may have an effect on your browsing experience.
Necessary
Always Enabled

Necessary cookies are absolutely essential for the website to function properly. This category only includes cookies that ensures basic functionalities and security features of the website. These cookies do not store any personal information.