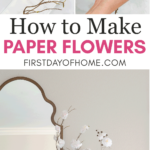
How to Make Paper Flowers – Easy Tutorial
This tutorial on how to make paper flowers has been on my to-do list for a long time! I’m thrilled to finally share some tips on how you can make this DIY decor from the most unexpected items and have it actually not look homemade.
This post contains affiliate links, and I will be compensated if you make a purchase after clicking on my links. For more information, please see my disclosures.
How to Make Tissue Paper Flowers
I love a good DIY, and these paper flowers add the perfect touch of spring whimsy to your home. They remind me of the cherry blossoms that bloom each year in Washington, D.C.
If you saw my recent Spring Mantel Decor, you may have noticed my crepe myrtle branches playing “dress up.” That’s right, you can use branches from your backyard to recreate this look!
Watch This Tutorial (1 Min)
Want to know the other secret ingredient for this paper craft? Check out the supplies list below.

Supplies
- Wooden branches
- Facial tissue
- Crepe paper (yellow)
- Sidewalk chalk or pastel chalk
- Scissors
- Hot glue or craft glue
Did you catch that? Yes, facial tissue, as in Kleenex.
I bought the crepe paper and sidewalk chalk at Dollar Tree, so we’re talking about a very affordable craft here!
Plus, these flowers have enough detail to fool the eye but not so much detail that you’ll spend hours creating each bloom.
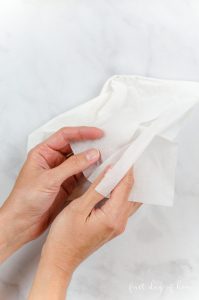
Step 1: Separate the tissue into three separate plies

As I’ve discussed in my decoupage tutorials, most napkins and tissues come in three plies. You’ll want to separate the plies to get the most delicate effect for your paper flowers.
Tip: Cut off the “seams” or edges of tissue that are glued together to prevent ripping when separating the plies. This also makes for smaller, daintier blooms.
Step 2: Cut tissue plies in half
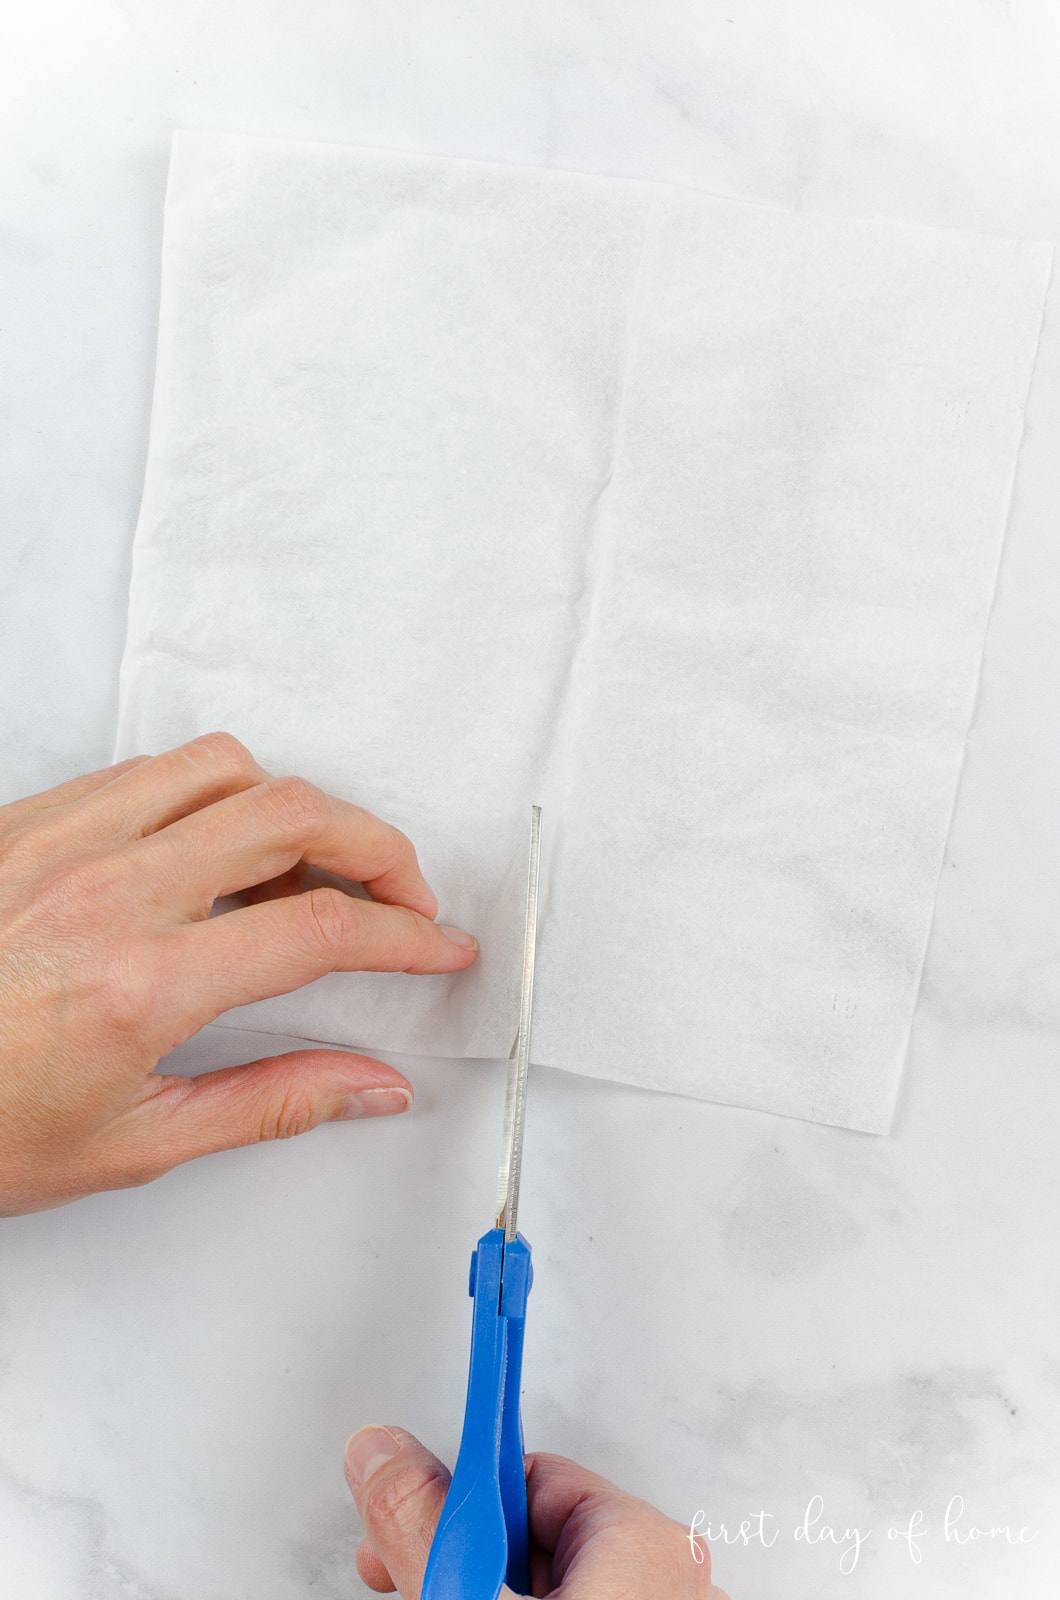
Begin by cutting the facial tissue ply in half lengthwise (shown above). Then, place the two sections on top of one another.
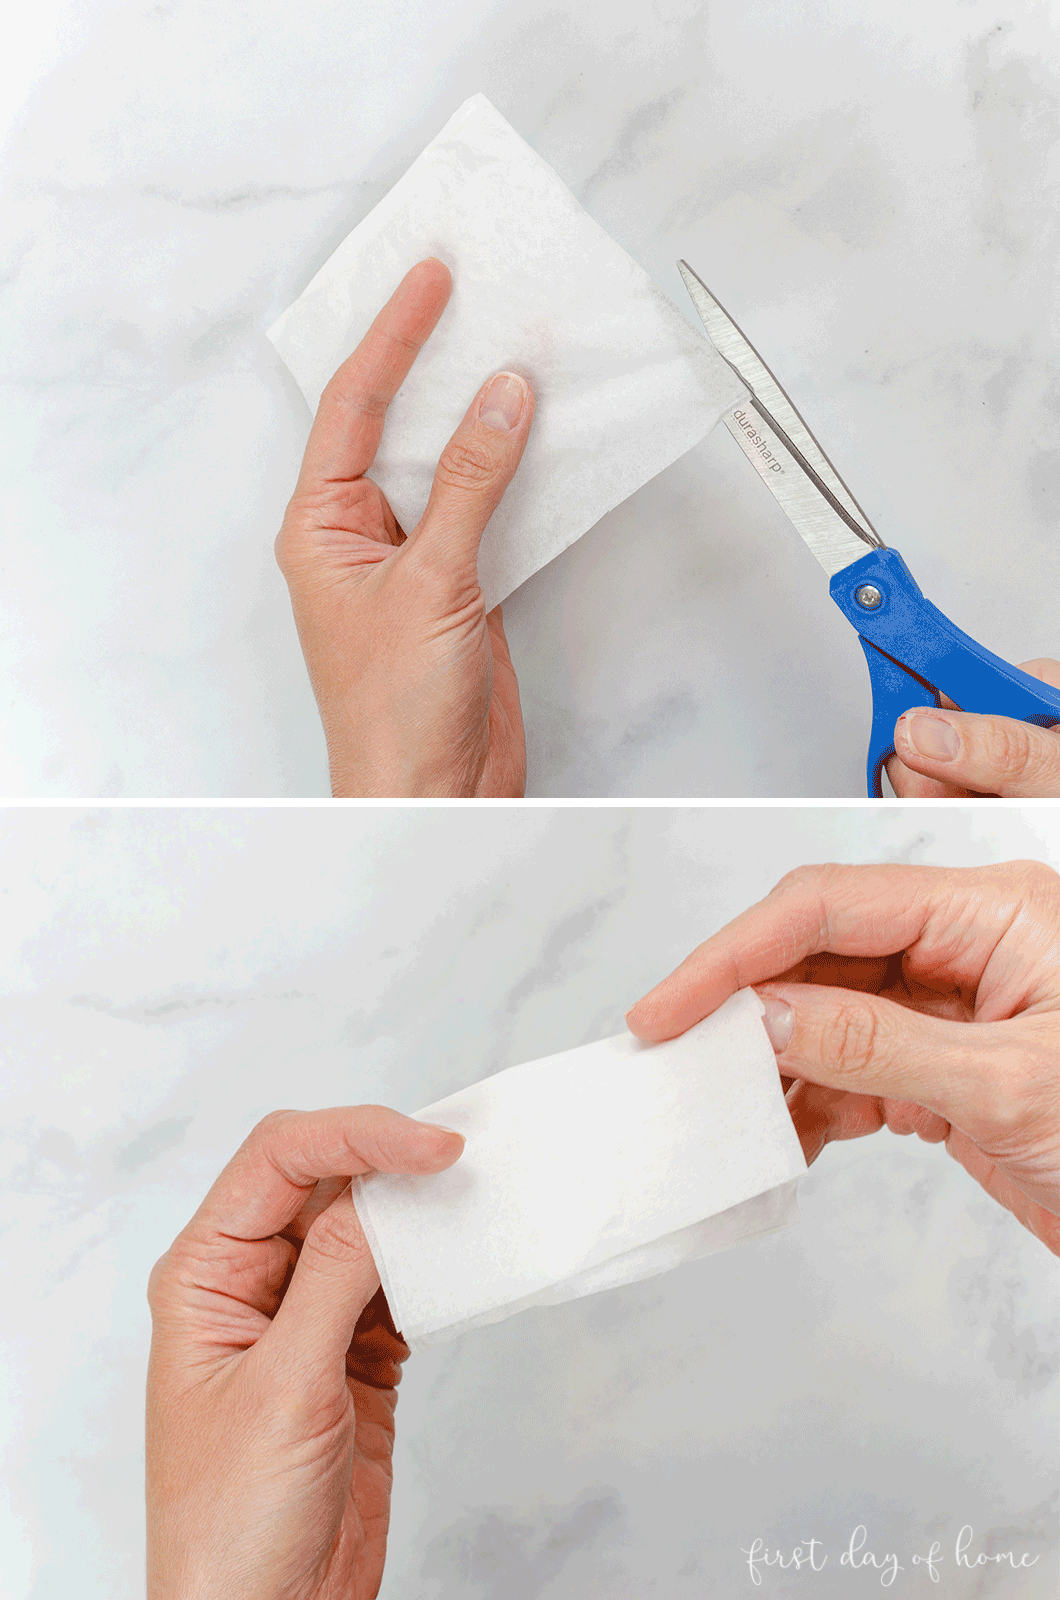
Fold the double layer of tissue in half again, and make another cut along the fold to create a square with four layers (top photo above).
Next, fold the square in half again (bottom photo above), and you are now ready to create the blossoms!
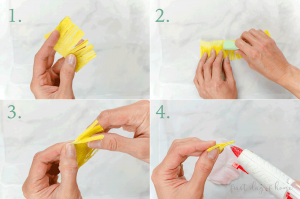
Step 3: Fold tissue squares to form cone shape

- Fold the top-left edge of the square toward the middle at a slight 45-degree angle.
- Then, do the same with the other top-right edge to form a cone.
- Trim the bottom edge of the cone in a scalloped shape.
- Carefully cut the pointy tip of the cone, which will become the center of your cherry blossom flower.
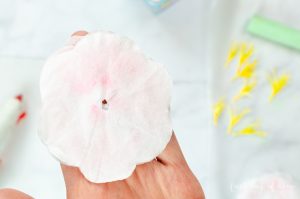
Step 4: Color the blossoms with colored chalk or pastels
Open up your newly formed “paper flower” and begin coloring it gently with colored chalk.

It’s helpful to hold the tissues at your fingertips to apply slight pressure as you dust the chalk onto the tissue, rotating between the layers. This helps prevent the tissue from ripping.

Step 5: Cut the edges of crepe paper to form stamens
To form the stamens, you’ll use yellow crepe paper and more pastel chalk.

- Cut a section of yellow crepe paper to create a “fringe” look that will become the stamens. Leave about 1/4 inch uncut so you can roll the strip of paper.
- Gently color the crepe paper with green chalk or pastels.
- Twist and scrunch the fringed edges of the stamens.
- Roll up the uncut edge of the crepe paper, trim the stamens to shorten them, and apply a dab of hot glue for the next step.
More Paper Flowers
If you want to learn how to make realistic paper roses, check out this related tutorial.
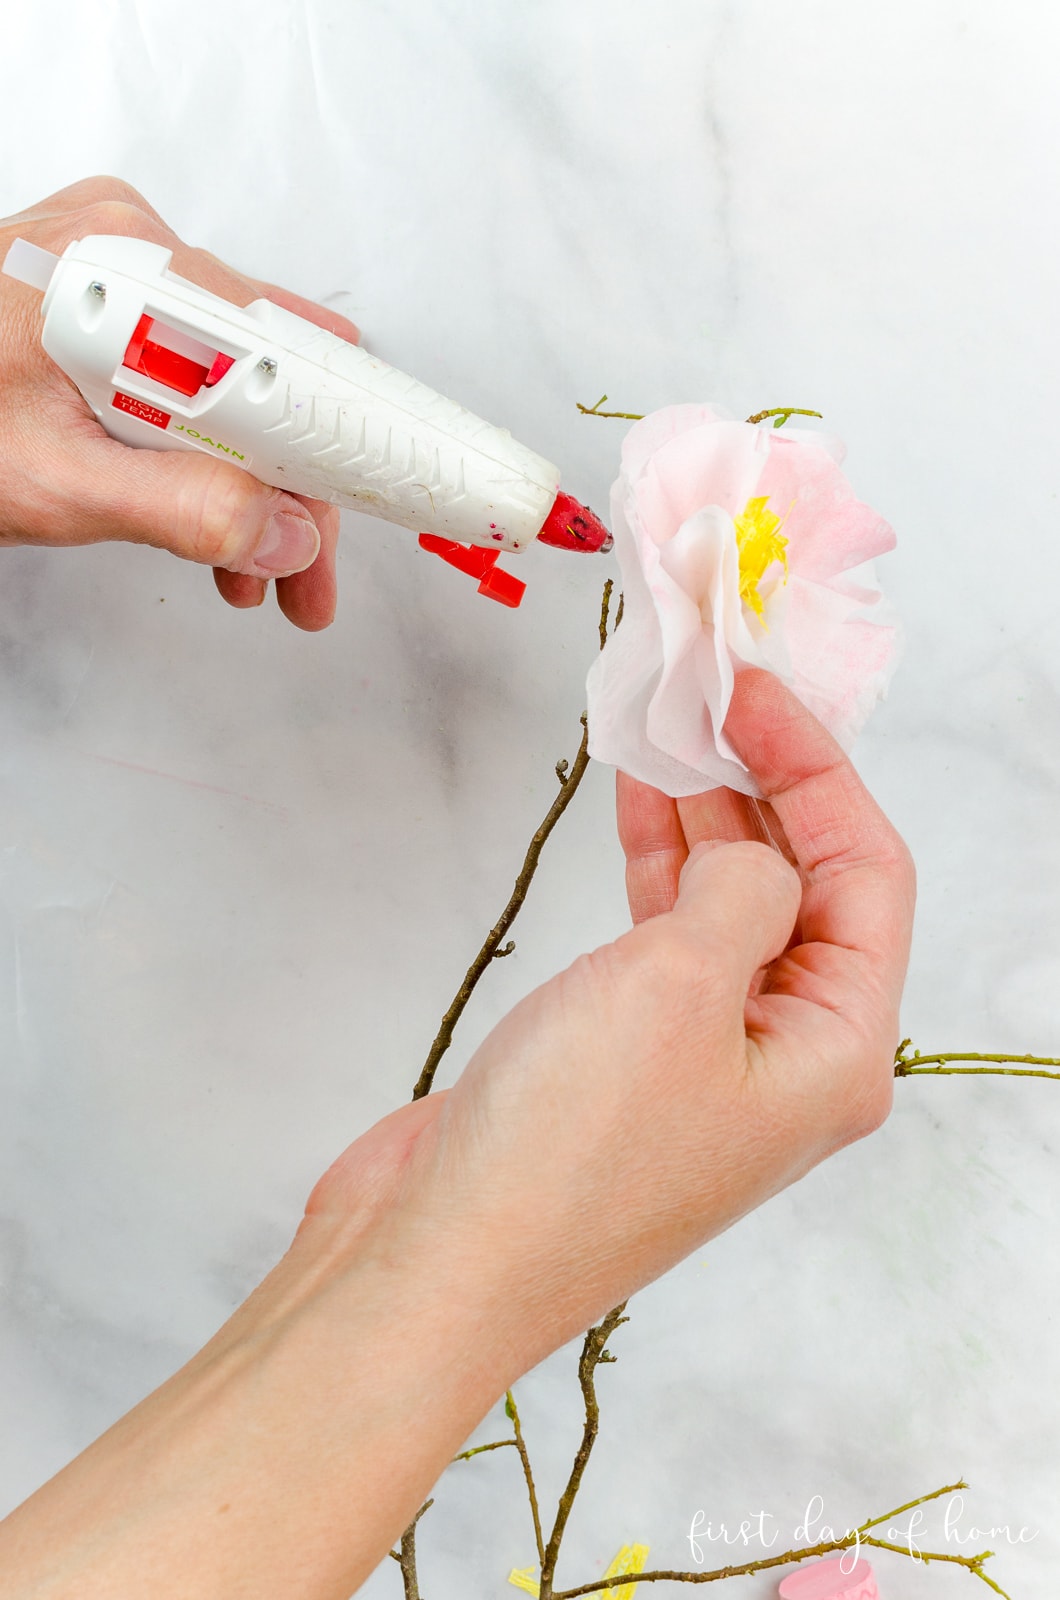
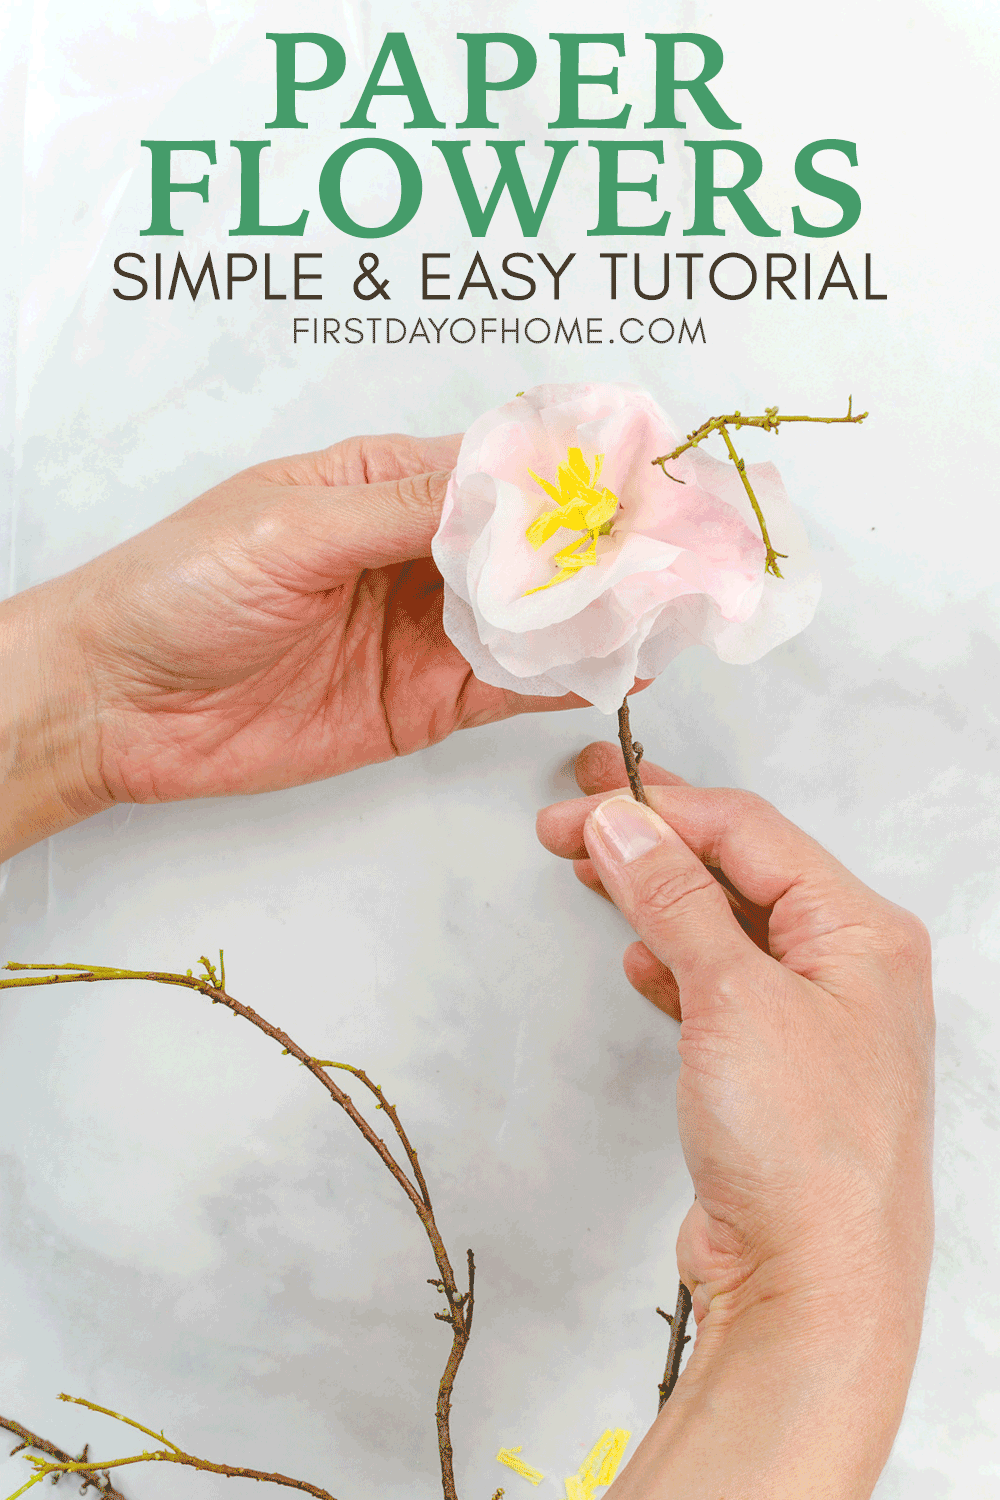
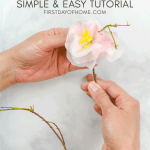
Step 6: Attach petals to stamen
While the glue is still hot on the stamen, attach one layer of tissue “petals” at a time, until you finish applying all four layers.
Try to alternate the scalloped edges of each layer to give more fullness, and use more glue in between the layers, as needed.
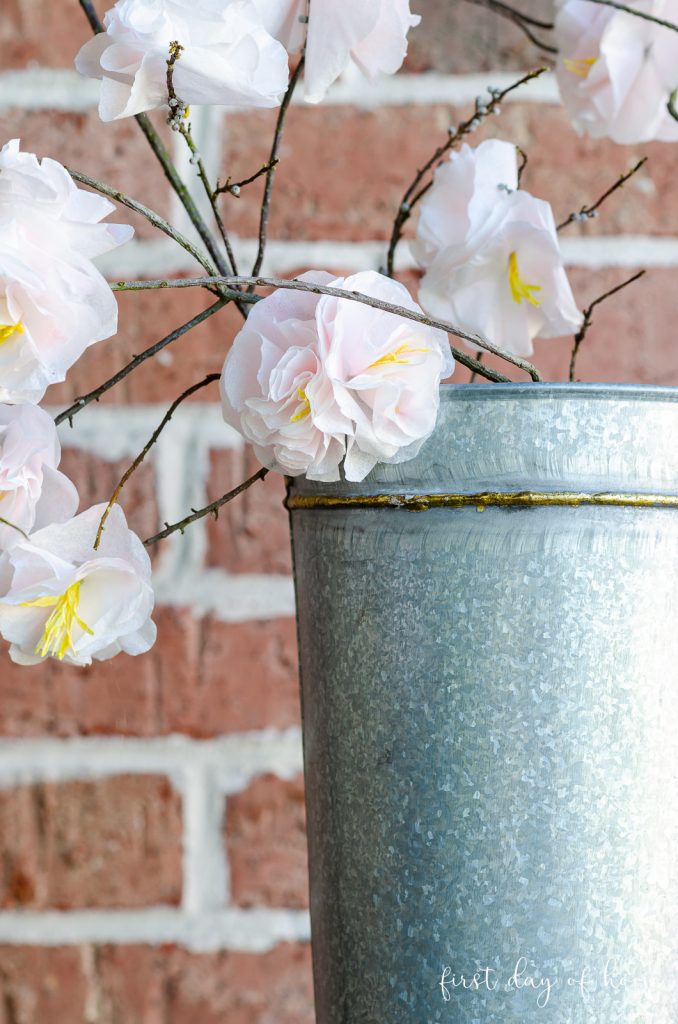
Glue the finished cherry blossoms to your branches, doubling some blossoms together here and there.
Final Look: Faux Cherry Blossom Paper Flowers
Here’s a final peek at the finished cherry blossom stems! I think these paper flowers are so romantic and spring-y.
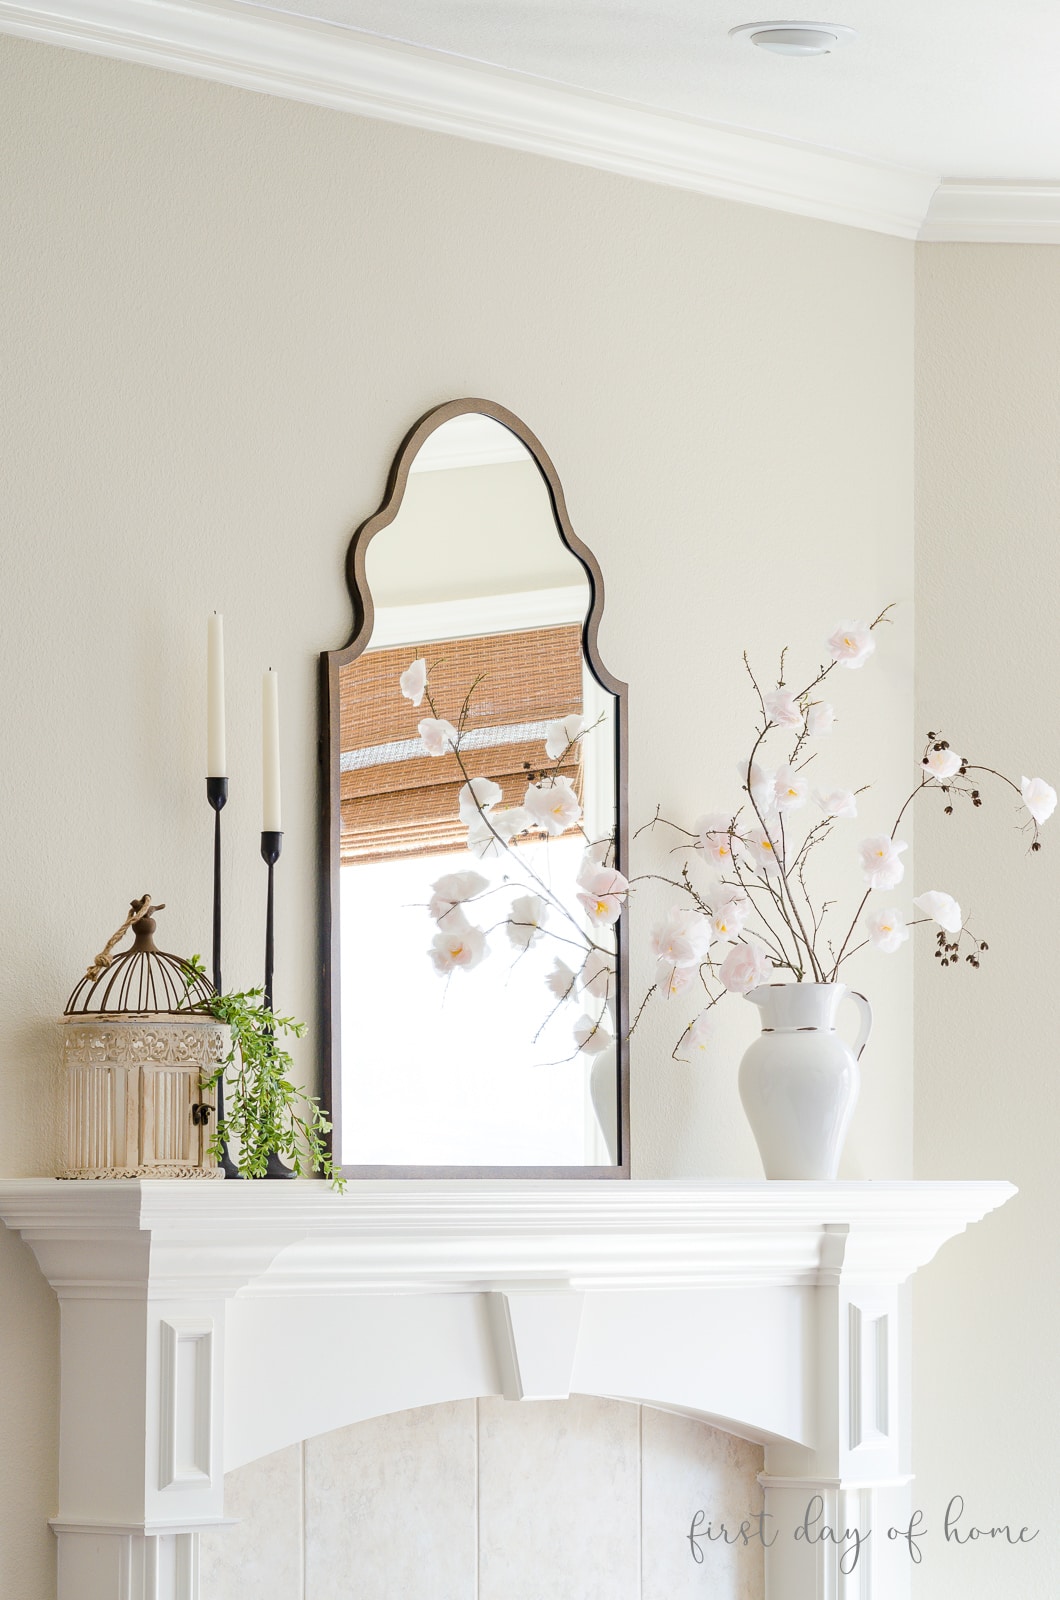
You can also find out more details about my spring mantel decor shown above and see what my blogging friends have done with their mantels this season.
For some different variations on paper decor, visit my posts on how to make tissue paper pom-poms, Cricut paper flowers, and mimosa bar ideas.
Pin it for Later!

How to Make Tissue Paper Flowers – Faux Cherry Blossoms
Equipment
- Scissors
- Hot glue gun or craft glue
Supplies
- Wooden branches
- Facial tissue
- Crepe paper (yellow)
- Sidewalk chalk or pastel chalk
- Hot glue or craft glue
Instructions
Petals
- Separate the tissue into individual plies to get the most delicate effect for your paper flowers.

- Cut the facial tissue ply in half lengthwise. Then, place the two sections on top of one another.
- Fold the double layer of tissue in half again, and make another cut along the fold to create a square with four layers.
- Next, fold the square in half again.
- Fold the top-left edge of the square toward the middle at a slight 45-degree angle.
- Then, do the same with the other top-right edge to form a cone.
- Trim the bottom edge of the cone in a scalloped shape.
- Carefully cut the pointy tip of the cone, which will become the center of your cherry blossom flower.
- Open up your newly formed “paper flower” and begin coloring it gently with colored chalk.


Stamens
- Cut a section of yellow crepe paper to create a “fringe” look that will become the stamens.
- Gently color the crepe paper with green chalk or pastels.
- Twist and scrunch the fringed edges of the stamens.
- Roll up the uncut edge of the crepe paper, trim the stamens to shorten them, and apply a dab of hot glue.
Blossoms
- While the glue is still hot on the stamen, attach one layer of tissue “petals” at a time, until you finish applying all four layers.
- Try to alternate the scalloped edges of each layer to give more fullness, and use more glue in between the layers, as needed.
- Glue the finished cherry blossoms to your branches, doubling some blossoms together here and there.

Thank you for another great craft project! And I really love how you offer the printable pages to keep for future reference. My friend in Ontario is buying a similar mirror to the one over your mantel so going to send her your blog so she can re-create your look. Love the tissue paper crafting…..
Many thanks again from Gwyn in Calgary AB
Hi Gwyn! Thanks for your kind comment! I’m so glad you enjoyed this little tutorial. It’s fun to look at ordinary objects and see their potential. I appreciate you taking the time to leave a sweet message and rating for me. Take care from Texas! -Crissy
These are beautiful! I really love how they turned out.
Thank you so much, Michelle! I appreciate you coming over to check them out!
These turned out so good! I love the fluffiness (is that a word?) of them!
Thank you so much, Pamela! I appreciate you stopping by, and yeah, I’m going to say fluffiness is a word. It should definitely be used more often! LOL!