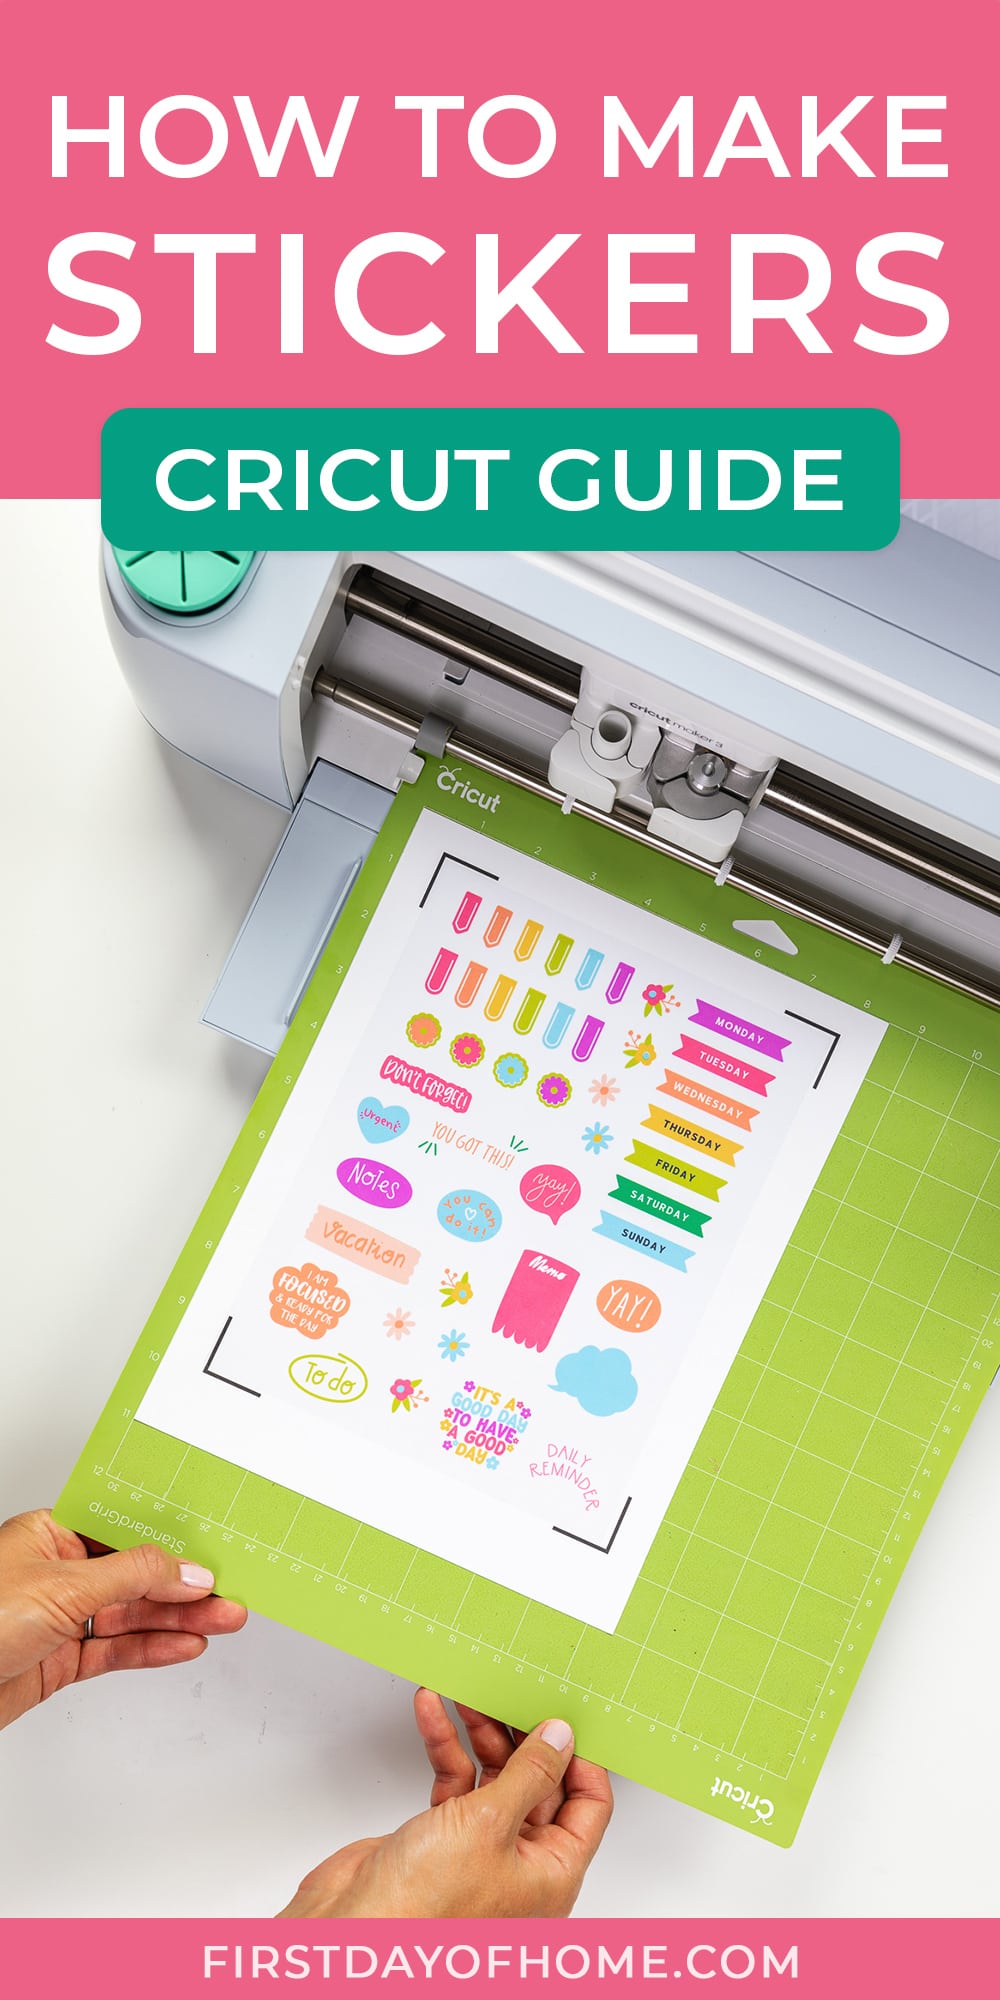
How to Make Stickers with Cricut
Learning how to make stickers with Cricut has plenty of benefits, from creating household labels to decorating a bullet journal…but it can leave you frustrated if you’ve never done it before. I’m sharing all of my troubleshooting tips in this tutorial so you can make DIY stickers and get professional-looking results.
This post contains affiliate links, and I will be compensated if you make a purchase after clicking on my links. For more information, please see my disclosures.
How to Make Stickers with Cricut
When I purchased my Cricut Maker many years ago, I went on a labeling spree around the house. Now that my boys are entering the pre-teen phase, stickers are all the rage.
Print then cut stickers are a great way to personalize gifts, decorate water bottles, or add color to scrapbooks and journals. While it seems as simple as printing a sticker sheet and loading it into your Cricut machine, there are definite mistakes to avoid. (Trust me, I’ve made them all!)
The first step is gathering all of the supplies and equipment needed for sticker-making.
Cricut Sticker Supplies
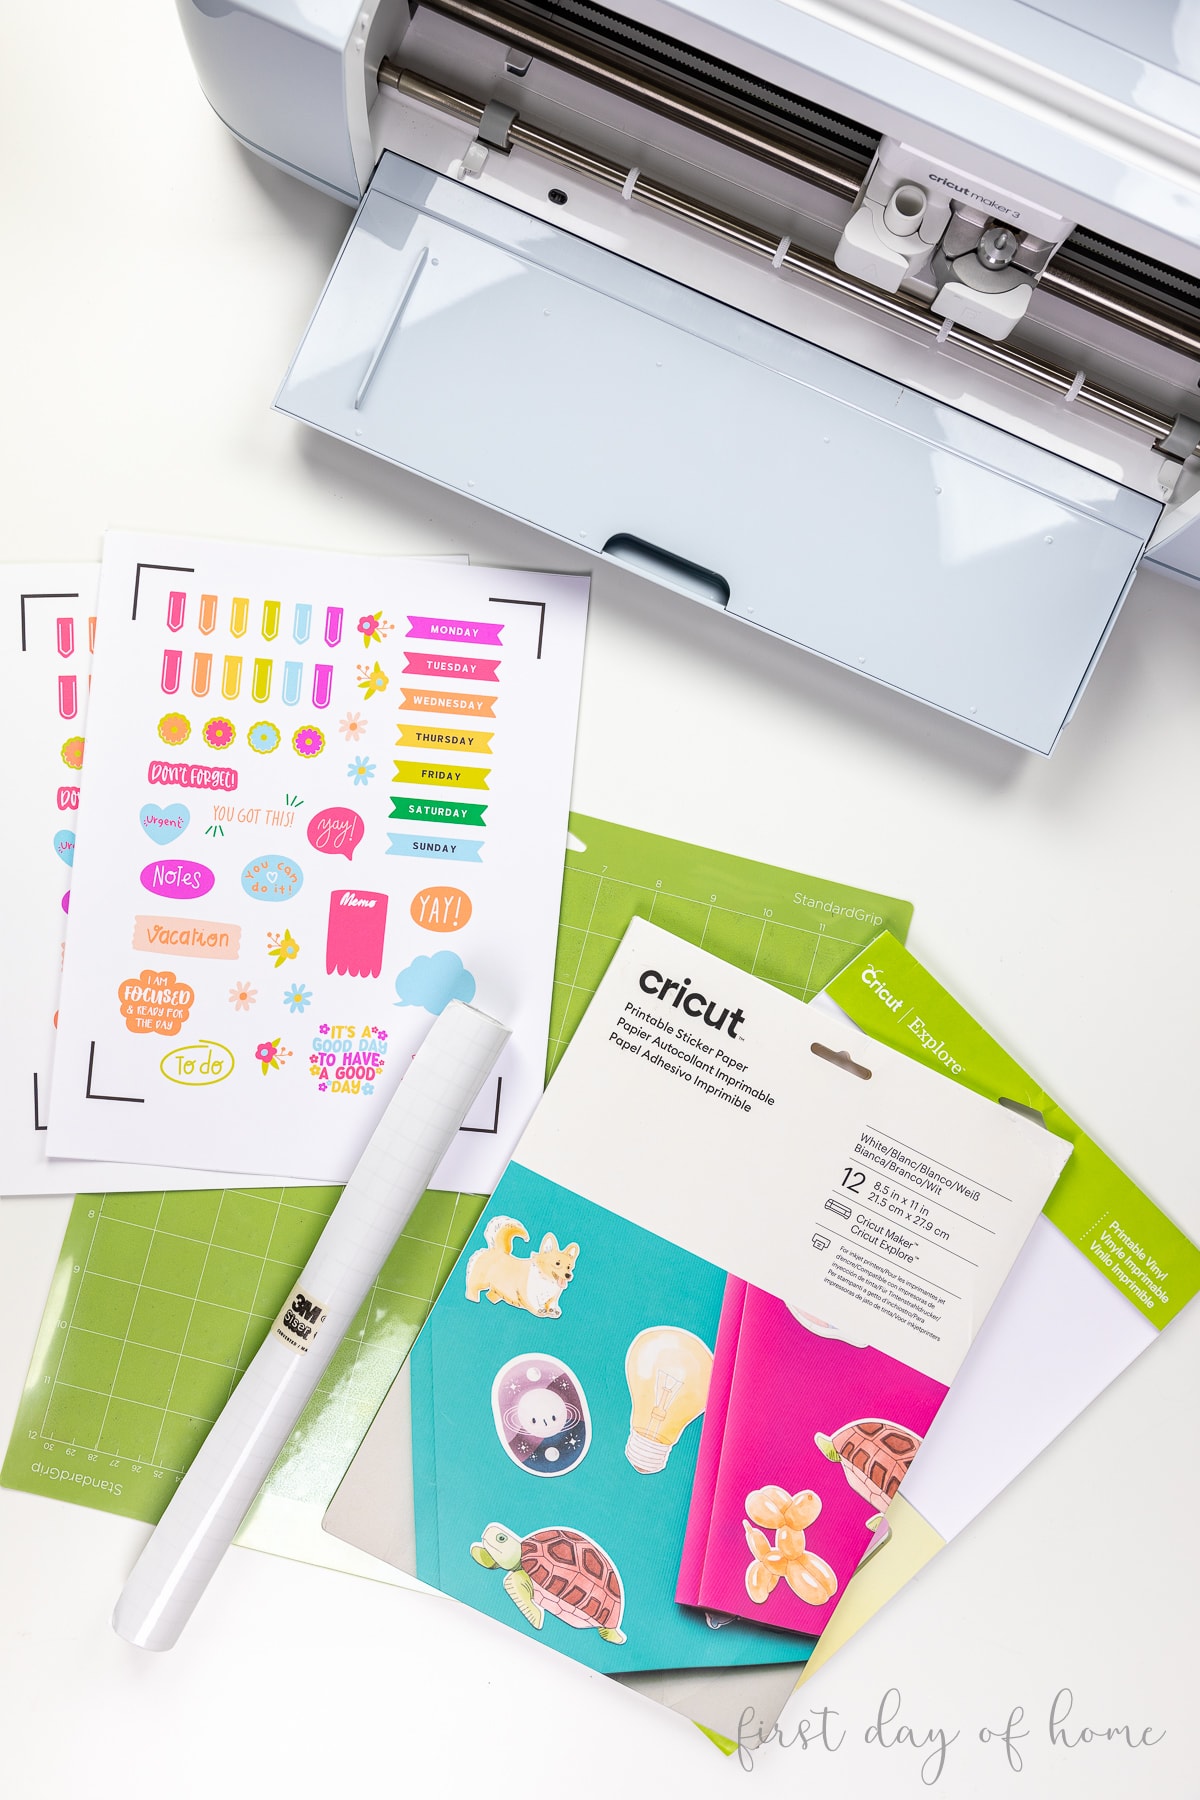
- Cricut Explore, Cricut Explore Air, or Cricut Maker machine*
- Inkjet printer
- Cricut sticker paper or Cricut printable vinyl sticker paper
- Light grip mat (for sticker paper)
- Standard grip mat (for printable vinyl)
- Acrylic sealer (optional)
- Self-laminating sheets (optional)
- Laminating machine (optional, for laminating sheet method)
*Unfortunately, the Cricut Joy does not offer a print-then-cut feature because it lacks the sensor to pick up the registration lines on the paper. However, the new Cricut xTra does allow for print-then-cut. I’ll only cover the standard method for Explore and Maker machines in this post to keep things simple.
Watch This Project Overview
Step 1: Calibrate your Cricut for Print Then Cut
Calibrating your machine sounds optional, but this is the biggest pain point for making stickers with Cricut. I suggest practicing on plain printer paper before attempting to print and cut on sticker paper.
In Cricut Design Space, choose Calibration from the main menu (the hamburger menu with the three horizontal lines). Then select Print Then Cut.

The software will prompt you to print off a test sheet and load it into your Cricut machine. (Use a light-grip mat if possible.) Follow the steps to calibrate your machine, and you’ll have this tedious part behind you.
If you still struggle with your sticker alignment, see the troubleshooting section at the end of this post.
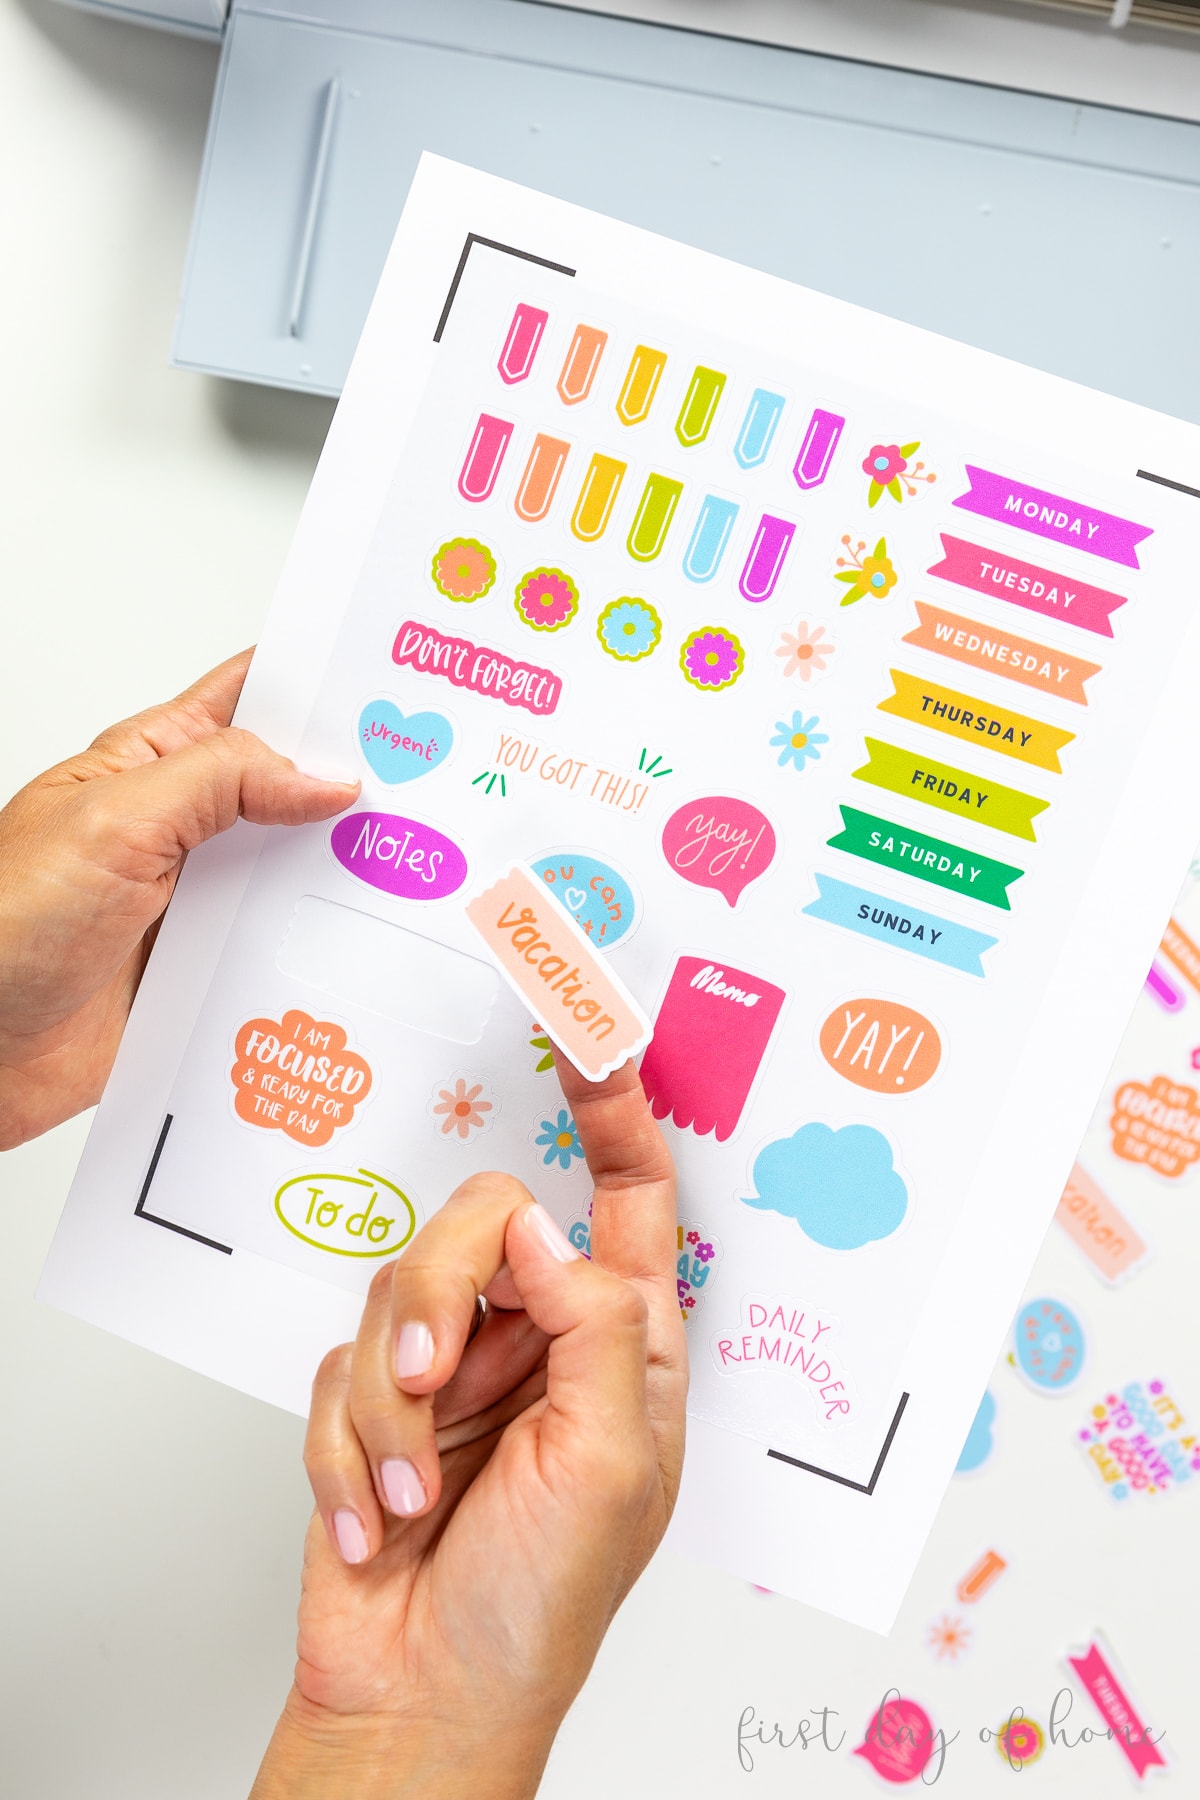
Step 2: Add or upload printable image to your canvas
Now to the fun part! Within Cricut Design Space, you can add multiple images to your canvas to create custom stickers. I selected a few designs for a planner as an example.
Follow me here in Cricut Design Space to add the same images to your canvas. You’ll see this project here in my profile.
Note: The maximum print area for Cricut Print Then Cut is 9.25″ x 6.75″ unless you’re using the beta version of Cricut Design Space. Create a colored rectangle around your sticker images to make sure you stay within this border, and hide this layer when you’re ready to print.
Once you’ve placed the images on your canvas, select Print Then Cut under the operation menu to change the design from a Basic Cut to a printable design.

Step 3: Format images with offset feature (optional)
To add a finishing touch to your stickers, you can create a white border around your images called an offset. This also provides a margin of error if your machine calibration is a little off when cutting.
Select the image(s) you want to offset, then click the Offset option in the toolbar.
If you want to apply an offset to multiple stickers at once, you can uncheck the “weld offsets” box to keep the offsets independent.

For a single sticker design with multiple layers, leave the “weld offsets” box checked.

After creating the offsets, you may need to change the color of the offset to white.
Step 4: Flatten layers and attach images
Once you finish formatting your stickers, select each sticker with all of its layers (holding the Shift key), and click Flatten tool in the layers panel. Be sure to include the offset.
Note: This step is only necessary when your sticker design includes multiple layers, like text on a shape background. If you skip this step, the machine will try to cut each layer of the sticker separately instead of just the outline.
After flattening the design, you cannot modify the colors, but you can always Unflatten it to make changes later.
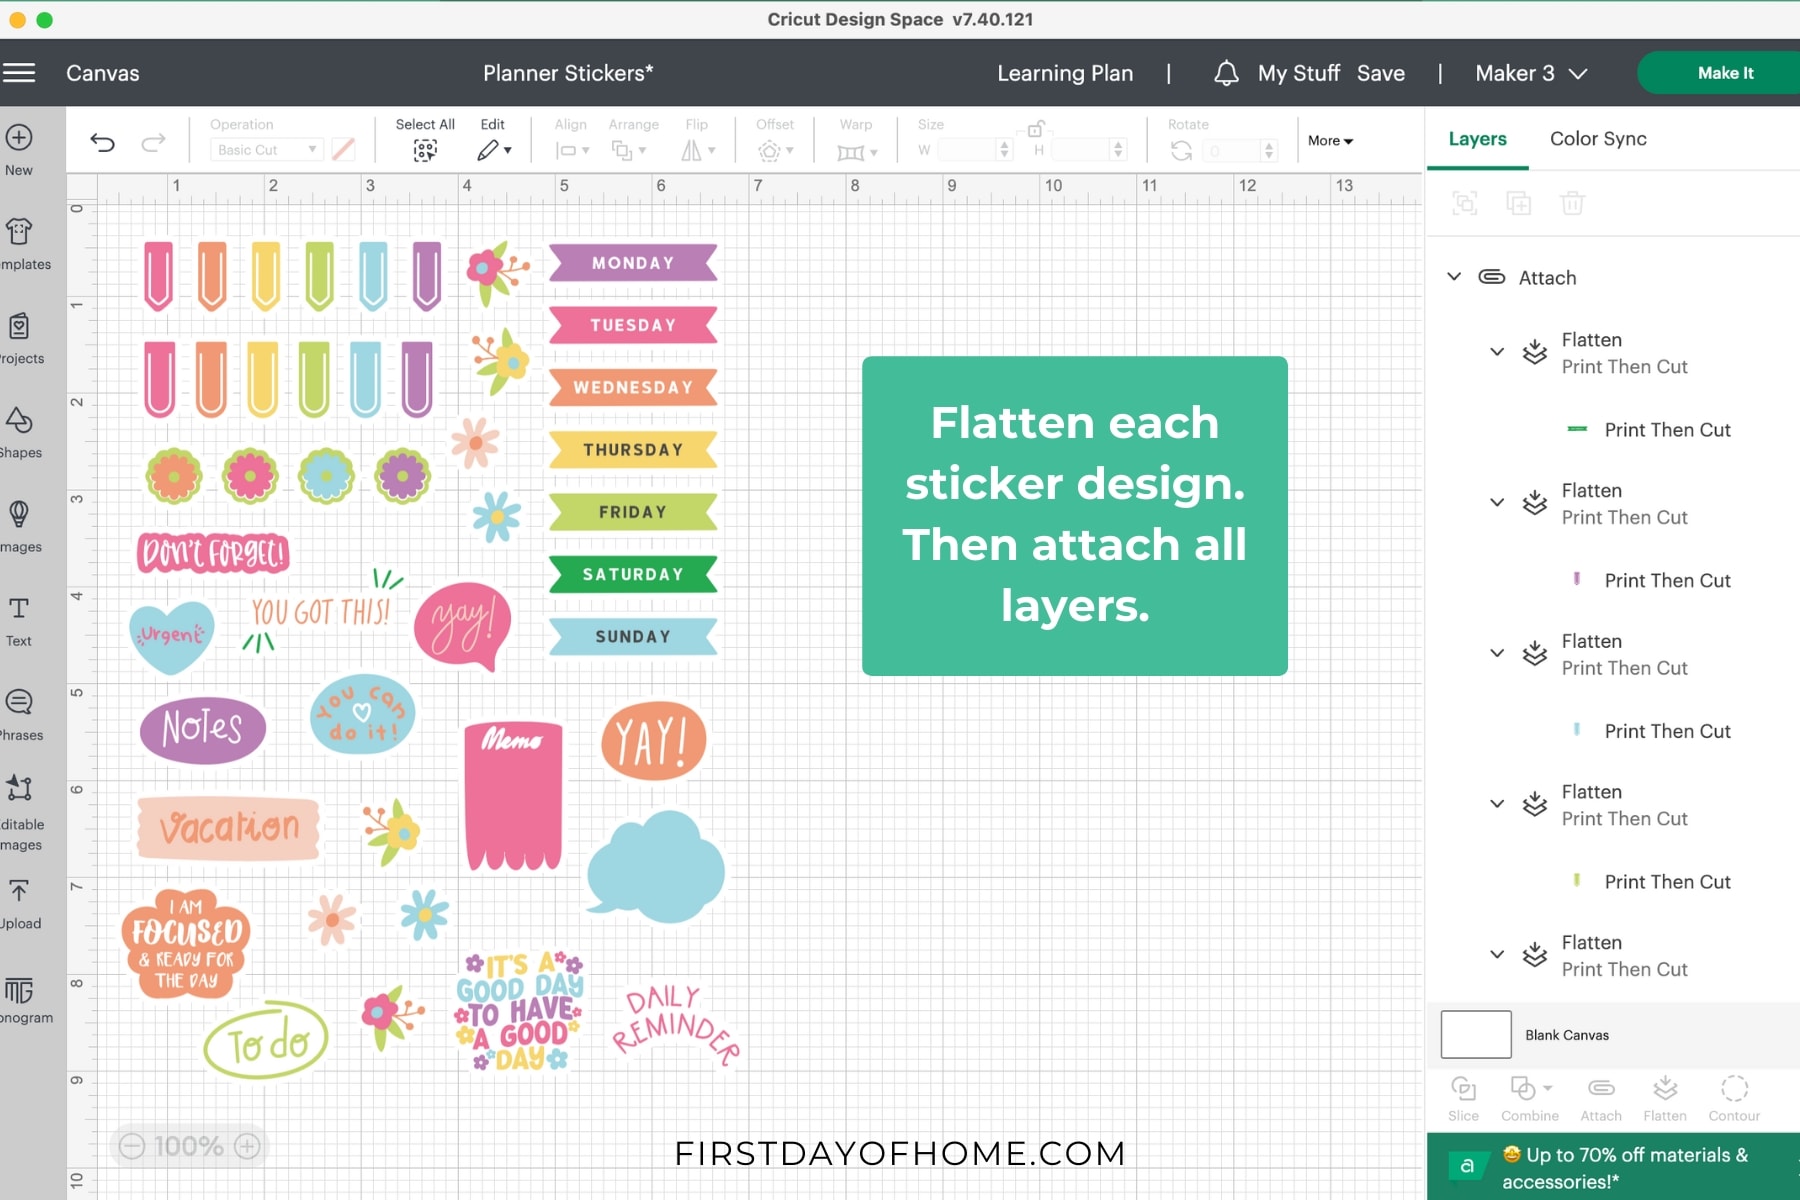
To keep your project in the order shown on your canvas, select all images and click Attach. Your layers panel should look something like the one above.
Note: If you used a rectangle as a guide for Cricut Print Then Cut, be sure to hide it (using the eye icon in the layers panel) before attaching your images.
Step 5: Print the sticker sheet
You’ve finally made it to the best part…making it! Once you click the Make It button, you’ll be prompted to print your design. When you reach the screen below, select “Use System Dialog” to specify your print settings.
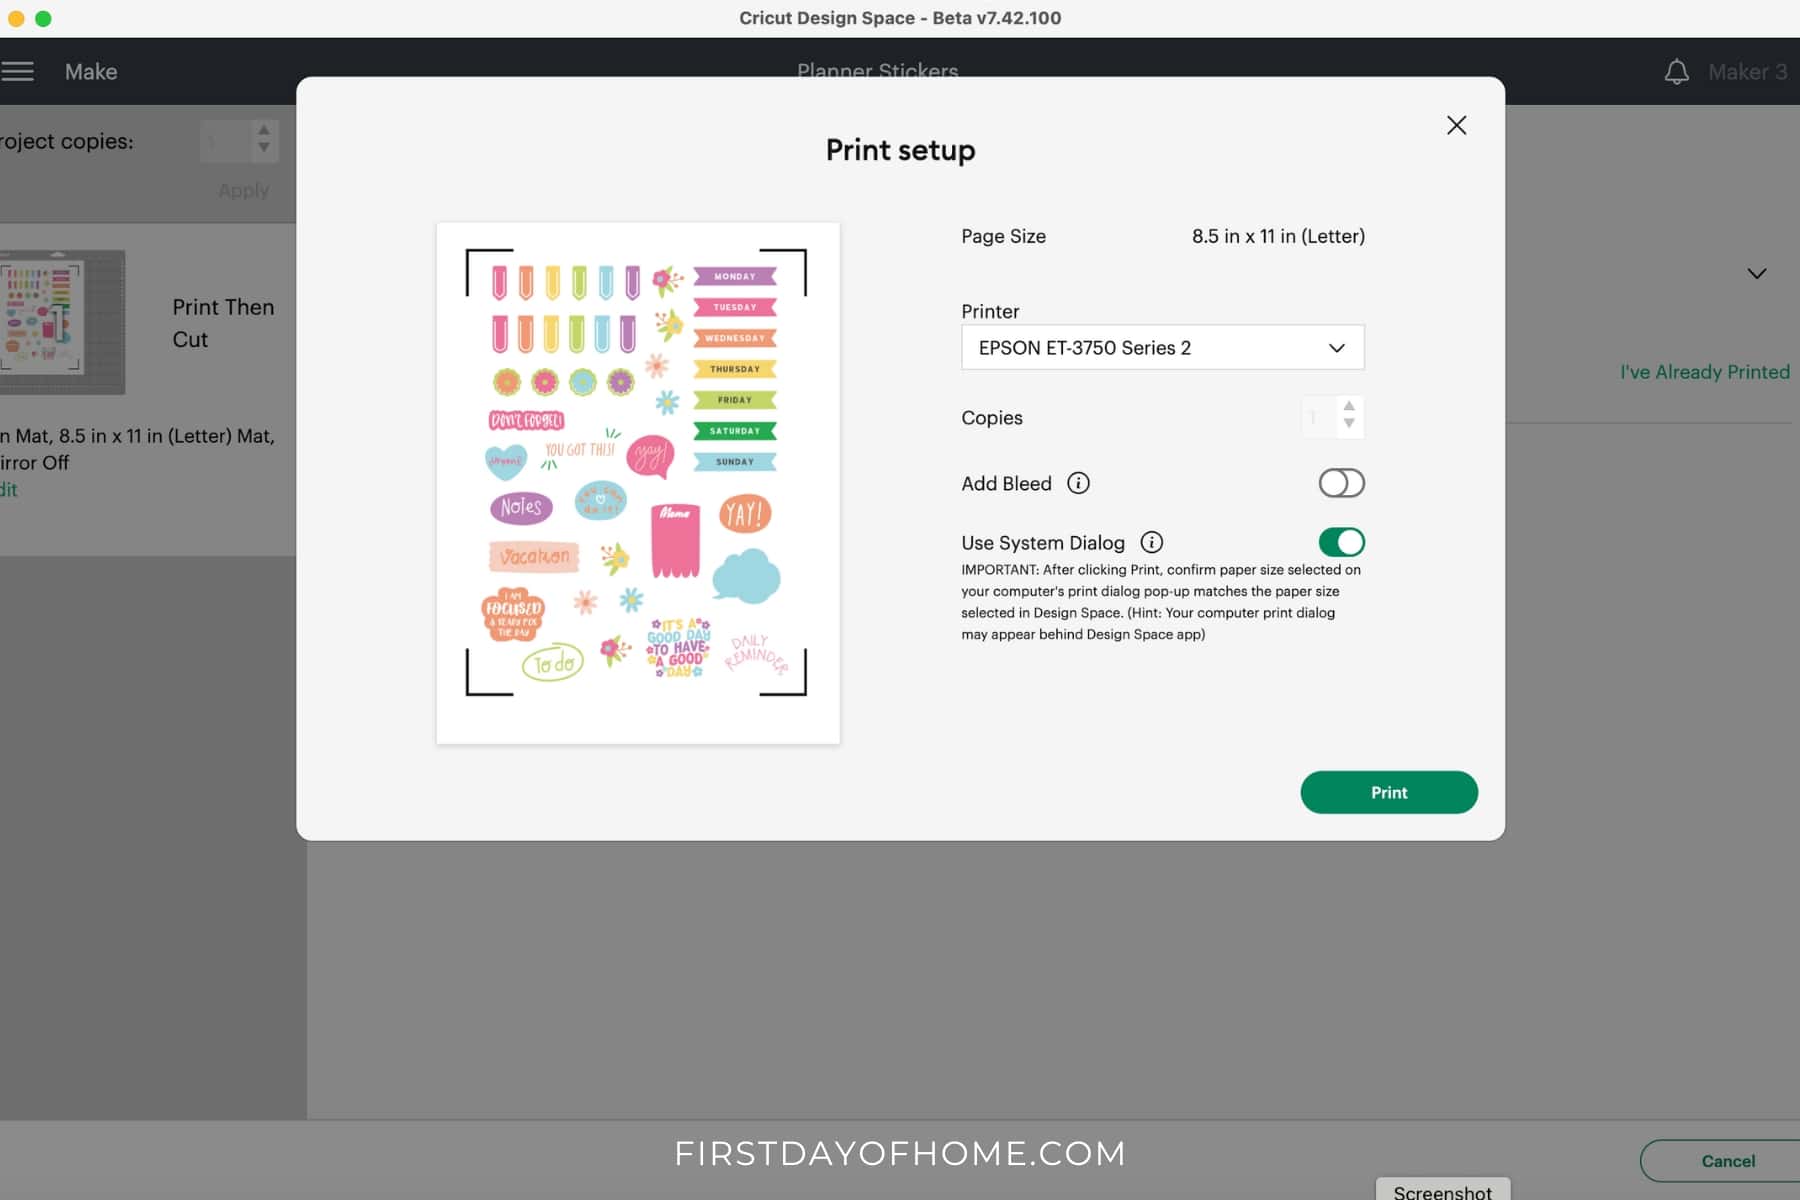
If you don’t have an offset on your stickers, you can select Add Bleed, which will extend the edges of your designs to ensure a clean cut. I prefer to use the offset method instead of adding a bleed.
If you don’t see the print dialog box, check behind the Cricut Design Space window.
Printer settings may vary depending on your model, but you want to select the highest-quality print setting possible. Make sure the sticker paper is compatible with your printer type since some paper is meant only for inkjet vs. laser jet printing.
If you have trouble loading the thicker Cricut sticker paper into your printer, try changing the paper setting or loading it from a different tray.
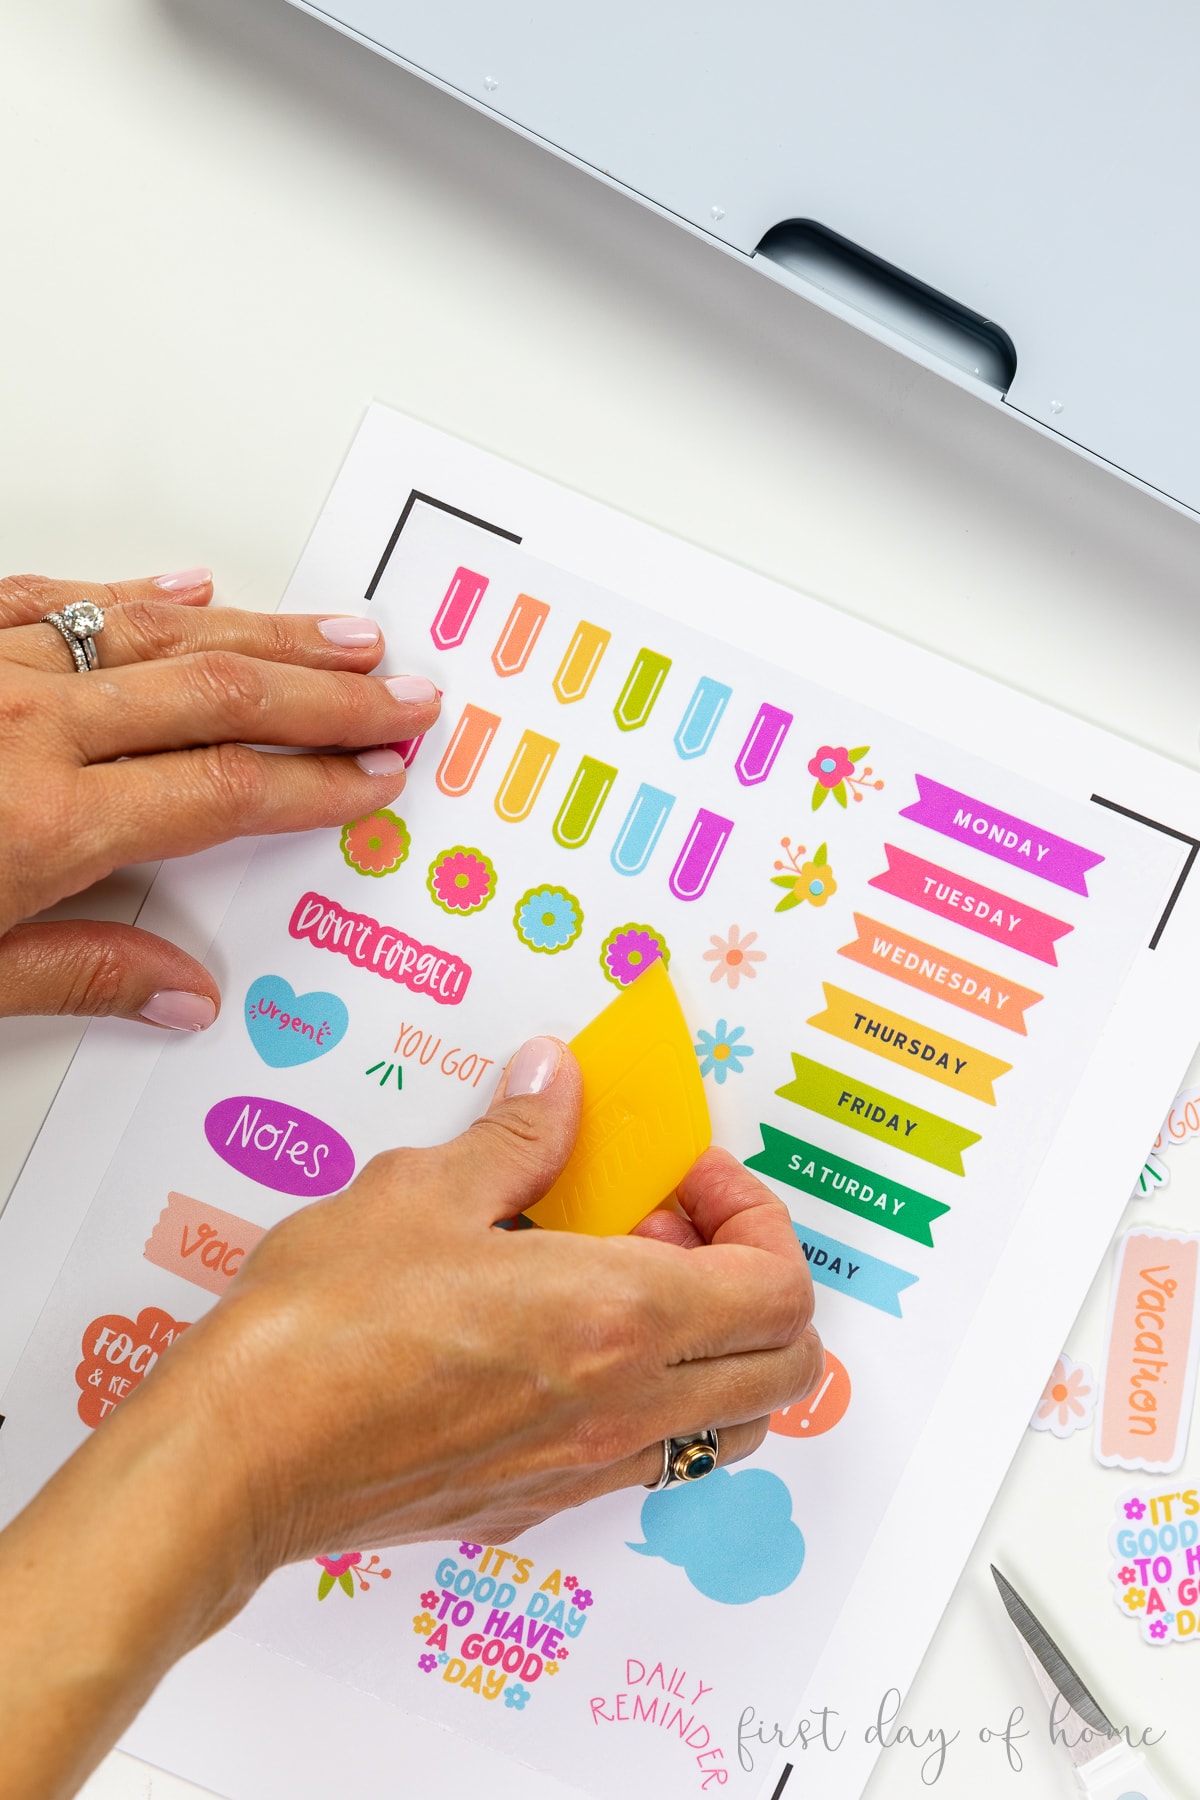
Step 6: Cut the images with a Cricut machine
In sticker lingo, a kiss cut only cuts through the sticker layer, leaving the paper backing sheet intact. A die cut creates individual sticker shapes, cutting the paper backing as well.
For Cricut sticker paper and Cricut printable vinyl, the default cut settings will give you a kiss cut. You can apply “more pressure” or “less pressure” if these system settings don’t work for you.
After you choose your material settings, load your cutting mat when prompted and hit start. You’ll use the standard fine point blade to cut stickers.

The machine will read the black registration marks to determine where to cut your sticker shapes. This is why Cricut Design Space gives you an error if your design exceeds the registration marks.
Tip: Test on Printer Paper
Before using a sheet of sticker paper, print and cut your design on regular copy paper to see if the machine is calibrated correctly.
The thickness of sticker paper or printable vinyl will vary greatly. If your machine is not cutting to your desired depth for a kiss cut, try using a slightly thicker/thinner material setting. A standard green cutting mat will work for most sticker papers, though a light-grip mat might work better for thinner papers.
For die-cut stickers, you can select “printable sticker paper” if you’re using printable vinyl. To die-cut printable sticker paper, you can choose a setting for a thicker material like medium cardstock.

If you add any additional layers of laminate for glossy stickers, that will also change your cut settings. (See the section on adding a glossy finish below.)
How to Upload Your Own Sticker Designs
If you want to import your own SVG files or other images into Cricut Design Space, click the Upload button in the lefthand menu. Follow the prompts to decide how to upload your image.
I like to select Complex as my image type to capture the most details (see below).

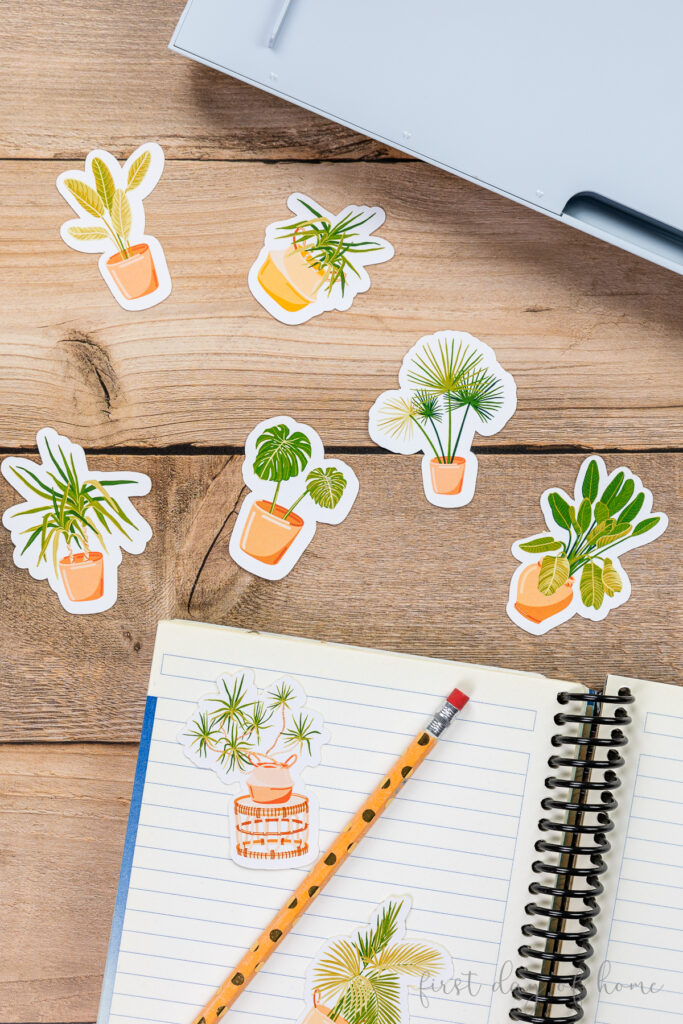
Once the image is imported, you can refine the details, if needed. I uploaded a collection of potted plant stickers in PNG format, so I didn’t need to remove the background.
You’ll notice how these PNG images already have a white offset, so we won’t need to modify them for Print Then Cut.

The last step is choosing the upload type. You’ll want to select Print Then Cut Image. You can also add tags to your uploaded image or assign it to a collection to stay organized.

One downside of Cricut Design Space is that you can’t upload multiple SVGs or PNGs at once. If you design your sticker sheet in another program, like Photoshop, Canva, or Procreate, you can then upload a single PNG file with all of your sticker images already formatted.
Get 10 Free Designs!
To download 10 free designs, including fonts and SVG files, sign up below for Creative Fabrica’s All Access Free Trial. Upon the 10th download or after 1 month, the free trial converts into an All Access subscription of $9 per month. You can cancel at any time, no questions asked. I’m doing it myself!
The best part is that these designs include a personal, commercial, and print-on-demand license. That’s almost unheard of for digital download sites.
How to add a glossy finish to stickers
So you want shiny stickers? One option is to use 2-3 coats of an acrylic sealer spray after cutting your stickers. My preferred option, however, is using a laminating sheet.
After printing your sticker sheet, apply a piece of self-laminating sheet just big enough to cover the images inside the registration marks.
Start in one corner of the printed sheet, and squeegee your way gently down and across.
If you own a laminating machine, it’s helpful to pass it through on a cold setting for good measure.

Laminated Sticker Paper Settings
When applying a self-laminating sheet to Cricut sticker paper, choose the “matte vinyl” setting for a kiss cut and the “medium cardstock” setting for a die cut.
Laminated Printable Vinyl Settings
If using Cricut printable vinyl with a laminating sheet, use the “printable sticker paper” setting for a die cut.
To get a kiss cut, you can create your own material setting by clicking “Browse All Materials”, and then “Material Settings.” Scroll to the bottom of the list and click “Add New Material” (see below). I found a pressure of 180 worked well.

Troubleshooting Tips
You may find that your sticker alignment is slightly off, even after calibrating your machine. Here are 5 tips for correcting this problem.
- Make sure the Cricut machine is well-lit so it can read the registration marks, but avoid casting shadows on your machine (like harsh sunlight).
- Check your mat alignment to ensure it won’t bend as it feeds into the machine.
- Increase the offset (white border) around your sticker designs to reduce the impact of small margins of error when cutting.
- Do a Forced Firmware Update. Turn off the Cricut machine and unplug the power cord. Then press the load button while plugging in the machine. You’ll see the power light turn red. In Cricut Design Space, you’ll then click the hamburger menu (in the top-left corner) and select Update Firmware. After the update, you can perform a Print Then Cut calibration once more and restart Design Space.
- If you notice a consistent misalignment to one side, you can nudge your offset around the image slightly to achieve the correct alignment when cutting.
Ways to Use DIY Stickers Made with Cricut
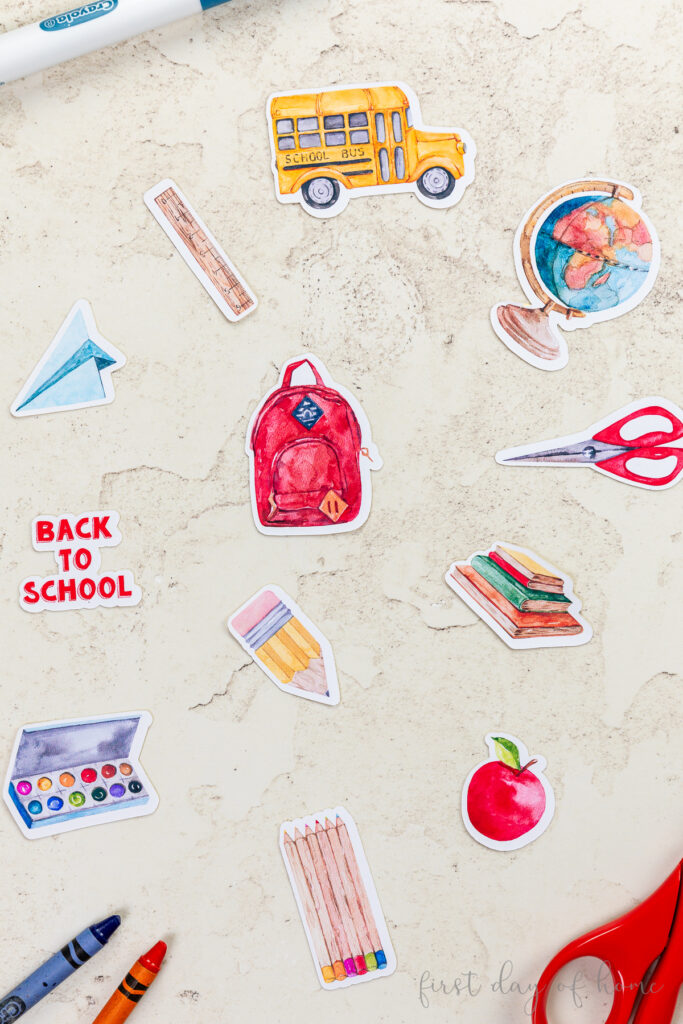
Once you know how to make stickers with Cricut, there are so many ways to enjoy them. I’ve created a collection for bullet journals, back-to-school stickers for notebooks, and plant stickers for my gardening journal. Leave a comment to let me know how you plan to use yours!

Pin it for later!

You Might Also Like…
I love this idea for making stickers for my planner.
Thank you for sharing,
Kippi
Thanks, Kippi! I appreciate your support. Hugs, Crissy
Thanks for sharing this thorough tutorial. The stickers turned out great!
Thanks, Marie! I’m glad you liked the stickers and hope you give it a try.
This tutorial for making stickers with Cricut is amazing! You always do such a good job with sharing the BEST way for us to do the crafts and DIYs you share! Pinned! And thank you, BB!
Thanks so much, BB! I always appreciate the encouragement and pins too. I hope you get some use out of making stickers. Big hugs!
This looks like such a fun idea, Crissy. I need to get a Cricut so I can do all of your cute crafts! I’m going to share a link to your post in my recap tomorrow. I think it’s perfect for BTS season and all my readers who are teachers and parents.
Thanks, Jen! I think teachers and students would definitely have fun with this. Thanks for sharing it in your roundup!