The Best Salt Dough Recipe for Families
Since my first salt dough ornaments seemed to be such a hit with my readers, I’m bringing you a smaller batch salt dough recipe with tips for getting great results every time! Making salt dough ornaments is a great boredom buster that will spark creativity in any child.

This post contains affiliate links, and I will be compensated if you make a purchase after clicking on my links. For more information, please see my disclosures.
The Best Salt Dough Recipe
In my earlier post on how to make salt dough ornaments with kids, I walked through each step of the process in detail. I even have a YouTube video if you’d like to make them right along with me!

For this post, I’m offering a small-batch recipe. I’m also going to focus on tips and tricks for decorating your ornaments and share reasons why you might have problems with ornaments cracking or puffing up.
First, here’s what you’ll need to get started!
I’d like to give a big thank you to PLAID, which donated the paints used in this tutorial.
Painting Salt Dough Ornaments
To paint salt dough ornaments, I generally prefer to use acrylic paints. There’s no need to dilute the paint or do anything special to the salt dough before you begin painting.
My boys and I used a combination of Apple Barrel and FolkArt paints for our latest ornaments.
Tip
Try not to brush over wet paint multiple times, as this will cause the paint to lift off the ornament. Let it dry completely before applying additional coats.
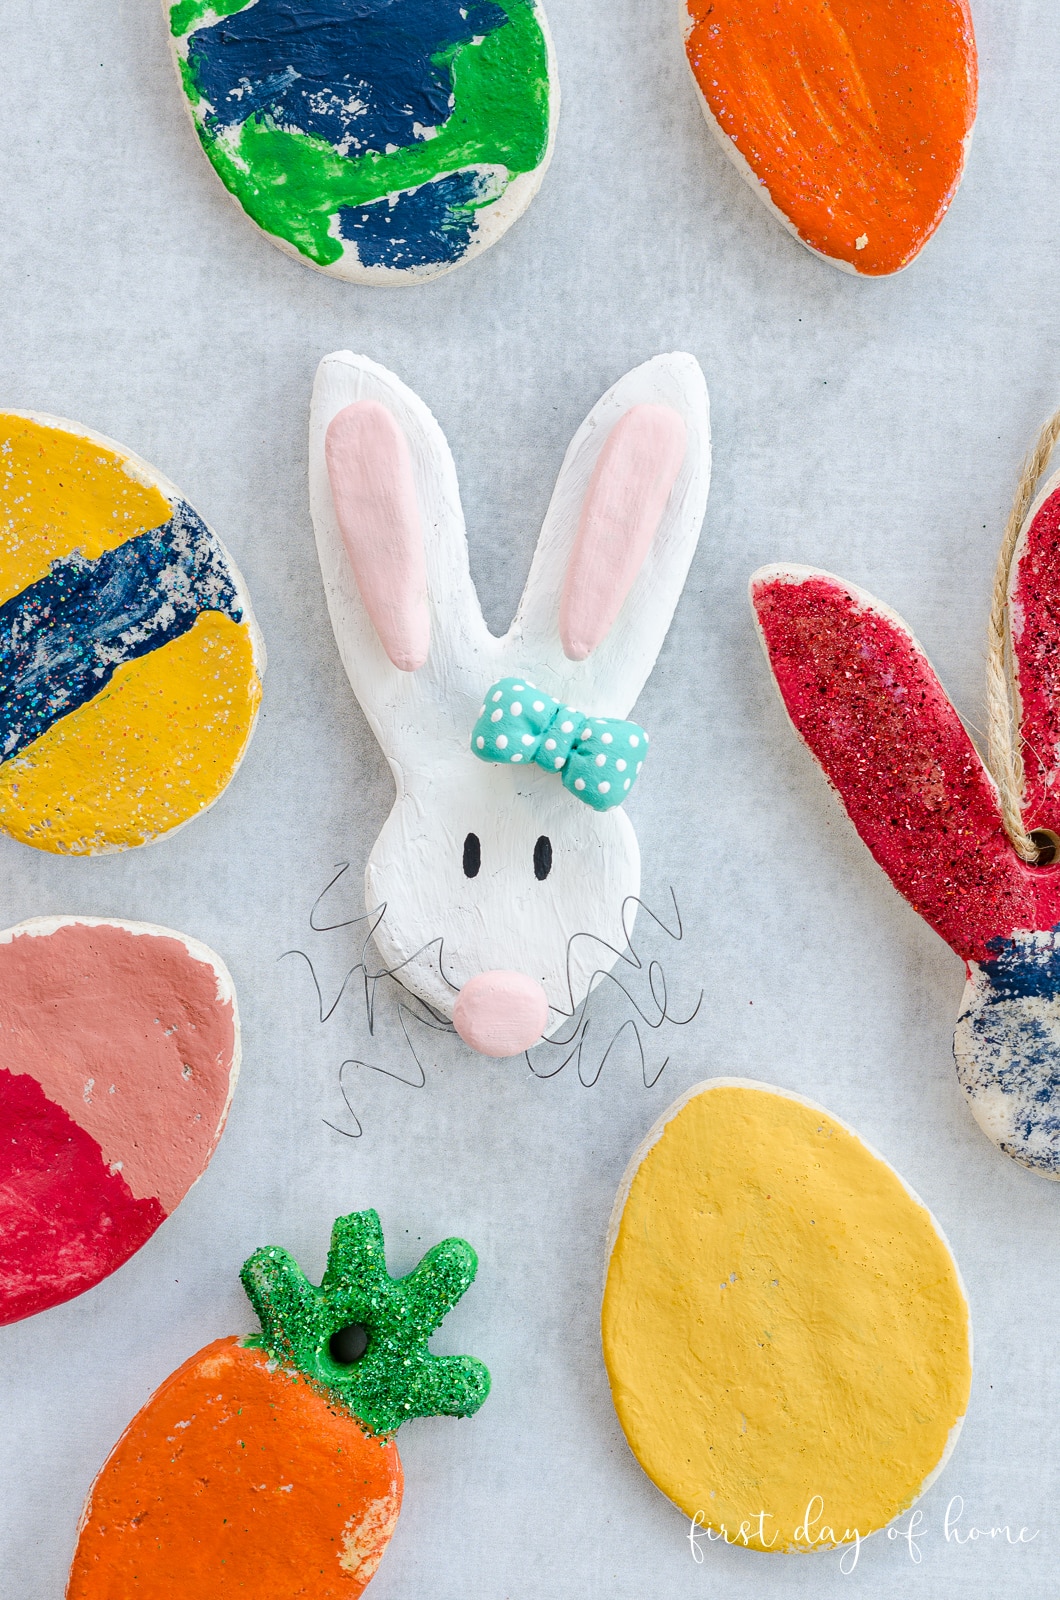
As you can see, there’s a lot more fun you can have with salt dough than just painting cookie shapes!

I hand-sculpted the ears, bow, and nose for the little bunny above and then hot glued the pieces together. The whiskers (my favorite part) are made from picture hanging wire. Mommies get to have fun, too!
How to Make Salt Dough Ornaments Shiny
To make ornaments shiny, I highly recommend using Mod Podge Gloss or Mod Podge Sparkle. I am in love with the Sparkle version!
You also have the option of using an acrylic sealer spray to create a sheen, but I really like the ease of using Mod Podge in a jar. Even the kids can help with it!
I had a lot of questions about how the Sparkle formula would look versus just using glitter. (I only used glitter in my other salt dough post.) Here’s a side-by-side comparison.
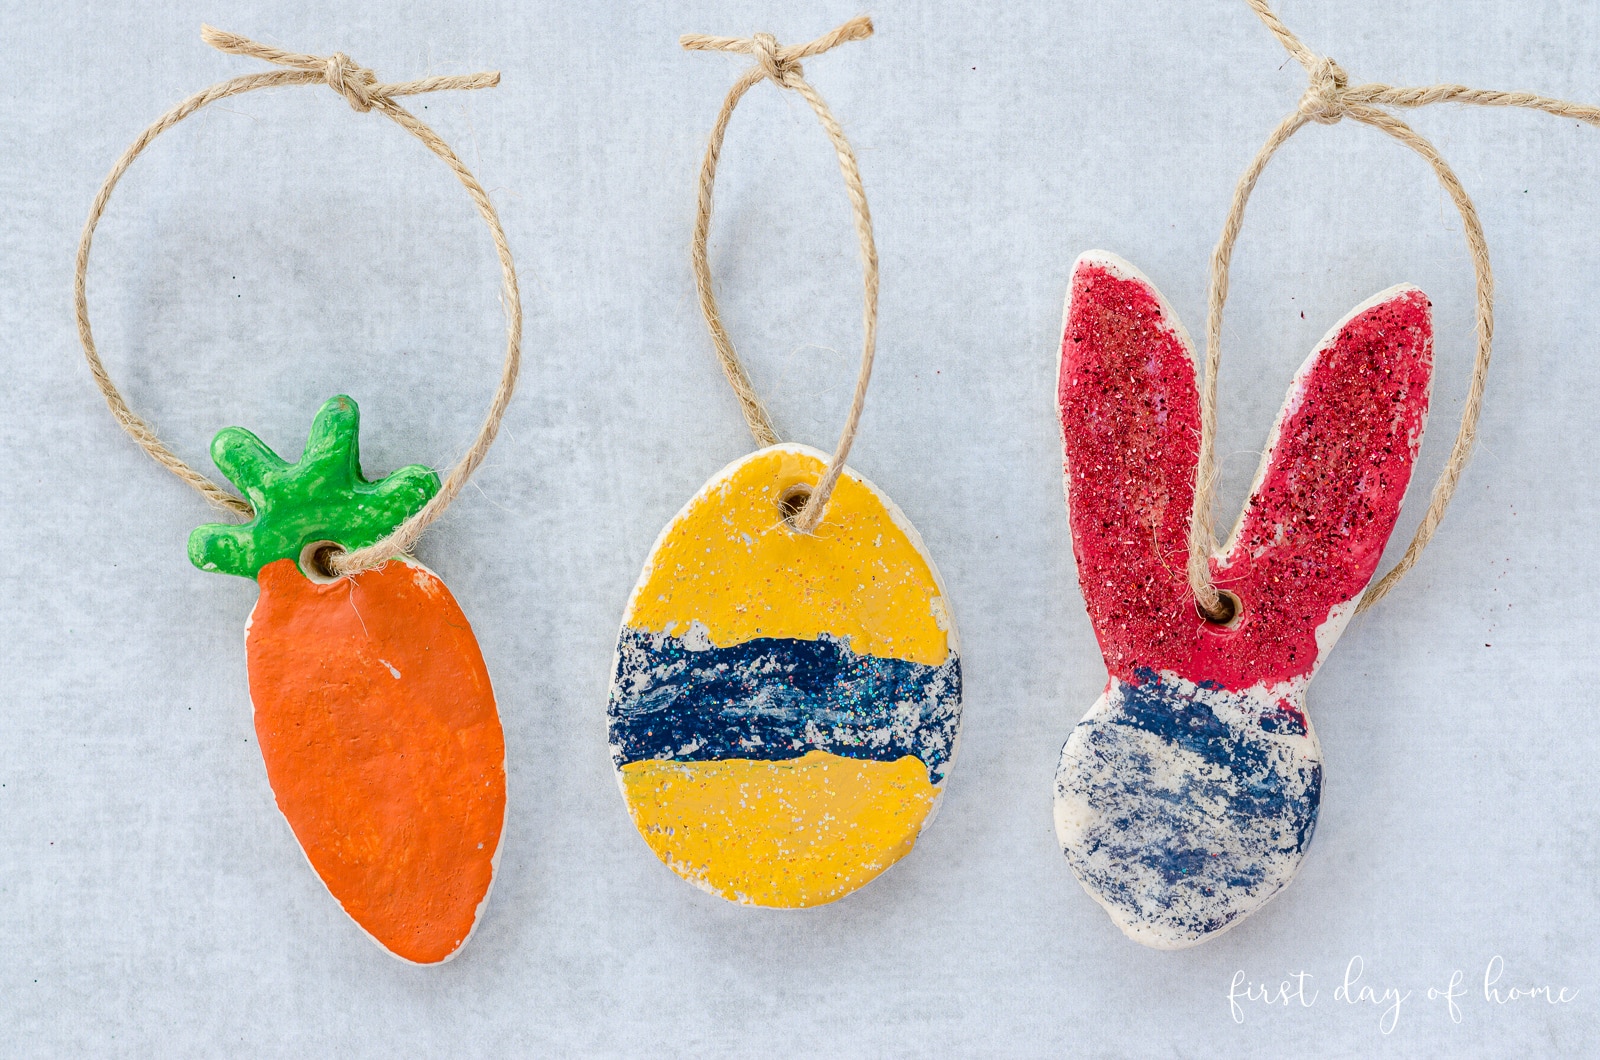
You can really observe the shine of Mod Podge Sparkle (egg ornament) at an angle. I love the fact that the ornament doesn’t shed like it would using regular glitter.

Tip
If using glitter to decorate your salt dough, first apply a thin coat of Mod Podge Matte, then apply glitter while still wet.
Why are my salt dough ornaments cracking?
If your ornaments crack during or after baking, try adding a bit more water to the dough next time or cooking at a slightly lower temperature for a longer period of time.
Of course, you always have the option of letting the ornaments air dry for 4-7 days if you have the patience. This is a great no-bake option, especially in classroom settings.
Sealing the ornaments with any type of Mod Podge formula will also prevent cracking and help preserve the ornament for years to come.

Why did my salt dough puff up?
If you have problems with your salt dough puffing up while baking, try making the ornaments thinner or reducing the baking temperature (cooking longer). Again, you always have the option of air drying your salt dough instead of baking it.
Also, please make sure you use all-purpose flour and not self-rising flour or other alternatives.
More Salt Dough Recipe Ideas
I have many more ideas for using this salt dough recipe in my related post, but here are a few ideas to help you imagine the possibilities!
- Salt dough garland
- Christmas card/photo holder
- Salt dough handprints
- Salt dough paw prints for pets
- Salt dough gift tags
Pin it for later!


How to Make Salt Dough
Equipment
- Easter cookie cutters (if making ornaments)
- Drinking straw
- Baking sheet (if baking)
Supplies
- 1 cup all-purpose flour
- ¼ cup table salt
- ¼ to ½ cup water
- Mod Podge Sparkle (optional)
- acrylic paint (optional)
- glitter (optional)
Instructions
- If baking, pre-heat the oven to 250°F. You can also choose a no-bake option and let the salt dough air dry for 4-7 days.
- Blend dry ingredients together in a large bowl.
- Gradually add water and knead the dough with your hands until it reaches your desired texture.
- If the dough feels too tacky, add more flour. If it’s too dry, you can gradually add more water.
- Roll dough out until 1/4 inch thick or less.
- Cut dough into desired shapes.
- Using a drinking straw, make small holes in the ornaments to hang them later.
- If baking, place the salt dough ornaments on a cookie sheet and bake at 250°F for about 2 hours or until all moisture is gone. If the ornaments are still soft in some places, you can continue to let them air dry.
- Decorate the salt dough ornaments with acrylic paint, Mod Podge Sparkle or other accents.
- Optional: Seal the ornaments with any Mod Podge sealer, if desired.
You Might Also Like…


Fourth day after heating in oven for 3 hours at 250 where they mostly hardened (one side in particular) & thought time would harden them the rest of the way. But now they are getting soft again. Any suggestions on what to do to get them hard would be appreciated.
Hi Karen! I would try placing them in the oven again and see if that helps. Mine usually don’t get soft again since they can also be air-dried. I wonder if there’s a lot of humidity in the air. You might want to place them with the opposite side facing down this time. I hope this helps!
What a great project, Crissy! It looks like your boys enjoyed making and decorating these ornaments, and I bet my students would love to make these too! Thank you so much for sharing! Happy Easter, my friend!
Thanks so much, Lynne! I’m sure your students would have a blast with it. The decorating is my favorite part. I hope you had a wonderful Easter! Thanks for stopping by, sweet friend!
This website is so busy and full of ads you can’t even find the danged recipe!!!! >:((
Hi Alicia. Sorry to hear you did not have a good experience. There is a button at the top of posts like this to jump straight to the recipe or tutorial. Since I provide all of this content free of charge, I rely on ads to support my small business. It is the only way I can afford to spend more time and money bringing new content to my readers. Thank you.