How to Make an Easy Back to School Sign [Free SVG + Printable]
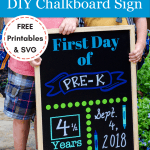

Are you ready for “back to school” mania to begin? Ready or not, here it comes! In this tutorial, you’ll learn exactly how to make an easy back to school sign and score a free printable and SVG file.

This post contains affiliate links, and I will be compensated if you make a purchase after clicking on my links. For more information, please see my disclosures.
Back to School Sign – Chalkboard SVG and Printable
About this time of year, parents everywhere are enjoying the last days of summer with their kids. Perhaps school has already begun but you’re feeling guilty that you didn’t have “one of those signs” for your kids. #alwaysnextyear
Perhaps you’re here because you’re scrambling to get your photo props ready for the first day of school.
In either case, I’m arming you with the files and supplies you’ll need to snap some great photos of the kiddos for all those social media posts you’re about to drop.
See two versions below: 1) a chalkboard sign made with Cricut or 2) a printable sign.
Option 1: “Back to School” Chalkboard Sign for Cricut
Supplies
- Chalkboard
- Matte adhesive vinyl
- Cricut (for SVG files)
- Transfer tape (for SVG files)
Step 1: Download the “Back to School” SVG File
See the instructions at the end of this post to download the free SVG file.
Upload the file to Cricut Design Space and add it to your canvas. Ungroup the design to separate the layers, and resize the images as desired. The crayon label with the oval cutout is intended to be layered on top of the solid crayon outline.
*Note: If using a Silhouette machine, you need the “Designer Edition” of Silhouette Studio to open SVG files.
Step 2: Send the design to your Cricut machine
Once you are satisfied with the size and layout of your design, click Make It to send the file to your Cricut machine.
When prompted to select how you plan to load materials, select on mat if using regular vinyl on a cutting mat or without mat if using Smart Vinyl.
Make sure you preview the images on each color of vinyl you plan to use. You may need to move some images to other cutting mats or make adjustments. If you need to move part of the design to a different color of vinyl, select the image and click the three dots in the upper left that appear. Then choose “move object” and select the mat or material color you prefer.
Your machine will prompt you to load each color of vinyl in the order you selected.
Regular, non-permanent vinyl works well for this project.

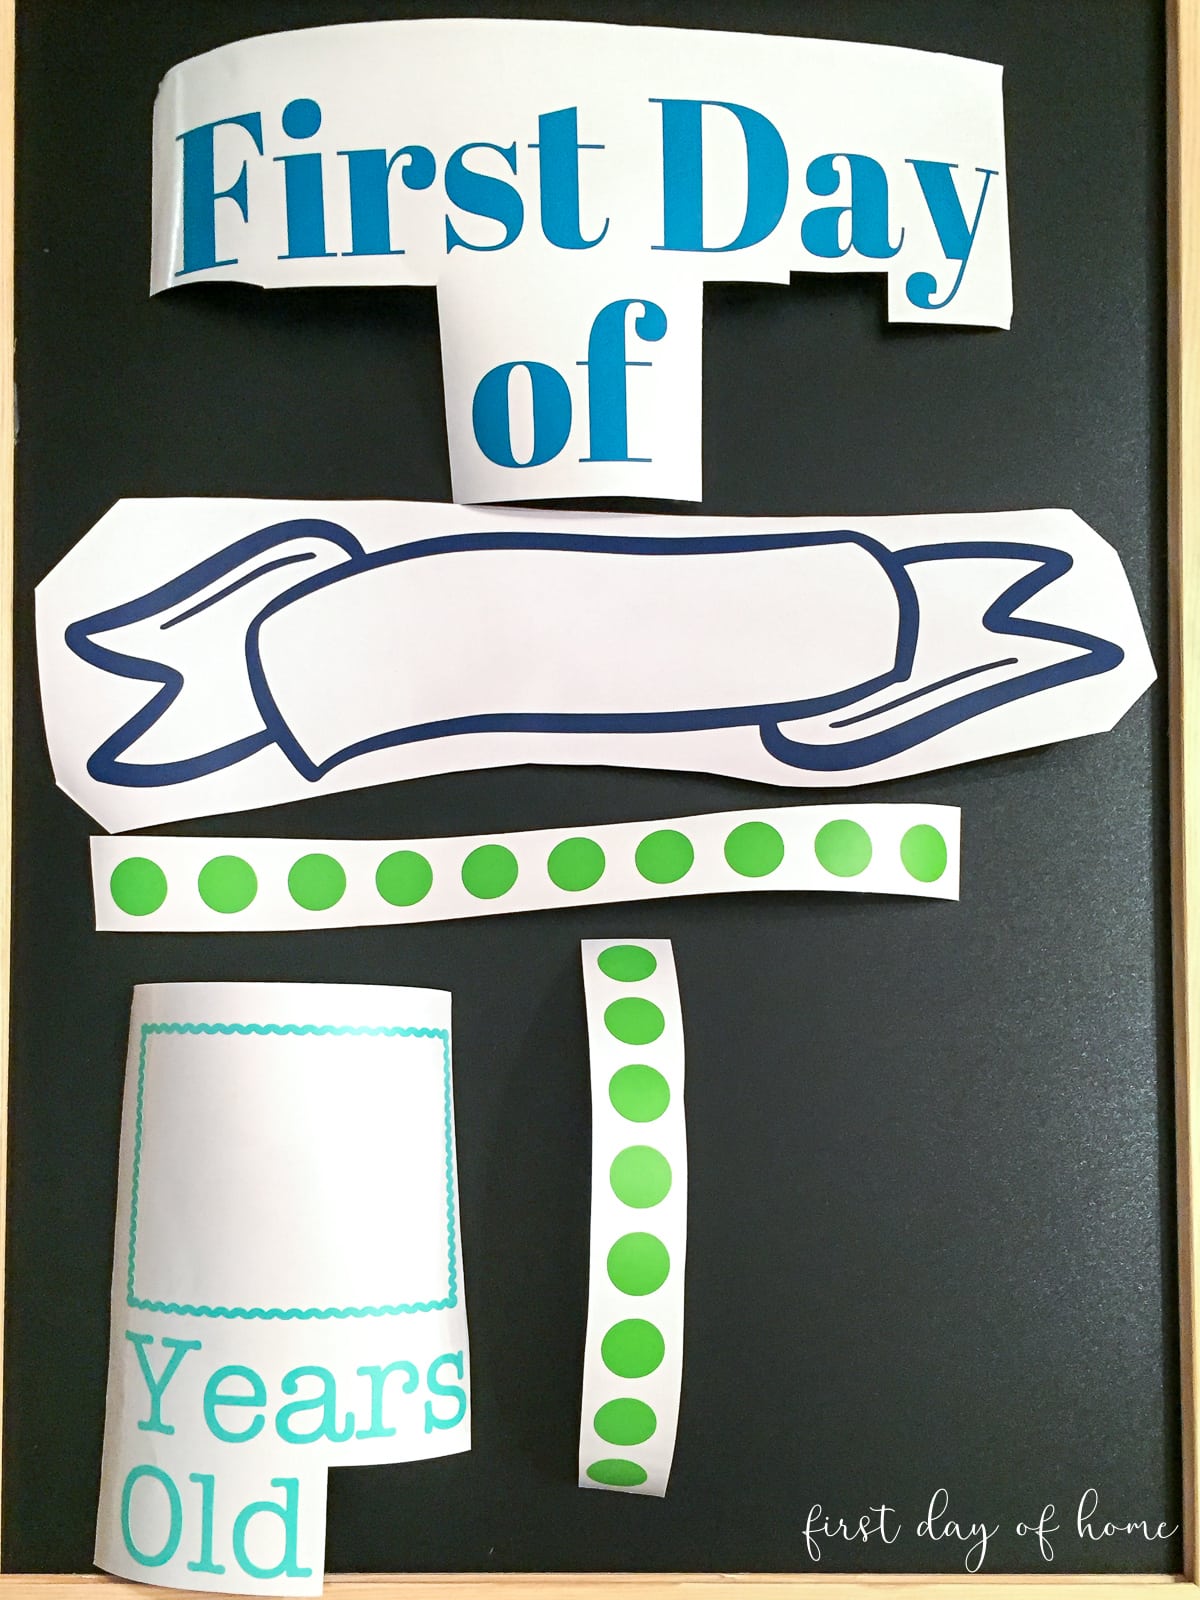
Step 3: Weed the vinyl
Once your design is cut, trim the vinyl so you can reuse the excess pieces at a later date.
Weed your design (remove the excess vinyl) to reveal only the text/image you want to transfer. (See the image below.) It’s helpful to place your design on the chalkboard at this point to get a preview of the final product.
Step 4: Transfer the design to the chalkboard
Use transfer tape to “pick up” the matte vinyl from the paper backing and apply it to the chalkboard. Start with the top edge and smooth the design onto the chalkboard with a scraper tool or a hard piece of plastic (like a credit card) to prevent air bubbles.
Then, pull off the transfer tape slowly, making sure your vinyl adheres to the chalkboard.

*Note: You can reuse the same transfer tape as long as it remains tacky.
Step 5: Personalize your chalkboard
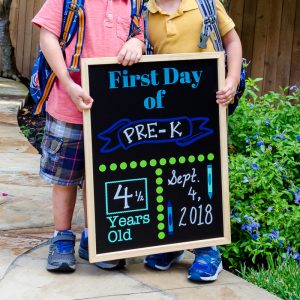
Write in the name, grade, age, and/or date on your chalkboard with chalk markers. This allows you to erase the details and reuse the sign every year (until your kids begin to protest the whole exercise).
Snap a photo, share it with friends and family, and wish your child a great start to the new school year!
NOTE: For other school-related projects, be sure to check out my post where you can download FREE fonts for fall.
Shop for Chalkboard Sign Supplies

Option 2: Printable Back-to-School Sign
If you need a quick photo prop, I’m also offering a printable “First Day of School” sign. This printable is formatted to print on a standard 8.5×11-inch sheet of paper or cardstock.

Have a great school year! If you use this back to school sign, please tag me on Instagram @firstdayofhome!
Pin it for later!

How to Make an Easy “Back to School” Sign
Equipment
- Cricut cutting machine for SVG file version
- Computer printer for printable file version
Supplies
- Chalkboard
- Adhesive vinyl
- Transfer tape (for SVG file version)
- Chalkboard markers (for SVG file version)
Instructions
- If using a Cricut, download the SVG file. Otherwise, download the printable PDF version and skip to step 7.
- Ungroup the design, and resize the images as needed to fit your chalkboard. Then click "Make It" to send the design to your cutting machine.
- Load each color of vinyl into your machine when prompted, and follow the instructions in Cricut Design Space for your chosen vinyl.
- Weed the vinyl to reveal only the graphics you want to transfer. Trim any excess paper backing.
- Use transfer tape to "pick up" the vinyl from the paper backing, and apply it to the chalkboard. Start at one edge and press firmly with a scraper tool or hard plastic to smooth out air bubbles. Then, remove the transfer tape and repeat with the remaining vinyl pieces.
- Using chalkboard markers, fill out the blank spaces with your child’s age, grade and other details.
- If using the PDF file, simply print the file on thick paper or cardstock (8.5×11-inch) and fill out the information for your child.
More Cricut Projects

Wow, this looks store-bought! Beautiful, Crissy!
Thanks so much, CiCi! It’s helpful to have this on hand so I’m not scrambling the night before school looking for a sign. (That’s my usual MO. Ha!)