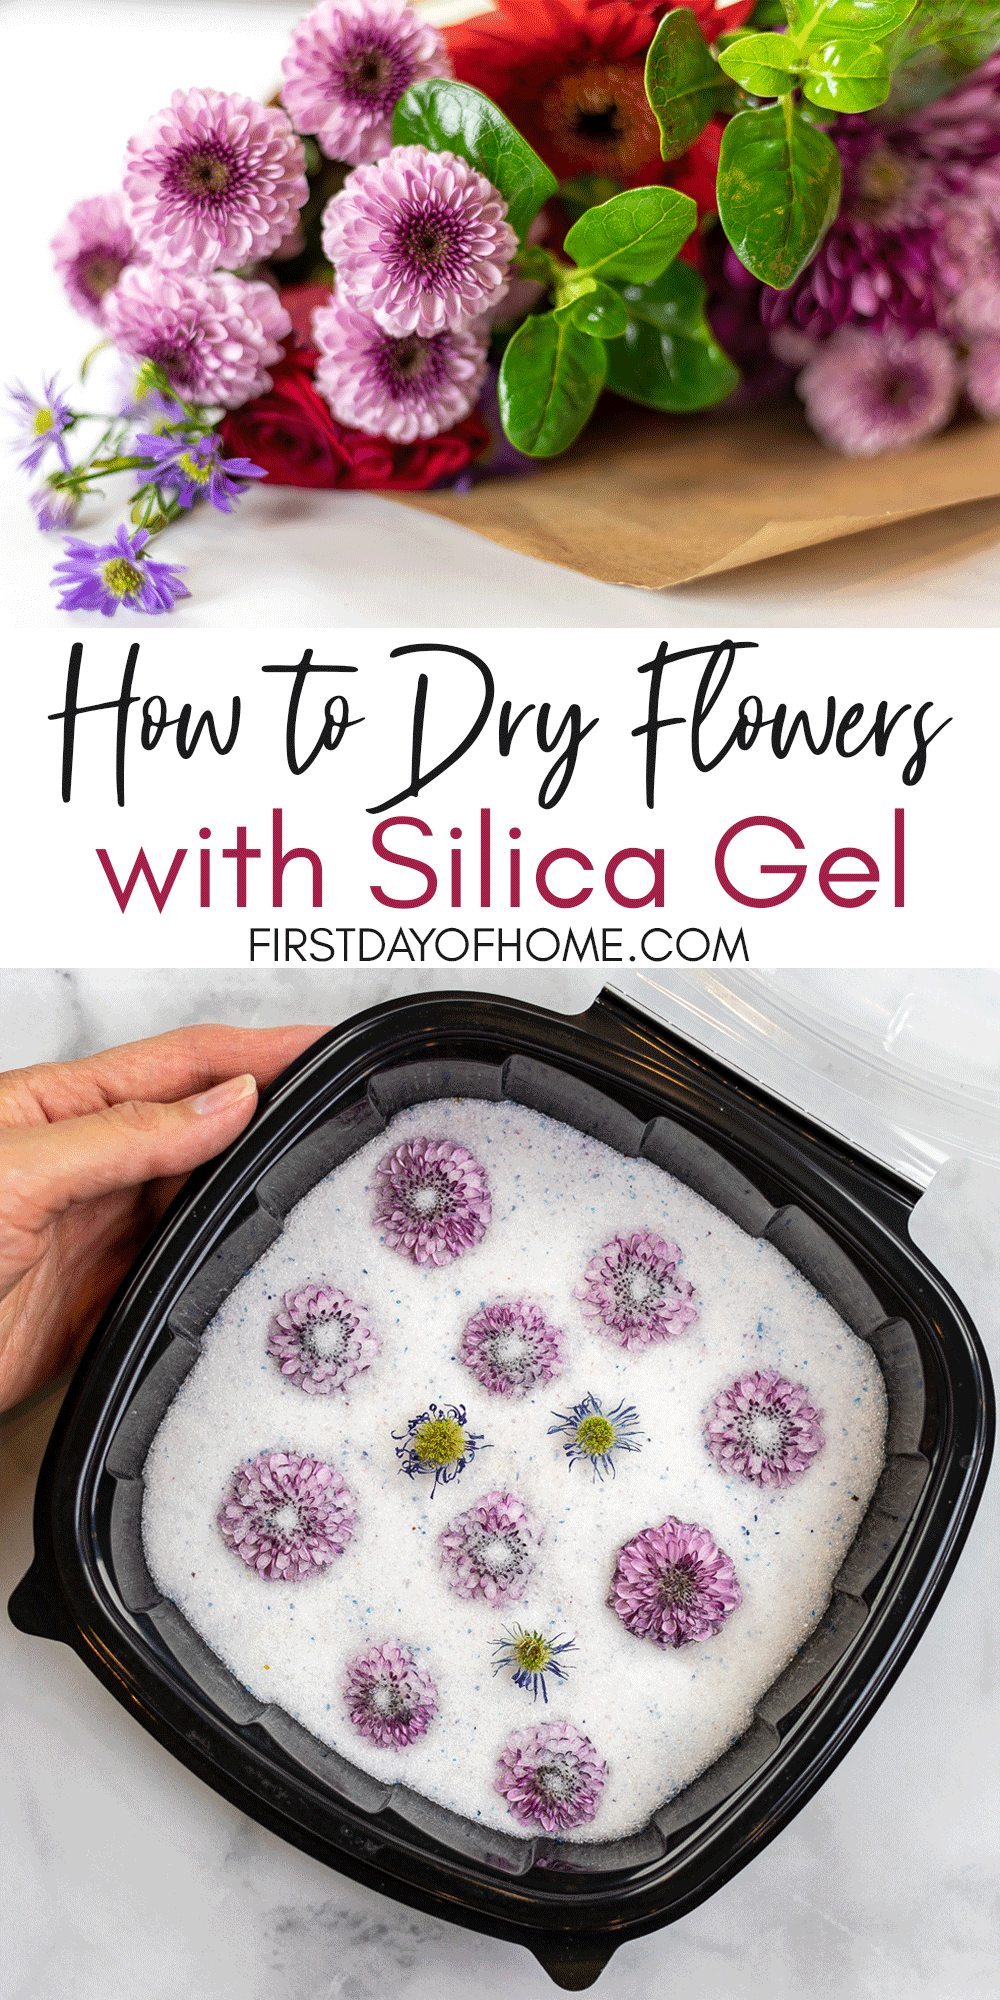
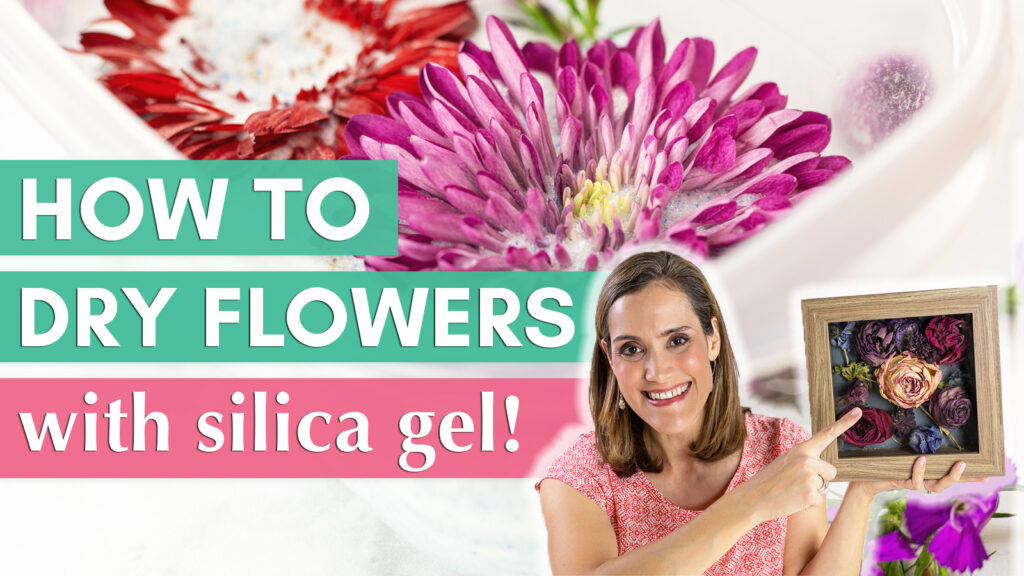
How to Dry Flowers with Silica Gel: An Amazing Technique!
I’ve heard some people say they don’t enjoy receiving flowers as gifts because the blooms never last long. Not this girl! Bring me all the flowers! When you know how to dry flowers with silica gel, you might join my club, too.
Over the years, I’ve experimented with many methods to preserve flowers. Silica gel offers both quality and efficiency. Toward the end, I’ll share some examples of how this method comes in handy for a variety of crafts and decor projects.
This post contains affiliate links, and I will be compensated if you make a purchase after clicking on my links. For more information, please see my disclosures.
What is Silica Gel?
Silica gel consists of blue and white crystals that act as a desiccant absorbing nearby moisture. The blue crystals work as an indicator, turning pink when the mixture has reached maximum absorption. At that point, the gel needs replacing or recharging for reuse. (See FAQs below.)
Think of those little packets that come inside a box with a new pair of shoes. You could either save up tons of those doohickies or, more realistically, buy the product I used for this tutorial, which was made specifically to dry flowers.

Drying Flowers with Silica: Conventional Method
Silica gel works wonders to preserve the natural color and beauty of flowers. It’s the perfect choice for preserving a bridal bouquet or creating dried flowers for jewelry, wreaths, resin crafts, or potpourri.
Supplies
- Fresh flowers
- Silica gel beads (not silica sand)
- Airtight plastic container or metal container
- Pruners or scissors
- Microwave and glass of water (optional method)
- Gloves and mask (recommended)
Caution: Do not reuse your container for food preparation after drying flowers, as silica gel may absorb pesticides from flowers.
Watch This Tutorial on YouTube
Step 1: Trim stems, and pat flowers dry
For the best quality, use fresh flowers. I love using flowers picked straight from my garden, but I opted to buy a seasonal bouquet from my local grocery store for this demo.

It included a mix of gerbera daisies, chrysanthemums, aster daisies, button poms (a.k.a. cushion pom mums), purple statice, and roses. I’ll admit, the finer petals on the aster daisies didn’t preserve as well as the roses or mums. We’ll get to that below.
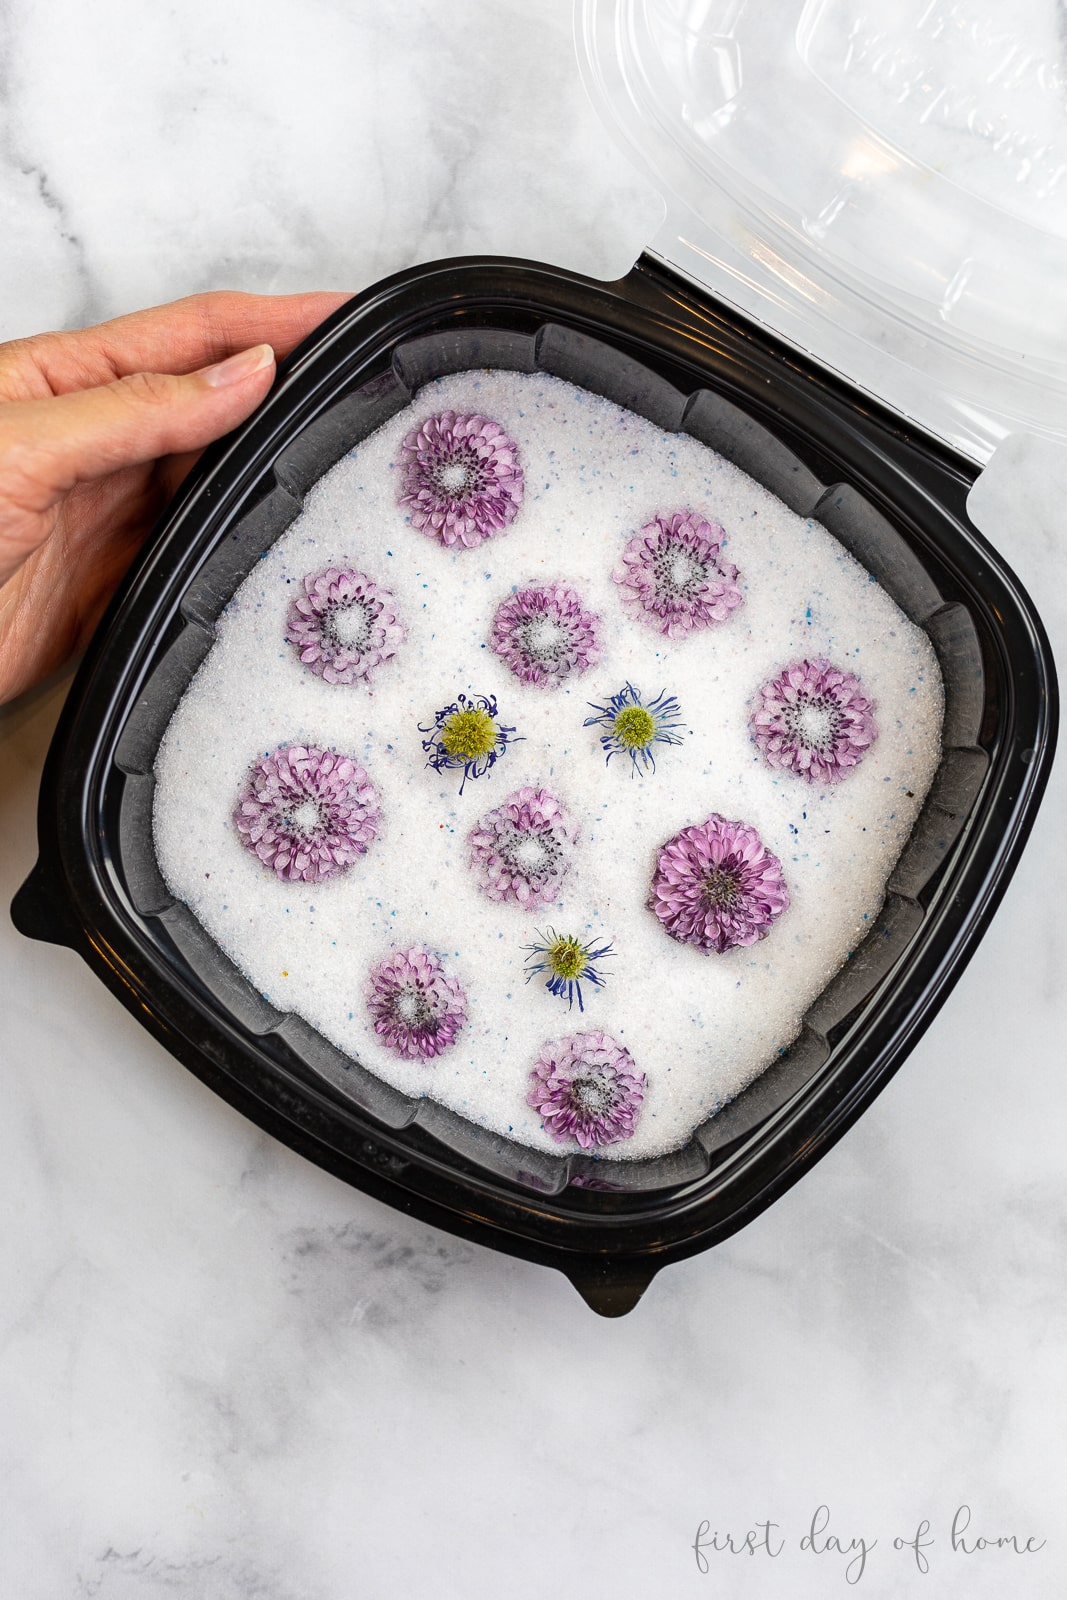
Step 2: Pour gel into airtight container
Note: Though silica gel is non-toxic, I recommend wearing a mask and using gloves when handling the product. As you pour the gel into the container, it can create fine dust that you won’t want to inhale.
To begin, pour a layer of crystals about 1.5 inches thick into your container.
Then place the flowers in the container (face up) and add more crystals in and around the petals until fully covered but not submerged completely.

Seal the lid closed when done, and set the container in a dry place.
You can also experiment with placing the petals face down in your container, but you risk the petals getting bent or deformed when working with flowers like mums, zinnias or daisies.
Pro Tip
For optimal results, dry flowers of the same type together. If drying different flowers together, check the container regularly to remove any flowers that have already dried.
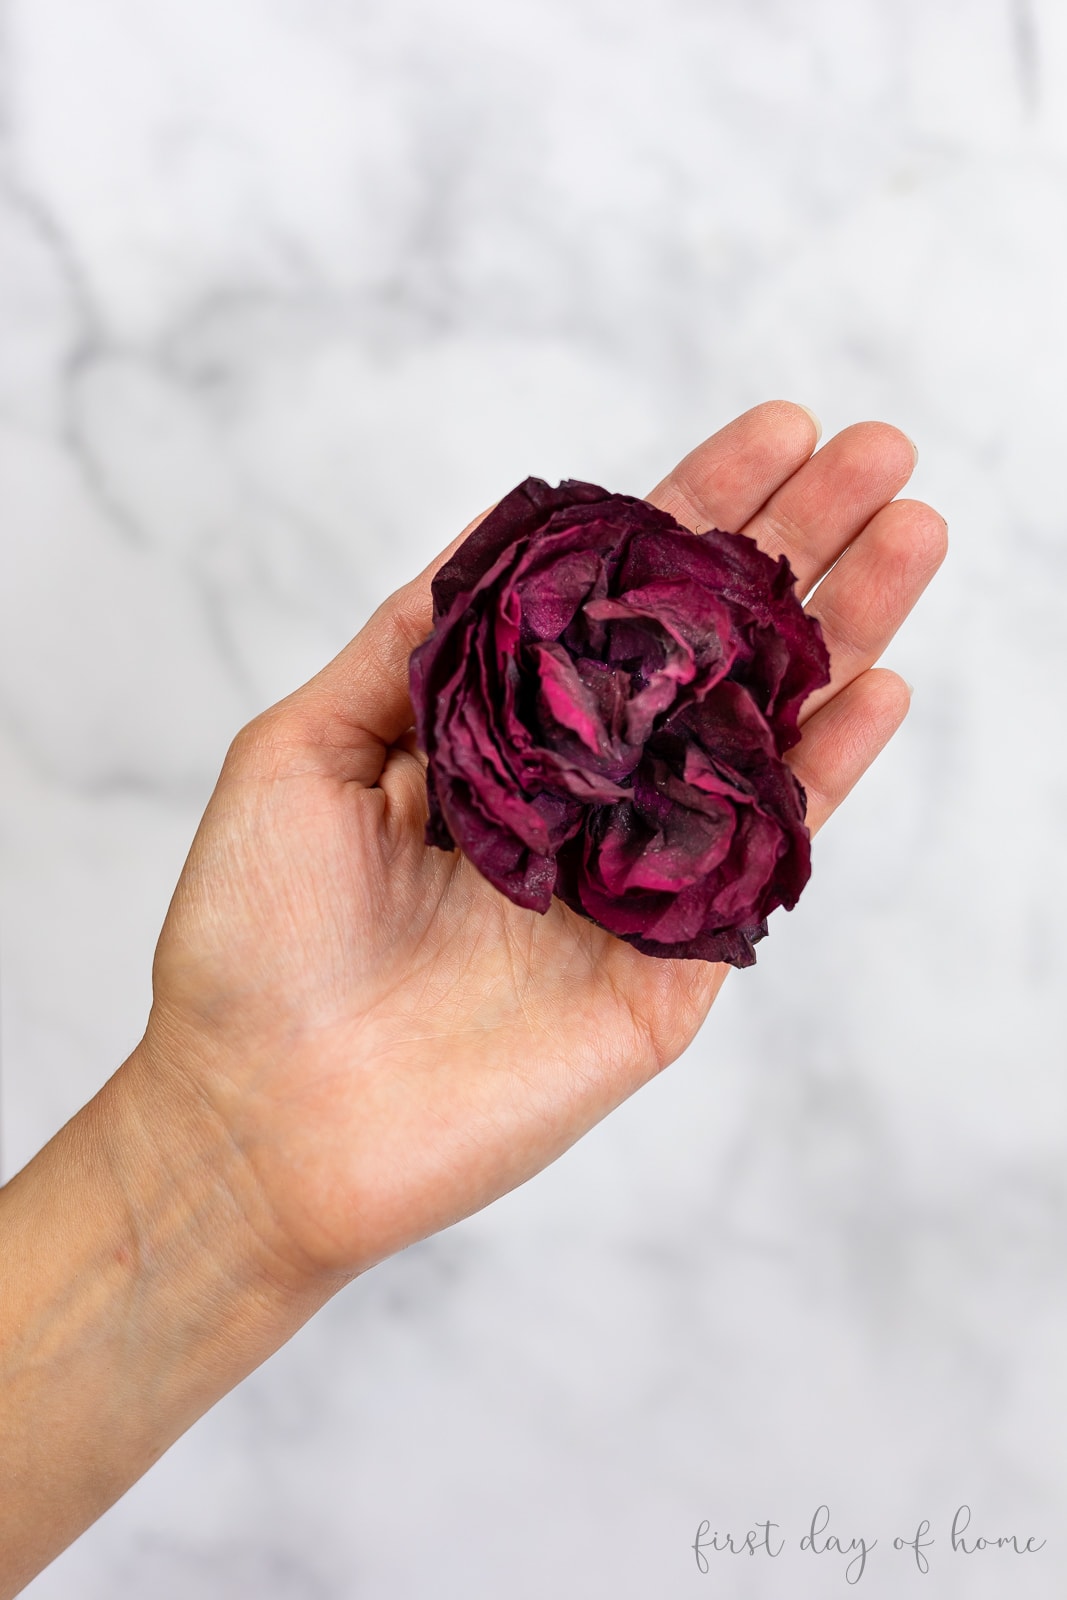
Step 3: Allow to completely dry and remove from gel
After 2-4 days, most flowers will dehydrate enough to remove from the silica gel. Blooms with thicker centers, like rose buds or zinnias, may need closer to 7 days.
Once dry, remove the flowers from the container and brush off any excess silica with a soft brush. You can leave a little gel deep inside the petals if you want to help protect them from room humidity.

As you can see, flowers like roses and mums turn out really well when drying with silica gel, whereas very dainty blossoms like aster may shrivel more. (Truth be told, I still like the spidery wisps of the asters.)
How to Dry Flowers in the Microwave
Short on time? I feel ya! The microwave method for drying flowers with silica can get results in a matter of minutes!
As with the conventional technique, you’ll want to start by trimming and drying your flowers before placing them into a microwave-safe dish over 1.5 inches of silica gel. Then gently cover the petals and centers with more silica gel until covered.
Do not put a lid on your container.
Simply place the open container in the microwave with a glass of water and heat on medium power one minute at a time. It will usually take anywhere between 1-3 minutes total for your flowers to dry.
Amazing, right?
Regardless of which method you choose, I’m a big believer in using silica gel to retain the best color and shape of your flowers!
In my complete guide on how to dry flowers, I talk about how it compares to other drying methods.
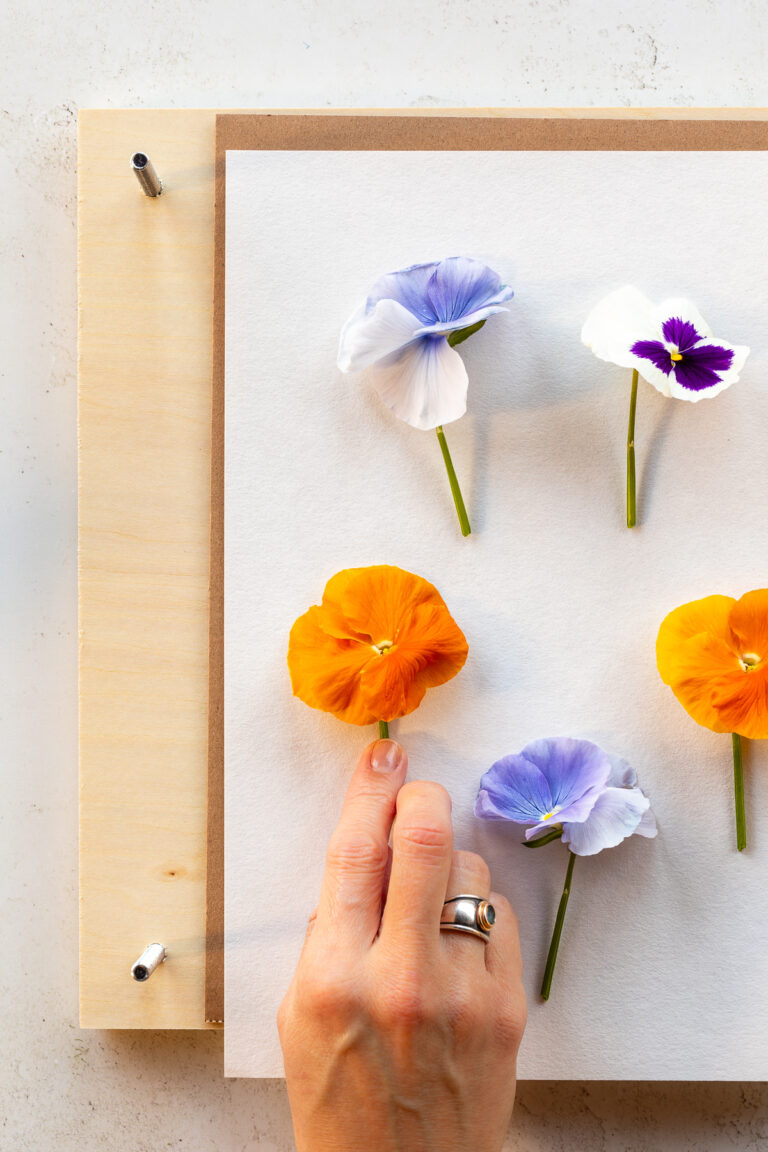
For an equally impressive but completely different technique, you can visit my guides on how to press flowers or making DIY pressed flower art.

How to Use Silica Gel for Drying Flowers
Equipment
- Gloves and mask optional
- Soft bristle paint brush
Supplies
- Fresh flowers
- Silica gel
- Airtight plastic or metal container
- Glass of water (microwave method only)
Instructions
Conventional method:
- Trim stems, remove leaves and pat flowers dry
- Pour silica gel into an airtight container until it creates a layer about 1.5 inches thick
- Place flowers face-up on top of silica gel and pour more crystals in and round the petals
- Seal the container, and place it in a cool, dry place for 2-4 days (more if bud is very thick).
- Once completely dry, remove flowers from the silica gel and brush off excess crystals with a soft bristle paintbrush.
Microwave method:
- Follow steps 1-2 of the conventional method, but be sure to use a microwave-safe container. No lid is needed.
- Place the container with flowers in the microwave (without a lid) along with a glass of water. Heat on medium power in 1-minute increments until dry. Most flowers will take 1-3 minutes.
- Gently remove any excess silica gel beads with a paintbrush.
Notes
FAQs
-
What types of flowers work best with silica gel?
According to the Activa product page, the flowers that dry best with silica include the following: rose, aster, carnation, marigold, dahlia, larkspur, geranium, zinnia, chrysanthemum, and delphinium.
-
How long does it take to dry flowers in silica gel?
Most flowers only take 2-4 days with the conventional method or as little as 2-3 minutes with the microwave method using silica gel. You can get a handy guide on page 2 of this manual for reference.
-
Can silica gel be reused after drying flowers?
Yes, you can reuse silica gel until the blue crystals have turned pink. The pink color indicates the mixture cannot absorb any more moisture, so it’s time to “recharge” the gel.
To do this, simply spread the crystals in an oven-safe pan and heat the mixture at 250°F for at least 5 hours or until the pink crystals turn blue again.
Some manufacturers will sell different color crystals. Please refer to the manufacturer’s instructions to determine how to reset your crystals. -
Can silica cat litter be used to dry flowers?
It’s possible to use silica cat litter to dry flowers. However, the texture or consistency of the litter crystals may affect the quality of your dried flowers.
-
Do I need to seal my dried flowers after using silica gel?
It isn’t absolutely necessary to apply a sealer, but you do have the option of using hair spray or this Mod Podge Sealer Spray to protect your dried flowers from fading.
-
If I want to keep the stem of a rose, should I place the entire stem in silica gel?
When preserving an entire rose, it is helpful to remove the stem and only place the flower in silica gel. You can then reattach the stem with floral wire once the rose has been dried with silica gel. (The stem can dry naturally and does not need to be dried with silica gel.)
To more easily reattach the stem, run the wire through the base of the rose before drying it. -
Can I place my flower face down in silica gel?
For best results, place flowers facing up when drying with silica gel. This allows the gel crystals to reach the center of the flower and will prevent the flower from losing its shape.
Leave a comment to let us know your experience, and have fun preserving your memories!

Im using a dofferent brand with orange beads that turn dark green, Does microwaving gel release pesticides or fumes?
No, microwaving does not release fumes in my experience, and most manufacturers have instructions for using the microwave to dry flowers with silica gel. I hope this helps!
It works well, im using an off-brand with orange beads that turn forest green, does using the microwave release fumes?
Hi Alex. No, there should be instructions that come with your silica gel that talk about a microwave option. I think I’ve used that same brand before as well. The microwave option is to speed up the drying. You would use the oven and a foil or oven-safe container to “reset” the crystals after they have turned green so you can reuse the silica gel. The main thing is not to use the same container for food after using it for silica gel. I have a video that walks through all the steps if you need more info: https://youtu.be/lLgpgD_xZzU?si=3XL9gWcuWcwBFh2P.
Hi! I had a question about the mod podge sealer- after I dry the flowers with the silica , if I’m going to put the flowers in resin , should I use the mod podge sealer still? Will it help to preserve the color of the flowers as well? Thank you!!!
Hi Kristin. You can skip using Mod Podge if you’re planning to place the flowers in resin. Just make sure the flowers are completely dry, and you’ll be good. Best of luck! -Crissy
Hi,
Thank you for this. I’m wanting to try this to some camellia petals (from my garden) and use them at my wedding. Will they hold their white colour? Or it isn’t worth it as they’re such delicate petals?
Hi Tanya! In terms of the shape of the flower, I think camellias are perfect for drying with silica gel. I would expect them to turn a slight shade of yellow, which is typical with white flowers. Check out this video I released with lots of questions answered about silica gel: https://youtu.be/PYZSlruBLxY?t=363. I’ve queued it up for you to the part where I show a white rose that has been dried in silica gel. This may give you a better sense of what to expect. Thanks!
Hi,
thanks for the instructions on how to dry (reactivate) the silica gel. I’ve wanted to do that for a long time, but the silica gel I use does not come with instructions (I guess they want you to buy new one… ) so I wasn’t sure about what temperature would be best. The drying with 250F/120C is working like a charm and took much less than 5 hours. Of course, it depends on how thick the layer of silica gel is. The thinner, the quicker. So it’s better to use several baking trays instead of one. And I would recommend opening the oven a few times in between to let the moisture escape.
Hi Christine! Thanks for sharing your experience. These are great tips that I’m sure others will appreciate! I’m glad you found a technique that is working for you. I agree that thinner layers help it reactive more quickly. Enjoy your flower drying adventures!
Thank you for your post.
I’ve dried some small petunias in silica gel and am struggling to remove all the silica. I’ve used a small paint brush and still it wants to stick. It’s a small amount but I’d like to sink the petunias in resin and I’m curious if I can still do this with some of the gel still attached. Will the silica gel cause a reaction or bubbles in the resin? Will I still be able to see the silica gel inside the resin? Thanks for your reply
Hi Chris. How many days did you let the petunias dry in silica gel? I find it often takes more days than the instructions would indicate. If the gel is sticking, could it be that the flower petals are still damp? If you’re pretty confident the petunias are completely dried, you might try turning them upside-down and gently shaking/tapping them so the silica gel will fall out of the flowers. The silica gel shouldn’t react with the resin, but you might see a few small granules depending on how you place the flowers in the resin. I hope this helps!
I dried my wedding bouquet using silica gel and it worked really well. All flowers were very dry (well at least I thought they were- I dried them according to recommended drying time and rose thickness etc).
I then arranged them into a plastic container while I waited for the shadow box to arrive. I put some silica gel in the container as well. 2 days later the shadow box arrived and I went to transfer the arrangement but found that all the roses were soft and some of the other flowers had started to brown.
I have put them back in the gel.
Do you have any recommendations on why this happened/how I can avoid it/what I should do now?
Hi Tammy! Congrats on getting married! This has happened to me before, and I think it has a lot to do with the thickness of the flower and the humidity in the air. For roses especially, the flower will sometimes stay moist in the very center. Putting them back in the gel is a good idea. I often find they need more days than the recommended time. If the blue crystals have turned pink, just follow the instructions to reactivate the crystals in the oven and then place them in a sealed bag again when they are blue. Also, I do find that it’s harder to maintain color with very light-colored flowers, but I do still think they can look pretty in a vintage way. I hope this helps!
Hi Crissy, I’m looking for a way to preserve my daughter’s beautiful cascading hydrangea bouquet. The hydrangea pieces, along with some greenery, are inserted into a floral foam base. If I can find a container large enough, can I just cover the whole bouquet with silica gel?
Hello there! I have to be honest that I don’t believe hydrangeas may be ideal for using silica gel due to the complexity of the many blooms they have. I know many people dry fresh hydrangeas by simply placing them in a vase with water and letting the water naturally evaporate. I’m not sure if that would suit your needs. My fear is that placing the hydrangeas in silica gel will result in crumbling petals since the blooms are so dainty. I know many home decorators use dried hydrangeas in their decor by using the air-dry method. I hope this helps! Congrats to your daughter, by the way! Best wishes, Crissy
Hey! Thank you so much for this super helpful post! I was hoping to ask if you had suggestions for how to stiffen/protect flowers that have been preserved in silica. I know you wrote above that it’s not necessary to seal them, but what if we want to treat them in some way to make them a bit less brittle? I just preserved a few full iris blooms in 3D but they’re so fragile I’m afraid to touch them, especially the petals!
Hi Karolina! I’m glad the post was helpful. I imagine your iris blooms are beautiful! You can try using a fixative like aerosol hairspray to preserve dried flowers a bit longer. Spray 2-3 coats to prevent the flowers from becoming more brittle, waiting a few minutes between coats. I would definitely try keeping them away from direct sunlight to prevent them from fading. Let me know how it goes, and best of luck to you! -Crissy
Hi Crissy!
Thanks for sharing this tutorial, I’ve found it really helpful! I am hoping to preserve some long stem roses using this method but I would like to keep the stems so I can put them in a vase afterwards. Does this method work if I lay the roses flat in my container and cover in silica gel or do they have to be standing upright? Thanks again!
Hi Tia! It may be tough to find a container long enough to fill with silica gel and cover everything. I suggest removing the stem (by cutting it close to the base of the flower) and then reattaching it with floral wire after the blossom has finished drying. You could even thread some floral wire through the base of the flower before you dry it to make it easier to wrap around the stem later. The stem doesn’t really need silica gel to dry properly. I hope this helps! -Crissy
Thanks Crissy, that’s really helpful! Does this method still work if the flowers are laid flat in the silica gel instead of facing upwards? Have you ever tried this? Thanks in advance for your response!
Hi Tia. Sorry for the delay getting back to you. I generally advise people to face the flower up so that the silica gel can reach the inside of the flower. Otherwise, you may find that the center of the flower is still a bit moist. I’m thinking specifically of roses that have petals concentrated in the center. Having the flower face up also allows for the petals to spread out a little more evenly. I hope this helps! Best wishes, Crissy
Thank you for all of the great information! I plan to put half of by bridal bouquet in silica gel and the other half pressed/dried with the book method. I would like to set my flowers up before leaving for my honeymoon and will return 10 days later. My question is, once the flowers are dried in the gel, is it okay to wait a few days to put them in the resin or should they be placed in resin immediately after coming out of the gel?
Thank you!
Hi Mackenize! Congrats on getting married! I think your flowers will be fine if you leave them out a few days before placing them in resin. I wouldn’t wait many months, but a few days won’t make a huge difference. I hope you have a great time on your honeymoon! -Crissy
Hello! I dried flowers and they came out perfect! I left them in a container and when I went to use them, they seemed to become soft again. I’d this normal? And how do I prevent this from happening?
Thank you!
Hi Lincy! That has happened to me before. Sometimes you think the flower is completely dry, but it might still have some moisture, or the moisture in the air can make the petals wilt again. (That’s the story of my life in the humid climate I live in!) It’s definitely not unusual. The flowers will continue to dry naturally when exposed to the air. You just gave them a head start with silica gel. You can always do another day or two in silica gel if you’d like. (See my notes on “recharging” your silica gel to reuse it if the crystals are fully saturated.) Next time, you might try leaving them in a bit longer. Hope this helps!
I followed the steps you said but my flowers are losing colour and begining to absorb moisture after being taken out of the silica gel crystal. In just a few days, it wilts and catches mold. What can I do to prevent that?
Hi Samprikta! I’m sorry to hear that you didn’t have a good experience. It sounds like either you tried drying a flower that doesn’t take well or maybe you didn’t leave it in the silica gel long enough. What type of flower did you use, may I ask?
How will i know when to take it out?? i dont want it to be too dry but i dobwant it to not be dry enough. This is for a memorial i will be casting it in a resin sphere. First time drying a flower though. I did run out just before a few petal tips were covered completly will it be ok? Or should i hurry to store?
Thanks
Hi Nadine! Don’t stress about having the entire flower covered. It will still dry out. Usually, the silica gel comes with instructions for different types of flowers. Typically, 3-4 days is enough. You can take it out and check on it periodically. I suggest you watch this video to get a sense of what it’s like. You can skip to the chapter on silica gel. https://youtu.be/lLgpgD_xZzU Best wishes, Crissy
When drying the rose i ran out and a little of a few petals is sticking out will it be ok? This is my first time.
Hi Nadine. Did my other response help answer your question? I think you should be fine with your rose petals. You can check on them after 2 days or so to decide whether you need to leave them in longer. Typically, they are done after about 4 or 5 days depending on the thickness of the flower. Best of luck!
I got married a couple of days ago and I just absolutely love my bouquet and my husband’s boutonniere, I’m new to all this (and I mean very new), how strict of an air tight container do I need? What do you typically like to do with your silica gel dried flowers? I was seeing some people using epoxy resin to make a piece… Any other recommendations to make a forever memory?
Hi Michelle! First of all, congrats on your recent marriage! That’s so exciting! To answer your question, you can use a simple tupperware-type container to dry your flowers. Just make sure you don’t reuse that container for food afterward.
I do plan to make some resin crafts with dried flowers and will post an update on that. Another great option is simply making a shadow box with your dried flowers. You can then put a dedication on the front glass using vinyl lettering. I use a Cricut or Cameo cutting machine to make the lettering. I hope this helps! -Crissy
Does it do any harm to the flowers if you let them sit in the silica gel for too long? I want to make sure it’s fully dry, but I don’t want it to sit for too long
Hi Rachelle! I’ve never had an issue leaving them in for too long, but keep in mind you can always let the flowers air dry slightly after you remove them from the silica gel if they aren’t completely dry yet. (Sometimes you think they’re dry, but they will remain soft on the innermost layers.) I’d say after 5-6 days, most flowers should be done. I hope this helps! Best wishes, Crissy
Hello!
I was wondering along the same lines, I got married Saturday, fully submerged my glowers in the Tiny Hippo crystals Sunday, and then had to take off for our honeymoon and will be gone 11 days, think they’ll be ok that long? I could have my house sitter try to remove them but as they’re so special and important I would of course prefer to do it myself when I return but don’t want them to disintegrate or anything…
Hi Stacey! First of all, congratulations on getting married! I’ve never used that brand of silica gel, but here are instructions for different types of flowers using the Activa brand: https://cdn.shopify.com/s/files/1/0276/9565/files/FINAL_Flower_Drying_Art_Product_Instructions.pdf?13397221985180623665. (See the second page for times by flower type.) Most flowers only take up to 5 days. I might have your house sitter just check a flower to see how it’s doing around that time. It won’t hurt the flowers to take a look and then put it back if it needs more time. Keep in mind the flowers will continue to air dry naturally if they are still a little moist in the center. I’ve never left them in 11 days, but I doubt there would be much harm. The crystals stop absorbing moisture after a certain point. Good luck!
Hi! I’ve tried drying roses a couple times already in silica gel and it has gone okay. When I pull them out though they are textured, as in the silica gel has made divots in the flowers. I have tried searching about this but haven’t found anything. Is there any way you could help?
Hi, Ray. I’m wondering what kind of silica gel you’re using. Can you tell me the brand name? I haven’t seen that happen with the gel I’ve used in the past. Mine is very fine and wouldn’t normally leave divots. Sometimes I need a brush to dust off the silica gel because the grains are more like a powder. Thanks, Crissy
It means the silica beads you are using are too large. The sand-like size doesn’t leave divers but the larger size (that you typically find in packets) does.
Yes, that could very well be the reason. Thanks for sharing this tip.
How do you know when a flower is completely dried out?
Hi Samantha. First, I would follow the manufacturer’s guidelines for the type of flower you’re using. It will vary based on how many layers of petals there are or how thick the petals are. If you don’t have guidelines for the product, I would typically wait 2-4 days for most flowers or up to 7 days for thicker flowers like roses if you’re using the traditional method (not a microwave). If you remove the flowers and find that they’re still moist in the center, you might keep them in the silica gel longer. They can always finish drying naturally after you remove them from the gel, too. At the end of the day, it’s just a judgment call based on the color and texture of the flower. I hope this helps! -Crissy
Hiya!
I can’t seem to get my silica gel crystals off of my flowers completely what should I do?!
Hi Daniela! Have you tried using a small paintbrush to gently brush off the crystals? Sometimes I wait a few days and gently shake the flower out over a sink or trashcan to let any remaining crystals fall out. It could be that your flower is not completely dried yet, so the crystals are still sticking to it. Usually waiting a few days and using a paintbrush helps. Good luck!
hi crissy
thank you for sharing this beautiful tutorial
it’s amazing to know that flower can be last longer with its original shape and colour. i wonder how long the dried flower will last ?
Hi Natalie. Well, the color and shape won’t be exactly like the original, but it’s as close to preserving the original as you can get with dried flowers. I think they can last for many years. You can expect lighter colored flowers to yellow with age eventually.
Thanks for this! What if I want the stem still on it because I will be using the flowers in a cloche and need them to be able to stand upright? Can I still use silica to dry them?
Hi Kirston! You’re quite welcome! Yes, you can use silica gel to dry the whole stem. You just need to make sure you have enough silica gel to cover the whole flower. I imagine you’ll need a bigger container to fit the stem, so perhaps it will take quite a bit more silica gel. I’ll warn you that “juicier” stems (like something on a gerbera daisy) might not dry as well as a rose stem.
If you want to explore other options before deciding, you can also see this article on drying flowers 5 different ways: https://www.firstdayofhome.com/how-to-dry-flowers/. Good luck! Cheers, Crissy
Hi Crissy, I wish I had read your website sooner! I have some dried out roses from a bouquet that have just dried in a vase while the water evaporated (for about a week and a half). Can I still use silica gel on them to further dry/preserve or will it not really do anything at this point?
Hi, Maija! You can definitely try using silica gel if the flowers are still a little moist. It won’t do any harm, but the flowers might be a bit brittle already. I have a separate post on ways to dry flowers, and air drying is a nice option too. You can see how the different drying methods compare here: https://www.firstdayofhome.com/how-to-dry-flowers/
I was wondering if you’ve ever dried a peace lily flower and if so, how? I have a peace lily plant that I got from my grandfather’s funeral about 5 years ago and it was full of blooms when I brought it home. Shortly after I brought it home, it quit blooming. Fast forward… I just lost my little Italian Greyhound, Gustavo, on November 24th and it’s been a pretty rough and depressing few weeks for my husband and I, he was our life. But, the day after he died I noticed a single bloom on the peace lily that definitely was not there the day before. I like to think that single flower is him telling us that he’s okay and we’ll see him again one day. The flower hasn’t bloomed quite yet, but when it does, I’d love to preserve it by drying it out and shielding it in resin. I’d love any tips or instructions on how to do this. Thanks so much!
Hi Ashley. I’m so sorry to hear about the losses you’ve suffered, especially recently losing Gustavo. I’ve had several readers ask about preserving flowers from memorial services for their loved ones, so you’re not alone.
I wish I had experience with peace lilies, but I’ve never preserved them before. I have done some work with white flowers, and sometimes they tend to turn slightly yellow when dried. If it’s helpful, I walk through a few different ways to dry flowers in this youtube video (https://youtu.be/lLgpgD_xZzU). It might help you decide whether it’s worth trying. I do think the silica gel method will probably give you the best results. Many people use it to preserve flowers in resin.
Also, this article from The Old Farmer’s Almanac has good tips on keeping your peace lily healthy: https://www.almanac.com/plant/peace-lilies. Perhaps you can keep the plant flowering and get back the blooms you once had.
I do think that beautiful flower is sending a message that you’ll see Gustavo again one day. Many hugs to you and your family. -Crissy
Thanks so much for the tips and the kind words, I’ll definitely do some more research and I’ll check out the peace lily care from the link you provided. I think I’m going to try the silica gel drying method, but before it blooms I think I’m going to buy another peace lily with blooms on it and try it on the test plant first to see how it turns out. I’ll send an update to let you know how it goes. Thanks again, I appreciate the help! 🙂
That’s a really smart idea! I’d hate for you to ruin the one special blossom on your plant. Yes, please do let me know how it turns out. I hope you’ll report back with some good news! Take care, Crissy
Hi Crissy
I want to try & preserve some of my Dads funeral flowers in resin tried to press some first, I didn’t completely dry them out from the rain hence some went very brown & were not useable I’m very new to all this,I’m going to try drying some out in silica gel do the flowers have to be completely dry before you put them into silica gel if so how is the best way to dry them off from the rain I really don’t want to ruin any more flowers
Hi Carol. I’m very sorry to hear about the loss of your dad. I hope I can help you preserve your flowers. You may want to hang the flowers upside down in a cool, dark place to get some of the moisture out from the rain. When they are less damp, you can try the silica gel method. If they are very wet, I believe it would take a long time for the silica gel to work. You always have the option of simply hanging the flowers upside down to let them air dry, but the color and texture may not hold up as well. Silica gel won’t completely preserve the color/texture, but it’s superior to other methods.
You can learn more about air drying and see the difference in my related video: https://youtu.be/lLgpgD_xZzU.
I hope this helps. Sending prayers to you and your family. -Crissy
Hi Crissy
Thank you so much for your reply on advice on preserving flowers from my Dads funeral,I have some in silica gel at the moment,as pressing wasn’t that successful so fingers crossed the silica gel will work many thanks once again
Kind Regards Carol
Hi Carol. I’m crossing my fingers that it works for you as well. Perhaps you can display them in a pretty shadow box. Let me know if you have any more questions, and again, please accept my sincere condolences. Thanks, Crissy
Hi Crissy,
Thanks for your article it was very helpful! I was wondering, after you silica dry the flowers can i then preserve them in resin? have you tried that before?
Hi Lauren,
I’m glad the article was helpful! Yes, you can absolutely use them in resin. I have a YouTube video planned to show you how. It’s a very common use for dried flowers with silica gel like this. You’ll just want to make sure your mold is big enough to accommodate the flower if it’s large. I’d love to see a pic when you’re done if you end up sharing it on social media!
I read where thicker flowers take longer to dry.
Does this method work well with roses? If not, what would you do for a rose that I want to frame. It’s a special rose and I don’t want to mess it up.
It was from my mom’s funeral, just recently. The rose is still perfect; it’s in my refrigerator. I hope you can help.
Hi Pam. I’m so sorry to hear about your mom’s passing. I can understand you’d want to take great care in preserving your rose. I’ve used the microwave method with silica gel to preserve red roses before, and I’ve been pleased with the results. The color will usually darken, and you may want to spread the petals out a bit in between microwave intervals. The center of the rose may take a little longer to dry out, but you can let it finish drying naturally. If you want to keep the stem on, you can also hang the rose upside down in a cool, dark location.
I hope this helps. Please feel free to e-mail again if you have questions as you get started. Take care, Crissy
My flowers are continuing to dry, and they’re crumbling. I had a gorgeous sunflower on a shelf, but now it’s all curling. I imagine the silica dust is still on them. Do I just brush better after?
Hi Jody! It sounds like maybe the flower wasn’t completely dry and probably continued drying after you removed it from the silica gel. Did you try drying the conventional way or in the microwave, and how many days did you let it dry? I’ve noticed sometimes thicker flowers won’t be completely dry after several days. I hope this helps! Thanks, Crissy
I’ve always wanted to know how to use this drying method, and your flowers turned out so pretty. I’m excited to feature your post this week at the Tuesday Turn About Link Party. Hope to see you there!
Thank you so much, Michelle! I will stop by this evening. I’ve been spending some time learning new methods of drying (with all the time spent at home), and this one was really fun. I hope you’re having a great summer!
Hello! I am trying to dry flowers from a funeral, they are roses, should I completely cover them with silica gel so that I cannot see them at all? Or just losely sprinkle the gel over them? I’ve watched so many videos and I cant tell@ these are flowers from my husband’s great grandmas funeral so don’t want ro mess it up if I can help it. Thank you SO much!!
Hi Danielle. I’m very sorry to hear about your husband’s great grandma. I’ve had several people ask about preserving flowers from funerals, so you’re not alone. To answer your question, you’ll first want to pour a bit of silica gel into the container you’re using to create a layer to support the petals. Think of the flower petals as “resting” on a bed of silica gel. Then, gently pour more silica gel into the container to fully cover the flowers. After trying this several times now, I would suggest covering the flowers as much as possible with the amount of silica gel you have. The gel is there to absorb all the moisture from the flower, so you need quite a bit to do that. I hope this helps!
What a great post, Crissy. I’ve never tried drying flowers with silica… but both methods for drying flowers seem easy and affordable! This would be so fun to do for a little vintage-look wreath or, like you said, jewelry! Pinned!
Thank you, Julie! I can’t wait to experiment more with it. I’m itching to get my hands on more pretty flowers. The nurseries are calling my name! I appreciate you visiting and pinning! Hugs!
Can you use silica sand?
Hi Shawn. No, I would not use silica sand as it’s not used in the same way as a desiccant. Silica sand is more for things like sand blasting, filtration or making glass. Silica gel is what you want, and the product I used in my tutorial is fine enough for delicate flowers. Thanks for the great question! -Crissy
My grandmother used your method to dry flowers that she used to make dried floral arrangements and framed floral designs. For the arrangements, she added a wire stem to each bloom. Every Christmas she provided an arrangement for my brother and me to give our teachers as gifts. I still have some of her framed pieces. The color of the flowers has faded but the floral design is still beautiful.
Your post was a wonderful trip down memory lane for me. I can picture my grandmother’s upstairs, filled with metal cookie containers that didn’t contain cookies, it contained silica gel.
I am looking forward to seeing what you do with your dried flowers!
That is such a great story, Paula! What a beautiful tradition your grandmother had. You must really treasure her creations. I’d love to see a photo of them sometime.
I have lots of ideas of what to do with the dried flowers. I might make some wreaths for the fall or a few shadow boxes. I wish I had thought to preserve my bridal bouquet. There are so many possibilities!
Thanks for stopping by!