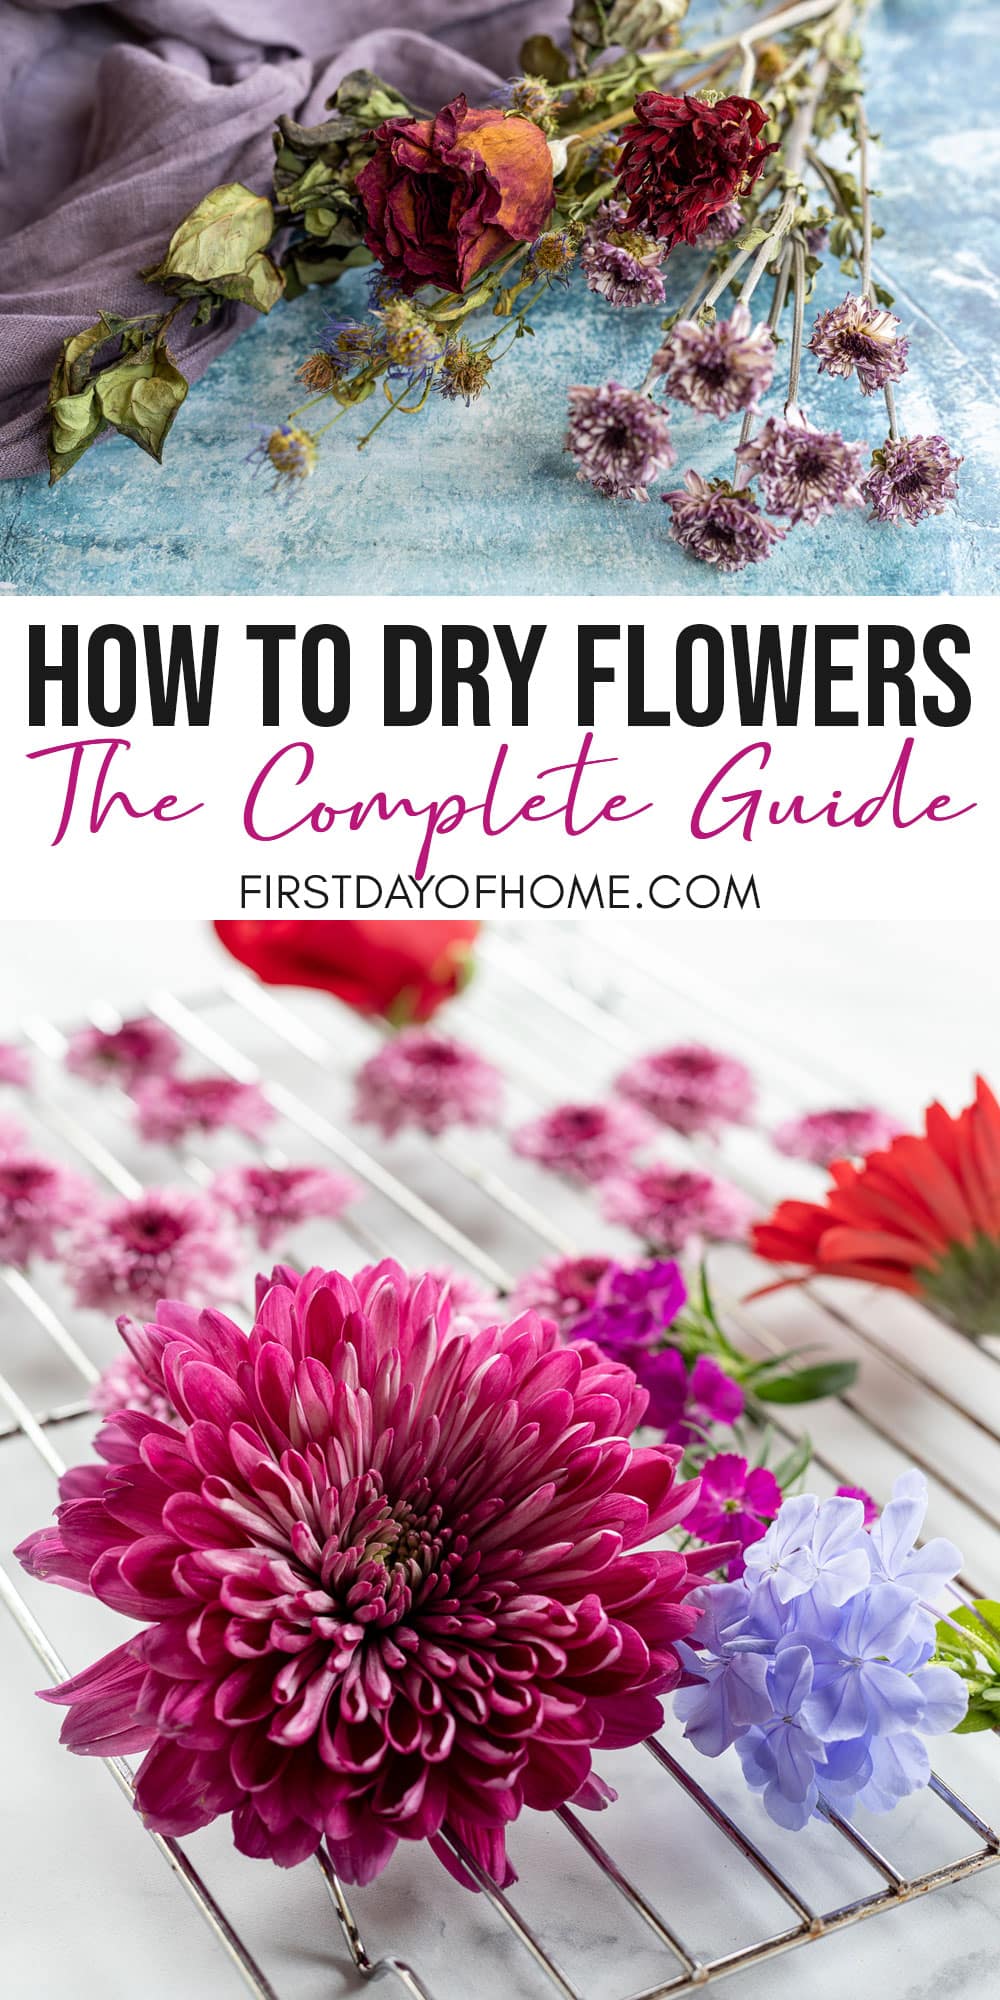
How to Dry Flowers 5 Different Ways: The Ultimate Guide
Do you want to make your special flowers last a little longer? Maybe you want to preserve a keepsake from your wedding or a loved one’s celebration of life? I’ve been on a flower pressing kick lately, so I thought it was high time I shared techniques on how to dry flowers, especially when only a 3-D effect will do.
This post contains affiliate links, and I will be compensated if you make a purchase after clicking on my links. For more information, please see my disclosures.
Video Overview
Click the image below to watch a brief 2-minute overview of these flower-drying methods.
You can easily navigate to the method of your choice using the table of contents below.
How to Preserve Flowers: What to Know Before You Start
When you see so many different techniques for drying or pressing flowers, it’s hard to know which one is right for you. (If you’re like me, you can’t resist trying them all at some point to satisfy your curiosity.)
Your choice depends on the type of display you want and the types of flowers you’re using.
For projects like pressed flower art, you may need paper-thin petals. See my complete guide on how to press flowers if that fits your bill.
For other resin crafts or shadow boxes, you might prefer one of the more three-dimensional options below.
Related: How to Dry Herbs
If you want to preserve herbs from your garden for cooking or homemade tea, check out these tips!
Tips for preserving flowers
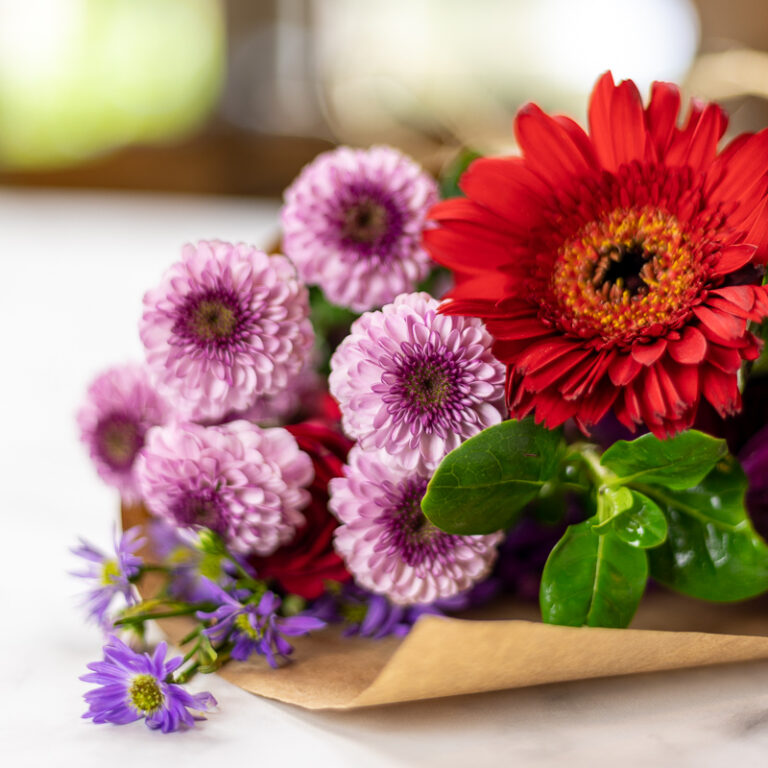
- Avoid using flowers with bruises or brown spots
- Always choose fresh flowers for the best results
- Pick flowers just before they have reached full bloom and after the morning dew has evaporated
- For thick flowers (peonies, ranunculus, roses), you can remove petals before drying
- Flowers with fleshy or water-rich petals may not preserve well
Trust me on the last point. I once scorched a microwave press while trying to dry a portulaca bloom. Gah!
1. Air Drying Flowers
Supplies
Letting flowers dry out naturally is perhaps the easiest (but not quickest) way to preserve your blooms. If you’ve followed the tips above for selecting good flowers, that’s half the battle.
Simply tie a piece of jute rope or string around 5-10 stems, removing any unwanted leaves or foliage as you go. You can also use a rubber band for this purpose.
If the stems are the dainty kind, you can insert florist’s wire through the base of the bloom (calyx) and down around the stem to secure them.
Hang the flowers upside down in a dark, well-ventilated space like a closet, attic, or utility room. Just make sure the room doesn’t have high humidity. I like to secure them to a hanger or rod in our laundry room…so much more fun than doing laundry in there!
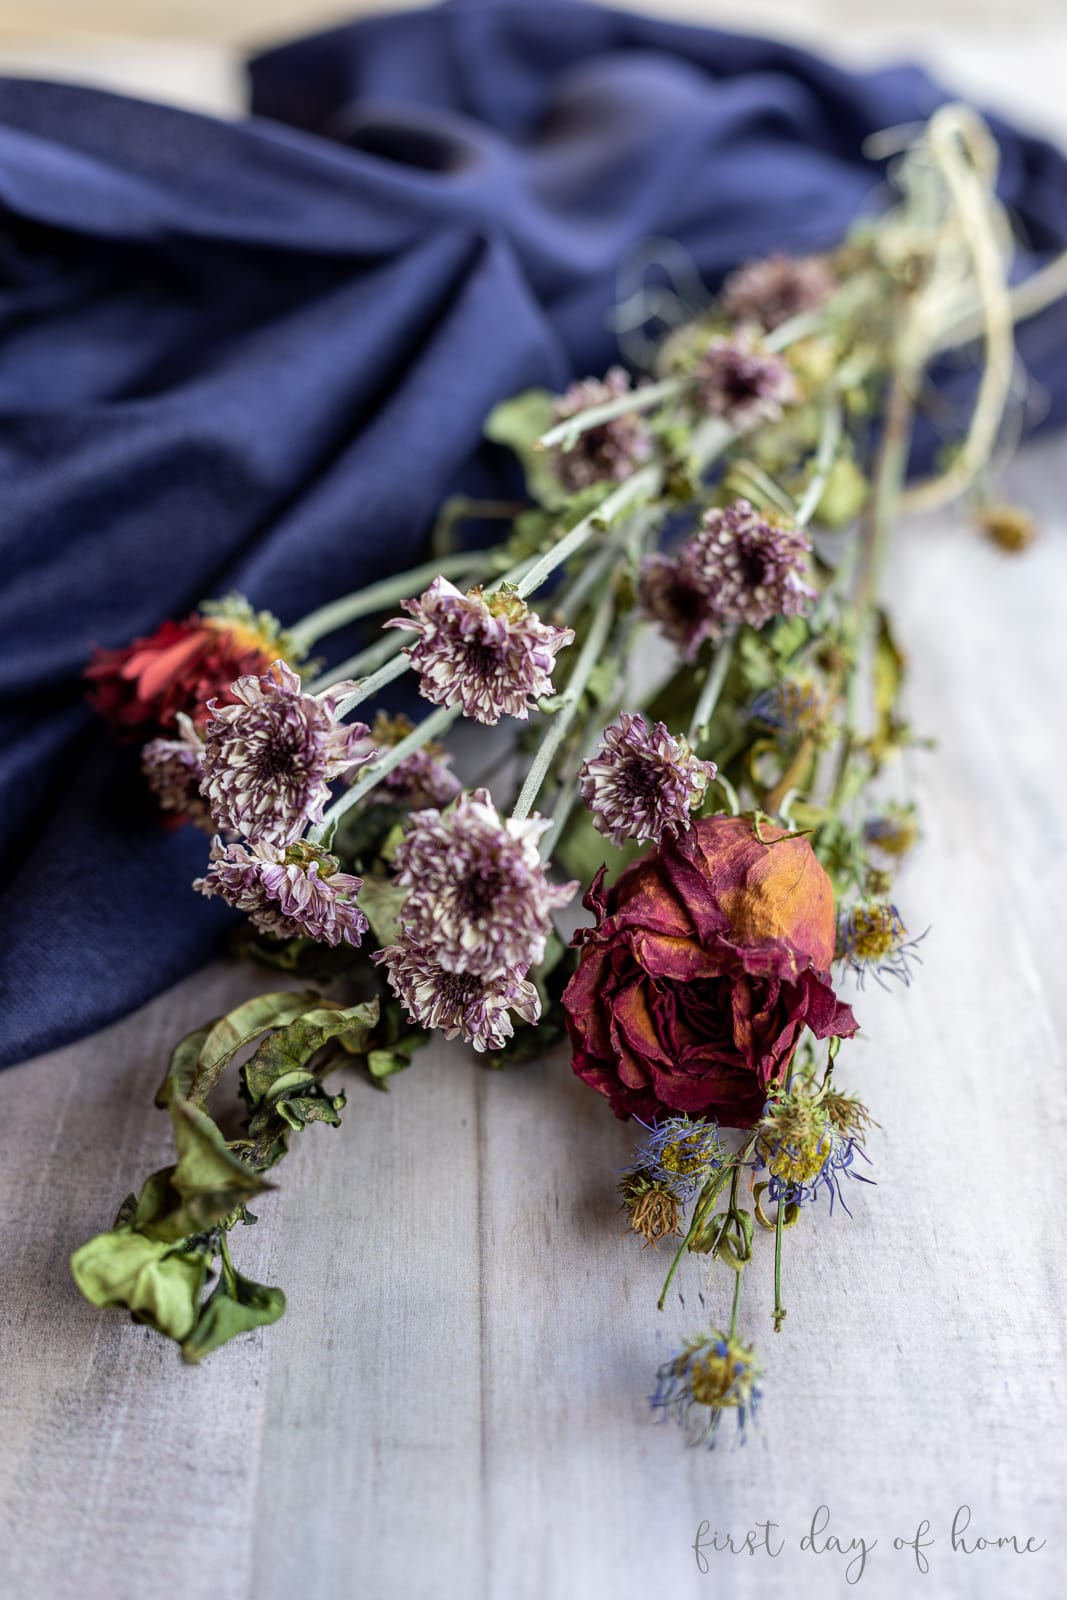
After 1-3 weeks, your flowers should be completely dry, unless the blossoms are particularly thick. Roses or mums may take longer depending on the size of the flower.
For reference, the bouquet featured in this tutorial was completely dry in about 5 days or so.
Once your flowers have dried, you can spray them with a fixative like unscented hairspray to better retain color.
Best Flowers for Air Drying
- Roses (my favorite blooms)
- Amaranth
- Baby’s Breath
- Celosia
- Coneflower
- Daisies
- Gomphrena
- Hydrangea
- Lavender stems
- Marigolds
- Statice
- Strawflower
- Thistle
- Yarrow
- Herbs (mint, lavender, basil)
According to The Old Farmer’s Almanac, flowers with a small calyx work well. The Almanac also talks about a “flash drying” method of sticking fresh blooms in your car trunk to dry in the sun for better color preservation.
Knowing me, I’d probably forget and have potpourri floating around in the back of my car all year!
Best uses for air dried flowers
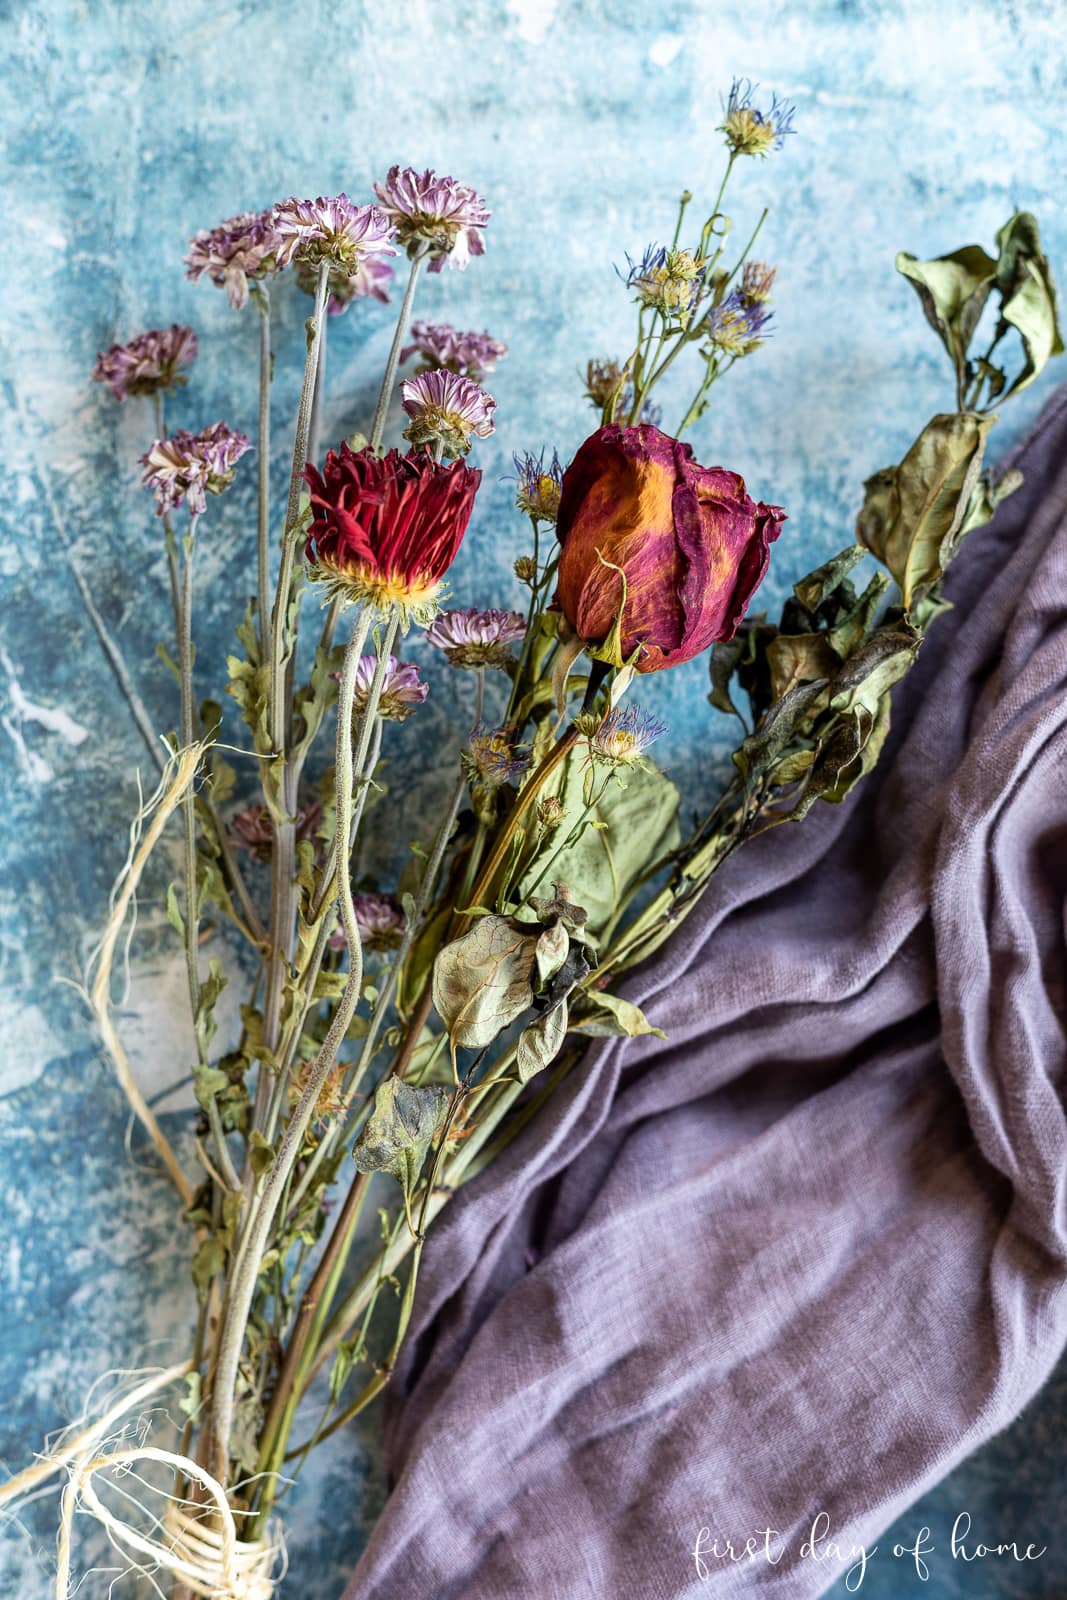
The air-drying method works well when you’re looking for a more vintage vibe. The colors don’t hold up quite as well as other methods, but there’s a romantic touch to the slightly yellowed blooms.
It’s also an excellent method when you want to keep an entire bouquet intact with stems. Just know the petals will be more brittle than with the silica gel method below.
2. Drying Flowers in a Conventional Oven
Supplies
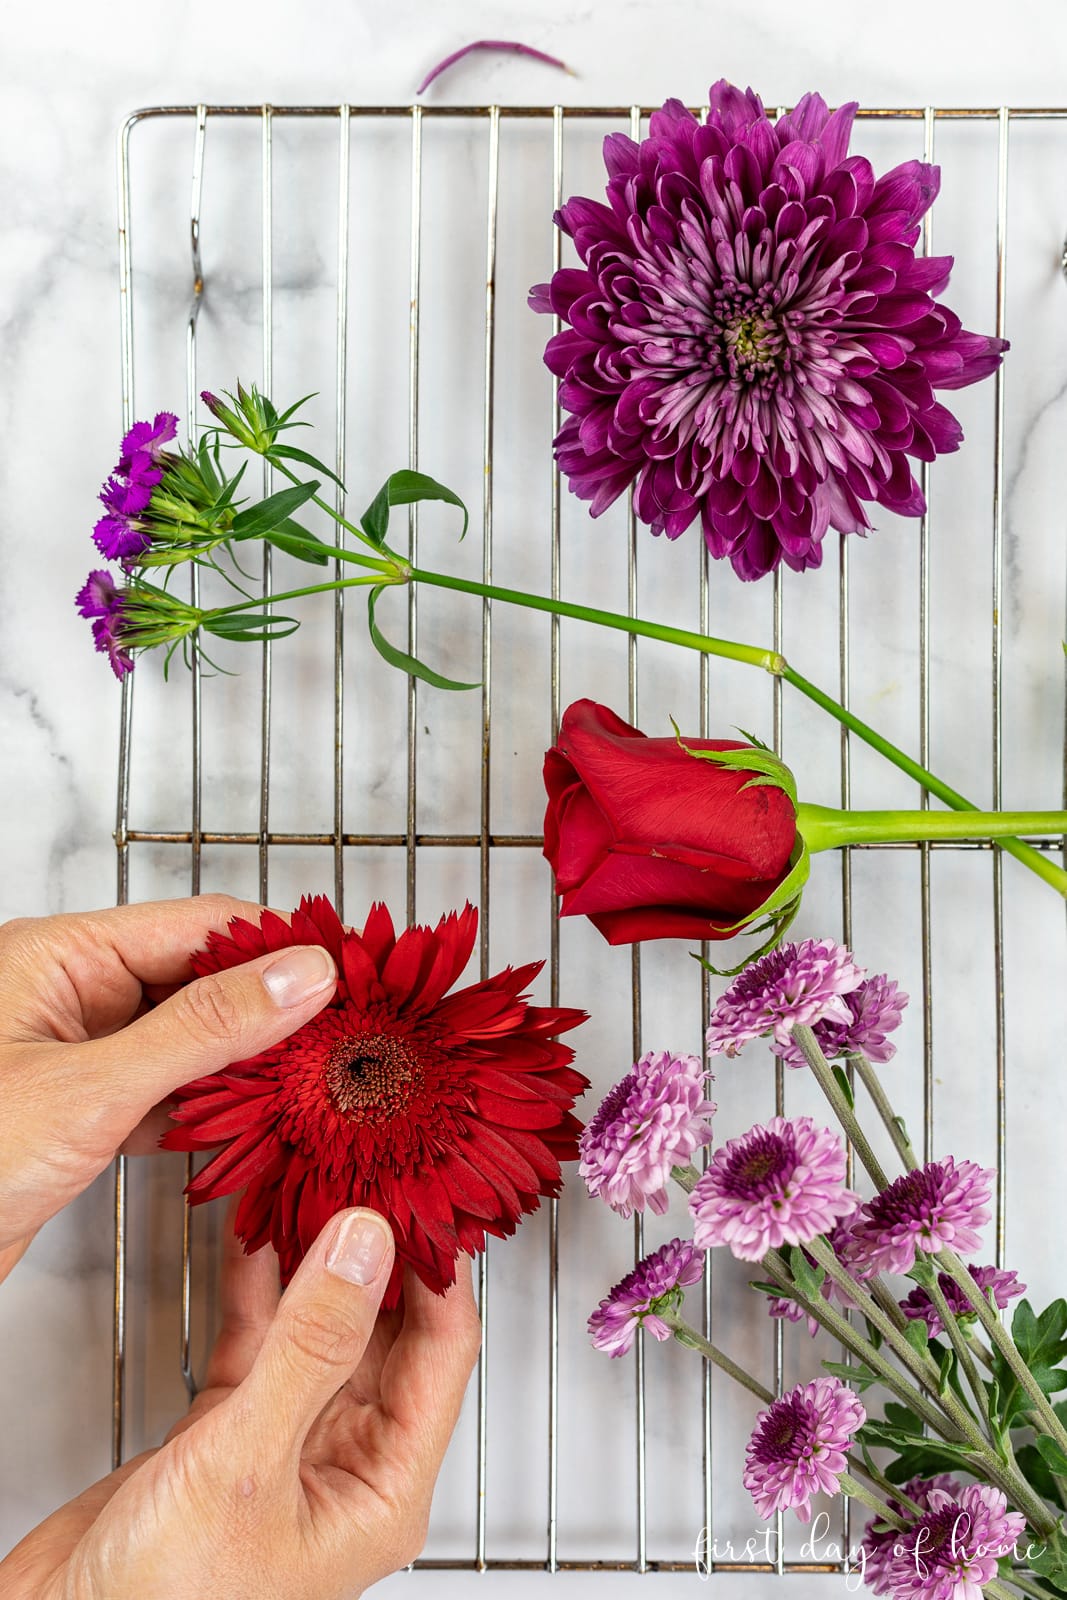
To dry flowers in the oven, first trim the stems off to leave only the blossom and calyx. Leaves won’t tend to dry very well in the oven based on my experience.
For roses, you will likely want to remove the individual petals, since the center of the bud is difficult to dry out completely without a lot of browning. You’ll also find that multi-petaled flowers like mums and daisies may tend to shrivel.
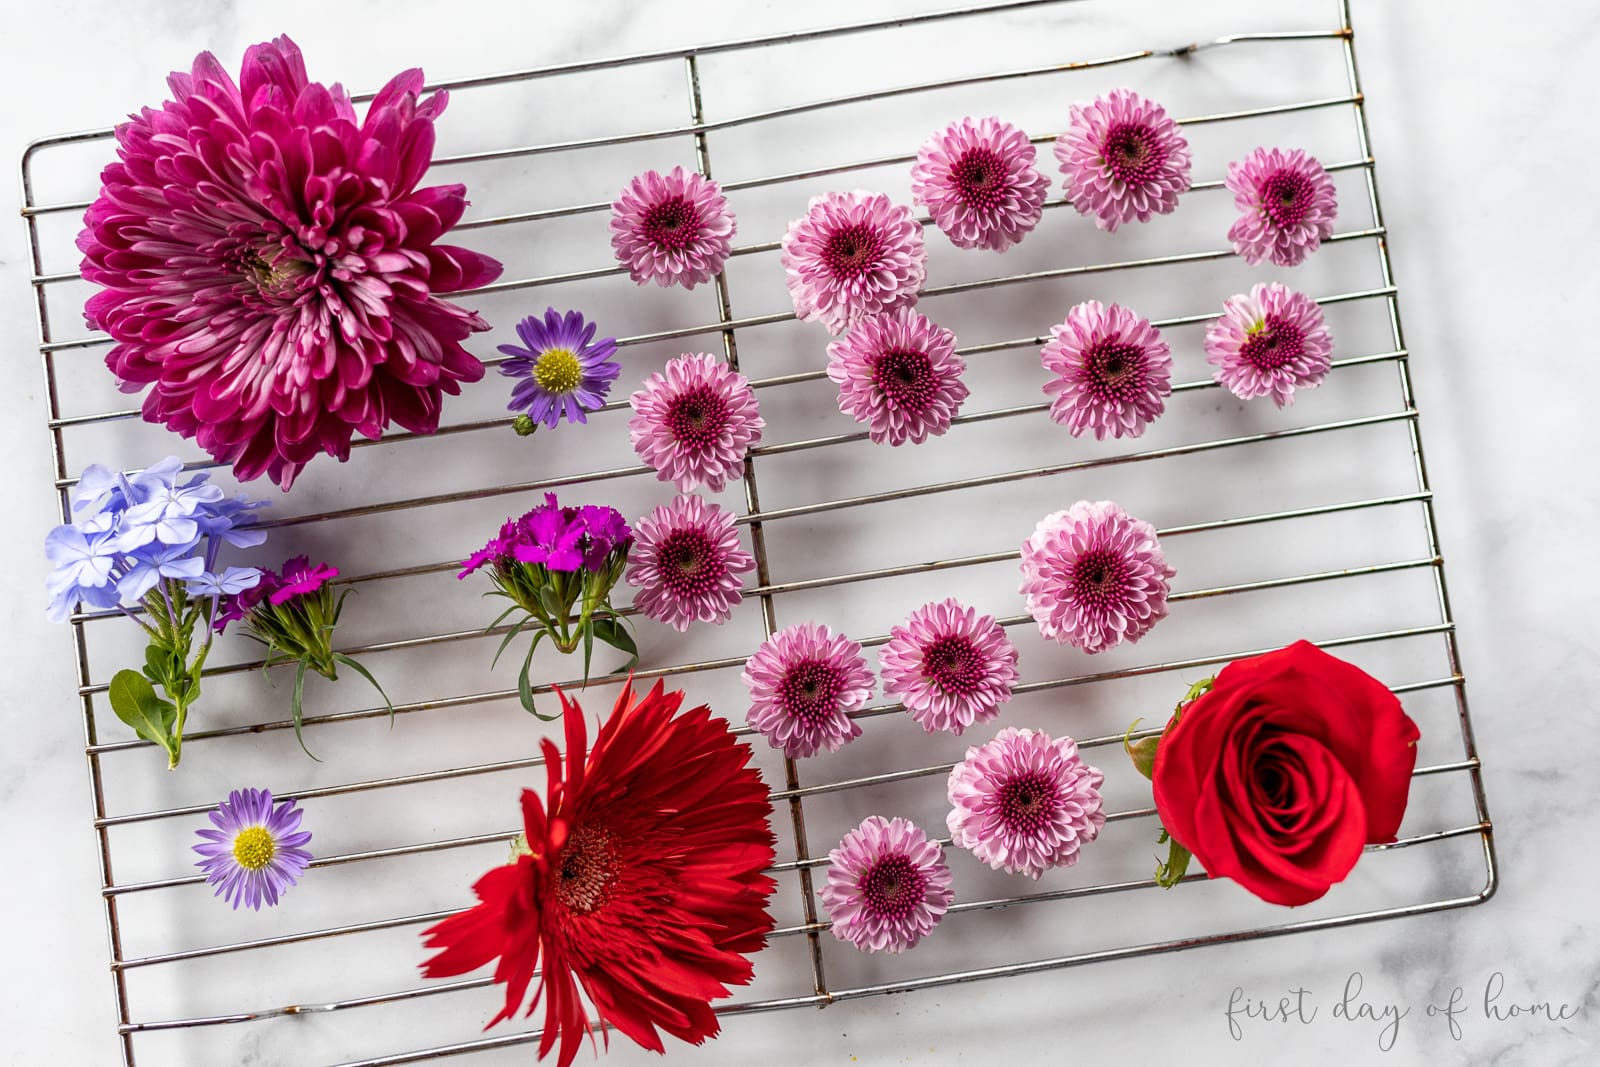
Next, spread your flowers on a baking rack placed on a cookie sheet. Bake at 200°F (about 95°C) for about 2 hours.
Smaller flowers will take far less time, so keep an eye out after about 45 minutes to 1 hour. You can always air dry the flowers for the last stretch.
Best Flowers for Oven Drying
- Roses
- Button poms
- Chrysanthemums
- Sunflowers
- Zinnias
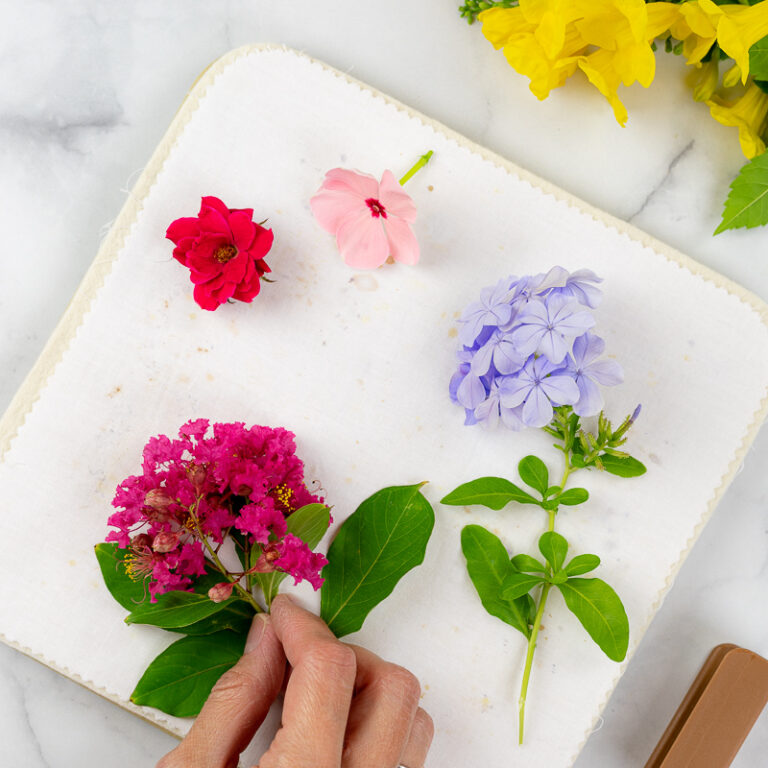
- Blue-toned flowers (e.g., plumbago, statice, gomphrena)
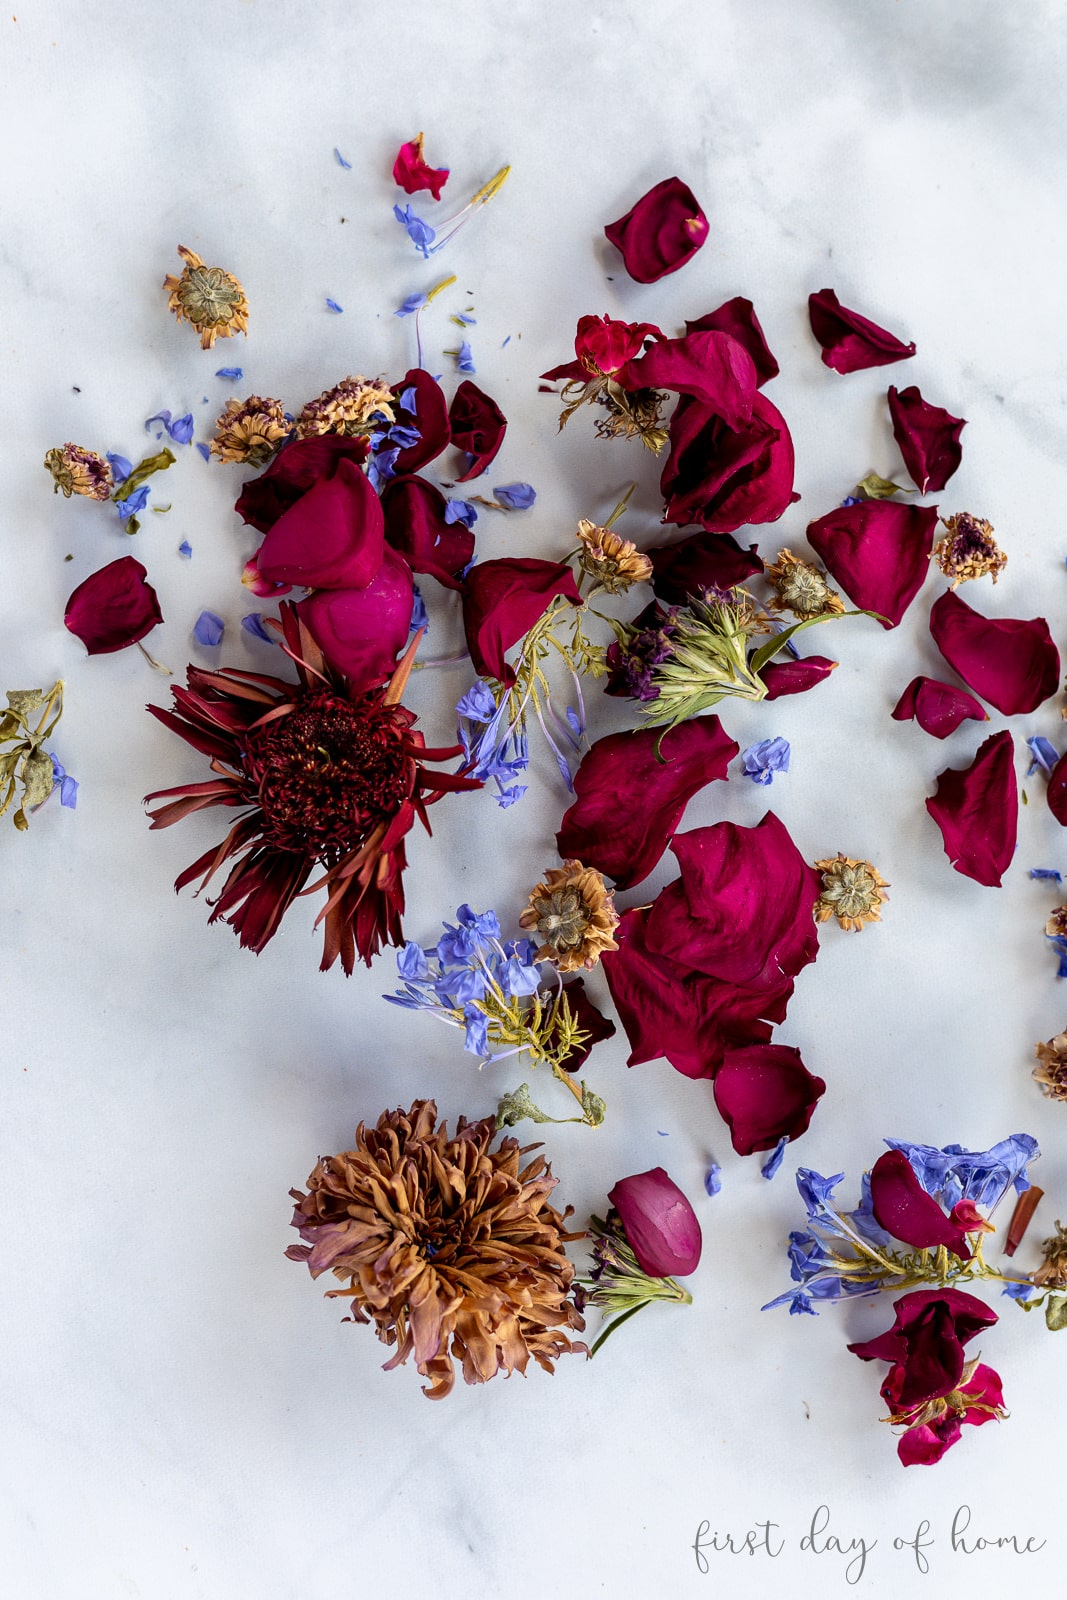
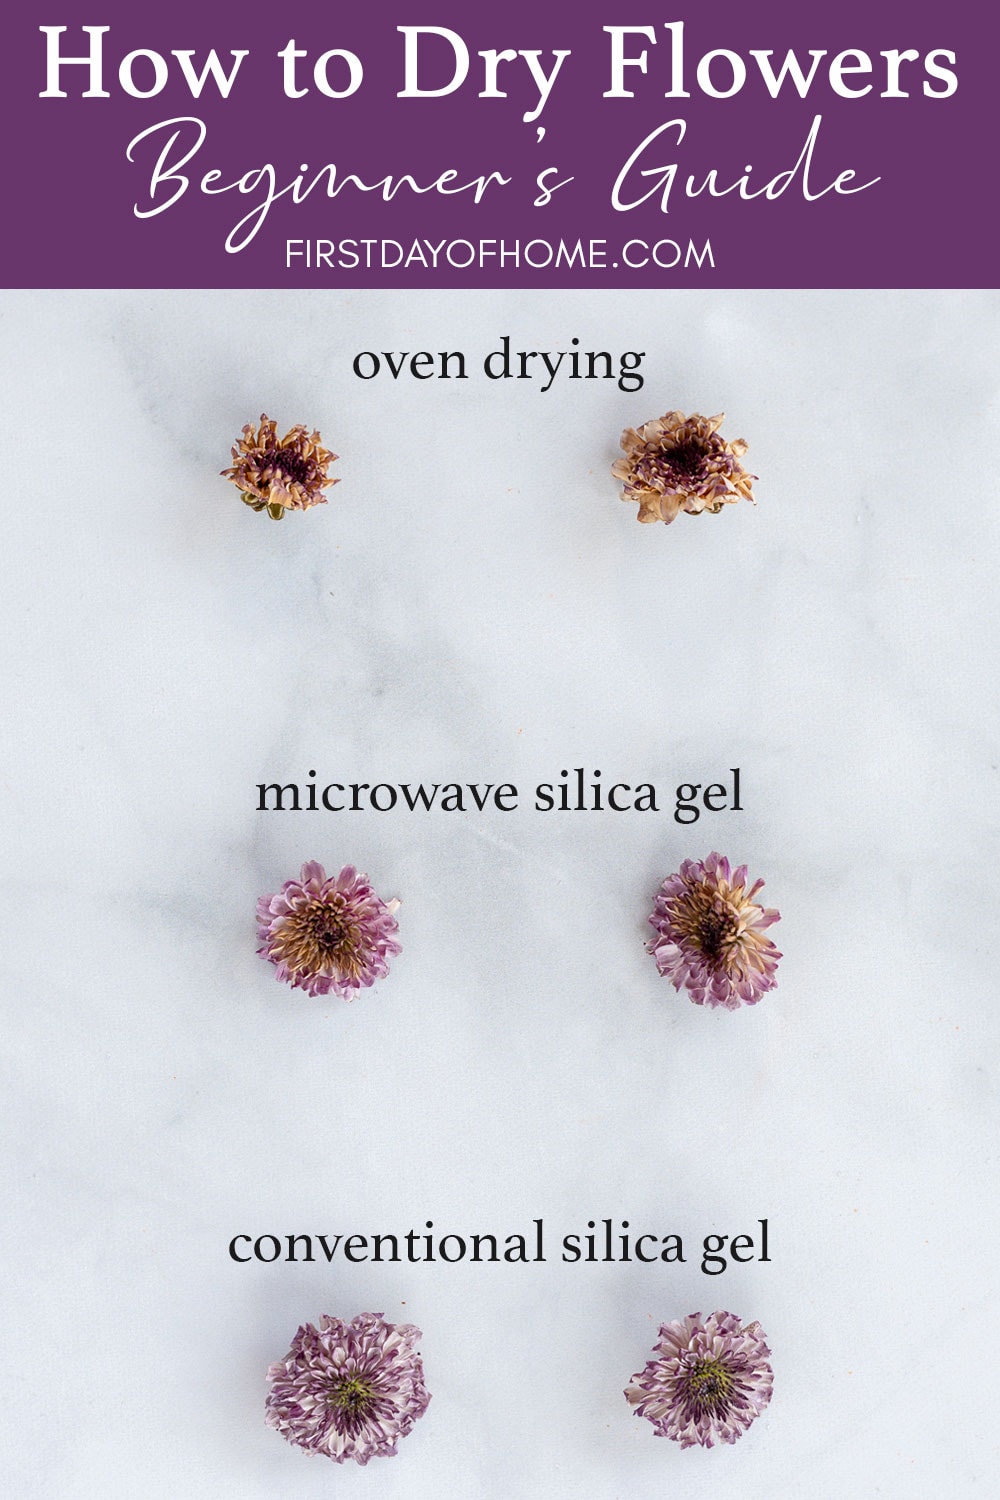
As you can see from the photos, flowers with bright blue or purple colors tend to retain their color extremely well, while bright red flowers will darken to a wine color and yellow blooms may tend toward brown.
Best uses for oven-dried flowers
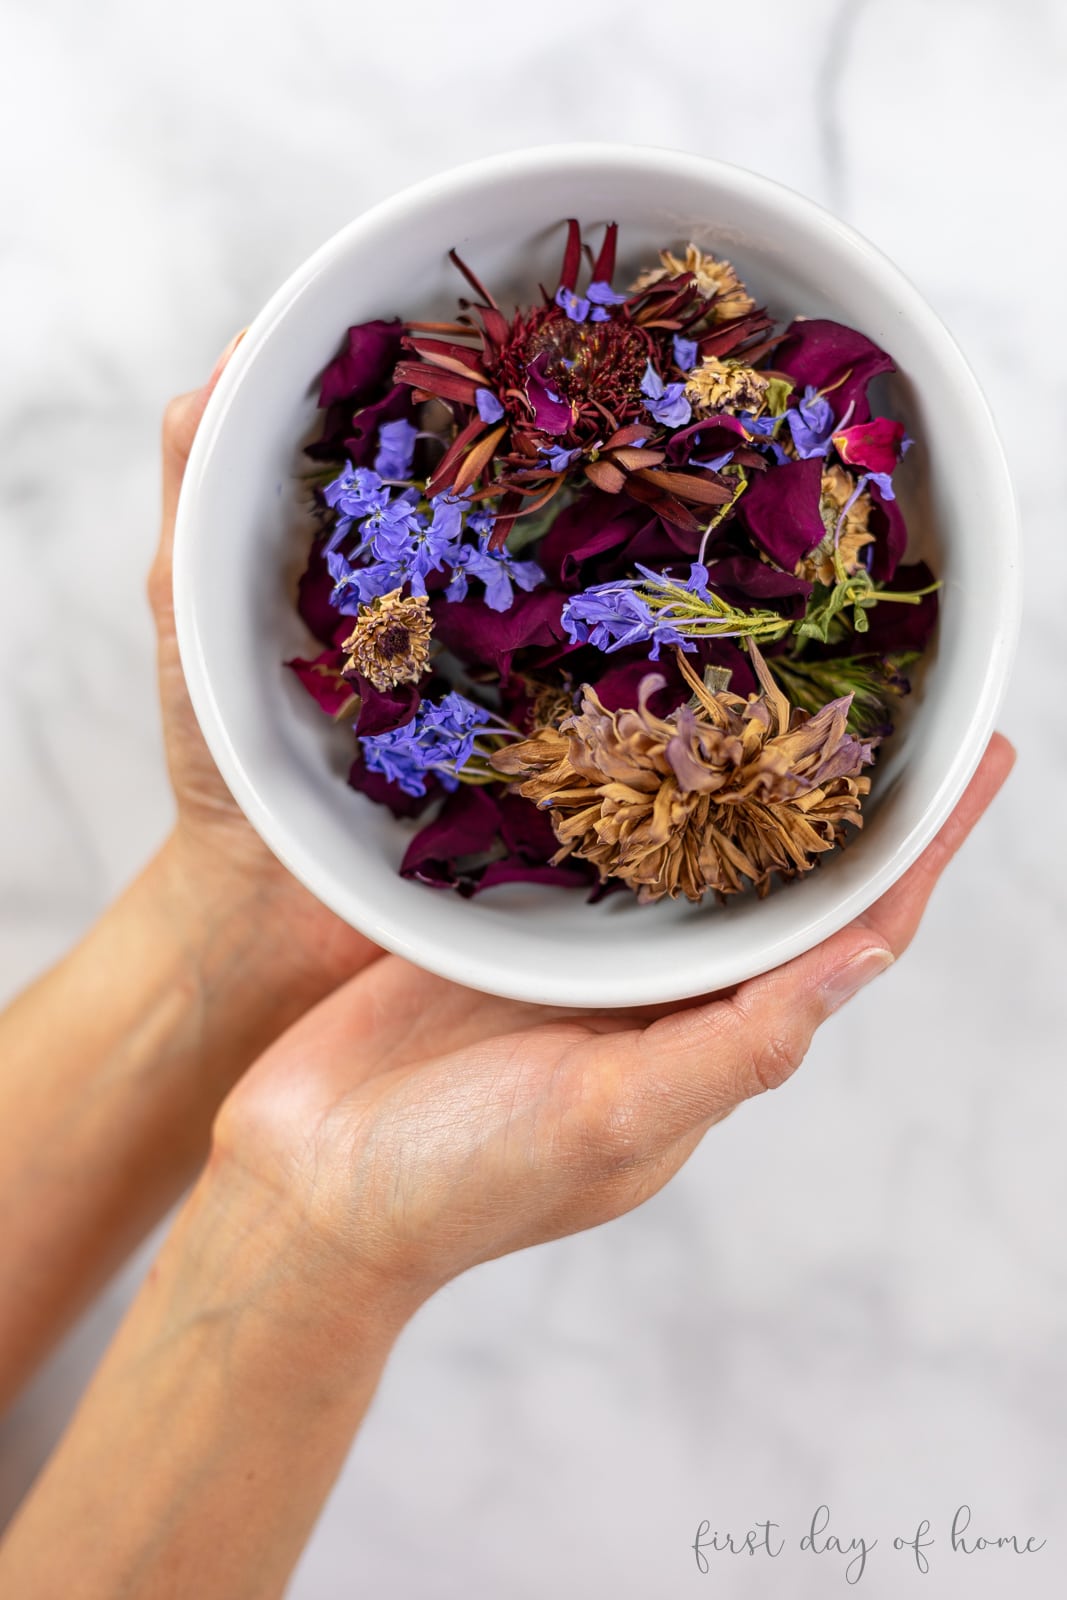
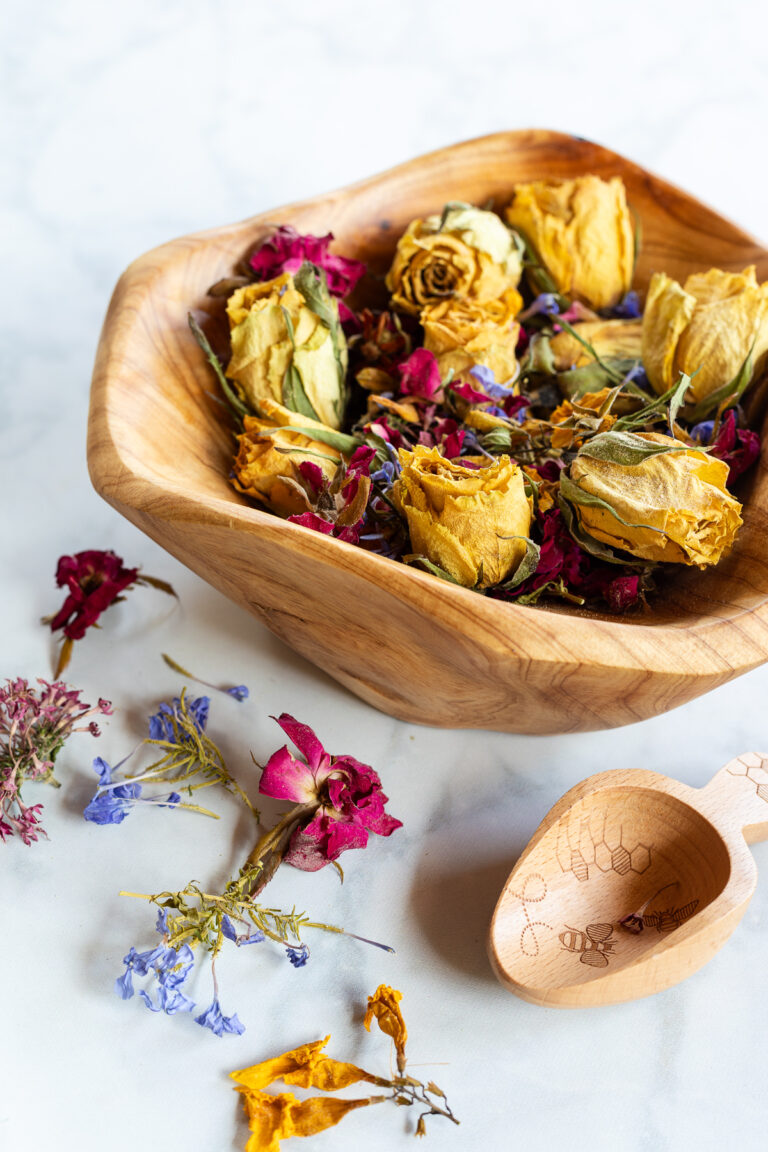
I love using the oven drying process when making homemade potpourri.
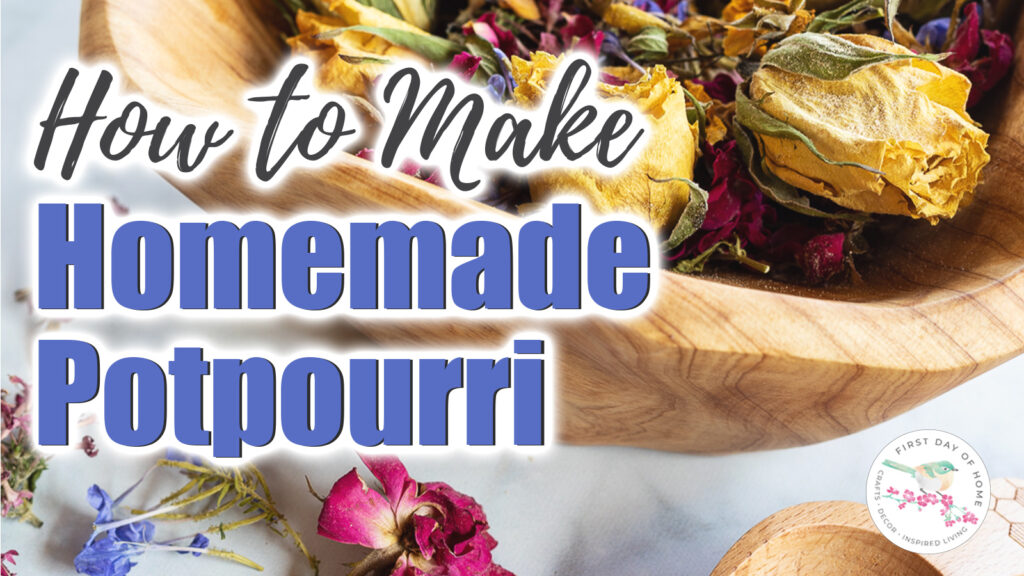
DIY Homemade Potpourri
Learn how to make your own potpourri in this quick video tutorial on YouTube,
The flowers have a crispness that looks romantic, and you won’t fret as much when petal pieces break off in the bowl. It just adds to the charm!
Oven-drying is also my favorite method for drying citrus fruits. You can see my post on how to make dried orange slices to see the results.
See the last photo in this post for a comparison of these methods.
3. Pressing Flowers to Dry
Supplies
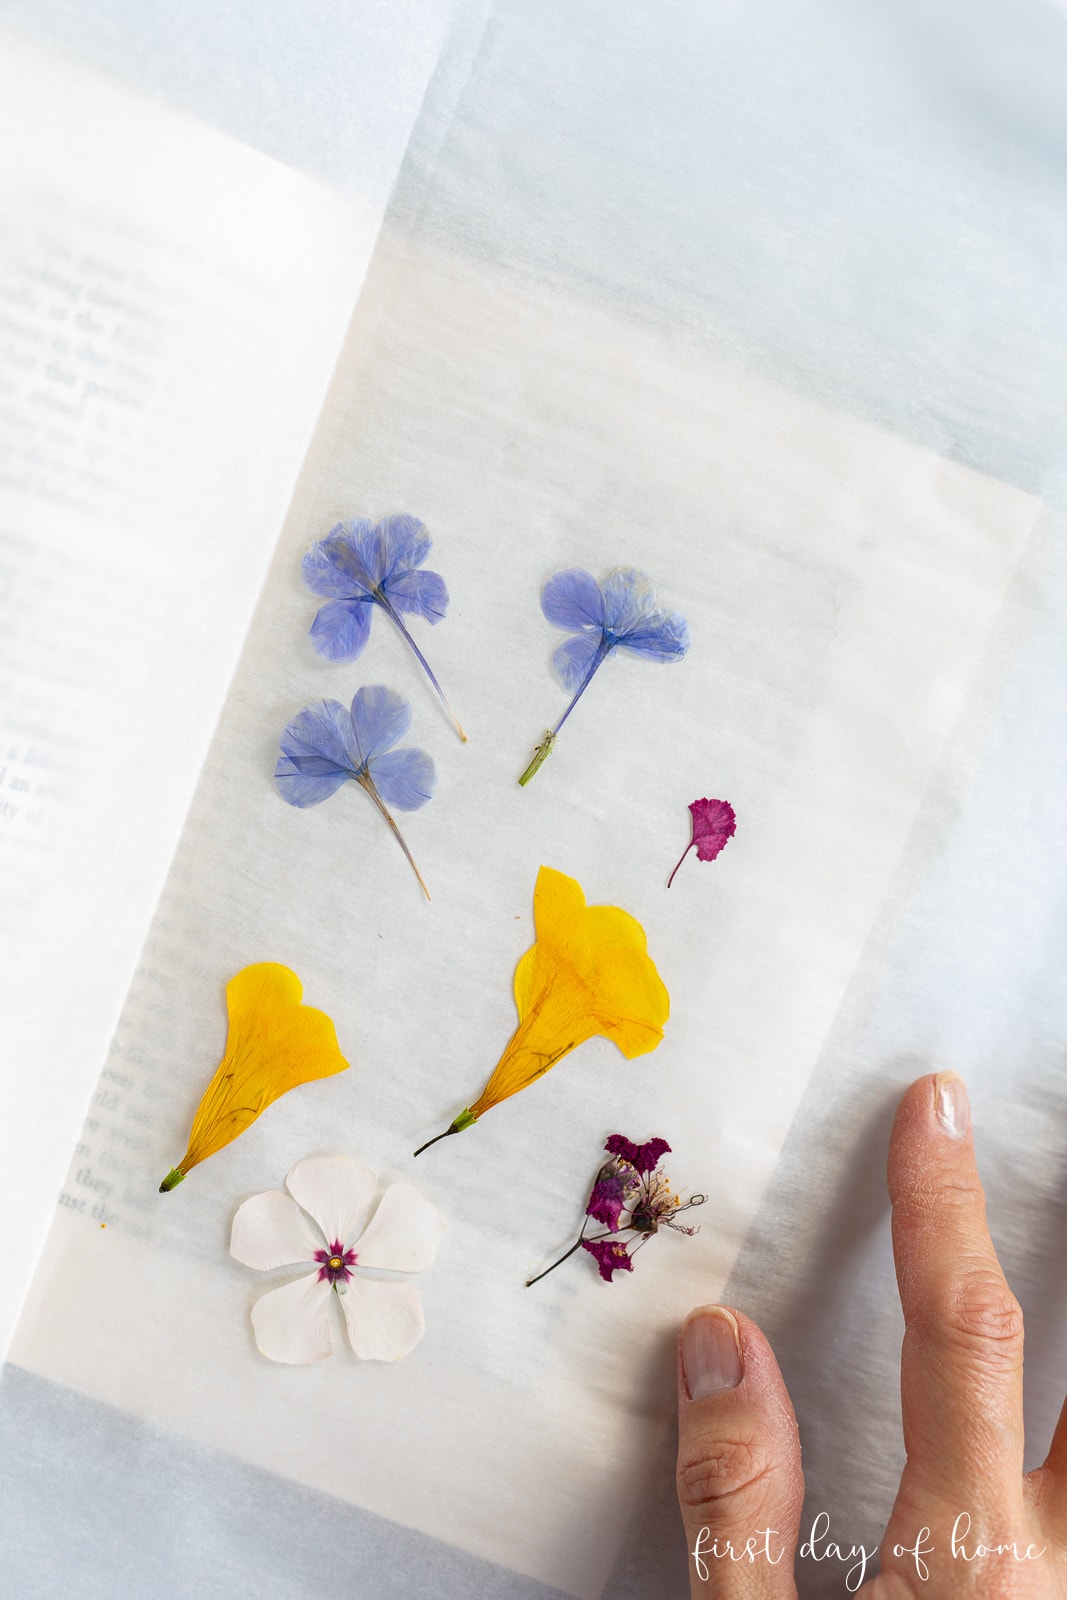
If you want to have completely flattened flowers, then flower pressing is for you! In my complete guide to flower pressing, I cover these 4 different ways to press flowers:
- Pressing flowers in a book with parchment paper
- Wooden flower press
- Microwave flower press
- Pressing flowers with an iron
The supplies needed will vary for each method, so I’ll leave you to check out the related post for all the details. My preferred microwave flower press that I’ve used hundreds of times is the Microfleur Max.
Get 10% off your entire order of Microfleur products with the code FIRSTDAYOFHOME. Click [HERE] to redeem. Limit one per customer.
Best Flowers for Pressing
- Cosmos
- Delphinium
- Geraniums
- Pansies
- Small ferns
- Sunflowers
- Vincas
- Violas
Best methods of pressing flowers
Generally, the same rules apply in terms of picking the freshest, most unblemished flowers to start. Larger flowers with spherical shapes (e.g., roses, peonies) don’t lend themselves well to pressing, but you can always separate the petals to press them individually.
There are trade-offs in time and quality for each method of flower pressing. Overall, my favorite method is using the microwave for the speed and ease of creating DIY pressed flower art.
However, the good, old-fashioned book press creates gorgeous paper-thin petals and does a great job of maintaining color. If you have a heavy book and 2-4 weeks to spare, it’s a great summer project for the kids!
RELATED PROJECT
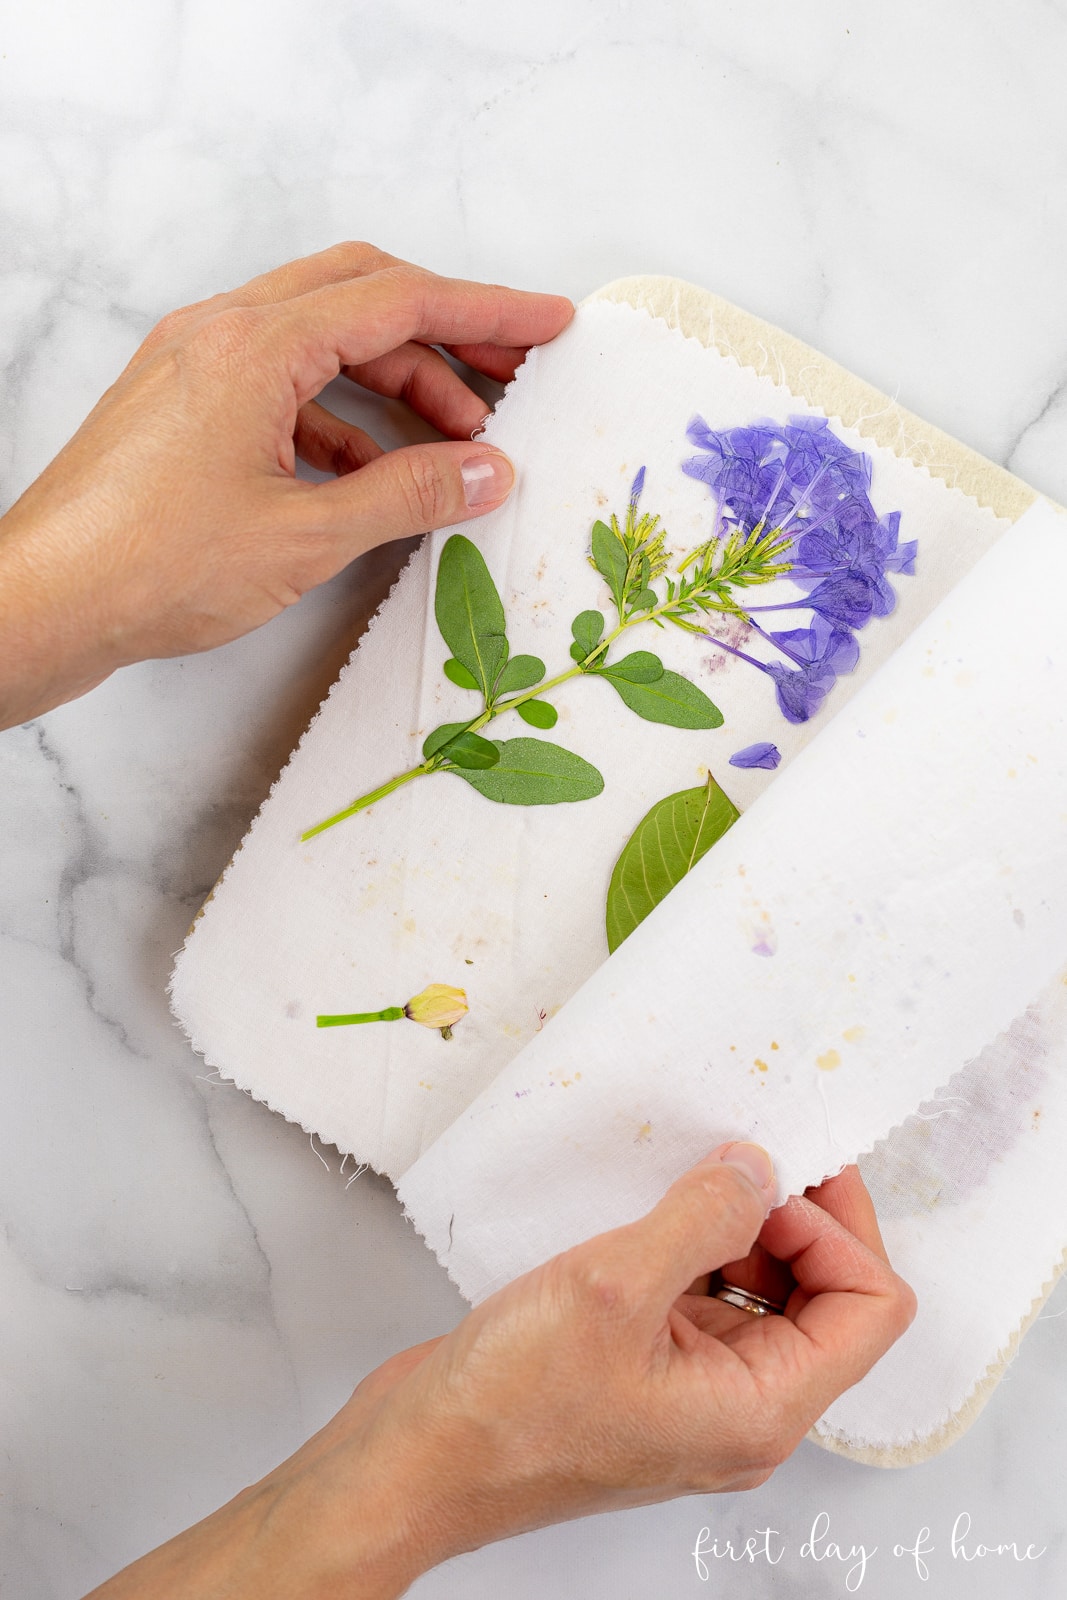
DIY Pounded Flowers
For another fun spin on pressed flowers, try making this pounded flower art. Transfer floral impressions to either paper or fabric in this tutorial.
When to use pressed flowers
You’ll want nice flattened flowers if you’re planning to make shallow resin crafts like a tray or coaster. Pressed flowers also come in handy to create beautiful wall art using a simple picture frame. I’m planning to decorate candles, mason jars, bookmarks, and mobile phone cases with my pressed beauties.
4. Using Silica Gel to Dry Flowers
Supplies
Silica gel is a desiccant product that wicks moisture away from flowers. I have a complete guide on drying flowers with silica gel with a step-by-step tutorial on using this product if you go this route.
Best Flowers for Drying with Silica Gel
- Roses
- Daffodils
- Dahlias
- Hyacinth
- Peonies
- Sunflowers
- Zinnias
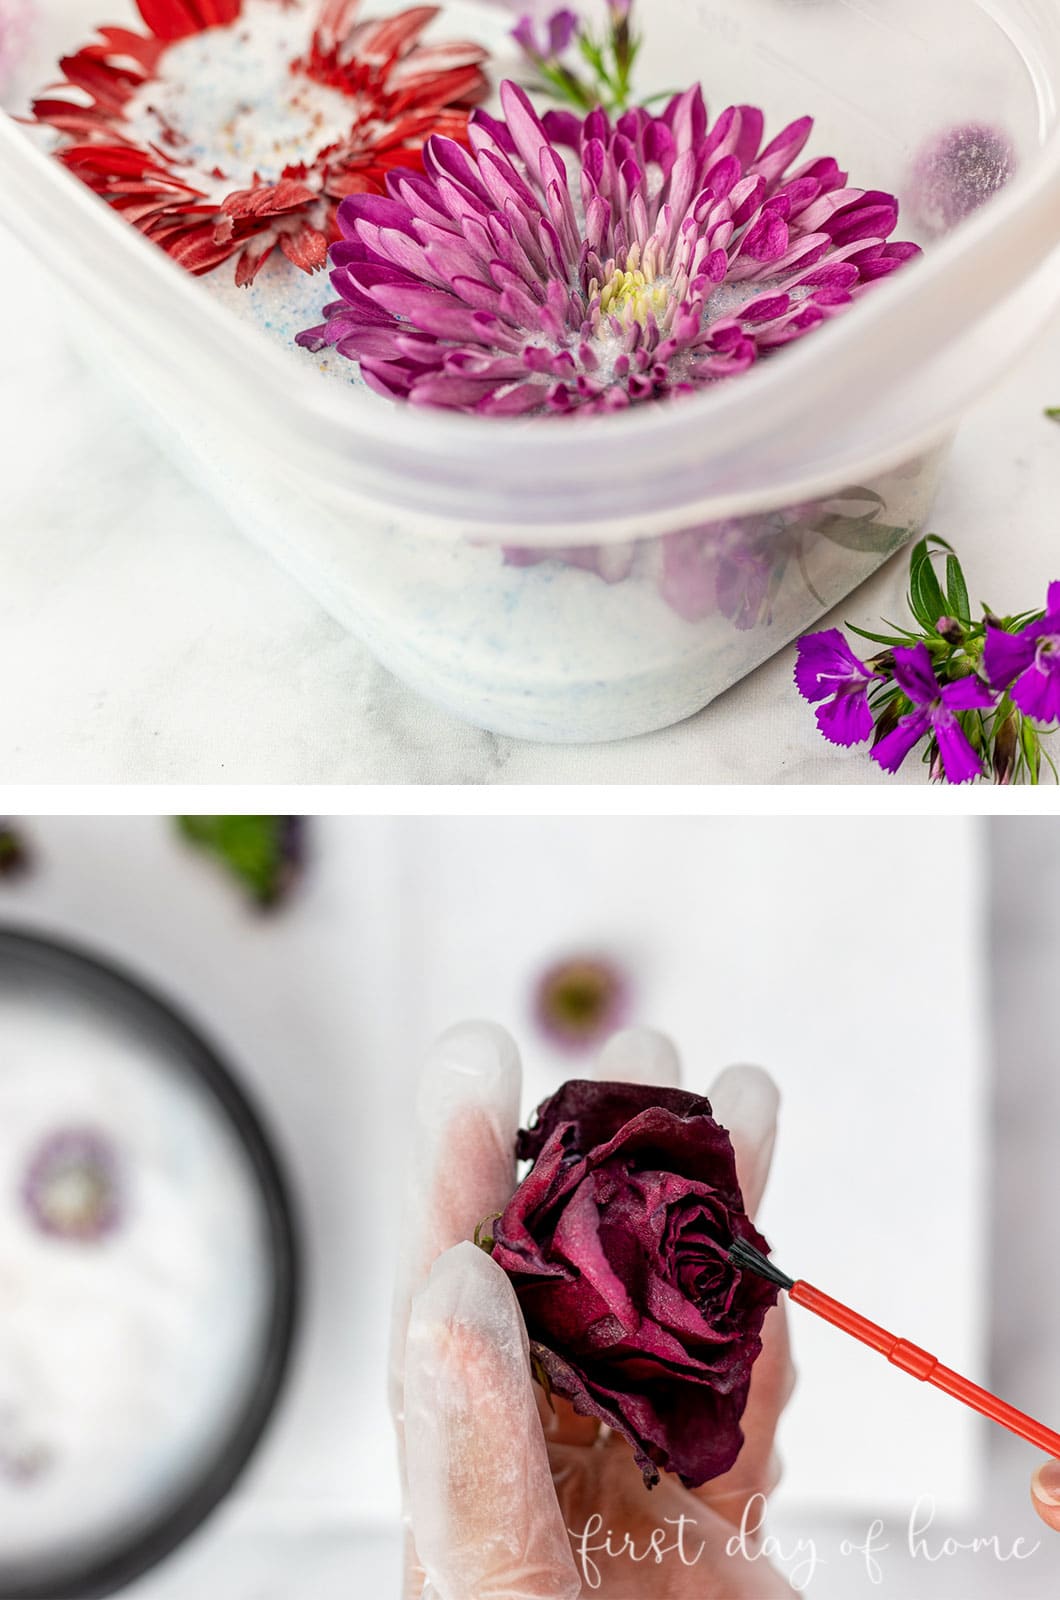
To begin, pour a layer of the silica gel (about 1.5 inches) into your plastic container, then place your flowers on top, layering more of the crystals in and around the petals.
Once you seal your container closed, you’ll need to wait 2-7 days for the flowers to dry completely. (The length of time will depend on the thickness of your blooms.) After you remove the flowers, you can use a soft brush to dust the excess crystals off your dried flowers.
This method works well with nearly any type of flower, though very delicate blossoms may give you fits, just like with any other method.
When to use silica gel
This is perhaps the most popular way to preserve wedding bouquets. It’s the perfect method for creating shadow box displays, three-dimensional resin crafts, and jewelry because you’ll get the best color retention and the softest texture.
While you can remove the stem and reattach it to the flower with wire after drying, this technique is more often used just to preserve the blossom.
5. Drying Flowers in the Microwave
Supplies
If you want to use a microwave to dry flowers, you can buy a microwave flower press (for flat flowers) or use silica gel in a microwave-safe dish. Assuming you want to preserve the shape and body of the flowers, I’ll cover the latter option.
Once again, you’ll create a blanket of silica gel in your container and spread out your flowers before placing more gel on top.
Unlike the conventional method, you will not cover the container but instead, place a glass of water in the microwave with it. Follow the microwaving directions based on the flowers you’ve chosen (typically 1-3 minutes total in 1-minute increments).
Of course, like most time-saving techniques, you’ll face a slight loss in color retention versus the conventional method.
Here’s a look at how the last three methods compare. You can pin it on Pinterest for reference later.
When to use a microwave to dry flowers
Using silica gel in the microwave makes sense when you want nearly the maximum color retention but just can’t spare the time. For something like eco-friendly wedding confetti, it’s the perfect solution!
Project Ideas for Dried Flowers
If you’re here learning about ways to dry flowers, you probably have a project in mind already. You can use your dried blossoms as beautiful decor or DIY gifts. Here are a few dried flower crafts to spark your imagination:
- DIY wreath
- Floral swag
- Flower crown
- Pressed flower table numbers
- Potpourri
- Resin crafts (paperweights, coasters, phone case)
- Jewelry
- Wall art or shadow box
- Gift tags
Let me know in the comments what you plan to do with yours and tag me on Instagram (@firstdayofhome) to share your creations!
FAQs about dried flowers
-
How long do dried flowers last?
Dried flowers can last many years, though colors may fade or develop a yellow tinge over time.
-
How do I make my dried flowers last longer?
To preserve your flowers longer, keep them away from direct sunlight and humidity. You can also place dried flowers in a container with a desiccant like silica gel to remove moisture.
-
What is the best way to preserve a wedding bouquet?
Silica gel is a great method for preserving wedding bouquets because it has the best color and shape retention compared to other drying methods. You can preserve whole stems by removing the stem before drying the bloom and then reattaching the stem later with floral wire.
More Dried Flower Crafts
Hi! I just got married and cannot part with our flowers. We got married out of state and had to transport the flowers back home (7 hour drive). Upon getting home, I placed the bouquets in water and the fridge. We messed up and put the boutonnières in the freezer 😭
I removed them after sitting in there for a day and have them hanging upside down in a closet. Can I still use silica gel on them? Or are they completely ruined.?
It’s been 3 days since the wedding and I’m not sure which method (if any) would work best to preserve the flowers.. At this point should I just air dry all of them? Can I use silica after they’ve been air dried?
Any help would be greatly appreciated- thank you!
Hi Jessica! Congrats on getting married! If the flowers are still soft, you can definitely try silica gel. Otherwise, your best bet is to continue hanging them upside down. Silica gel won’t really help once they are already dry. Check out this YouTube video I made all about preserving my niece’s wedding flowers. It might help. https://youtu.be/lLgpgD_xZzU?si=3XL9gWcuWcwBFh2P
Thanks for the tutorial, Crissy! I’m planning my summer garden accordingly! Pinned 🙂
Thanks so much, Cindy! I can’t wait to see your summer garden. I’m sure it will be lovely! Hugs, Crissy
I would like to enjoy my roses as long as possible before i dry them. is that ok? i’ve already taken them all off the stems and started drying them in a basket, just tossing them daily. will this way work too? r do i just need to start from scratch?
Hi Elisha! I’d say enjoy them as long as you like. There’s no right way or wrong way to dry flowers. Roses are actually among the easiest flowers to dry, and many people just hang them upside down to finish drying. I think what you’re doing is just fine. It will look like potpourri after a week or two. I have a whole blog post about making potpourri if you want to try that: https://www.firstdayofhome.com/how-to-make-potpourri/. Enjoy!
Hello Crissy, just wondering- if I wanted to keep flowers with stems on them, do you think I could use the silica gel method and put the flowers with the stems in a large Ziploc bag, which would give the same airtight effct. Have you tried this or do you think it may work?
Hi Ashley! I don’t see why you couldn’t try that as an option. The silica gel comes in a thick plastic bag. I might go for the thicker “freezer” Ziploc bag. Another option is to remove the stem, let it dry out naturally, and then reattach it once the flowers have dried with silica gel. You can do that with floral wire. That’s what the manufacturer suggests, but I think the Ziploc option might work, too. Cheers, Crissy
Thank you so much for sharing the how to Crissy. I have tried the silica gel method, but the flower become wither pretty fast, just by days. May I know how to store and how to make it last longer? thank you so much!
Hi Mary. I think a lot depends on the flower and the texture of the blossom. I’ve noticed that thin petals sometimes shrivel no matter how you dry them whereas flowers like roses have much better results. What type of flower were you using? Is it possible that you need to dry them longer too? I usually don’t have to store mine any particular way once they are fully dried.
Love this! We have some hydrangeas I’ve been thinking I want to try drying. I really love the way hydrangeas look when they are dried. Thanks for the idea!
Thank you so much, Julie! I saw some hydrangeas at a nursery recently, but I wasn’t sure if I’d be able to keep them alive at my home. I’m sure yours would look really lovely when dried! Enjoy experimenting! Hugs, Crissy
Great informative post! I have tried a few of these, most recently the microwave method…I was surprised that it really worked! Thank you for stopping by and linking up at Embracing Home and Family Linky Party!
Thank you, Jenn! Yes, it’s fun to experiment with different methods. Today, my 6-year-old son wandered in with some flowers and leaves taped to a piece of paper. Melted my heart! It’s such a fun activity during this time of year. Happy to join you at the party!