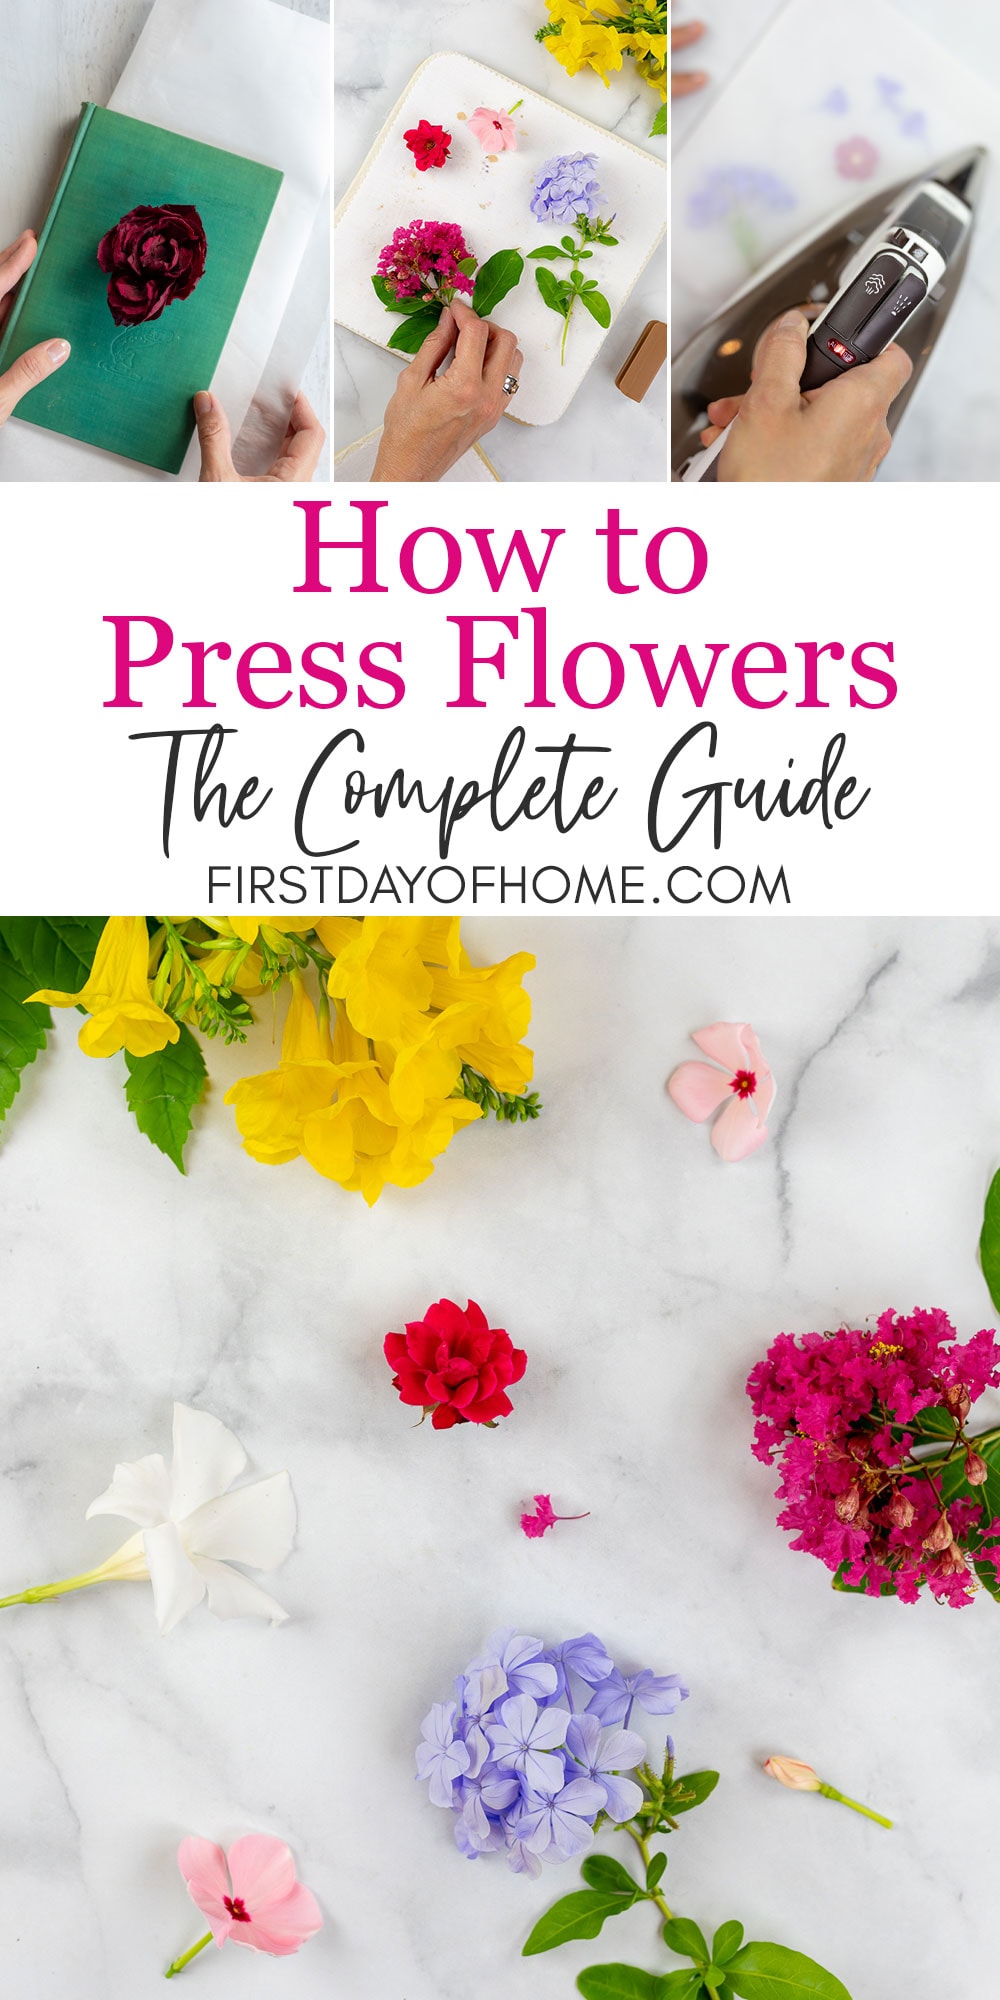
How to Press Flowers: Four Methods for Beginners
If you’ve followed my blog for any amount of time, you know I’m a flower pressing fanatic! My original post on how to make pressed flower art is a reader favorite, so I decided to test other methods. I’ve learned a ton, and now I’m giving you the skinny on how to press flowers four different ways.
This post contains affiliate links, and I will be compensated if you make a purchase after clicking on my links. For more information, please see my disclosures.
I have fond memories of pressing flowers with my own mother as a child. It’s a tradition that strikes a sentimental chord with me. Do you feel that way too?
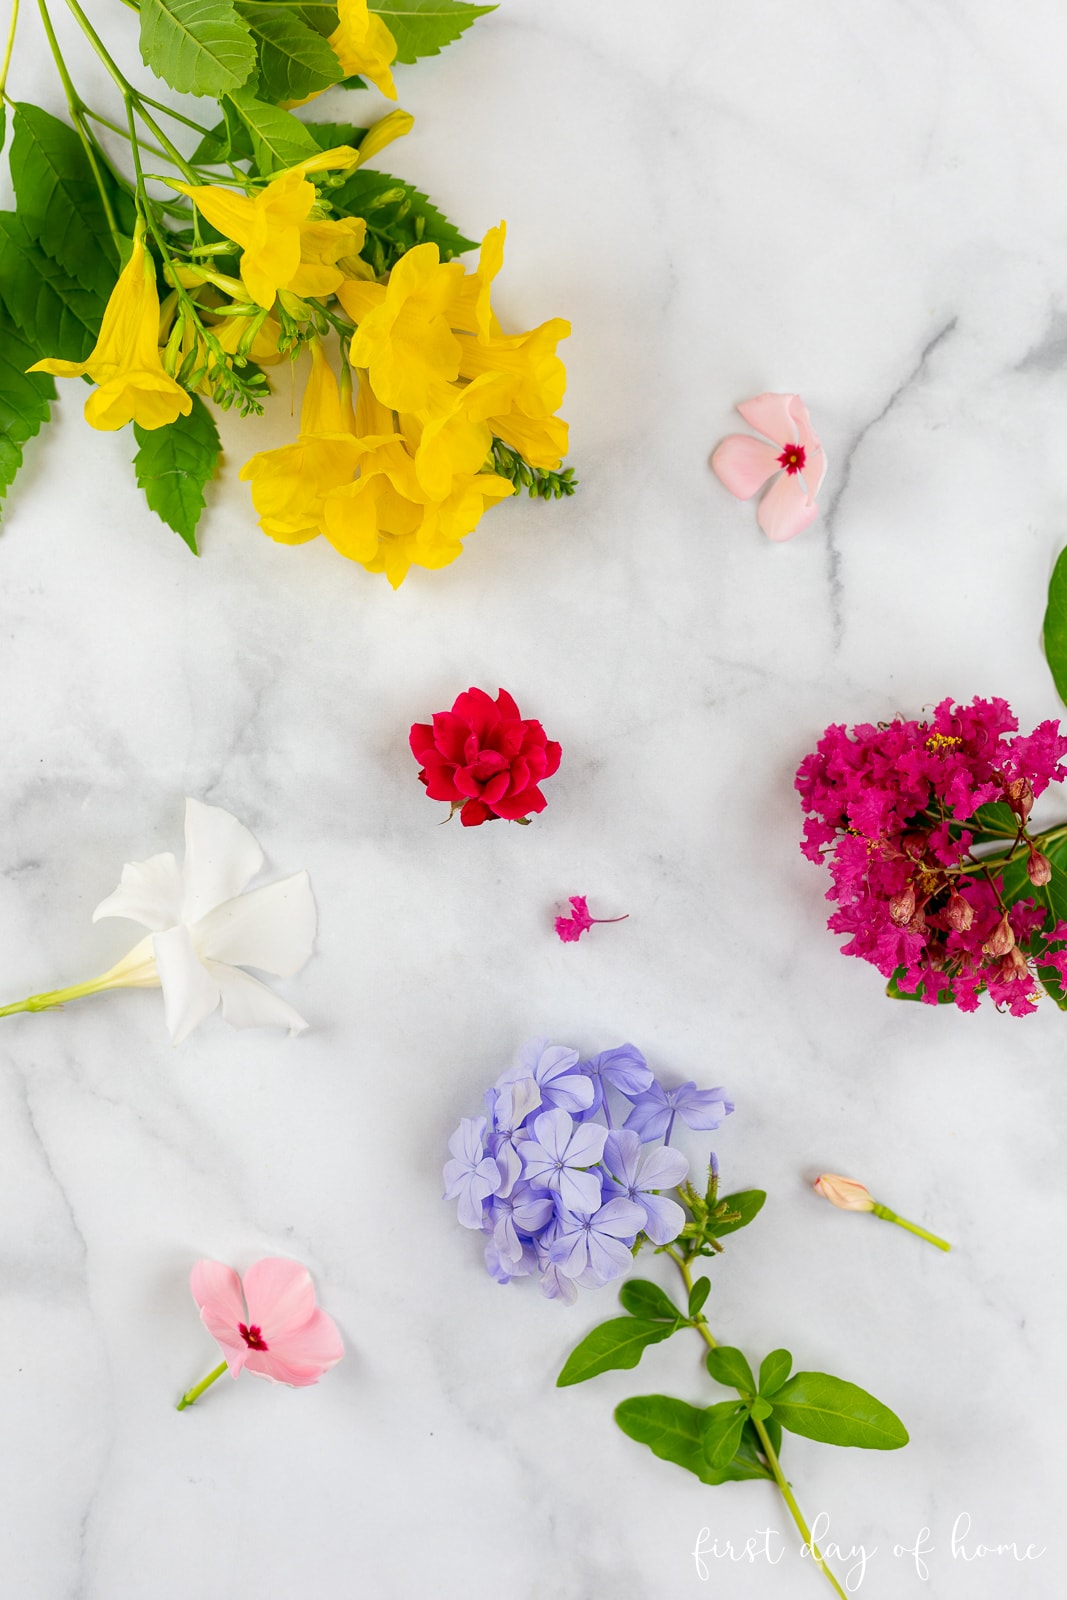
To keep things simple, I’ve selected flowers from our garden for this guide. You can experiment with any flowers or leaves you have on hand. (Why not use this as an excuse to buy a pretty bouquet?)
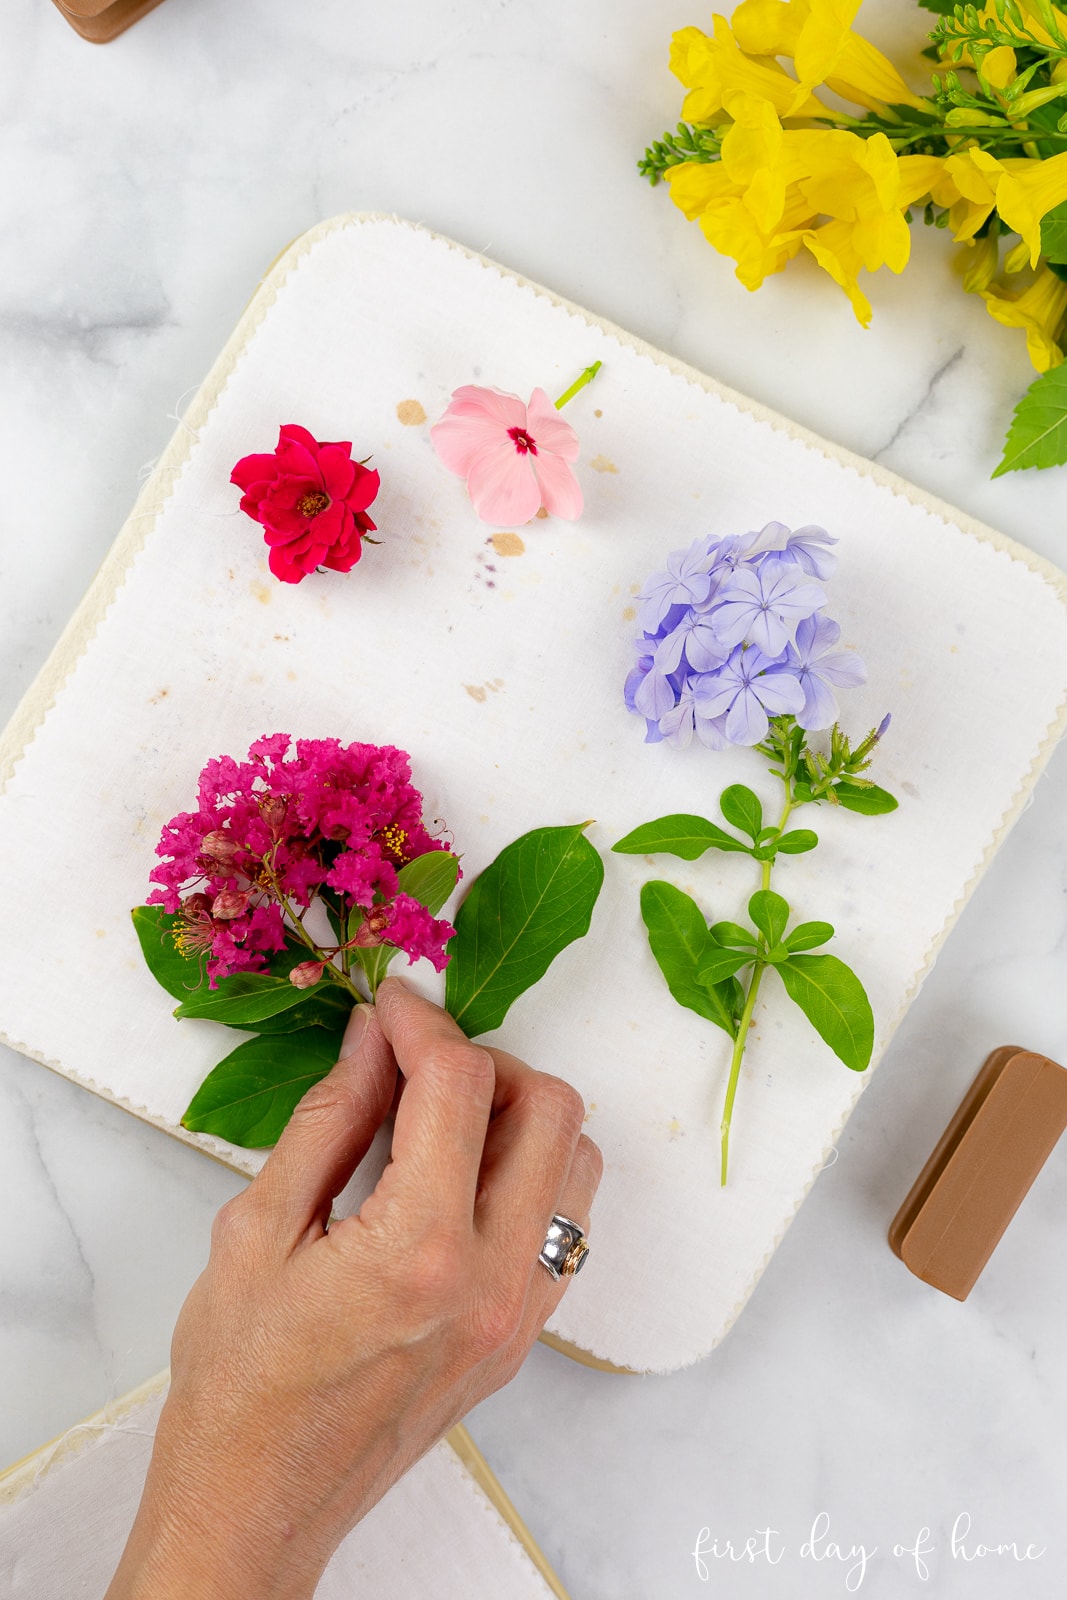
How to pick the best flowers for pressing
If you want to make a masterpiece, you need to start off with the right supplies. Picking the right flowers at the right time is very important for flower pressing.
Tips for selecting, picking, and preparing your flowers
- Always choose flowers that are close to full bloom and avoid ones with blemishes or dark spots.
- Pick flowers from a garden in the morning once any dew is gone.
- Make sure flowers are completely dry, as wet or damp flowers can become moldy.
- If using a bouquet, keep it in water until ready to press. (Tip: Always cut stems at an angle and place flowers in a vase with flower food to maintain freshness. Replace water daily and remove any leaves below the water line.)
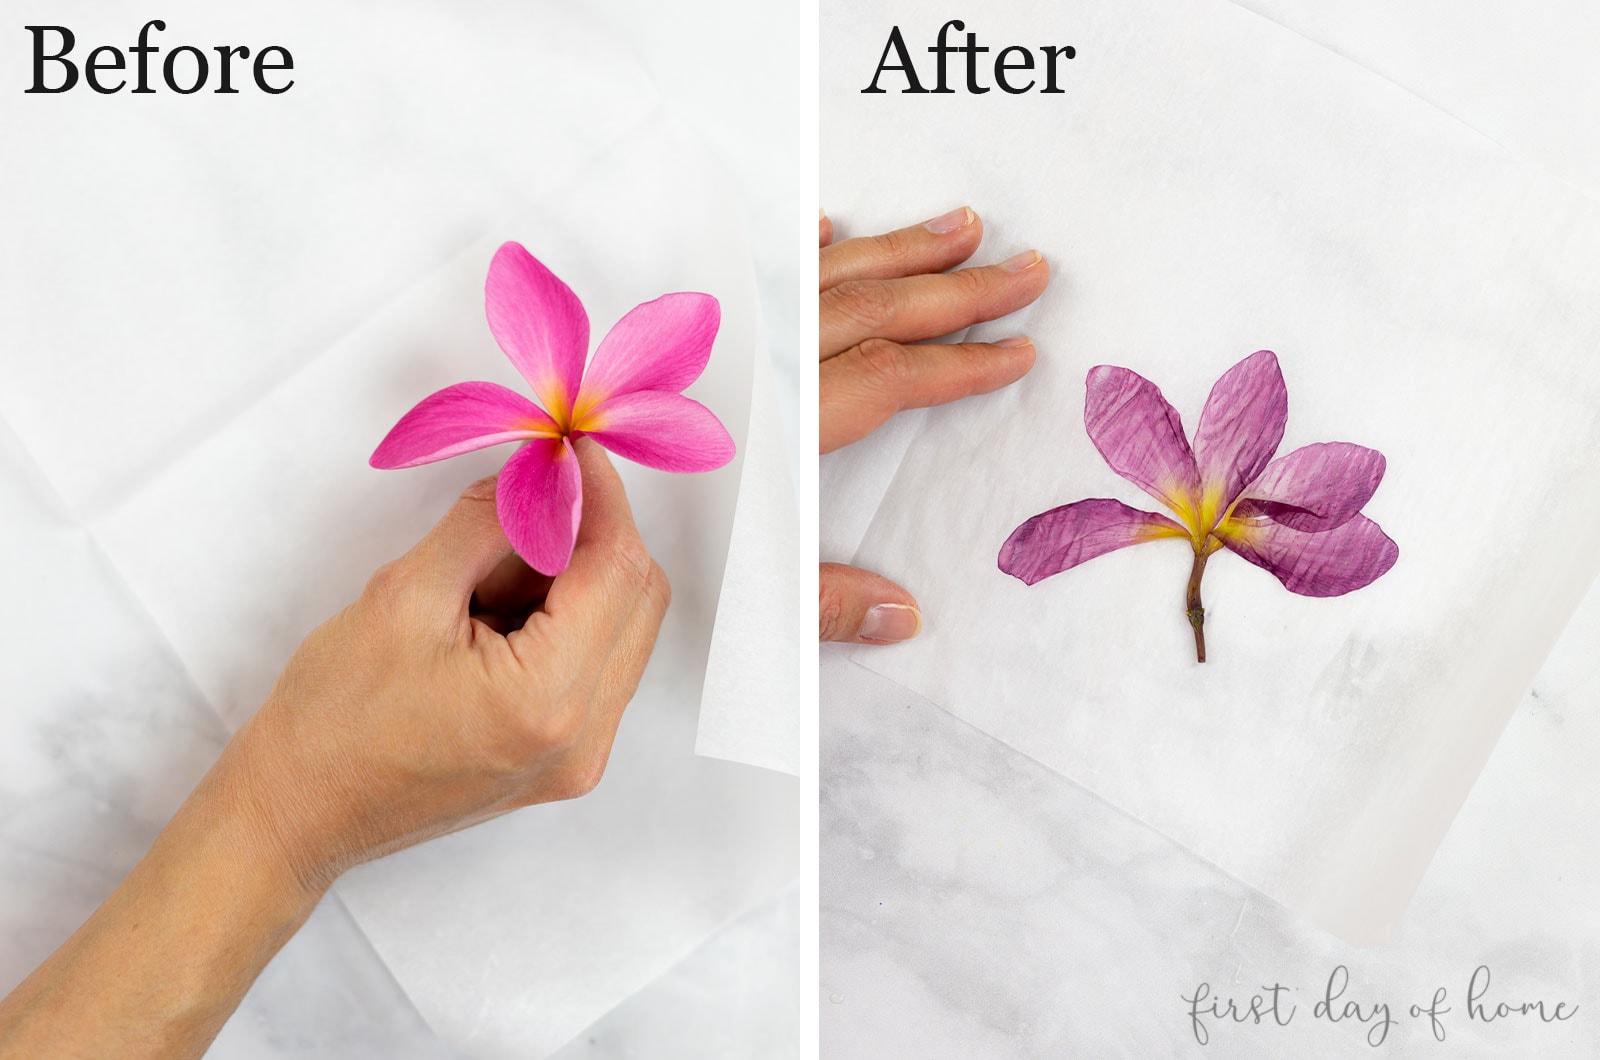
- For large flowers with layered petals, consider separating the petals before pressing and then “reconstructing” the flower later, if desired.
If you’re interested in preserving the 3-D shape of flowers, check out my post on how to dry flowers.
Best types of flowers to press flat
Over the years, I’ve learned some flowers were born to be pressed, and some weren’t. I might have scorched a flower or two in my ambitious attempts to press them. Whoops!
The best flowers for pressing include ones with a single layer of petals and flat faces. I’ve used everything from flowering shrubs like plumbago to roses, vincas, pansies, Esperanza, zinnias, and delphinium.
For larger bulbs or spherical flowers like peonies or ranunculus, you may have better luck preserving the whole flower. You can do this through various drying methods or by separating the individual petals from the stems. For thicker flowers (like roses), you can also split the flower in half before pressing.
Note: Avoid using flowers with fleshy, water-rich petals (e.g., begonias, portulaca). They may be prone to mold or scorch when pressed.
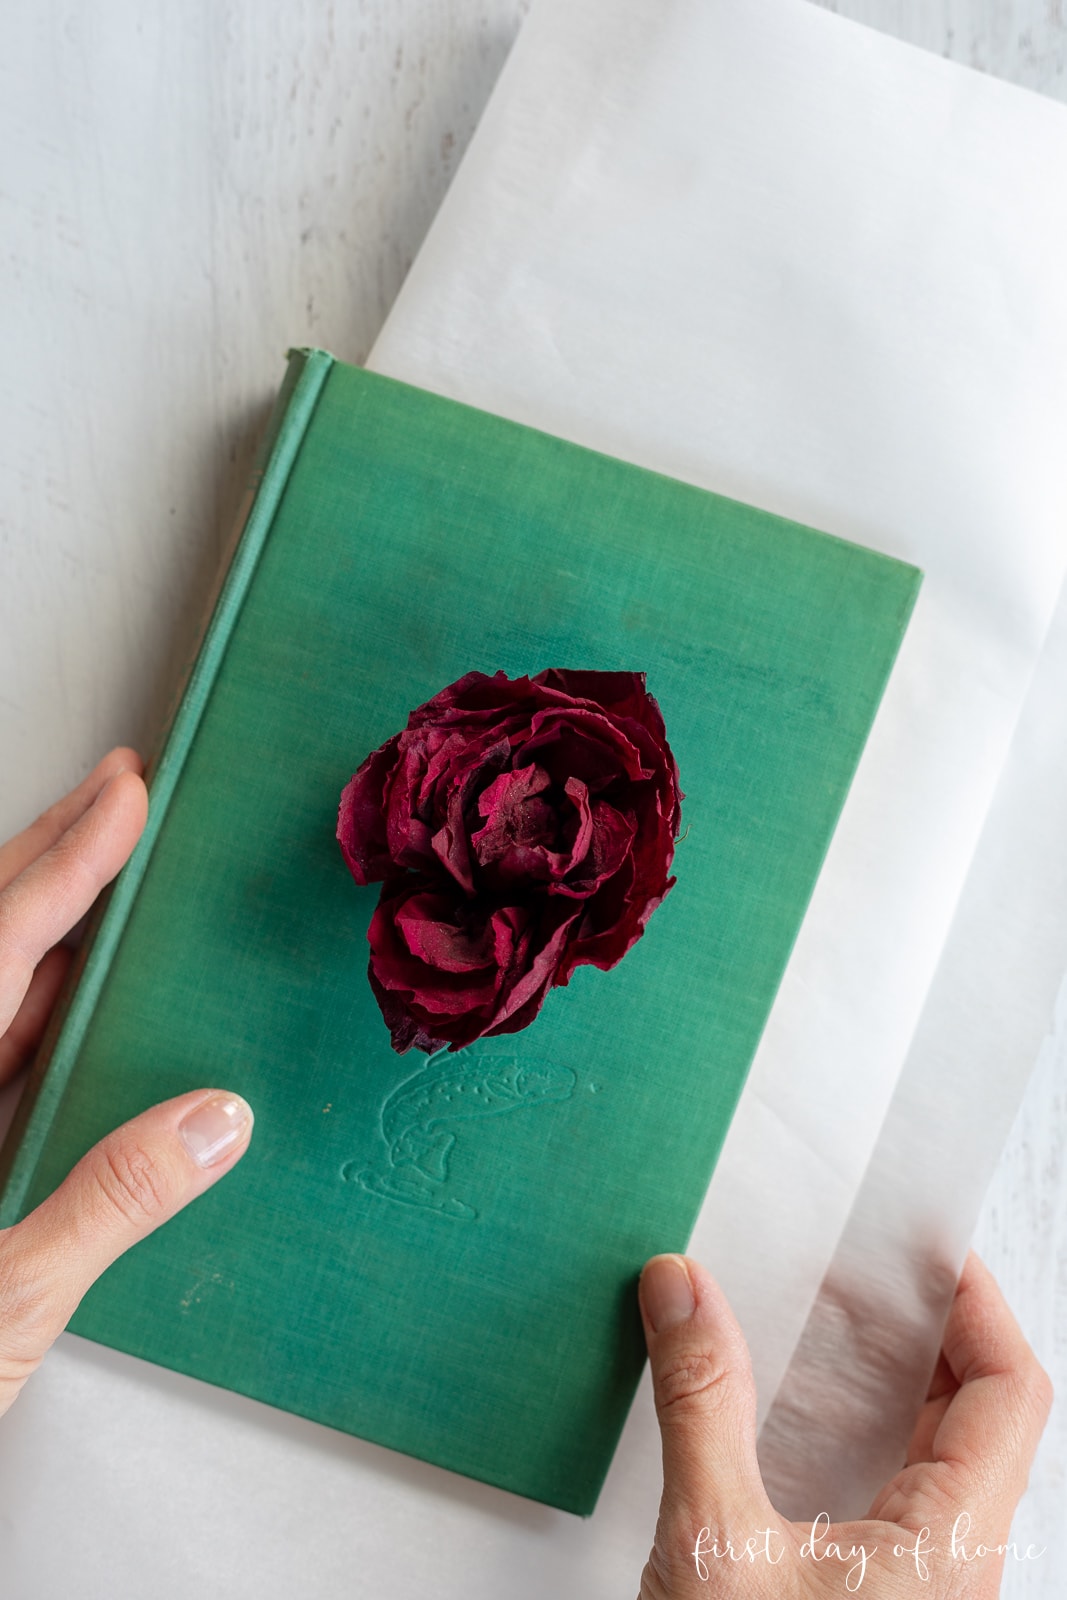
How to press flowers in a book
Pressing flowers in a book is one of the oldest, tried-and-true methods. I’m quite fond of the technique if you have the time and patience to wait. (If you don’t, I’ve got a solution for you below.)
Supplies:
- Sturdy book (e.g., phone book)
- Paper to absorb moisture (parchment paper, thin cardboard, newspaper, coffee filters or blotting paper)
- Heavy weight
Note: For best results, avoid using paper towels. Paper with texture or embossing may leave an imprint on the flowers.
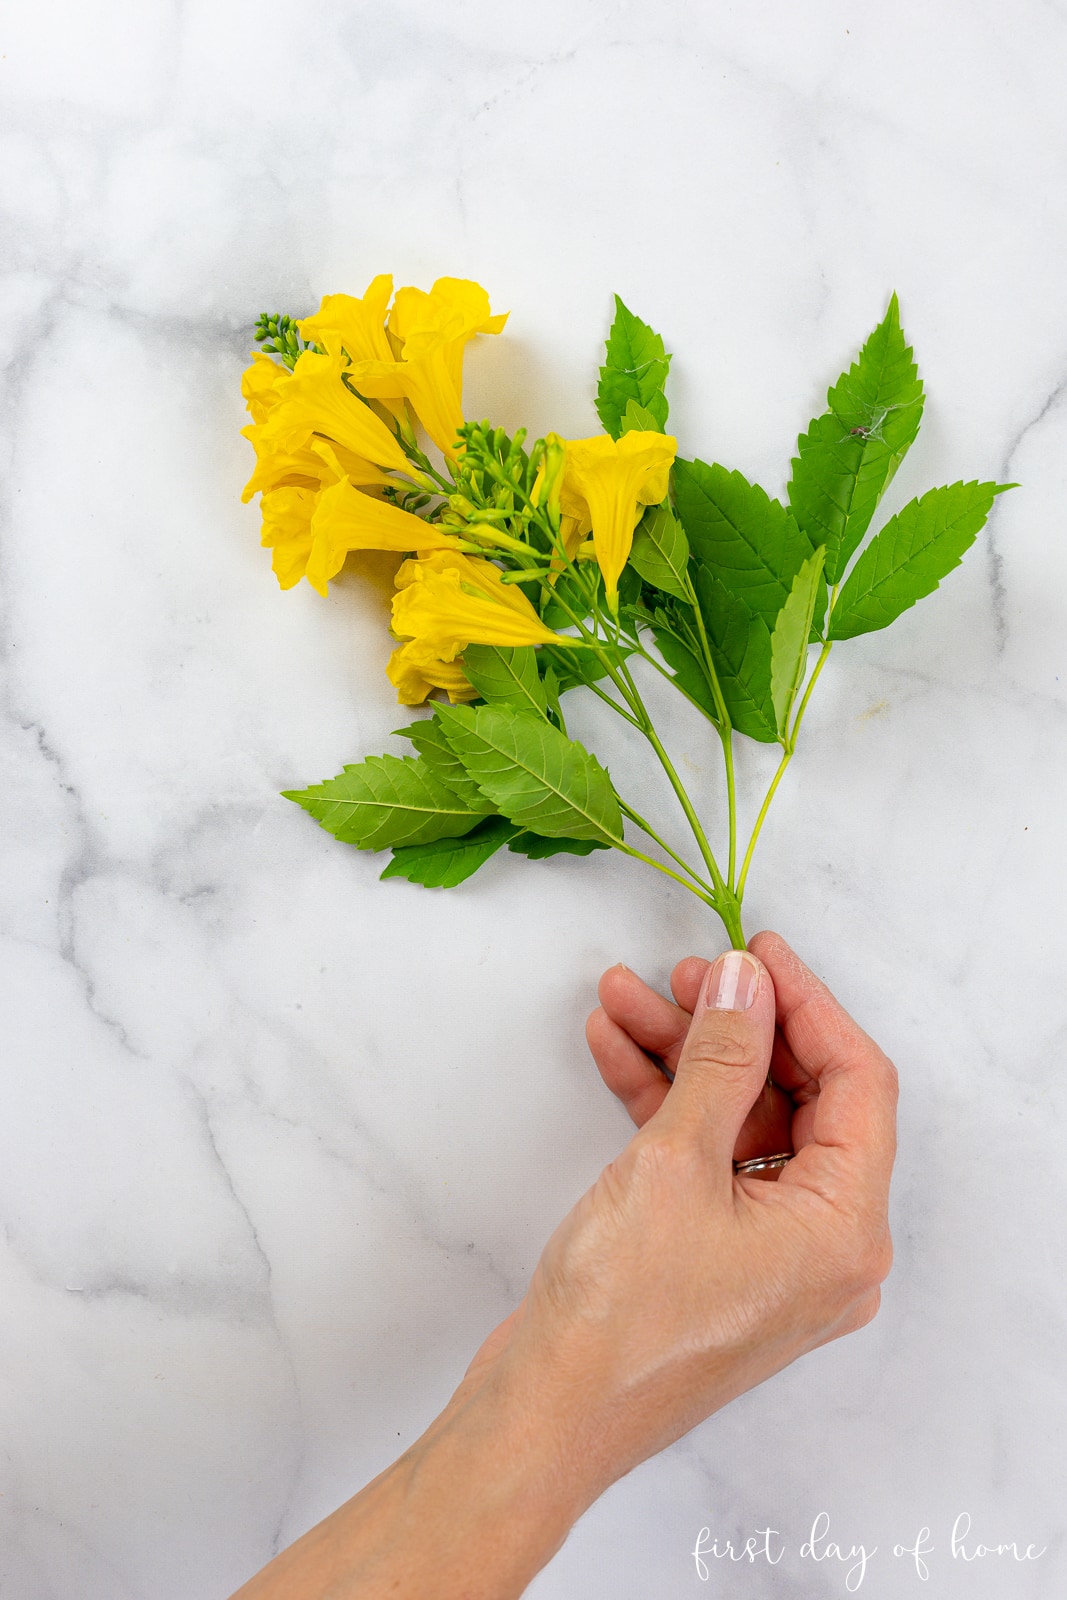
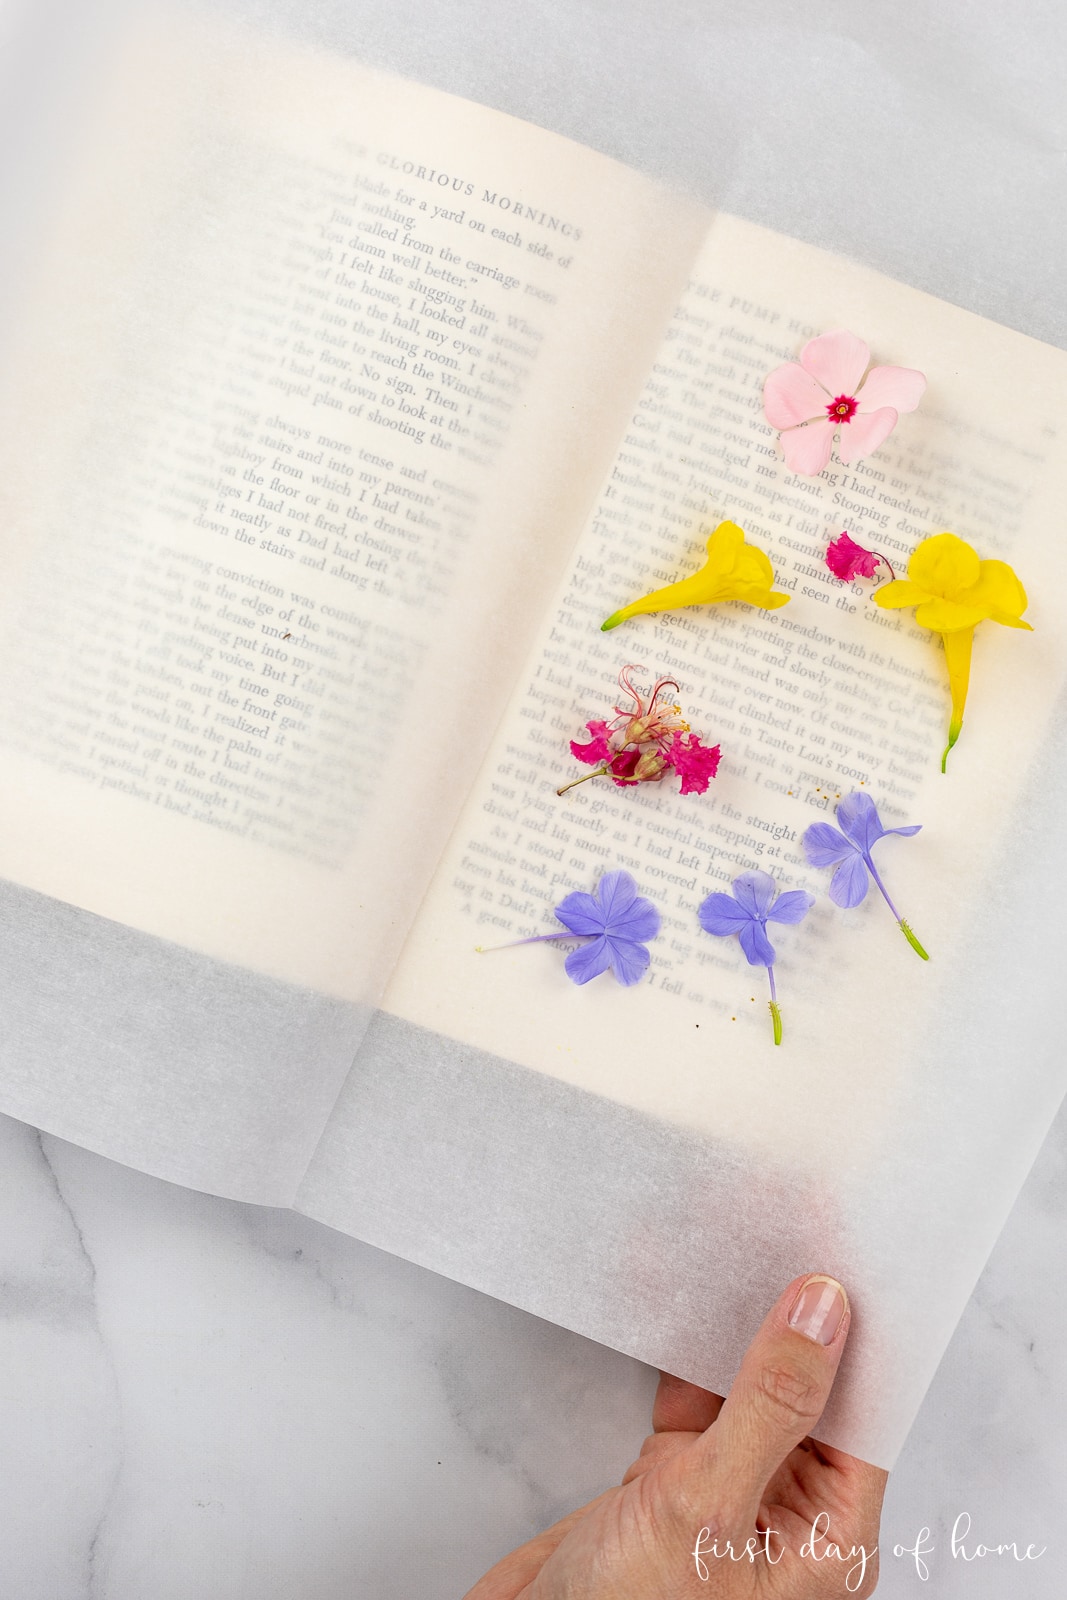
Step 1: Prepare flowers
Before you begin, separate any petals if needed. Then, arrange your flowers on one sheet of parchment paper with at least 3/4-inch of space in between. Try to press flowers of similar varieties or thicknesses together.
Step 2: Cover flowers and close the book
Place the second piece of paper on top of the arranged flowers. Take care to flatten the flower face in the shape you’d like to achieve when pressed. I find it easiest to fold my sheet of parchment paper in half. Then, I can sandwich my flowers inside like a book rather than cutting two sheets of paper.
Next, close the book and set a weight on top. You can also pile on more heavy books or a brick, but you’ll want something heavy enough to create even pressure.
Step 3: Wait 2-4 weeks for flowers to dry
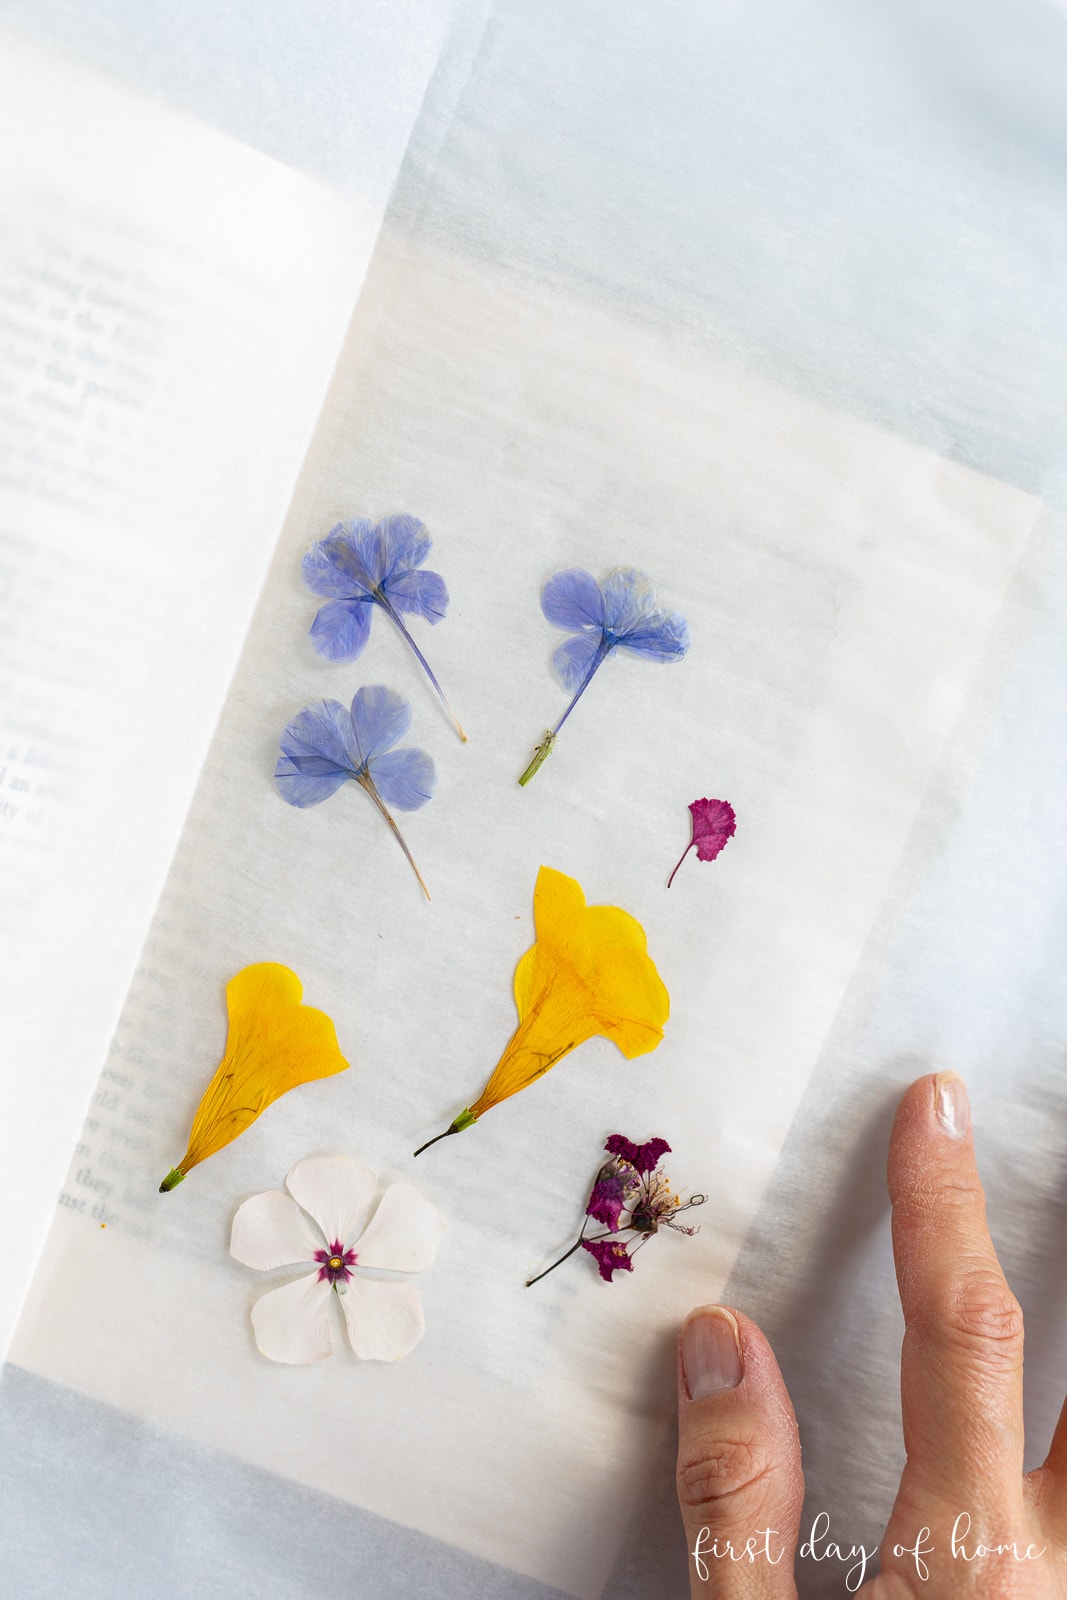
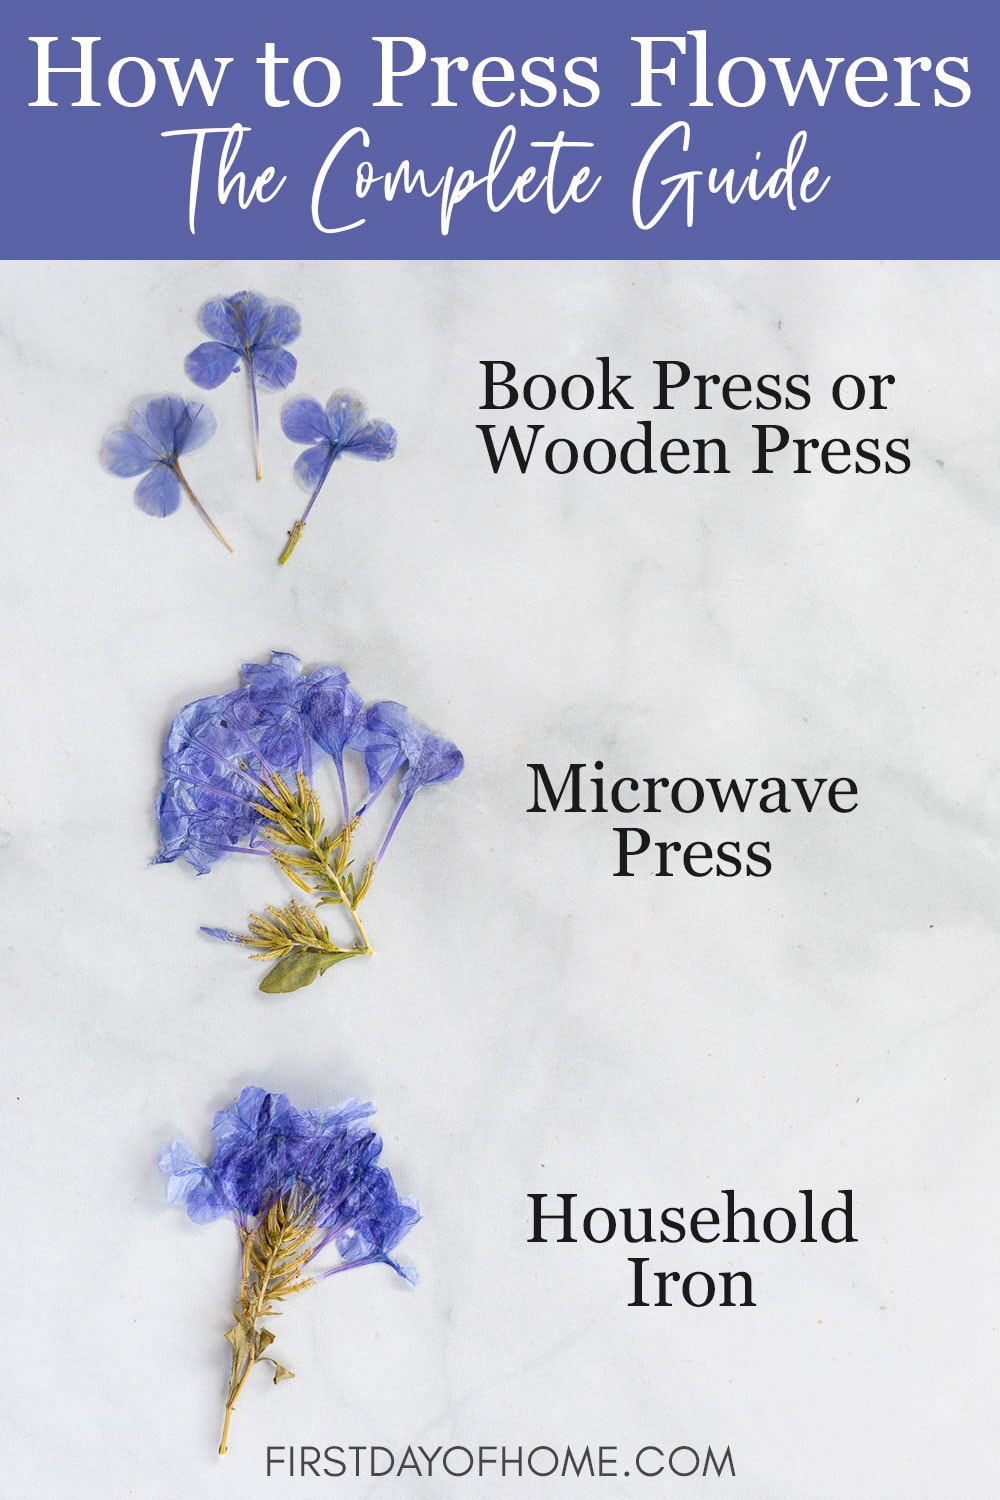
The drying time will depend on the thickness of the petals. I waited only 2.5 weeks for my flowers to dry in the photo above. They came out paper-thin and had great color retention! For thicker flowers, you may choose to wait closer to four weeks.
Some people suggest replacing the absorbent paper every three days or so. However, I didn’t find that necessary with parchment paper.
Once you’re done, I recommend using these nylon tweezers to handle your dried flowers. Book-pressed flowers can have very delicate structures, and you don’t want to tear your pretty specimen!
Using a homemade wooden press
Much like the book-press method, a homemade or store-bought wooden flower press can give you fabulous results. (Plus, you can decorate a wooden press or customize it to match your style-BONUS!)
Supplies:
- Two 12 x 12-inch pieces of plywood or MDF
- Cardboard sheets
- Two pieces of paper (blotting or parchment paper)
- Four bolts and wingnuts
Step 1: Drill holes in boards
Drill a hole in each corner of the boards, about 1 inch from the edge. Make sure you match the size of your bolts and line up the holes on both boards.
Step 2: Arrange flowers in between cardboard and paper
Cut the cardboard to fit inside the plywood or MDF, working around the four holes where you will insert the bolts. Lay a piece of blotting paper on top of the cardboard, and arrange the flowers on top as desired.
Again, you will place the flower between two pieces of blotting paper. Then place a piece of cardboard on either side, followed by the wood or MDF.
Step 3: Screw in the bolts, and wait 2-4 weeks for flowers to dry
Insert the bolts, and tighten the wingnuts until secure. Drying times will again depend on the thickness of the flowers used.
Compared to book pressing, the pressure is more evenly distributed with a wooden press. Plus, you don’t risk damaging any books. Visit the full DIY flower press tutorial for more details.
Shop Wooden Flower Presses

Pressing flowers with a microwave
Perhaps my favorite method of pressing flowers for framing is using a microwave. When you’re short on time, this is the ideal option for you!
I wrote extensively about how to use one of these in my post on DIY pressed flower art. Go visit that post for a detailed tutorial using my favorite press, the Microfleur Max.
Get 10% off your entire order of Microfleur products with the code FIRSTDAYOFHOME. Limit one per customer.
Supplies:
- Microwave flower press
- Tweezers (optional)
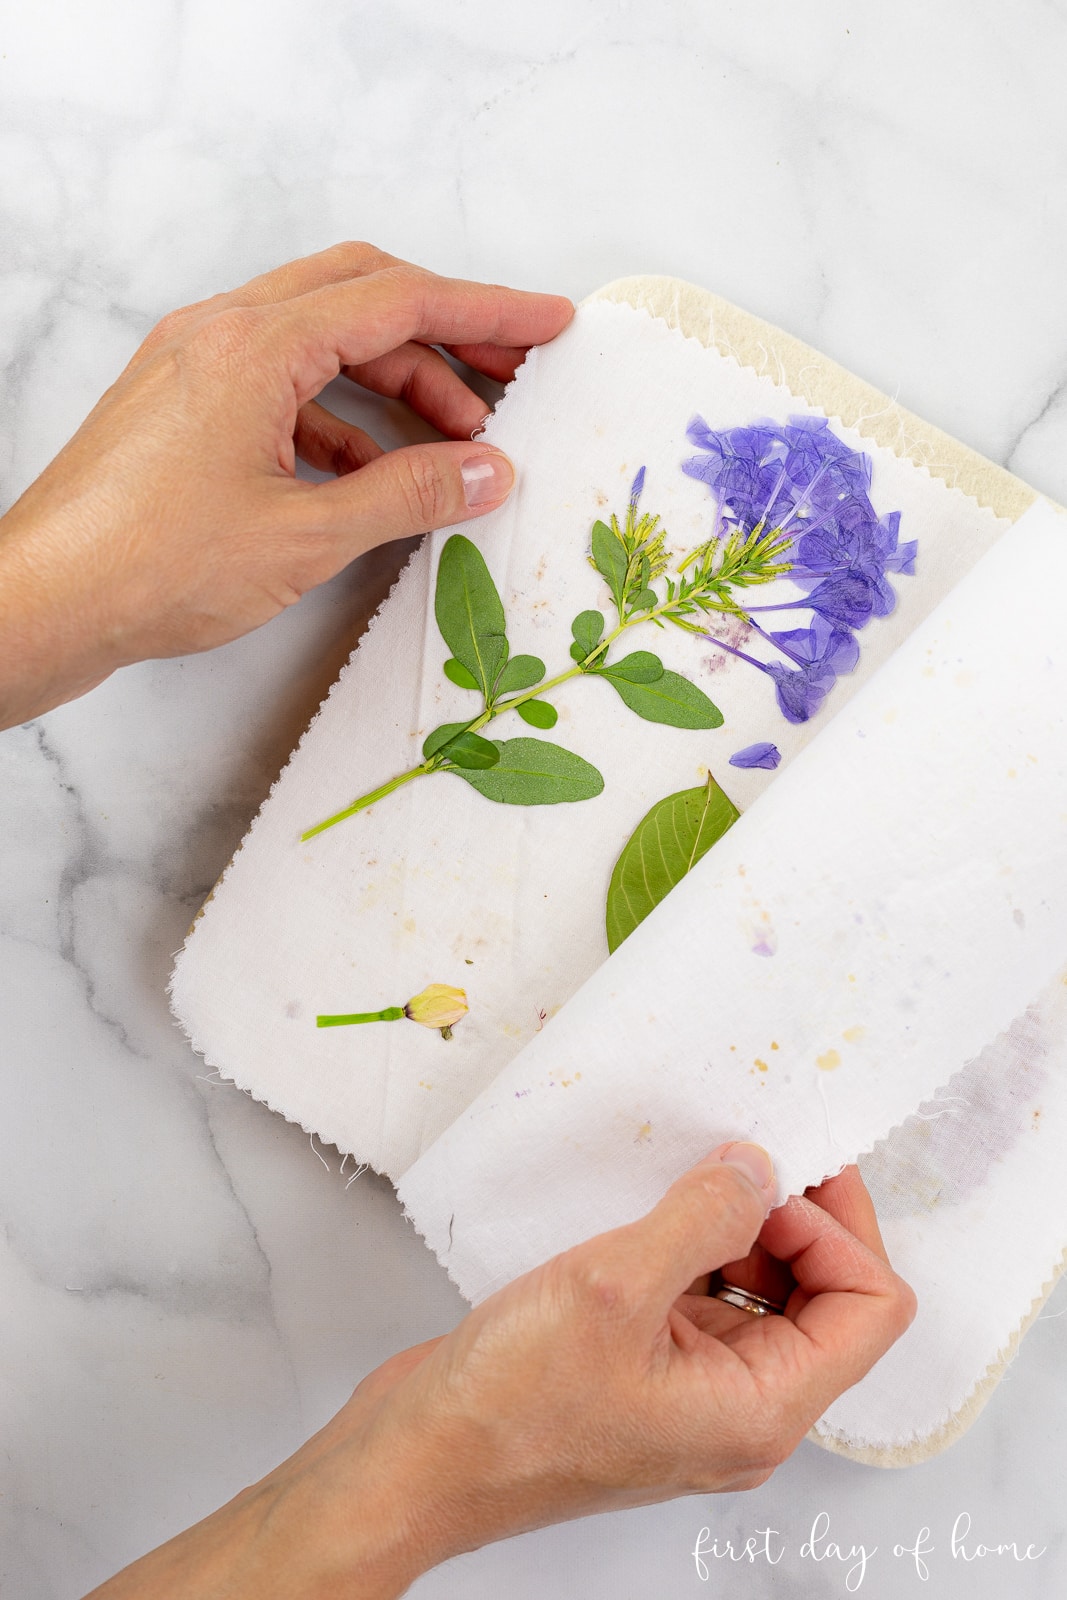
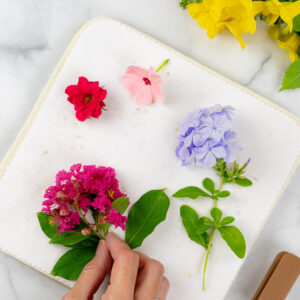
Step 1: Place flowers on inner lining
You’ll want to arrange your flowers on the fabric liner in the shape you want to achieve in the end. Always try to group similar flowers together.
Step 2: Microwave flowers for an initial burst
With most microwave presses, you’ll want to heat the flowers for one long initial “burst.” I typically start with 25 seconds.
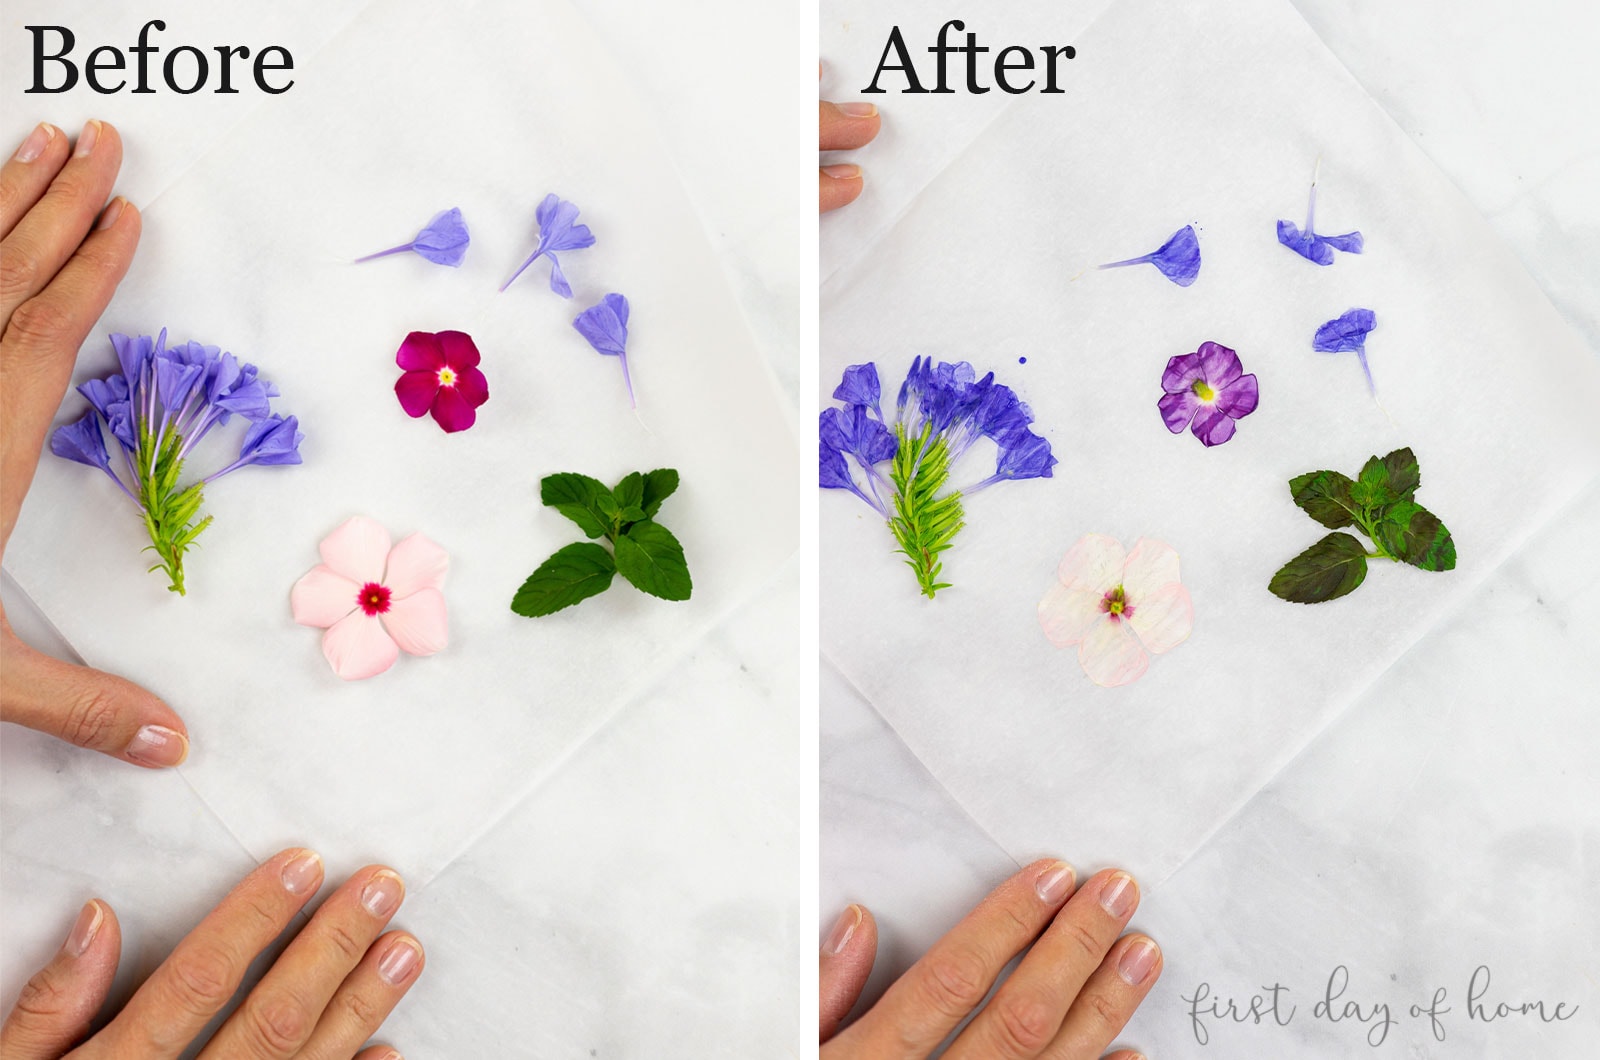
Step 3: Continue microwaving in short bursts
Continue to microwave your specimen in 10-second bursts until the flowers feel paper-thin. Always air out the plates in between bursts to prevent browning or scorching. If scorching occurs, you can always reorder refill packs. (Ask me how I know.)
Note: Using succulents or flowers with fleshy petals may cause scorching when microwaving.
Take care when you remove flowers, since petals may stick to the inner liner. It helps to stretch the fabric liner in opposite directions or use nylon tweezers to help release the flower.
You can also use a book in the microwave instead of a press. Just please make sure there are no metal accents on the cover that might create a fireworks show!
Pressing flowers with an iron
You can also apply heat to dry flowers using a household iron. I must admit, this is my least preferred method because I just don’t think the quality compares to the other methods. However, it’s a good one to have if you need pressed flowers ASAP and don’t have another microwave option.
Supplies:
- Iron
- Parchment paper or other absorbent paper
Step 1: Arrange flowers between paper
I used parchment paper to sandwich the flowers and position them into place before ironing them. A good hard surface with a thin towel underneath also helps.
Kids Craft Idea
For a fun kids’ craft, use wax paper to create a “suncatcher” with the flowers preserved in between. The wax paper will seal itself around the flowers, and you can staple thick cardstock as a frame for display.
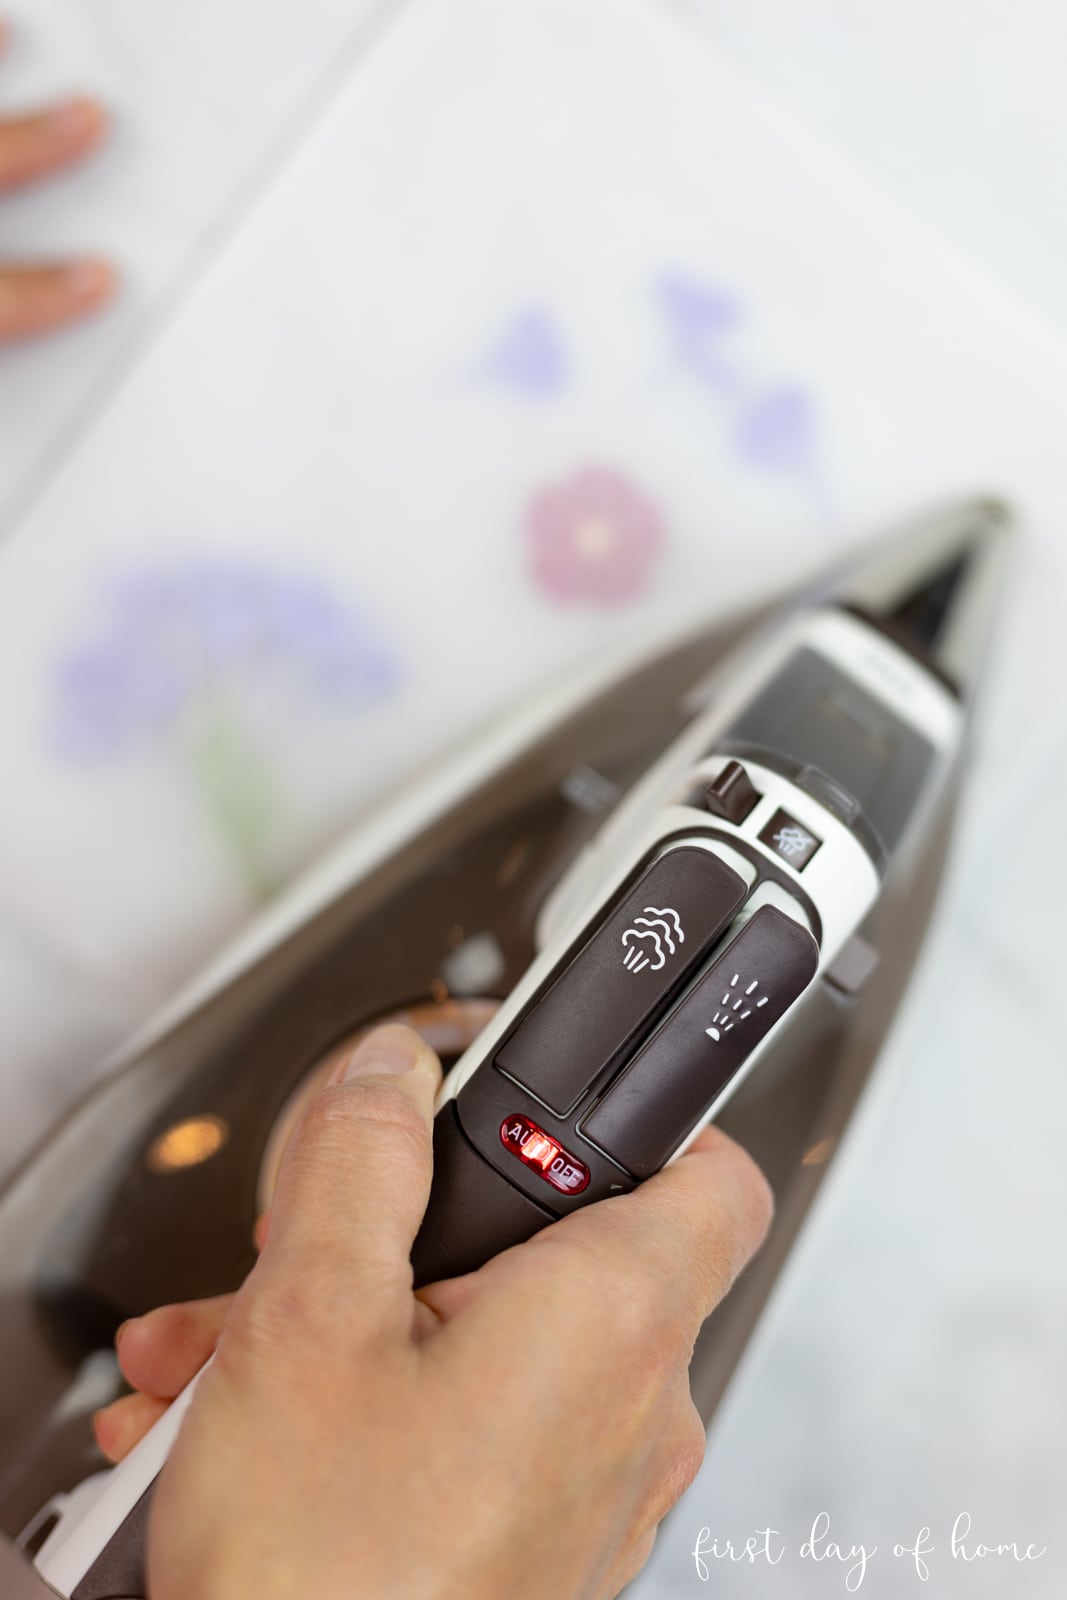
Step 2: Iron on low heat
Turn off any steam settings, and iron the flowers for about 15-30 seconds at a time on low heat. Let the flowers cool briefly before attempting to press again.
Once the petals have partially dried out, you can choose to finish drying using the book or wooden press method above.
As you can see, the results of ironing don’t measure up to the other methods, in my opinion. The parchment paper tends to wrinkle, which causes ripples in the petals of the flowers as well.
What is the best way to press flowers?
I decided to create a little chart for an easy comparison across the methods (nerd alert!).
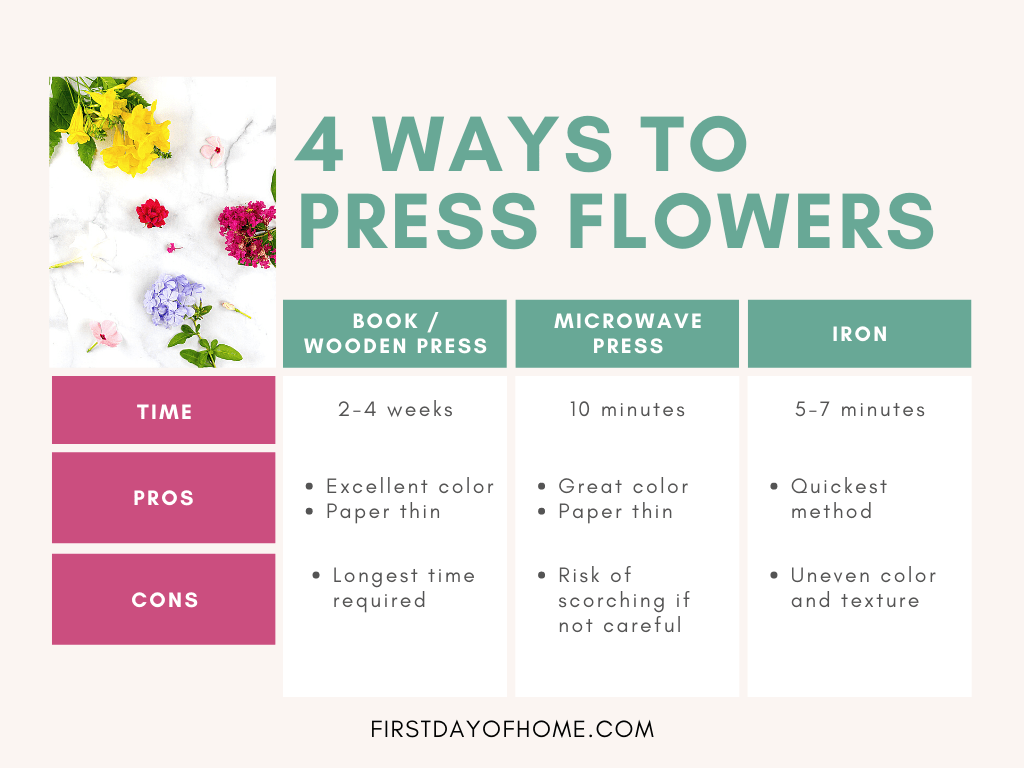
The best technique to press flowers and keep the color and texture was the book method. The microwave flower press is a close second and definitely wins in terms of convenience. I would not suggest ironing unless you’re in a pinch or need some quick flowers for a kid’s craft.
If you want another method for preserving flowers, try drying flowers with silica gel. It’s the best way to maintain the texture of your blossoms.
Pin it for later!
What to make with dried flowers
Now that you know how to make pressed flowers, you can preserve flowers from any occasion. Consider preserving flowers from your wedding, vacation, or other life events. I’ve even had readers preserve flowers from a funeral to remember loved ones.
I have a tutorial on making wedding table numbers with pressed flowers if you need inspiration. Talk about gorgeous!
For a home decor project, visit my article on making pressed flower wall art with a spray painting technique.
In my collection of pressed flower crafts, you’ll find fun ideas for using dried flowers in everything from jewelry to shadow boxes.
How to Press Flowers Four Ways
Supplies
Book Press Method
- Fresh flowers
- Heavy Book
- Parchment paper or absorbent paper
DIY Wooden Press Method
- 2 12×12-inch pieces of plywood or MDF (or store-bought wooden flower press)
- Cardboard (2 pieces cut to fit plywood/MDF)
- Parchment paper or blotting paper
- 4 bolts and wingnuts (if making DIY press)
Microwave Flower Press Method
- Microfleur Flower Press
- Tweezers (optional)
Ironing Method
- Standard iron
- Parchment paper or absorbent paper
Instructions
Book Press Method
- Arrange flowers on parchment paper, and place another sheet of paper on top.
- Close book and set a heavy object on top to apply pressure.
- Wait 2-4 weeks for flowers to dry completely.
DIY Wooden Press Method
- Drill four holes in the corners of the plywood/MDF, or use a store-bought wooden press.
- Arrange flowers between two sheets of parchment paper and then two pieces of cardboard.
- Sandwich the pressed flowers between the two pieces of wood/MDF. Then, tighten the bolts and nuts through the holes in each corner.
- Wait 2-4 weeks for the flowers to dry completely.
Microwave Flower Press Method
- Place flowers on the inner lining of the microwave flower press, and cover with the remaining lining and felt pieces.
- Microwave the flowers for an initial "burst" of about 25 seconds or per the manufacturer’s instructions.
- Open the press to release moisture before continuing to microwave in 10-second intervals. Release moisture in between bursts to prevent scorching and burning.
- Gently peel flowers away from the fabric lining once flowers are completely dry.
Ironing Method
- Place flowers between two sheets of parchment paper or other absorbent paper.
- Turn off any steam settings, and iron the flowers on low heat in 15-30 second intervals.
- Let the flowers cool before continuing to press.


Hey! I’m trying to press my wedding bouquet flowers to put in a picture glass frame to display but I am having a hard time preserving the dahlias with the press method. They keep molding even though I change the sheets every two days. Thankfully I’m still able to find new ones in the same color to try again and I did cut some of those in half and those worked, but I’m hoping to have some full. Have you had any luck with dahlias using the microwave press method?
Hi Anna! Are you familiar with the silica gel method of drying flowers? I have a blog post about that. That’s my preference for drying thicker flowers and preserving wedding bouquets because it maintains the shape of the flowers better. You can read about it here: https://www.firstdayofhome.com/drying-flowers-with-silica-gel/. It would be perfect for dahlias. I hope this helps!
Thankyou very much for a simple comparison of the different techniques. I’m going to make a wooden press for my daughter to use as she has started scrapbooking for her friends as their birthday presents. Given children can be a little impatient when it comes to waiting 2-4 weeks 😆 would the flowers benefit from being in the sun outside while in the press to speed up the process or do you think it may actually spoil them.
Thanks for any advice.
Hi Mark. I’m glad you’re giving this a try! If you start with fairly simple/flat flowers, it may not take very long to get pressed flowers. I’d avoid placing the press in direct sunlight or high temperatures just to prevent damage to the flowers. You might find that the flowers are fairly dry after about a week if you’re using something like pansies. Small wildflowers also dry quickly. Another idea is to stage the timing so that they are ready at different times. After a week or two, you’ll have a revolving supply. I hope she enjoys it!
This is a great article about pressing flowers to keep them preserved for a time to come. Thanks for taking time to write and publish these helpful flower tips!
I’m glad it was helpful. Thanks for the kind comment and rating!
This is a wonderful article. I want to start pressing flowers with my 3yo daughter. I was hoping to preserve them with a picture for vacations, note the date and maybe any info on the flowers/leaves. I might not always have the wood press but an iron or microwave would be a great alternative away from home. Any tips on preserving them for a long time? Like using hairspray on vacation or something else at home to “seal” the color in and make them less brittle over the years? I’m not expecting the flowers to last for 80 years, but maybe just an extra little durability boost.
Hi Shelby! Those are great questions. I’d consider just taking a book and a couple of sheets of parchment paper if you want to press flowers away from home. It’s easy to protect them and press them at the same time with a book. I’ve done that when preserving wildflowers here in Texas. As for preserving them for a longer period, you could use hairspray or a matte acrylic spray like this one: https://amzn.to/3JAqvsq. I hope this helps! Enjoy making memories with your daughter. -Crissy
Thanks for sharing such valuable information from all your experience. It’s very helpful.
I only need to preserve the shape, as I use them as impressions in paintings. I’ve been using botanicals (mostly grasses I foraged last autumn) that were dried, but now that there are fresh pieces and I’ve experimented with freshly gathered flowers, leaves, and grasses, I think using them dry makes a better impression.
I’m hoping this will work: I have a lot of pressings between parchment and matte boards that I’ve then stacked between heavy MDF shelves and weighted on top. I hope in a few weeks to see how well my theory worked. Thanks again
That sounds lovely! I’ve done some art with pressed flower impressions in various styles here if you want to take a look: https://www.firstdayofhome.com/pressed-flower-wall-art/. These are fairly easy and basic, but perhaps they will give you some ideas of what’s possible. I also made a DIY flower press that sounds similar to your setup (https://www.firstdayofhome.com/diy-flower-press/) if you’re looking for a longer-term solution. Best of luck with your flower pressing! I’m sure you art will be beautiful.
This is such a helpful tutorial! Thank you for sharing these 4 amazing techniques for pressing flowers. I loved your tutorial so much that I couldn’t resist featuring it (with proper credit) on Crafts on Display, a thriving community of fellow crafting enthusiasts. You can check it out right here – https://craftsondisplay.com/home-decor/how-to-press-flowers-4-different-methods-43232/ I hope you enjoy it, and please keep up the fab work!
Hi Violeta! Thanks for the feature and for the kind words. It’s nice to know about your site. Looks great! Thanks, Crissy
Hi! I’m trying the book flower pressing technique for the first time! Will it ruin my books that I have it between? Even through the parchment paper? I just put the flowers in the book under a stack of other books, so I can quickly retrieve it if it will harm my books. Thank you! Catherine
Hi Catherine. The only time I would worry about the pressed flowers ruining your books is when the flowers contain a lot of water in the stems or petals. I usually press flowers with thin petals and stems, and I’ve never had an issue. However, I’ve had some readers mention problems with mold or staining, and I suspect this is because the flowers had too much moisture. I always advise against using succulents or other thick flowers. I hope this helps! -Crissy
Thank you so much! I used hydrangeas and some other flowers from the bouquet my fiancé gave me when he proposed recently! Hopefully it all works well and I can keep these memories forever! Thank you for responding so quickly. I also read a bunch of your articles on the site and really enjoyed them!
Congratulations! That’s so exciting! I hope the dried flowers turn out well for you. Thanks for your kind words too! I’m thrilled you liked the articles. Have fun with the wedding planning! -Crissy
Hello.
Thank you so much for this information. It is well presented and very informative.
I tried the book method with parchment paper like I did with my Nana when I was a kid.
I just checked them and most of them had rotted/molded!
It had been quite warm & dry here over the past month, but we have had a couple rainstorms.
They were thin petal flowers, not a lot of extra greenery on them.
I’m assuming it was most likely due to the humidity. How do I avoid this in future?
Thanks in advance.
Hi Erika. I’m so sorry to hear about your flowers! Yes, humidity definitely could do some damage. Do you think the flowers were fully enclosed in the book? I try to use the heaviest book possible so the flowers aren’t exposed to the air. Sometimes it all depends on the flower. I find that wildflowers generally press pretty well in a book, but anything that might retain a lot of water won’t do as well (like portulaca). Do you know what type of flowers they were? -Crissy
Thank you so much for replying, Crissy.
I picked an assortment from my garden and can’t even identify what they were. I did it on a whim and am not sure what was what. The light purple columbine pressed nicely and the sweet william worked. But the rest (including some of the light purple columbine) were unidentifiable after.
I had placed them between parchment paper, put that between 2 large books, and set a case of apple juice on the book for weight. 😄
I am going to try again. I will aim to pick more delicate flowers and I will take a photo of the flowers before leaving them to press.
The last batch did leave mold on my books. 😬 It wiped off with a little diluted vinegar but I’m going to have to find books I can live without incase that happens again.
Thanks again.
I’m always happy to help! Sorry to hear about your book! If the flowers seem to have a lot of “juice” in the flowers or stems, that might be a sign they won’t press very well. I’ve had great luck with single petal flowers like simple vincas, pansies, etc. I’ve also pressed flowers like angelonia, bluebonnets, and salvia without issues. My guess would be that the flowers had too much moisture. I wouldn’t give up without trying a few different varieties…and with a book you don’t care to read again.😬 If you’re interested, I also have tutorials on preserving flowers with other methods instead of pressing them flat. You can find more info here: https://www.firstdayofhome.com/how-to-dry-flowers/. Best wishes, Crissy
Thank you so much for the reply and the link!
I have hung flowers to air dry before, but am definitely going to try some of the other methods now!
Thanks again. 💞
You’re welcome! I hope it gives you some options to preserve flowers. Feel free to reach out if you have more questions. I also have YouTube videos to illustrate some of the techniques if that helps. Enjoy! -Crissy
Amazing tutorial!! + very organized
Thanks so much, Karkat! I appreciate your sweet comment. Have fun pressing your flowers! -Crissy
Great one!