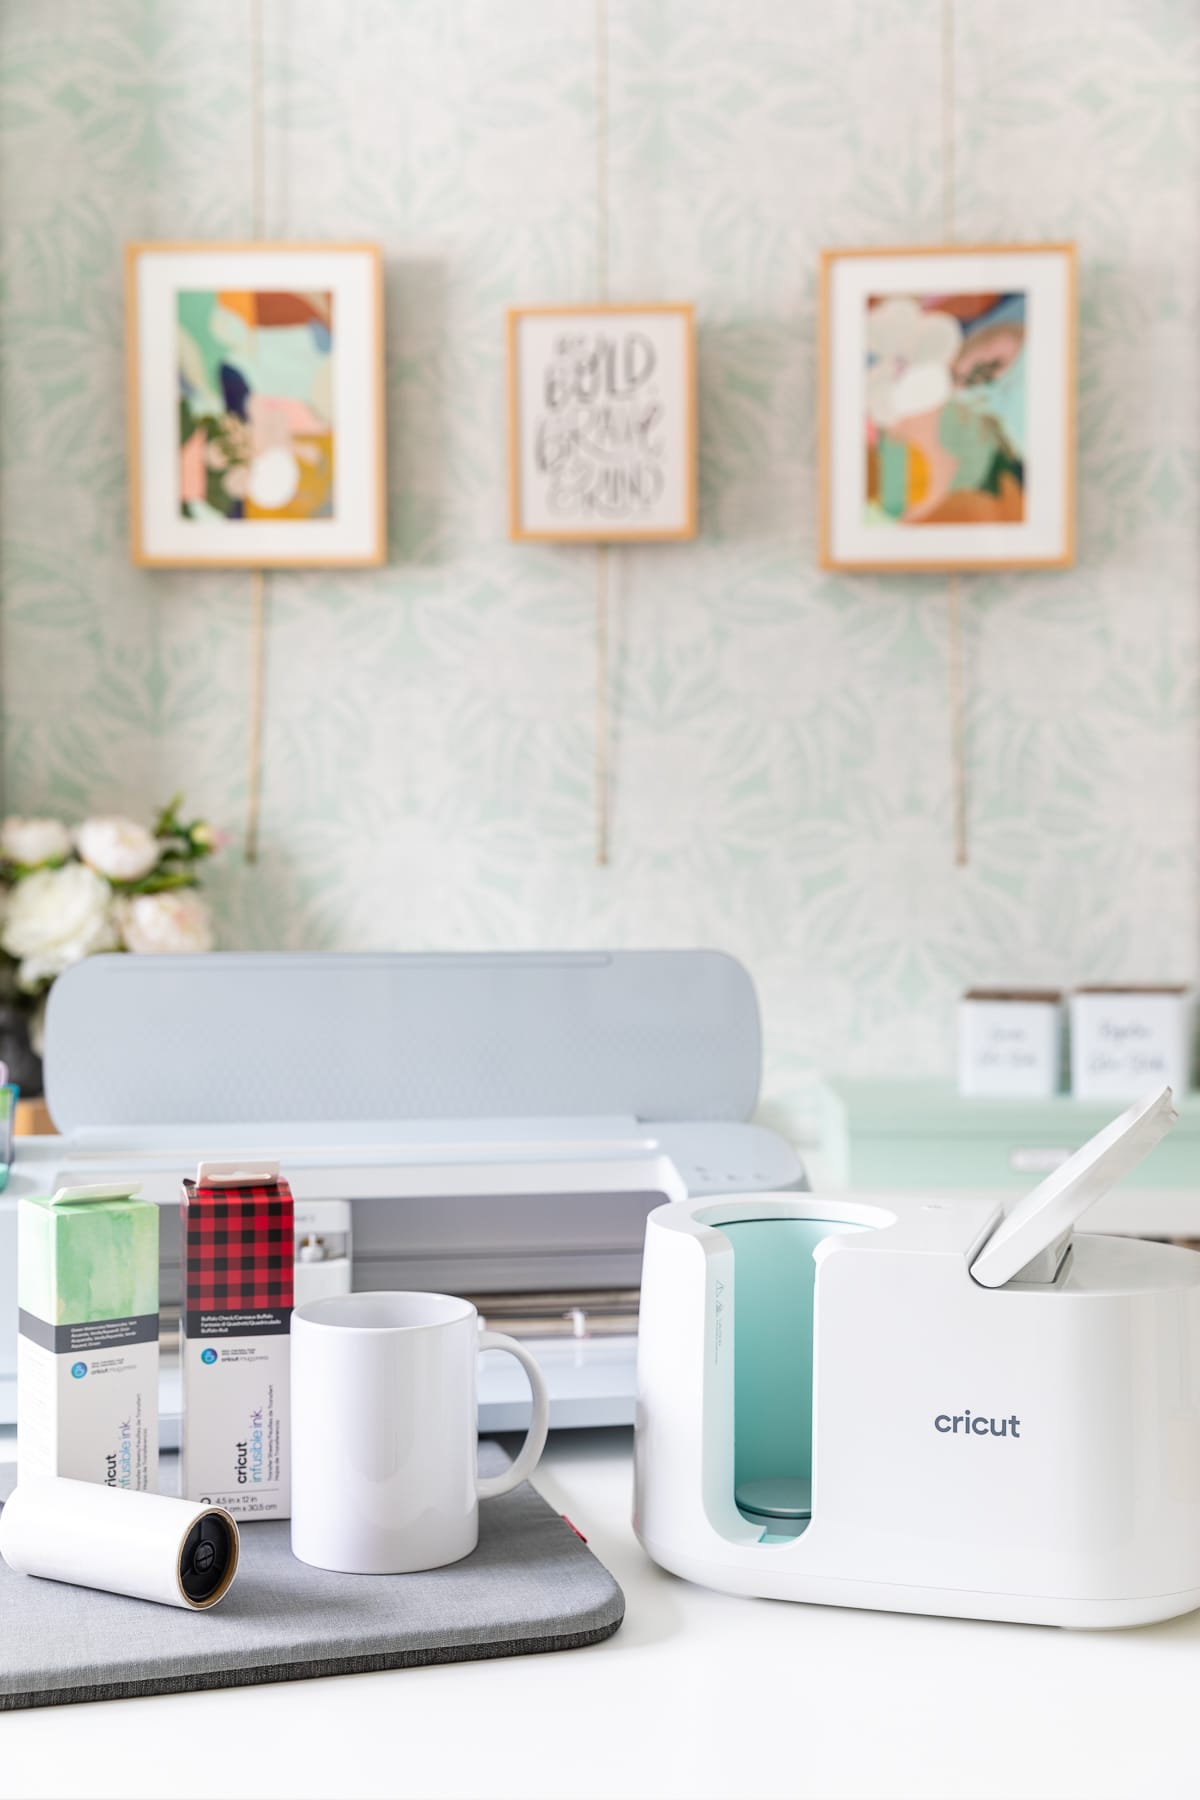
Beginner’s Guide to the Cricut Mug Press
When it comes to making professional-looking products in minutes, the

This post contains affiliate links, and I will be compensated if you make a purchase after clicking on my links. For more information, please see my disclosures.
What is special about the Cricut Mug Press?
The Cricut Mug Press takes all the guesswork out of sublimation mug printing. Using
The designs on the transfer sheets will look dull until the heat activates the ink, creating vibrant mugs that look professionally crafted.
The Mug Press comes equipped with a simple lever that you press down when you’re ready to transfer your design, so there’s no need to determine what temperature or time to set for the heat transfer process. I love this one-touch feature!
The best aspect of the Mug Press is the result. The mugs are both dishwasher and microwave-safe. The design is also seamless and permanent, meaning it won’t flake or peel like vinyl would.

Before you get started setting up your machine, let’s walk through the supplies you’ll need.
Safety note: Always work with infusible ink in a well-ventilated area since sublimation can cause vapors that sensitive individuals may find irritating. Please refer to
Can you use any mugs with the Cricut Mug Press?
If you want to purchase a new machine, keep in mind the

Here are a few varieties of Cricut Mug Blanks available today. Some even come with multiple color schemes for an added pop of cheer.
Non-Cricut Blanks: What You Need to Know
If you do select a non-Cricut product, here are the specs you should look for, according to Cricut’s Mug Press FAQs:
- Capacity of 10 – 16 oz (295 – 450 ml)
- Drinkware with smooth, straight pressing area only (i.e., no curves, bevels, or textures)
- Diameter between 3.2 in – 3.4 in (82 – 86 mm)
- Maximum height of 4.72 in (120 mm)
How do you set up the Cricut Mug Press?
Activating your
In the upper right corner of Cricut Design Space, click on your profile name, and select Settings. (Note: The location for the new machine setup recently changed from the upper left menu to the upper right menu.)

Once you open the Settings menu, go to the Machines tab and select the Start button next to New Product Setup (see image above). From there, you’ll choose to activate a new heat press and choose the Cricut Mug Press.
If you don’t have a USB port, you can often find adapters for your computer, or you can borrow someone else’s device.
Why register your heat press?
It’s important to register the mug press because it keeps the firmware updated. If you sell the mug press, the new owner will want to register the heat press to his/her account too.
If you’re looking for a heat press that has the versatility to make t-shirts, wine bags, tote bags, or other flat projects, be sure to read my EasyPress 3 review.
Cricut Mug Press Beginner Tutorial
You might find the list of supplies intimidating, but these are items you’ll use for many infusible ink projects. Check out my infusible ink guide or infusible ink coasters for other examples of sublimation projects.
Supplies for Cricut Mug Press
- Cricut Mug Blanks
- Cricut Mug Press
- Cricut Maker, Cricut Explore, Cricut Joy, or Cricut Joy Xtra machine
- Standard grip cutting mat or light-grip cutting mat
- Infusible ink transfer sheets
- Rubbing alcohol
- Lint roller
- Heat resistant tape
- Cricut EasyPress mat
Note: Other

This tutorial will walk through the steps using infusible ink transfer sheets, but I’ll note any major differences when using infusible ink pens or markers. You’ll need laser copy paper and three layers of butcher paper when making mugs with infusible ink pens or markers.
Step 1: Design the mug in Cricut Design Space
The key to working with the
Save yourself a lot of headaches by starting with this easy template. It’s actually not that easy to find if you search in
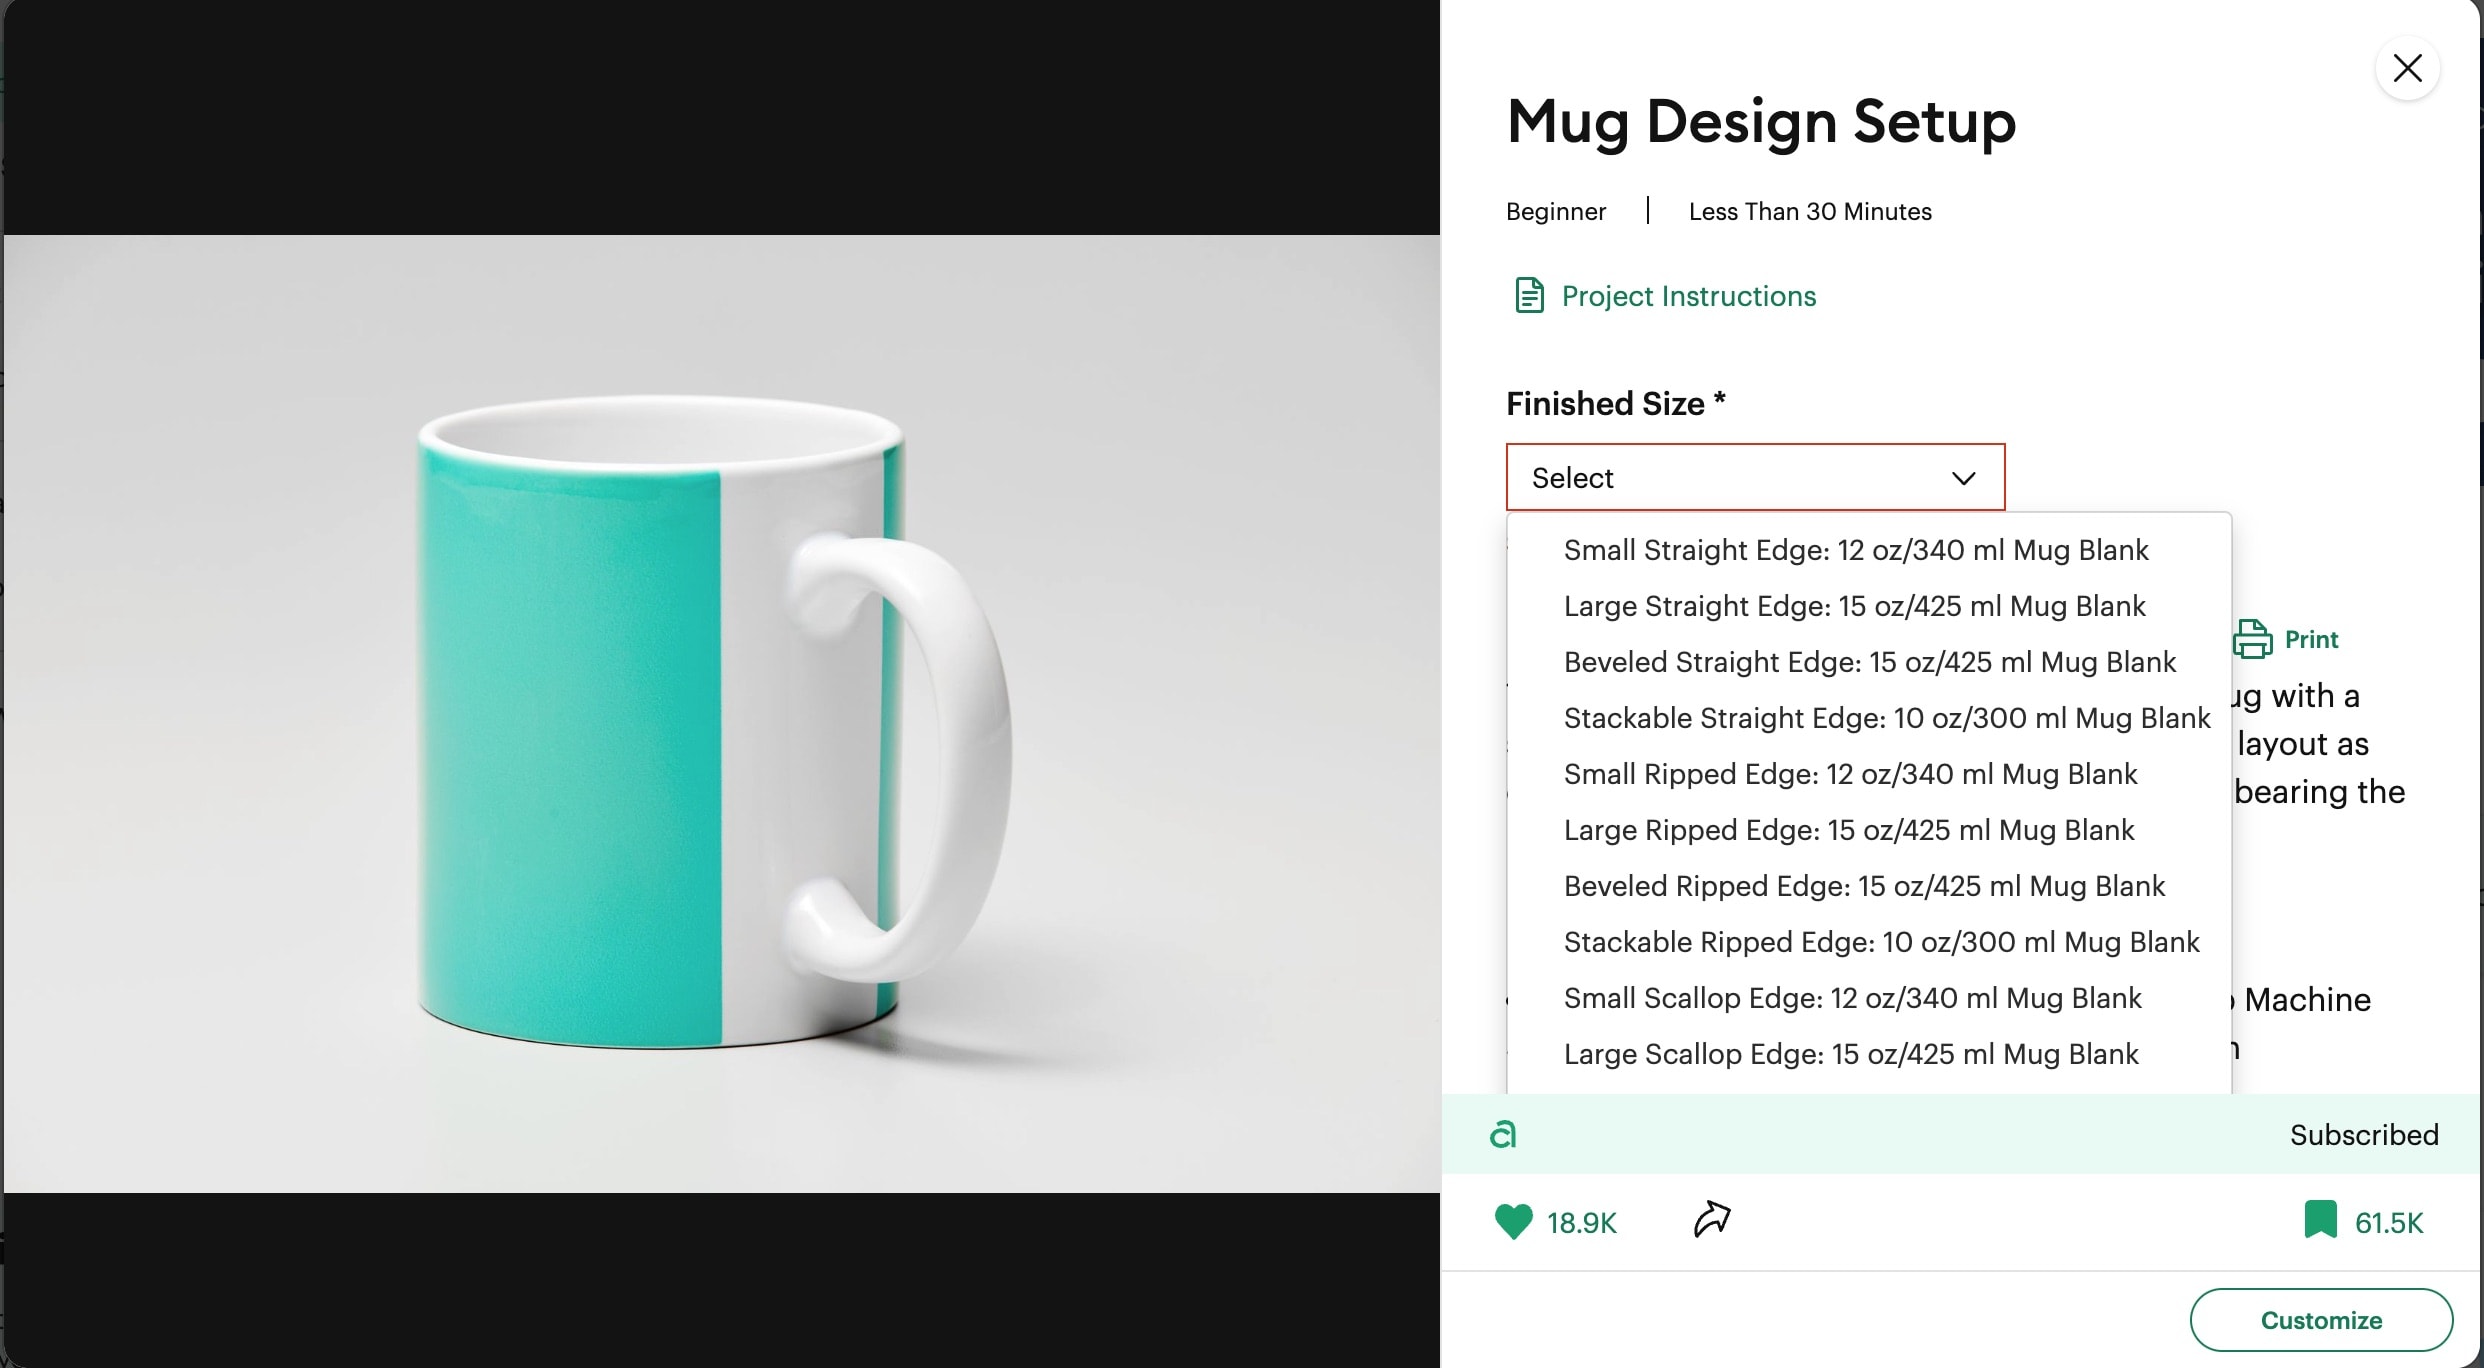
In the setup, you can choose your mug size and design template. For this tutorial, I chose a Large (15-ounce) Straight Edge design since I’m importing my own SVG file.
If you’re working with the mug template, make sure your design fits within the shaded area, leaving about a 1/2 inch from the mug handle on either side. (This 1/2-inch margin is key for designs using infusible ink pens or markers too.)

If you’d like to use the same Christmas design from this tutorial, you can find it on Creative Fabrica here. Creative Fabrica is one of my go-to sources for great SVG files and loads of freebies too. You can try their special offer below to get started.
Get 10 Free Designs!
To download 10 free designs, including fonts and SVG files, sign up below for Creative Fabrica’s All Access Free Trial. Upon the 10th download or after 1 month, the free trial converts into an All Access subscription of $9 per month. You can cancel at any time, no questions asked. I’m doing it myself!
The best part is that these designs include a personal, commercial, and print-on-demand license. That’s almost unheard of for digital download sites.
If you’re uploading your own design, click the Upload button on the left panel of your Canvas. You can also choose pre-made mug designs within
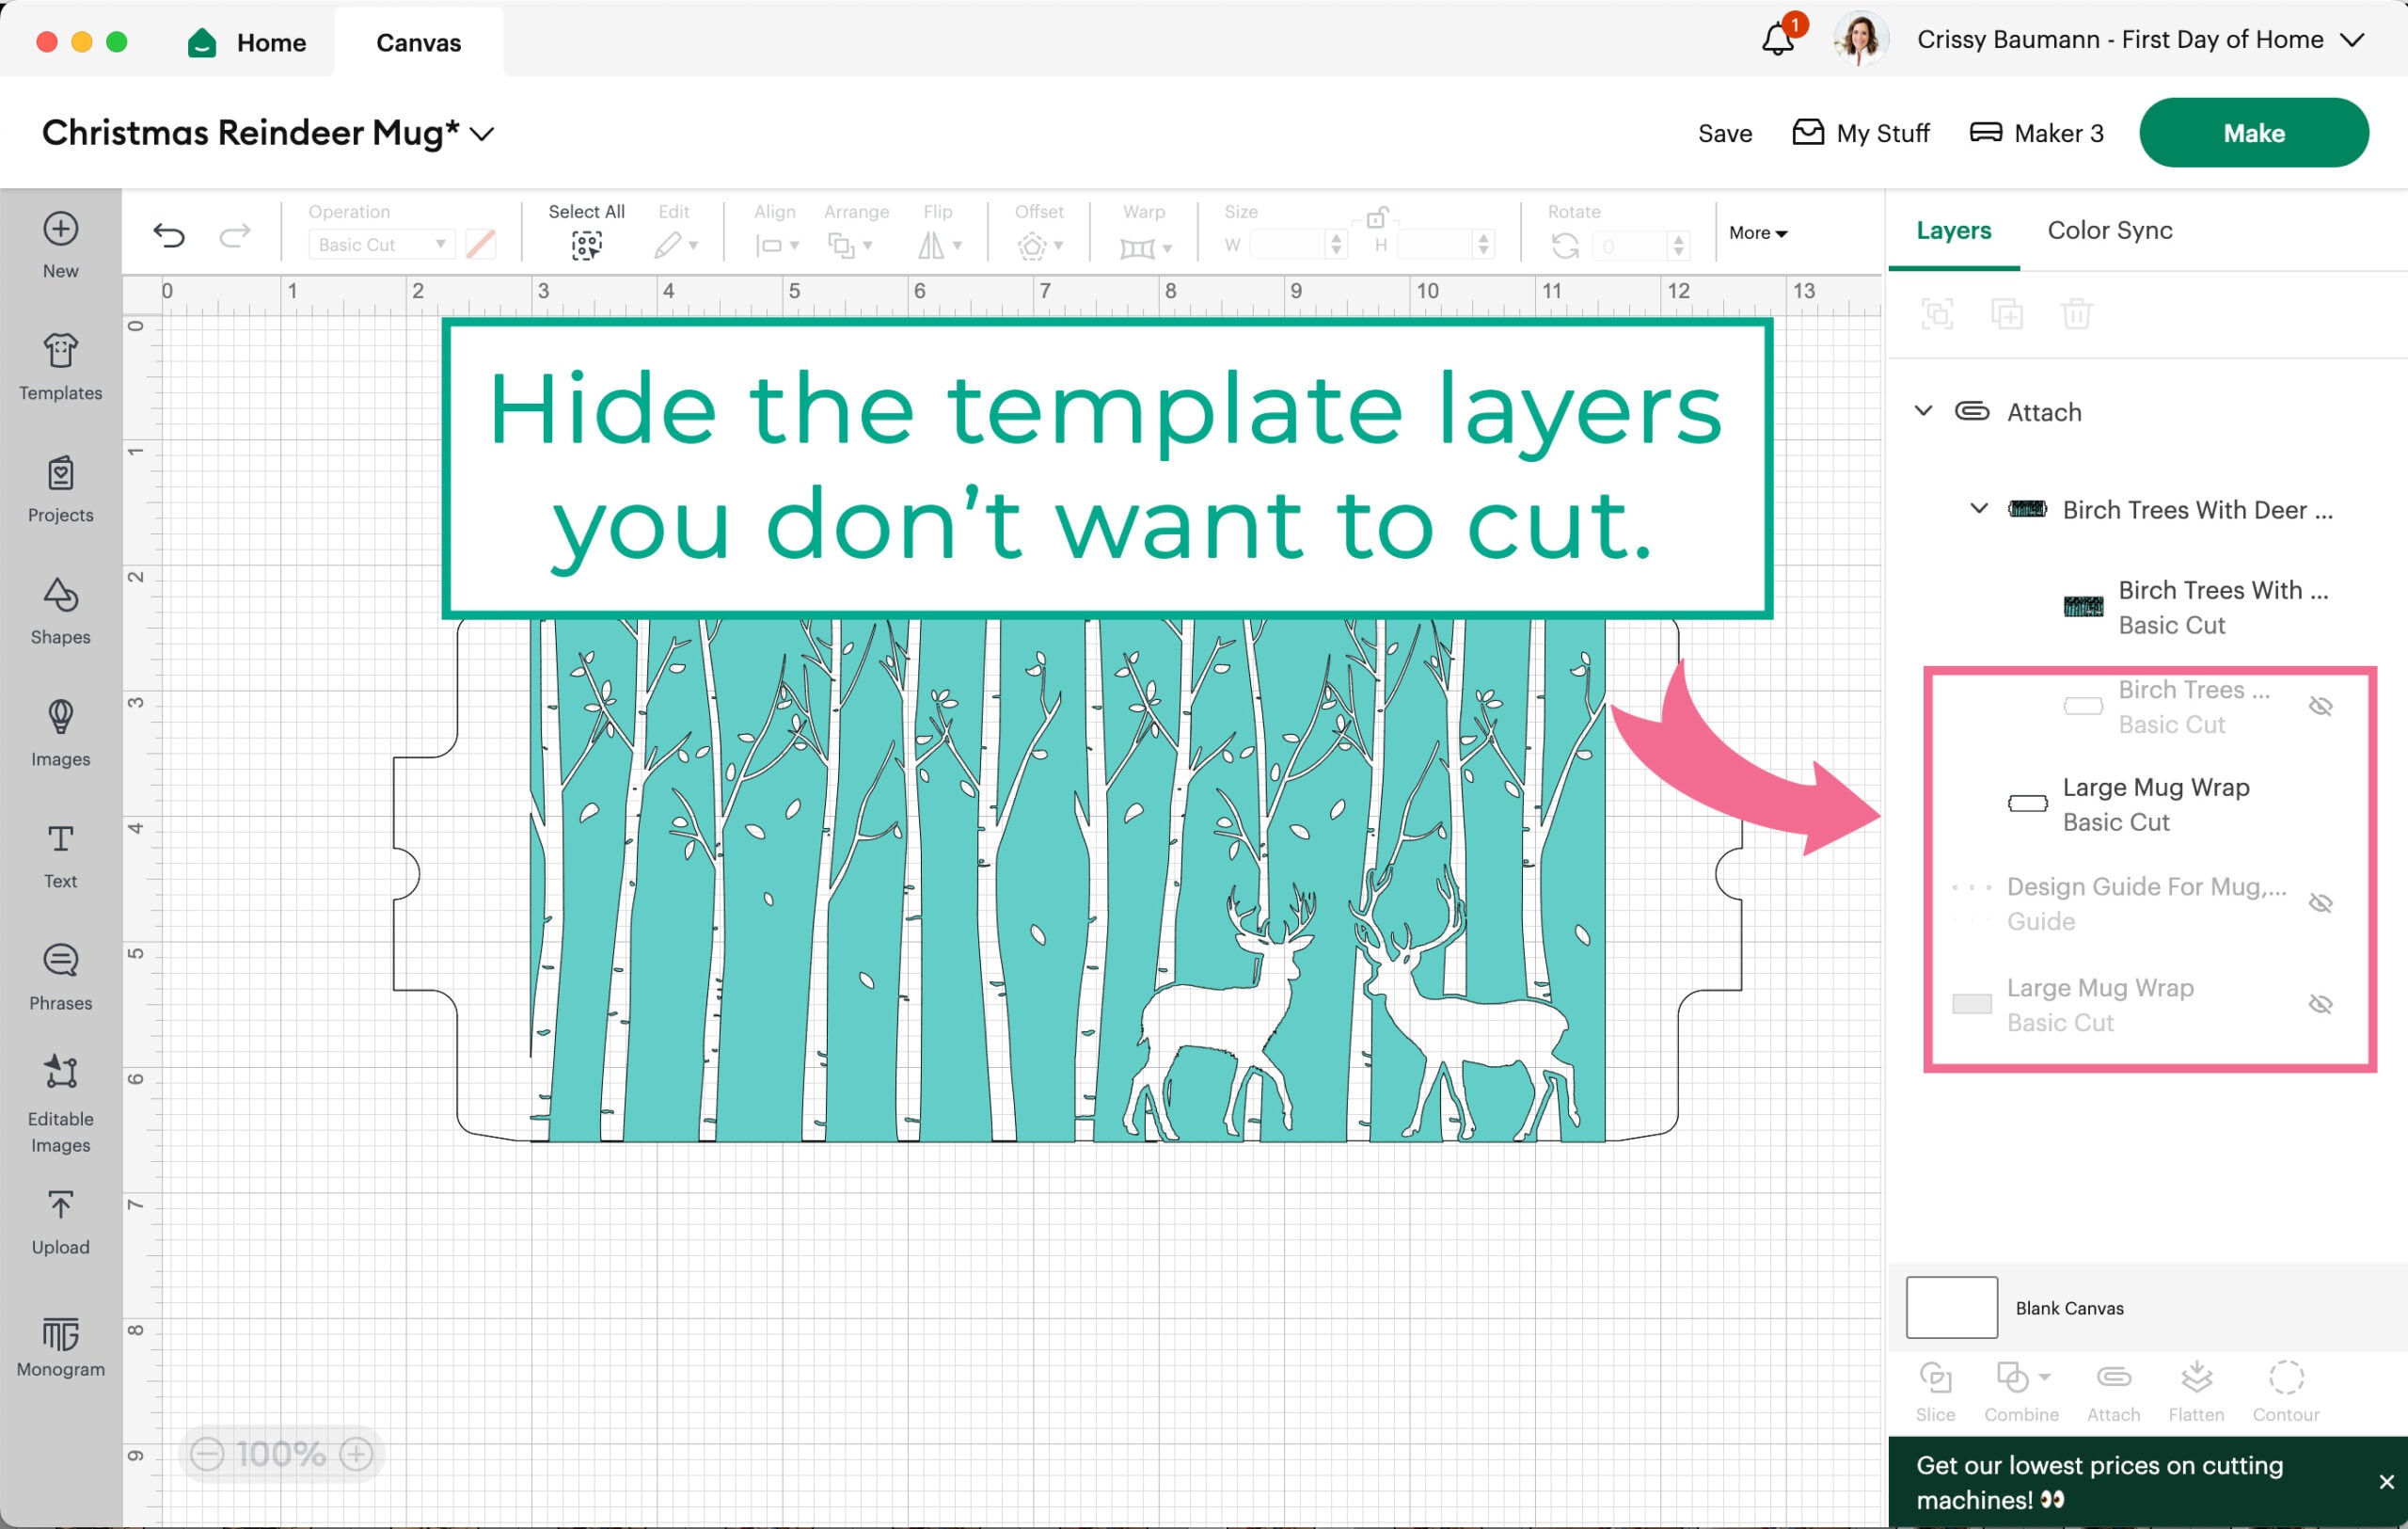
Before you send the design to cut, make sure you hide the mug wrap templates by clicking on the eyeball icon when hovering over those layers.
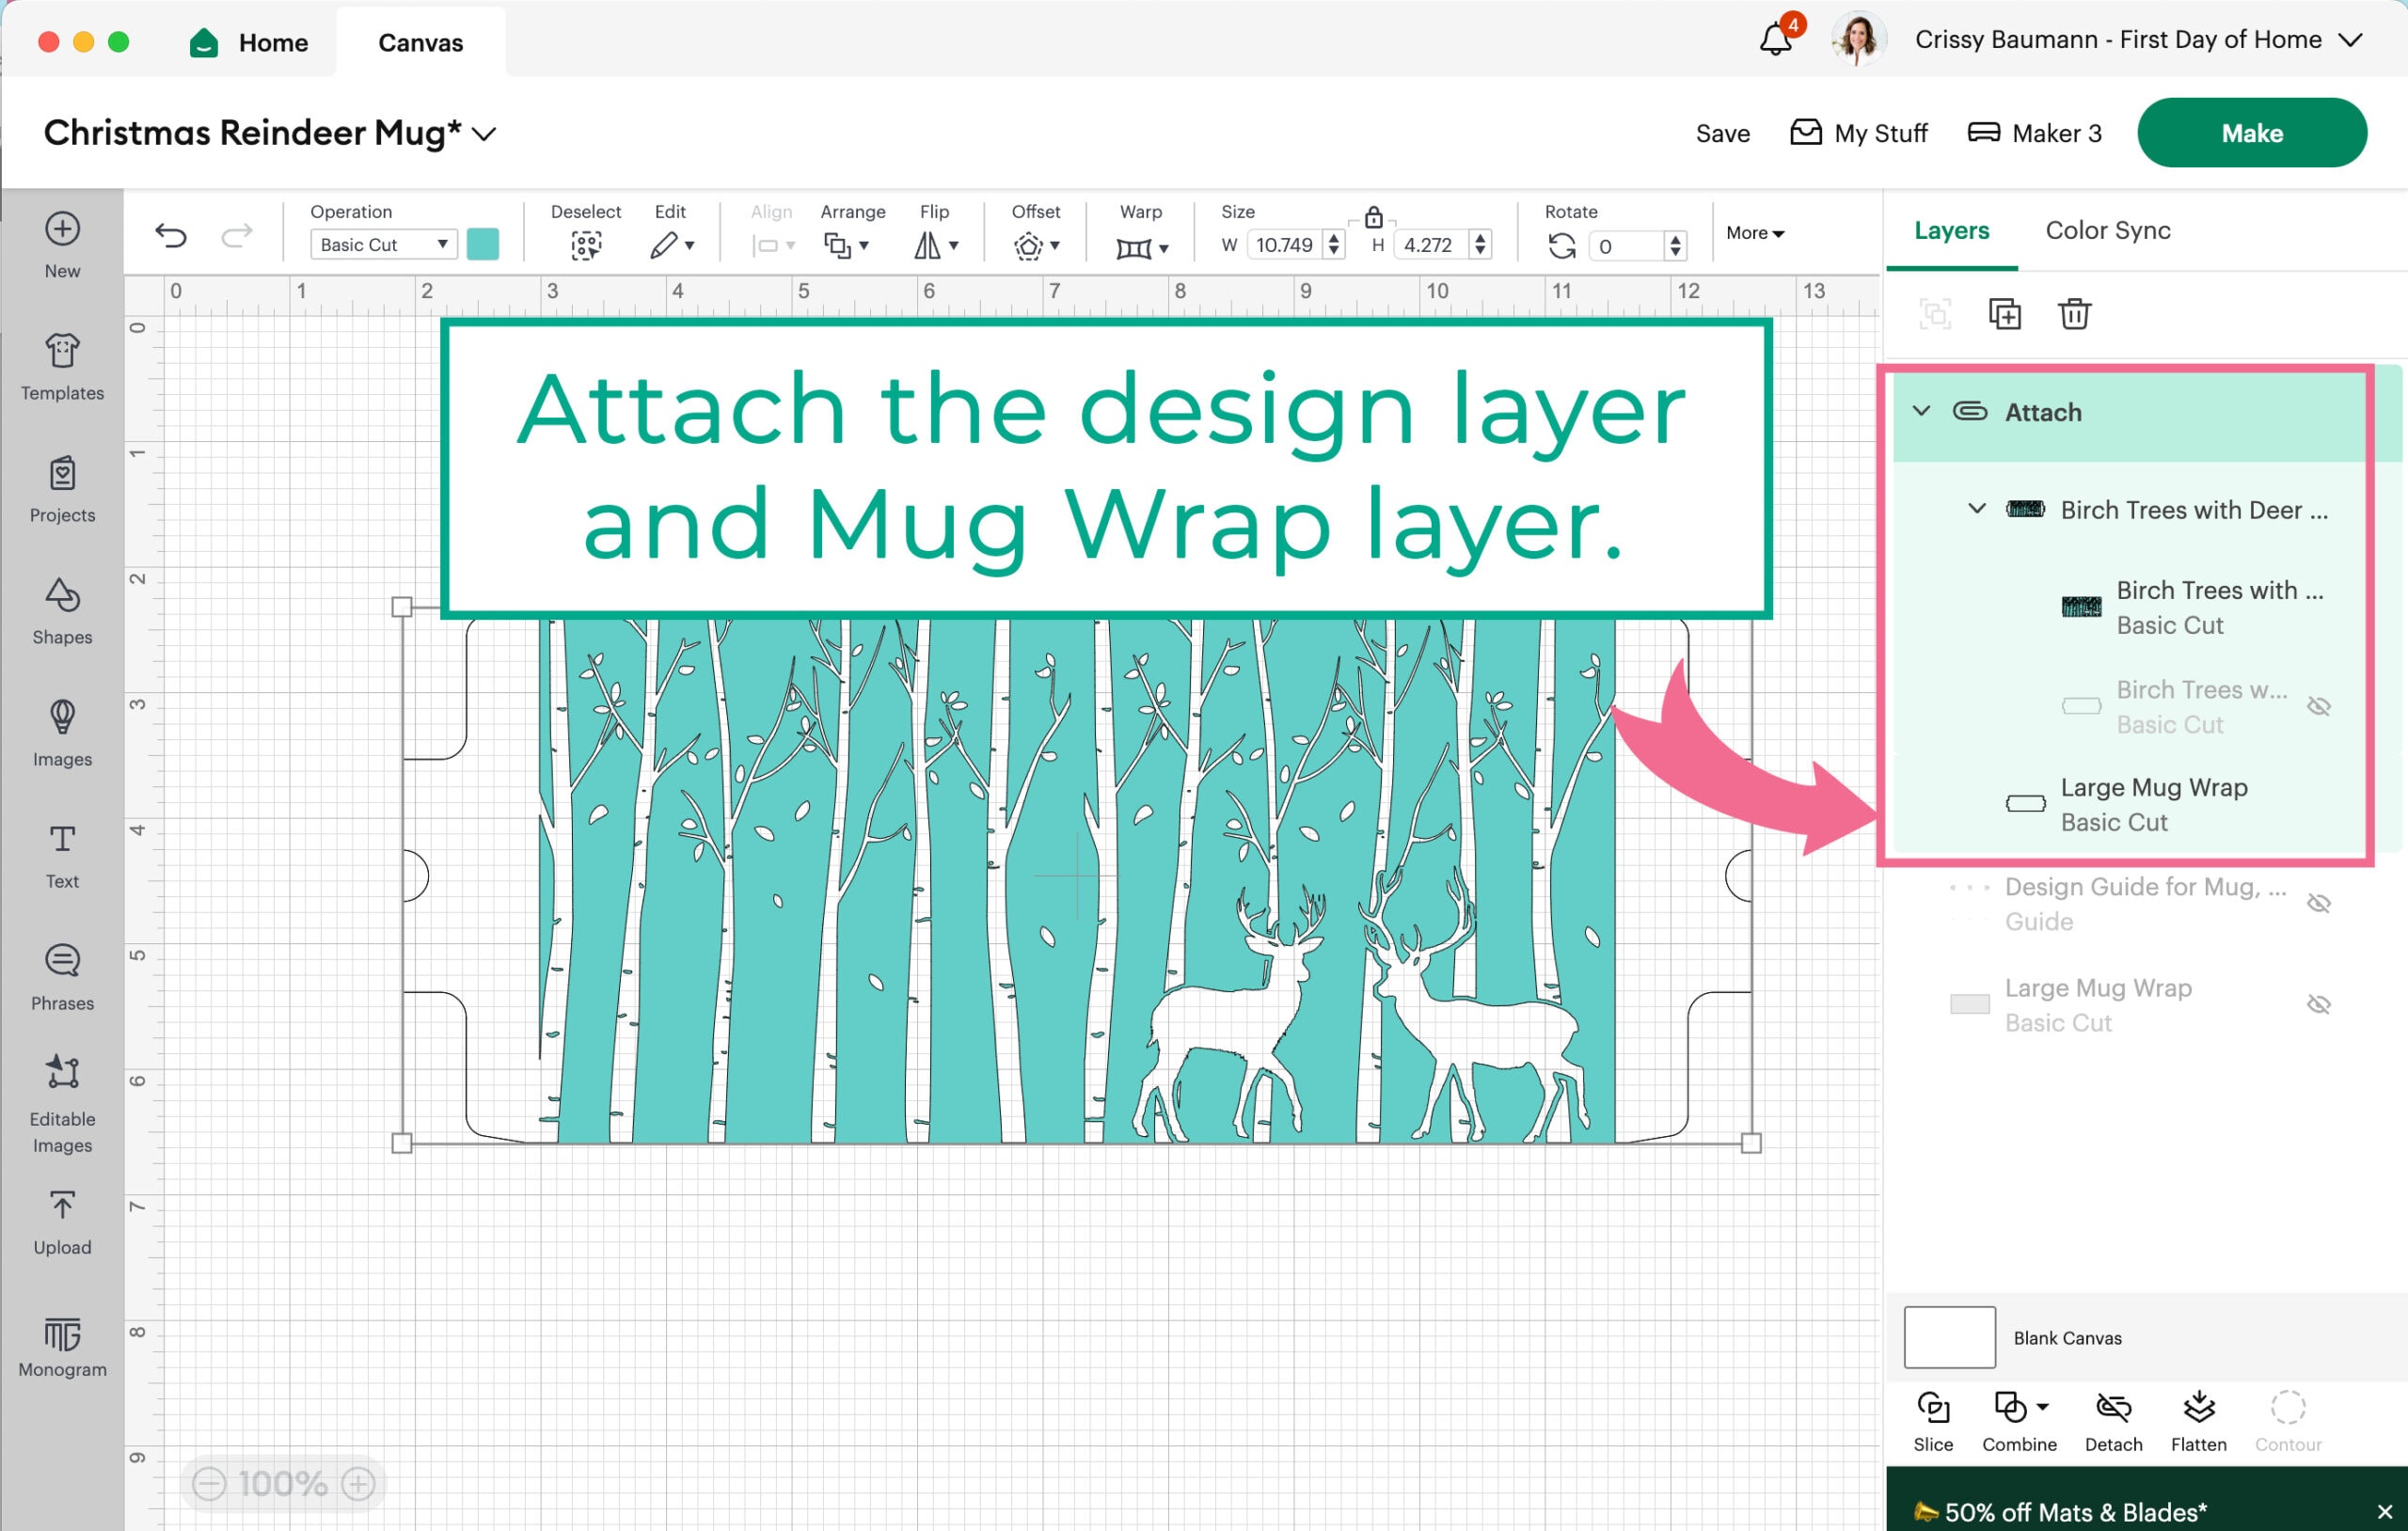
Then select the design layer and the outer mug wrap cut layer while holding shift before clicking Attach.
Finally, hit Make in
Step 2: Prepare the infusible ink transfer sheet and cut your design
Using a standard-grip or light-grip mat (for laser copy paper), place the infusible ink transfer sheet on the mat with the printed side up. In

I used this fun set of Christmas plaid infusible ink sheets for this project.
Click the Mirror button to make sure your design will be formatted correctly when applying it to the mug. Then click Continue.

Select infusible ink transfer sheet as your transfer material or laser copy paper if you’re using infusible ink markers. After following the directions to load your materials, hit the flashing Go button on your
Step 3: Weed the mug design
You’ll notice the template cuts the mug outline twice to ensure you can remove the whole outline from the sheet along with the liner. For the design itself, you’ll want to remove any excess that you don’t want to transfer.

To weed the design, use the “crack and peel” method by bending the carrier sheet and gently pulling up the pieces of the design. To prevent the infusible ink from getting damaged, avoid using any weeding tool or sharp object.
You’ll notice that there is extra liner on either side of your design. This will help you place the design when you wrap it around the mug.
Step 4: Begin heating the Cricut Mug Press
With the Mug Press plugged in and the lever raised, press the power button on the machine. It will automatically begin heating. Once it is ready, the light will turn from orange to solid green. One nice safety feature is that the Mug Press will automatically turn off if left unused.
If you ever forget the steps for preparing your mug, you can always refer to the Cricut Heat Guide online. It has each step listed as a handy reference.
Step 5: Clean the mug surface
While the Mug Press is heating, use rubbing alcohol on a cotton ball to wipe the mug clean. Then use a lint roller around the surface of the mug to make sure there are no fibers left to interfere with the heat transfer.
Step 6: Apply the design to your mug
Wrap the design around the mug, leaving an equal distance on either side of the mug handle. To easily line up the design, place the mug on a flat surface, and hug the design around the mug with the handle facing you. Make sure there are no air bubbles as you smooth out the design.
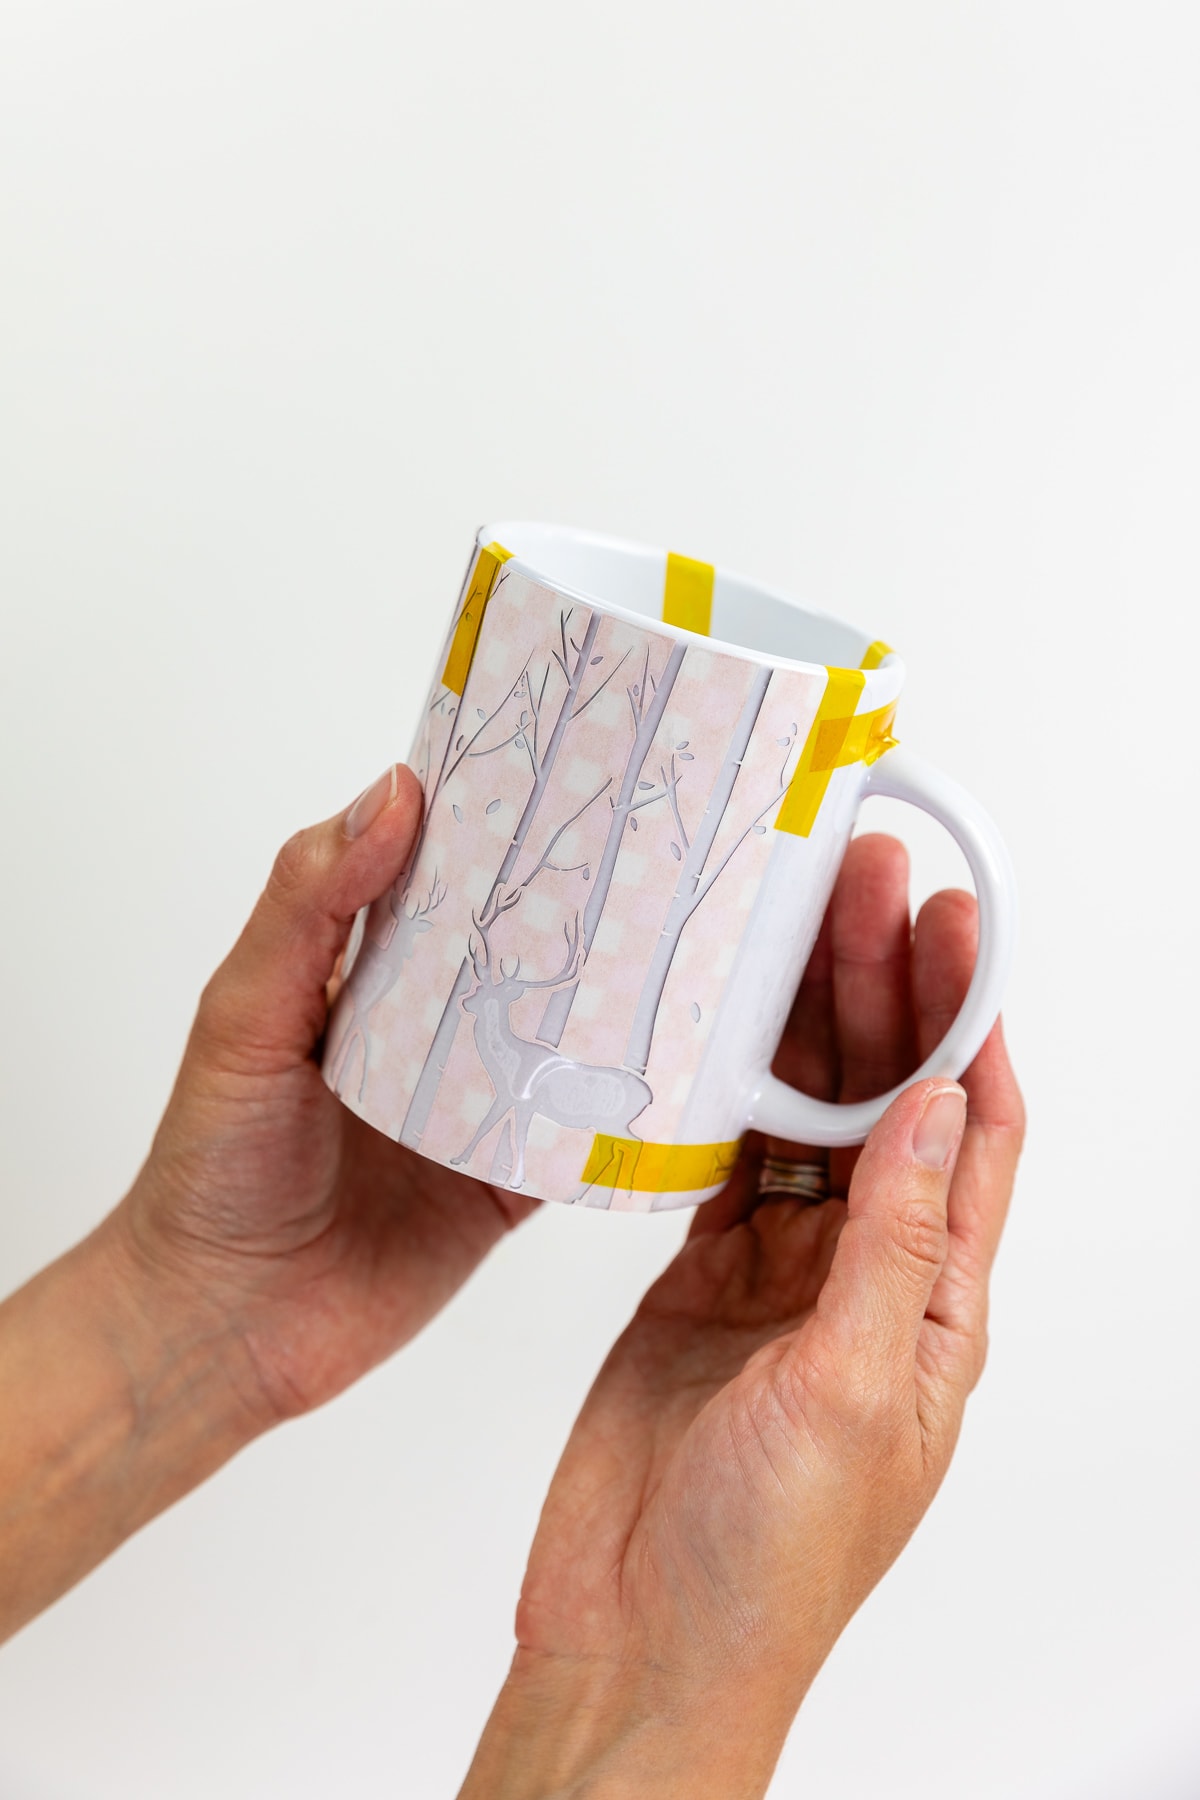
I like to secure my transfer sheet with heat-resistant tape to prevent the ink from shifting before or after the transfer process.
(Take it from me, I once had a design shift as I pulled the mug out of the heat press, and it left a small smudge.)
Step 7: Begin heating the design
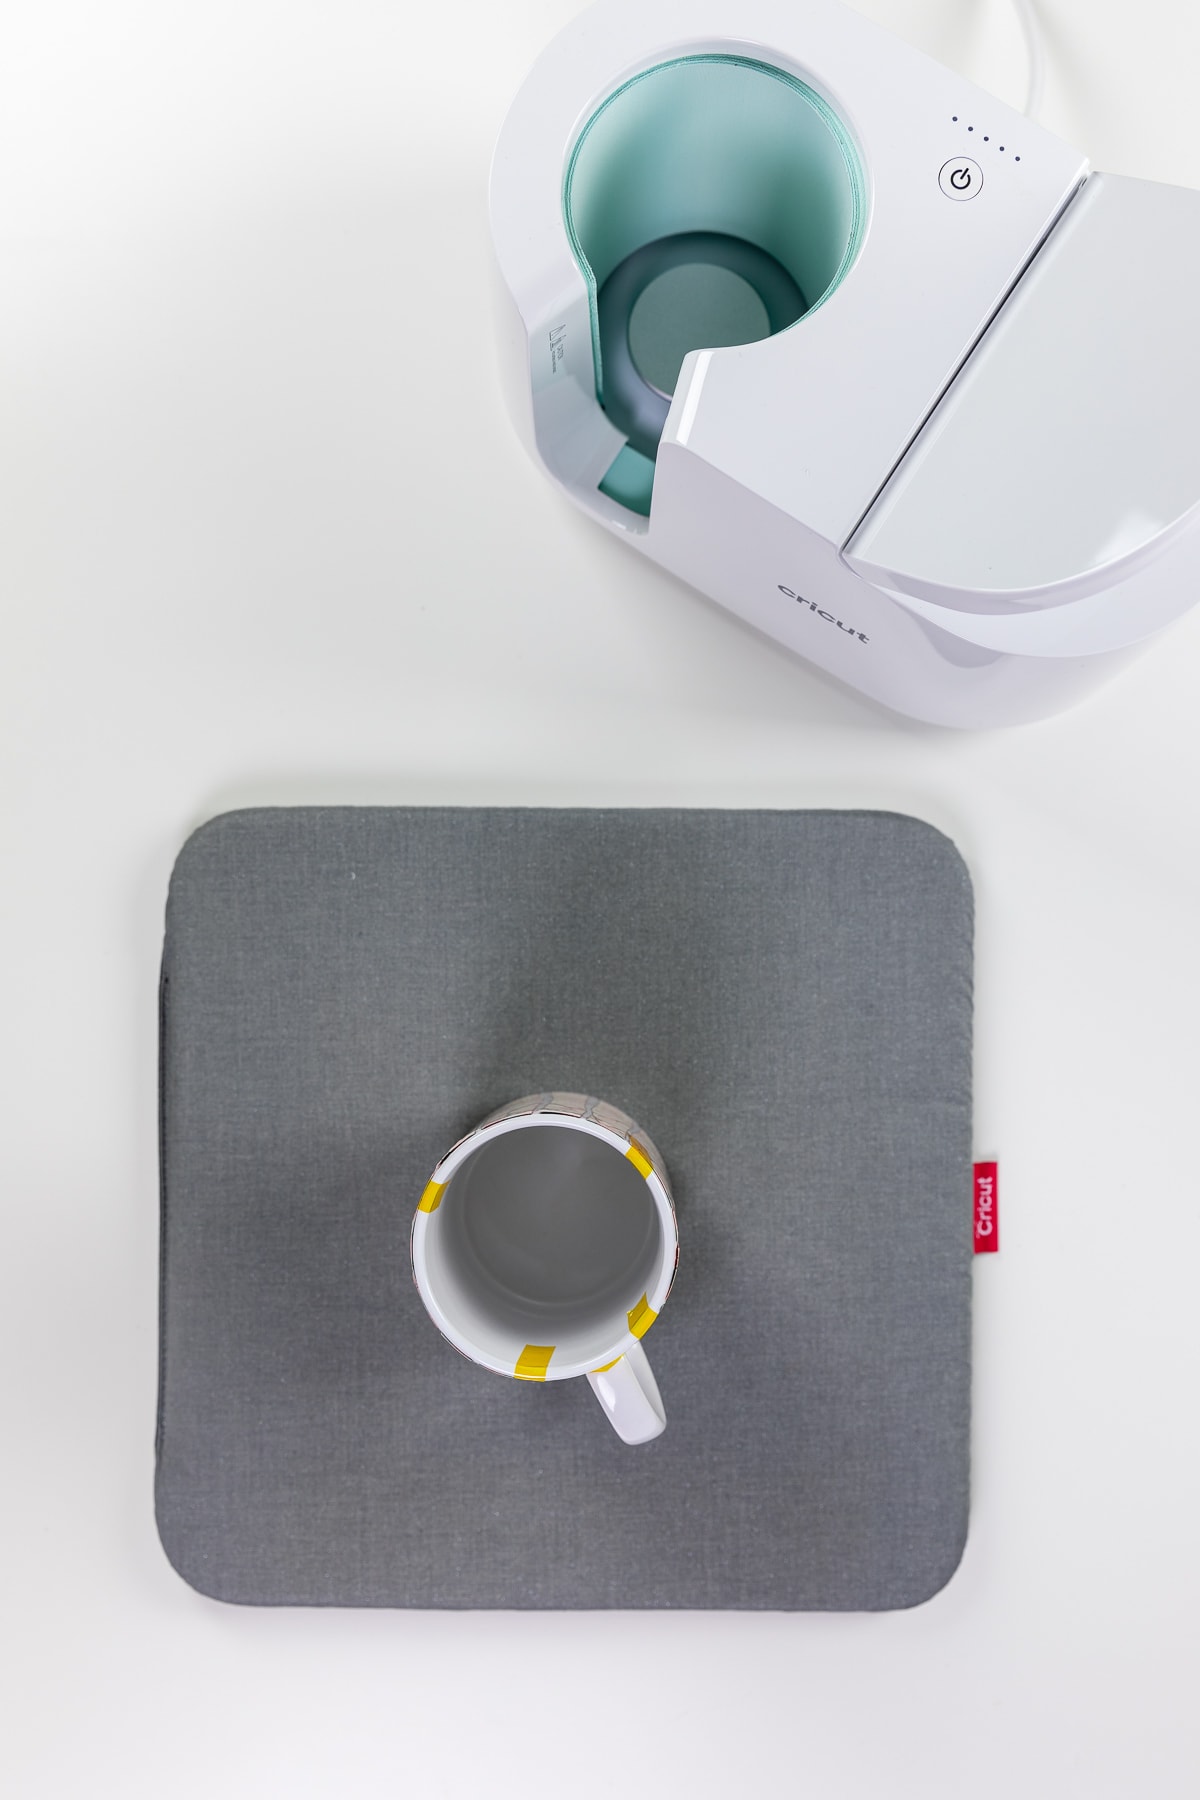
Once your design is securely attached and the Mug Press light is solid green, place the mug in the Mug Press with the handle facing you. If you’re using laser copy paper with infusible ink pens/markers, place three layers of butcher paper around the mug first.
Make sure the mug design is fully covered by the heat plates as you press the lever down. Never let a mug hover above the bottom heat plate of the Mug Press since that can damage the machine.

Safety note: The
The lights on top of the heat press will show the progress and beep when it’s done. It took me only 5 minutes and 47 seconds to complete my Christmas mug project. Yes, I’m the nerd who timed it!
Step 8: Let the design cool
Once the project is complete, lift the lever of the Mug Press and carefully remove the mug by the handle, setting it on an EasyPress Mat or thick towel to cool.
Do not touch any other part of the mug as it will still be extremely hot.
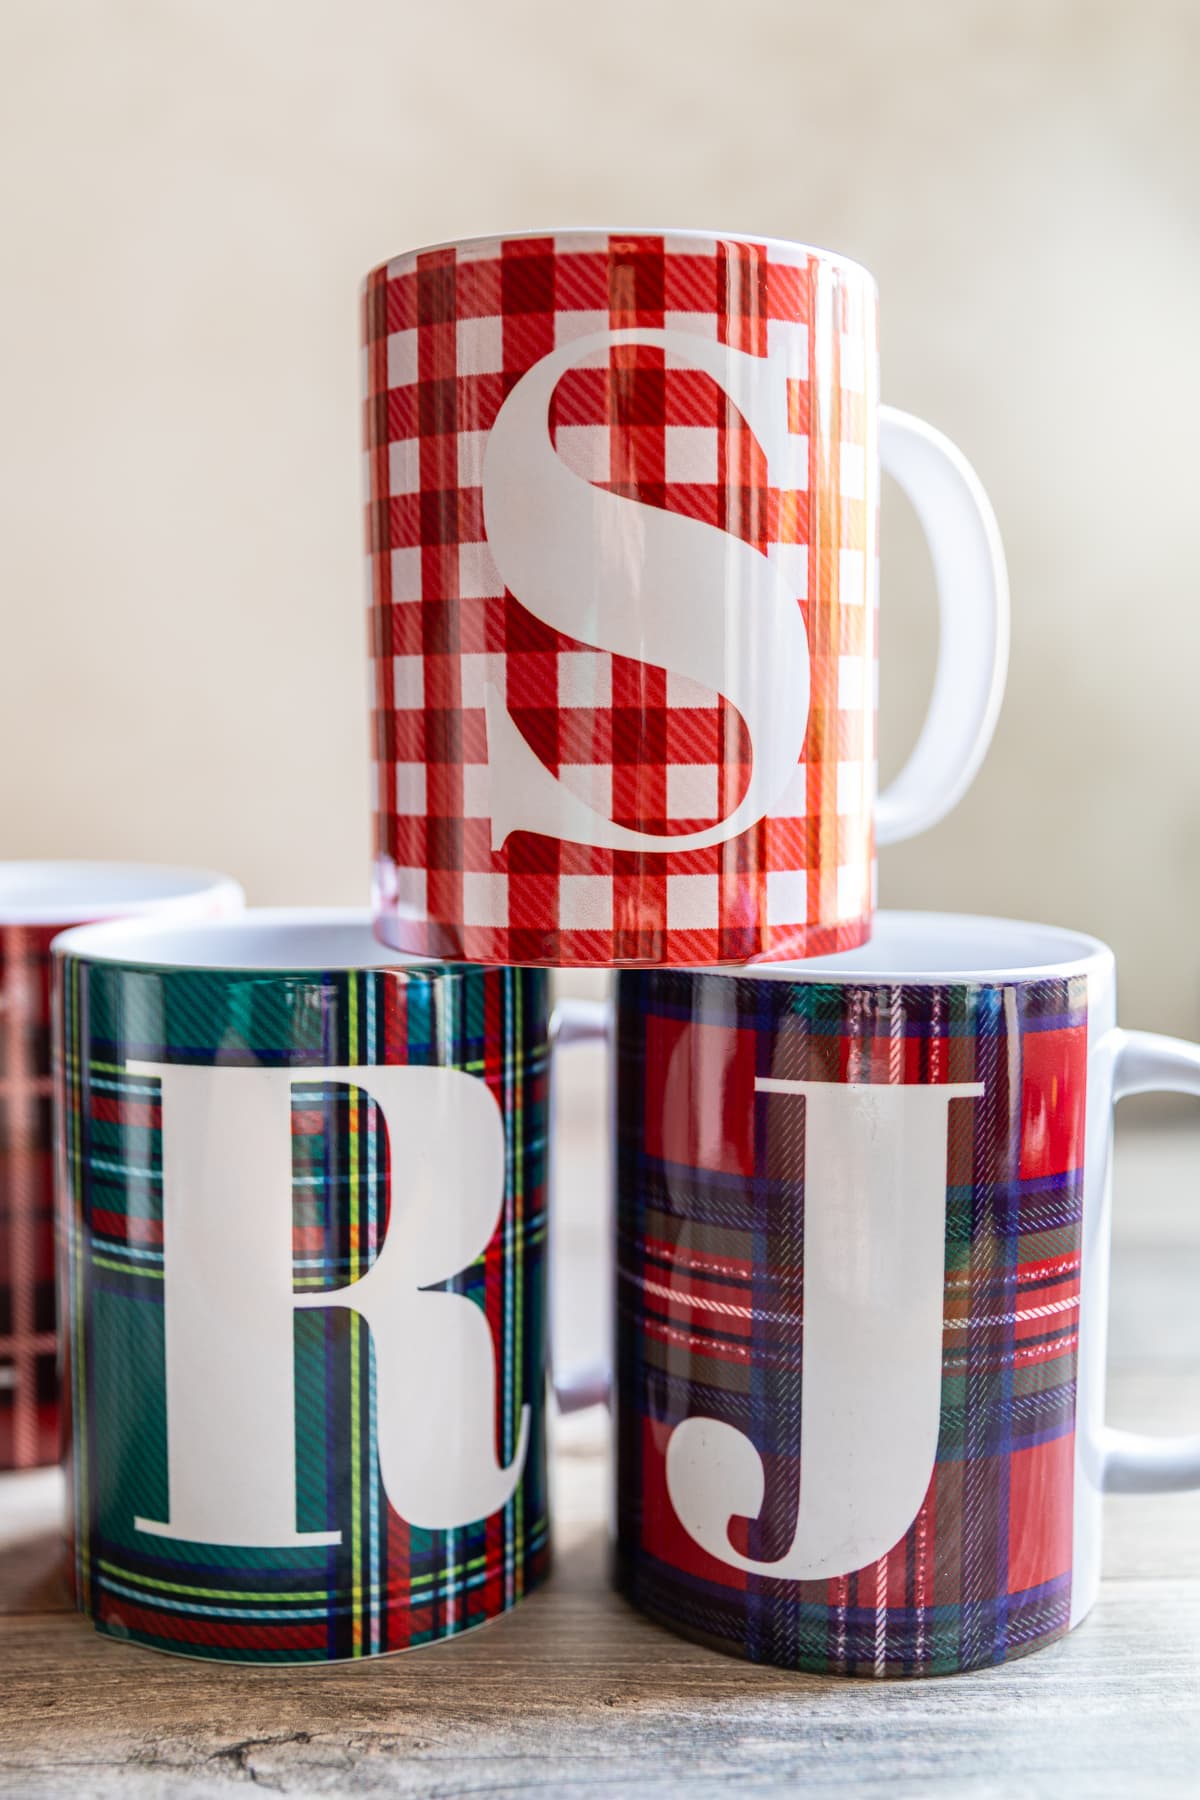
After about 15-20 minutes, once the mug has completely cooled, peel the liner away from the mug. It is now ready to use!

I enjoyed making custom monogram mugs for family this year. The
I’d love to see your creations to, so be sure to tag me on Instagram if you use this tutorial! Be sure to check out more
Pin it for later!

Infusible Ink Mug Care Instructions
Infusible ink mugs can be washed by hand or in a dishwasher (top rack only). To avoid damaging the design, don’t use steel wool, colored cleaning agents, or harsh abrasives to wash your mugs.
The mugs are also safe to heat in the microwave. You can reheat your hot cocoa or coffee all day long if you’re a busy mom like me!
Frequently Asked Questions
-
Can you use a sublimation printer with the Cricut Mug Press?
Yes, any sublimation designs can be used with the Mug Press. Follow the same instructions for sublimation paper as you would if using infusible ink pens or makers.
-
Can you use iron-on vinyl with the Cricut Mug Press?
The Cricut Mug Press is not designed for heat-transfer vinyl (HTV), also known as iron-on vinyl. The temperature for infusible ink is much higher than it is for iron-on, so you risk damaging the heat press and/or mug if you try to use vinyl instead.
There are hacks describing how to use iron-on vinyl in the Mug Press by reducing the heating time, but Cricut’s own Heat Guide does not give you an option for pressing vinyl with the Mug Press.


You are the queen of the Cricut Machine Crissy! That mug press looks like fun to work with!
You’re so kind, Cindy! Thanks for stopping by! I hope you’re doing well and enjoying the holidays.