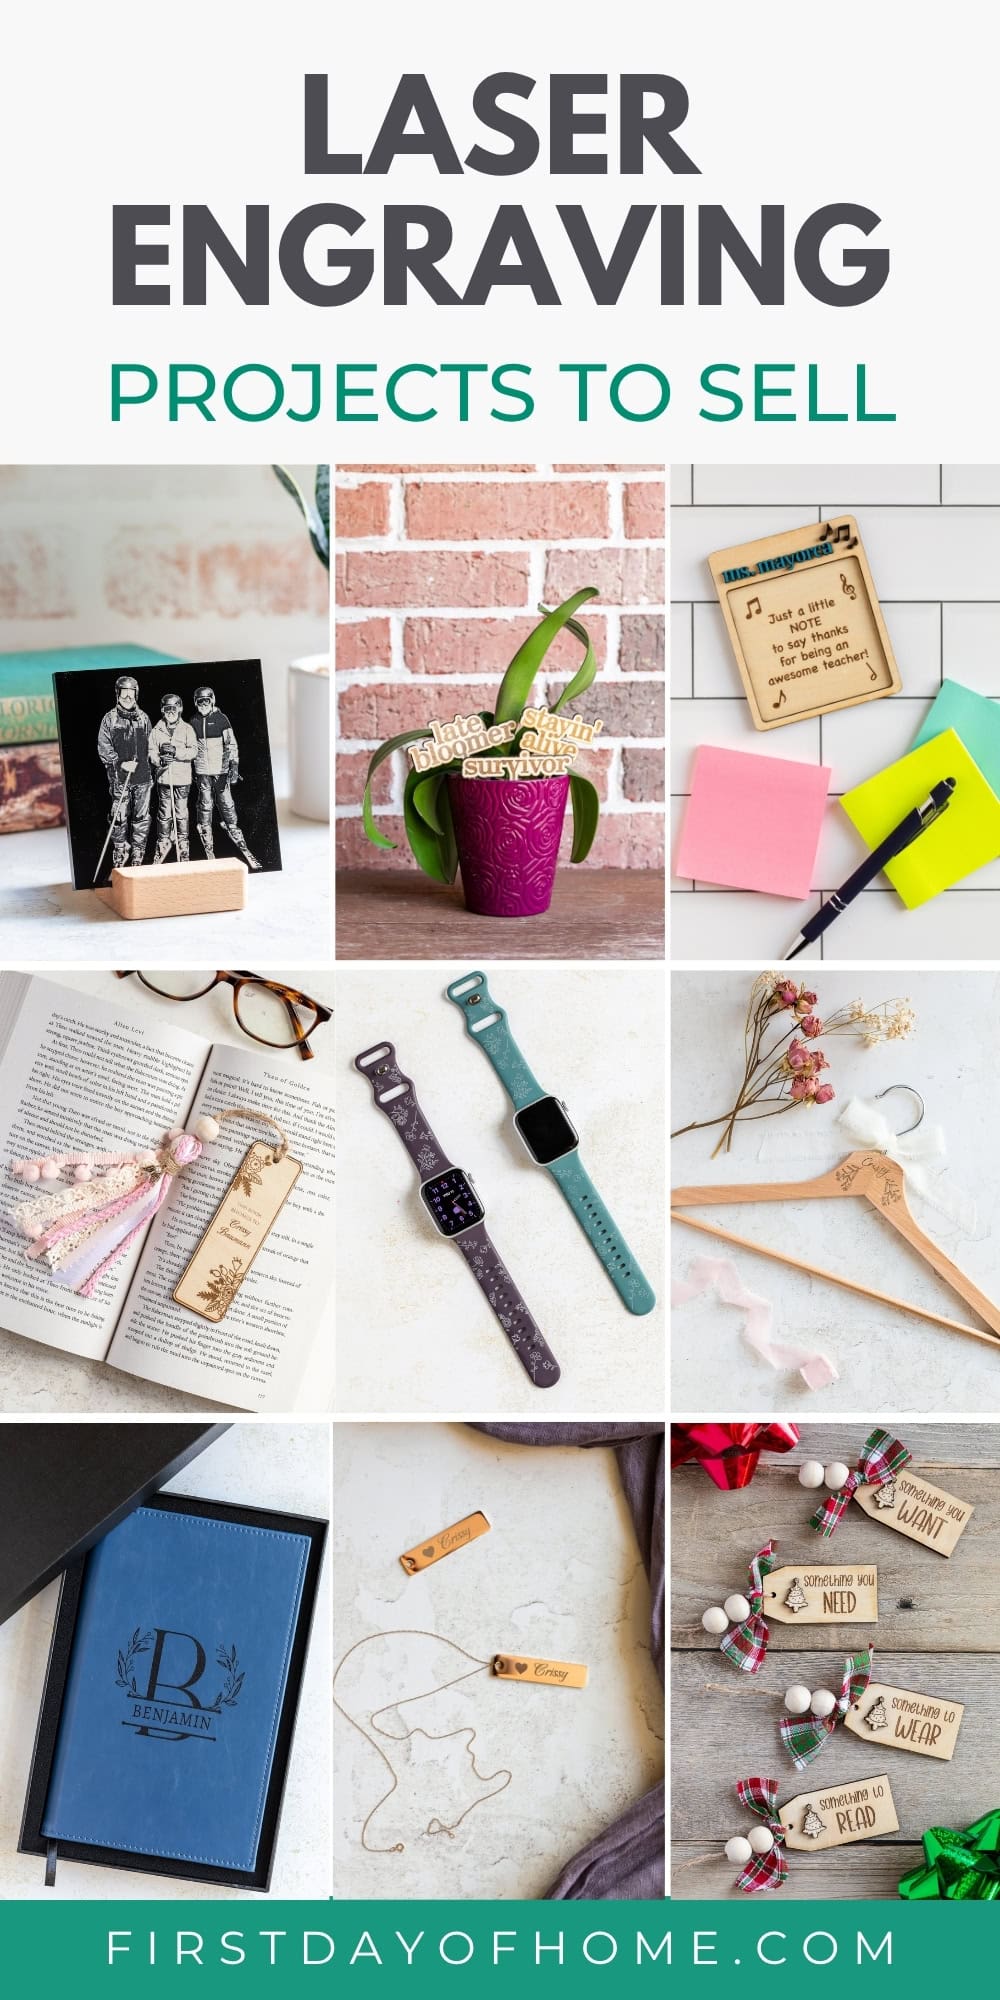
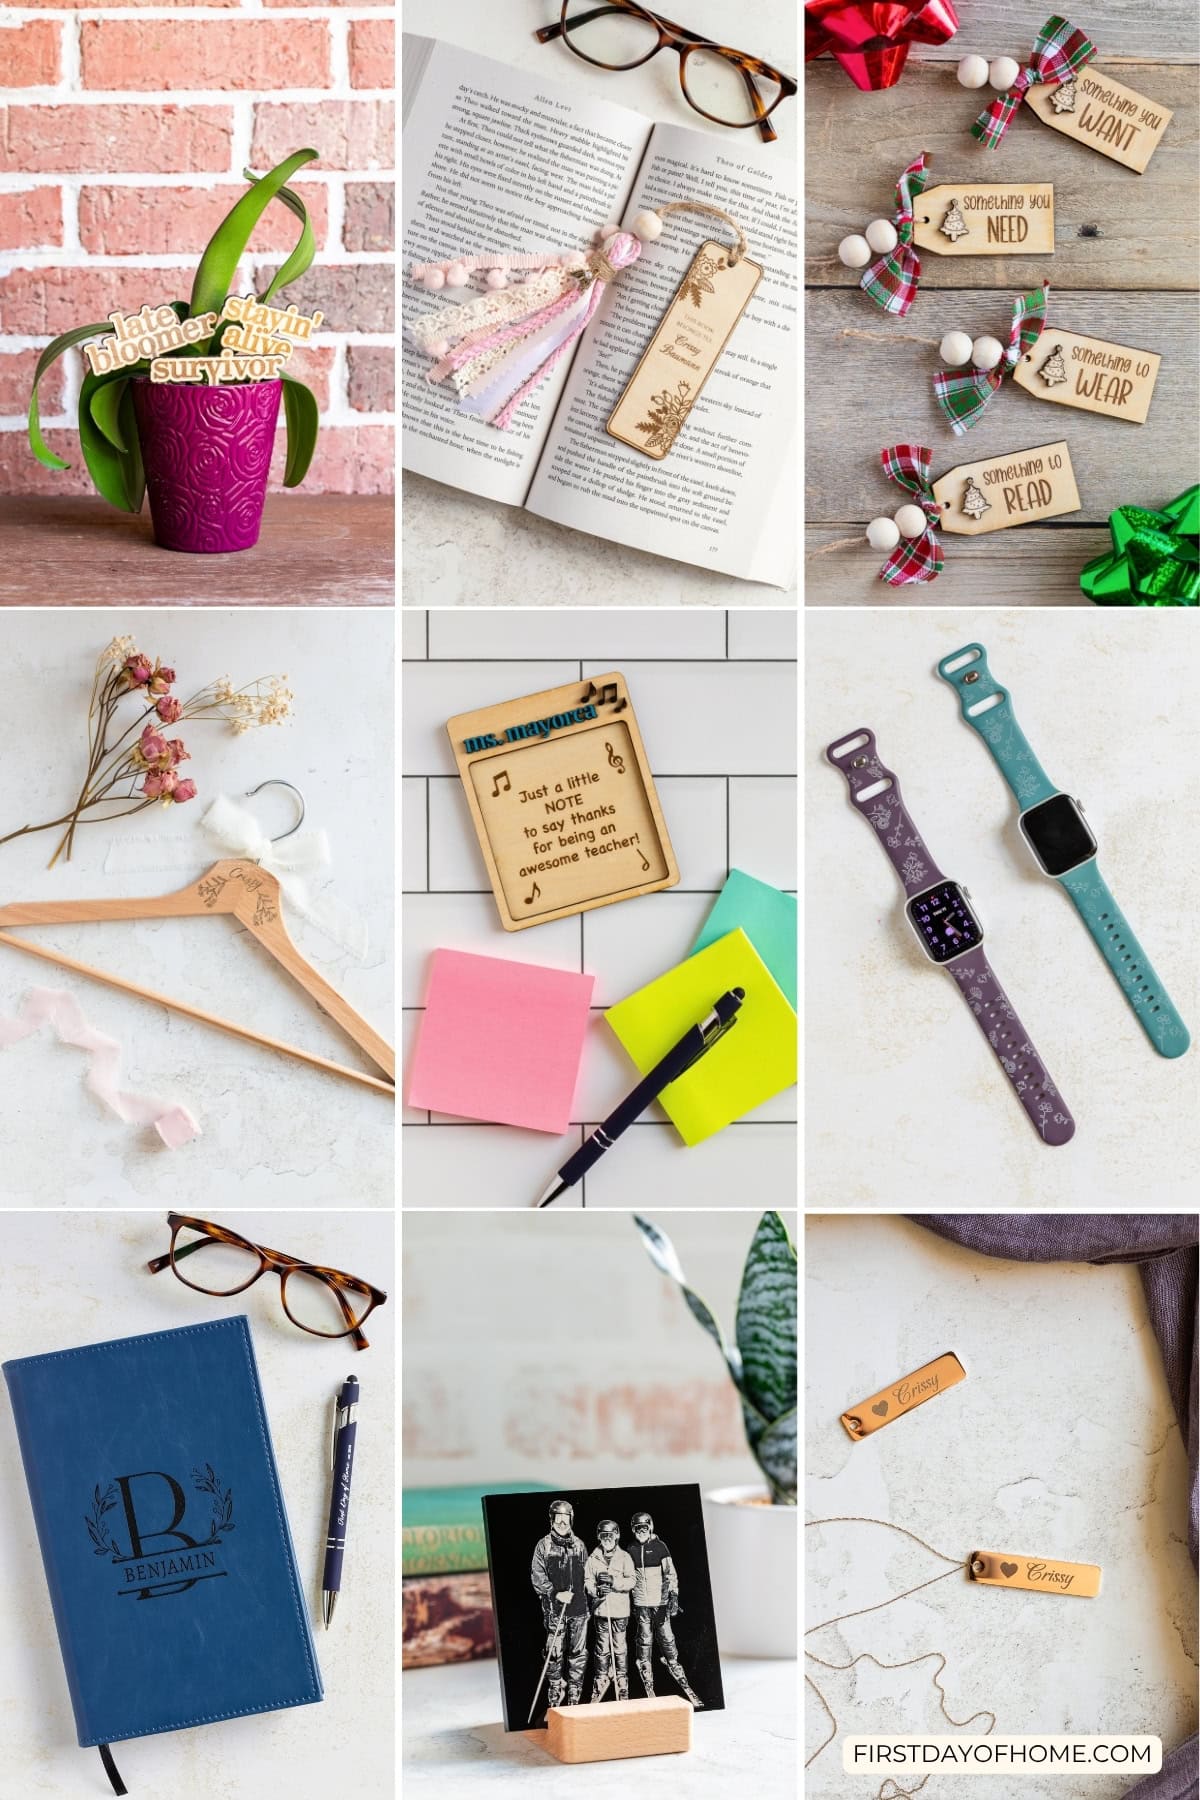
Laser Engraving Ideas for Beginners
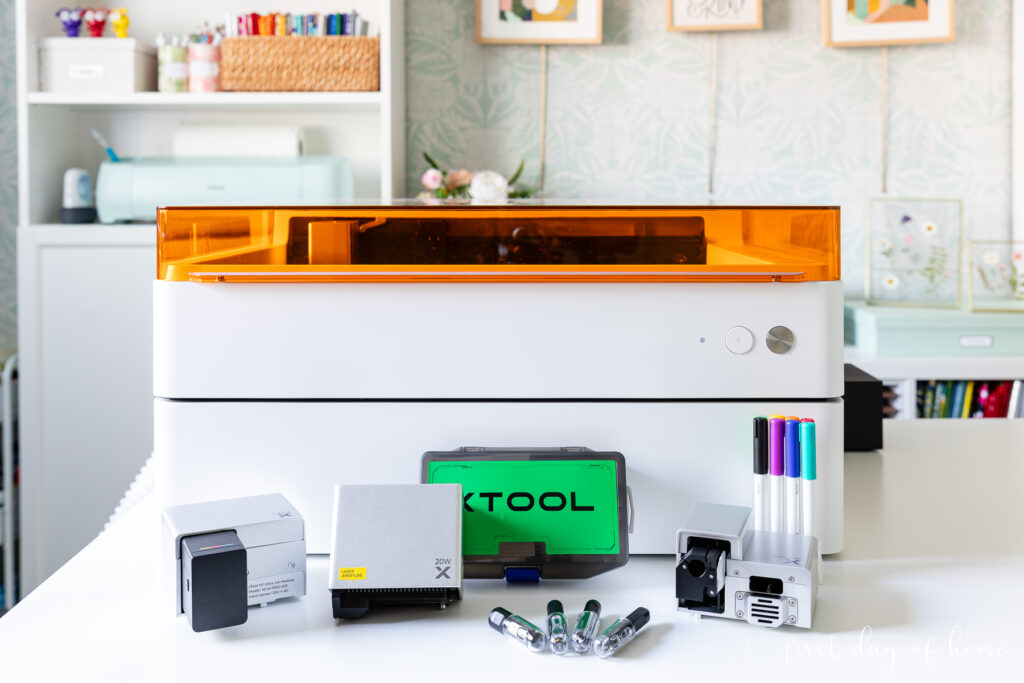
These laser engraving ideas are perfect for anyone wanting to personalize items and potentially sell products at craft fairs or online. All of these projects were made with the xTool F2, a great laser machine for beginners who want portability and simplicity.
This review is sponsored by xTool, but all opinions expressed are my own. This post also contains affiliate links, and I will receive a small commission if you make a purchase after clicking on my links. See disclosures for details.
Choosing the right laser machine for the job
The projects below showcase a wide range of materials you can engrave, including wood, faux leather, pens, silicone watch bands, metal tags, and acrylic. The types of materials you can process will depend on your laser machine.
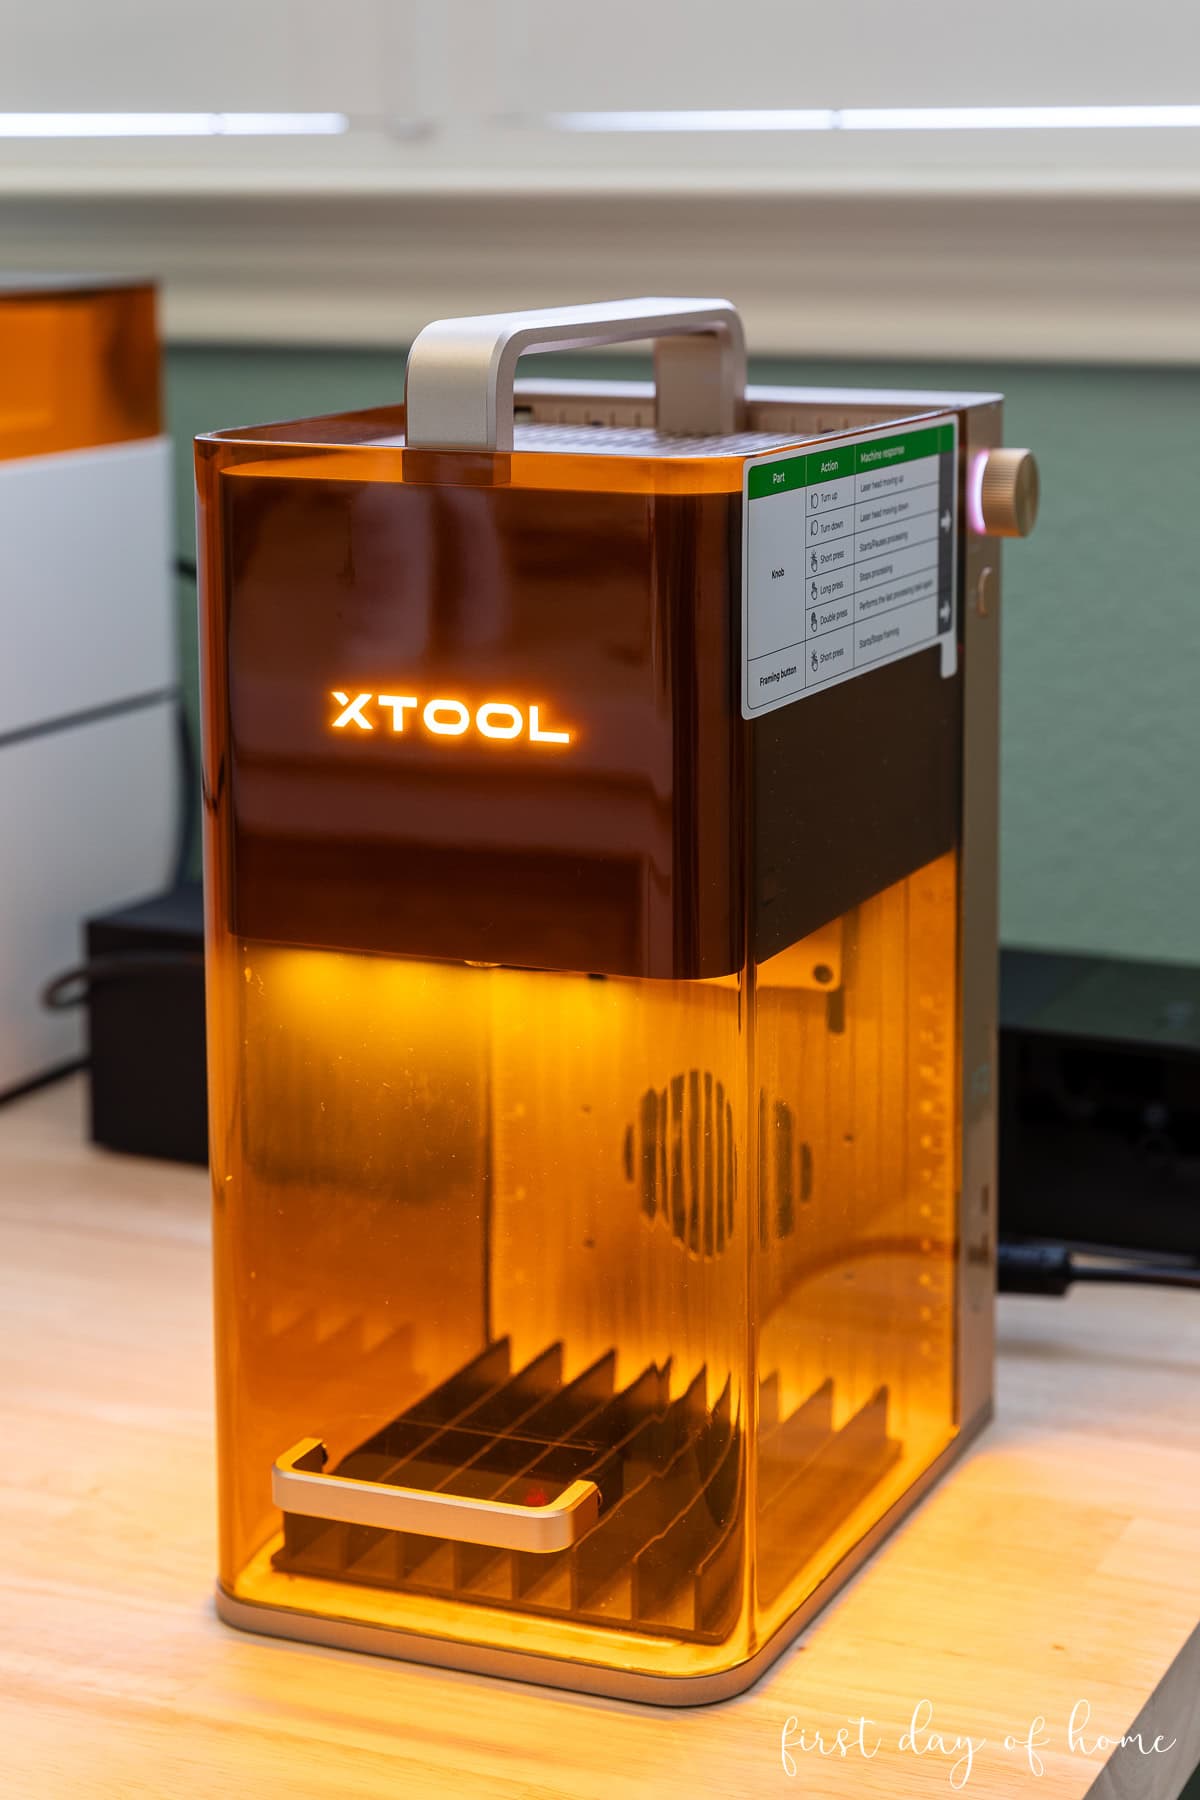
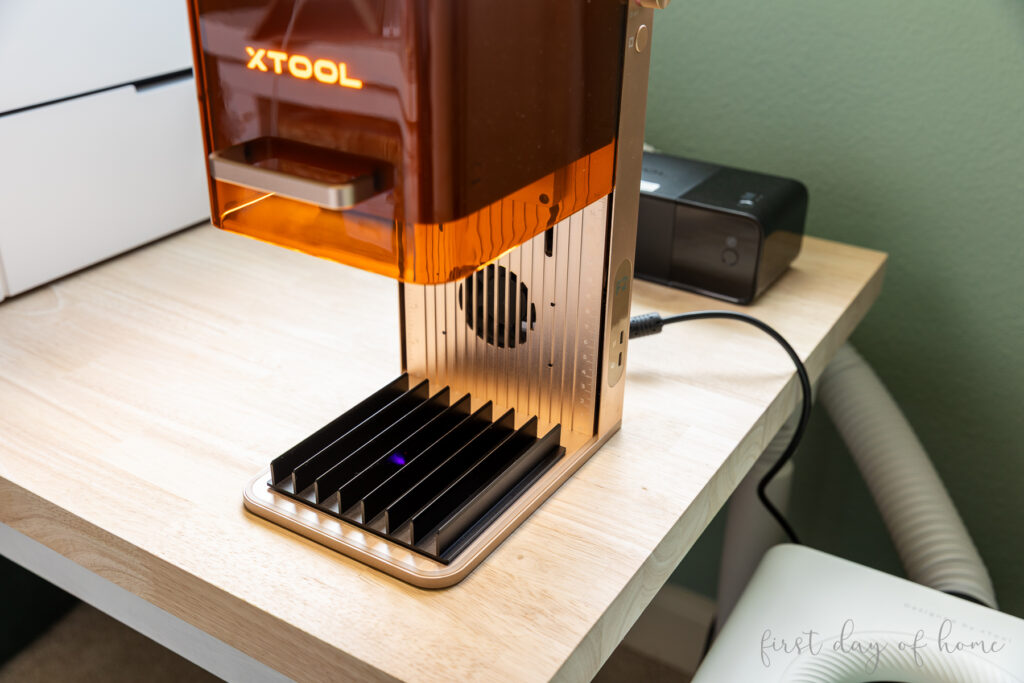
The xTool F2 is a great laser machine for beginners. It features two unique lasers: a 15-watt diode laser (blue light laser) and a 5-watt infrared fiber laser. Whether you’re at home or on the go, the F2 enables you to customize projects with ease.
All the projects below were made with the xTool F2 to demonstrate that you don’t need a large machine to make custom items. Most are also suitable for the M1, M1 Ultra, and P2 machines that I’ve written about on the blog.
Galvo lasers vs. gantry lasers
The “F” in xTool’s F-series machines stands for “Fast.” The speed of the F-series comes from galvo laser technology, where tiny mirrors reflect the laser beam from a central location to cut or engrave designs. This feature keeps machines like the F2 compact and perfect for craft fairs.
By contrast, gantry lasers use a module to move the laser along an x- and y-plane across the material. Gantry laser machines are slower but ideal for processing larger materials. The M, S, and P series machines by xTool are gantry lasers.

xTool F2 (Galvo Laser) xTool M1 Ultra (Gantry Laser)
Three considerations for selecting a laser machine
When deciding which machine to use, consider the maximum size of the projects you’d like to make, the materials you’d like to cut, and your desired processing speed.
All of the projects below work perfectly with the xTool F2, and I’ll highlight specific instances where it outperforms larger laser machines or requires trade-offs.
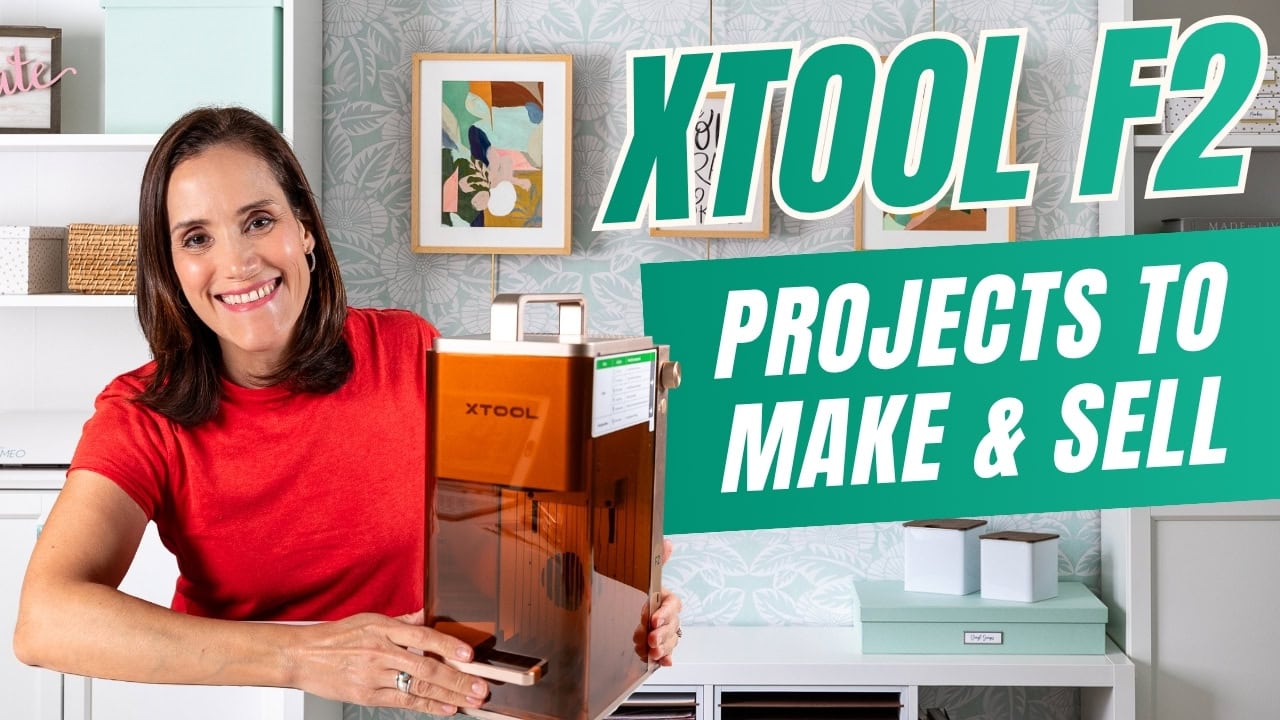
Watch These Laser Engraving Ideas (Video)
To see these projects in action, including software demonstrations and additional tips, check out my full YouTube video below.
Note: All of the laser settings below assume a 15-watt diode (blue light) laser or 5-watt infrared laser power. You can convert the power settings to adjust for your machine’s wattage, if needed.
1. Laser Engraved Wooden Bookmark
Wooden bookmarks are perfect for personalization. You can customize them by adding tassels with wooden beads and ribbons, which are great for up-selling.
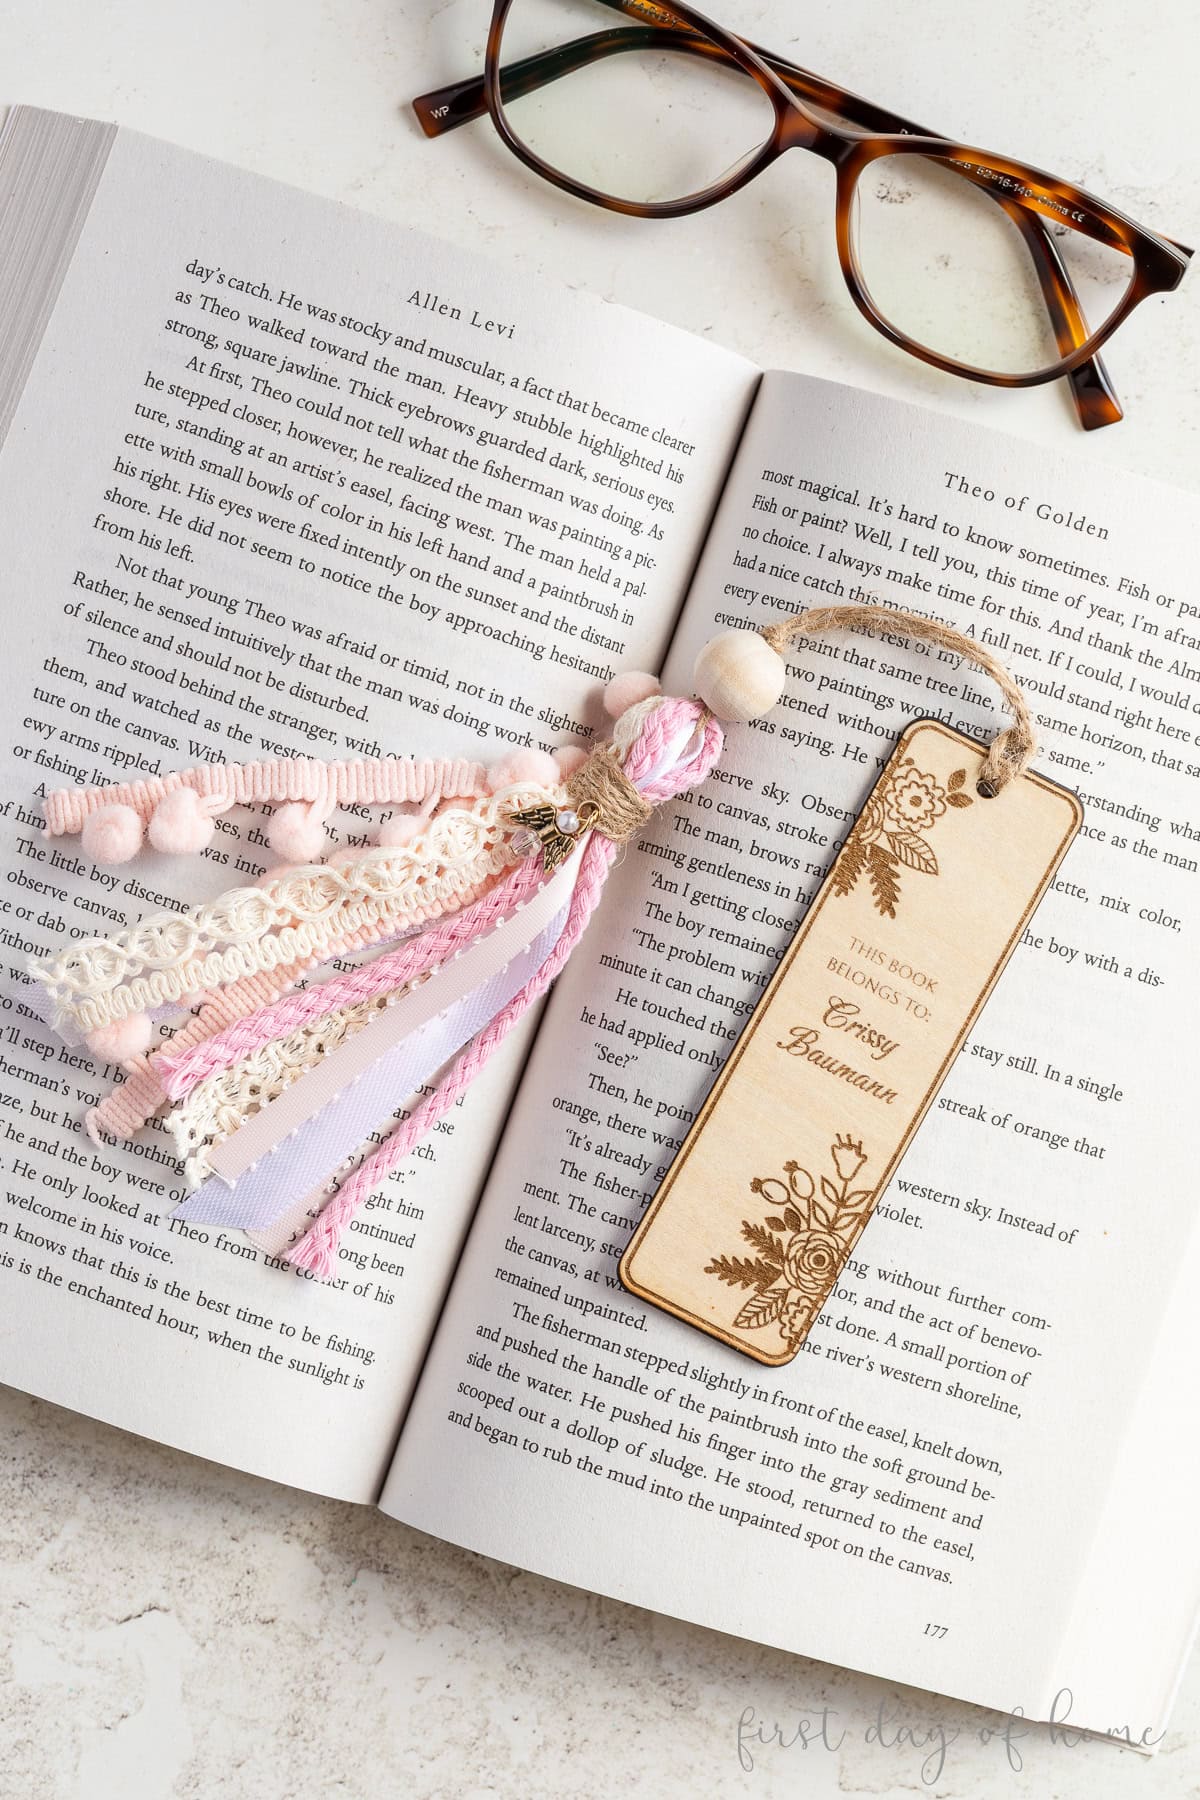
Tip: Use vinegar and a lint-free cloth to clean any charred edges after laser cutting.
Keep in mind that galvo laser machines like the F2 will cut at an angle, and the angle is more pronounced the further the material is from the center of the machine. For petite bookmarks like the one above, this isn’t a major issue.
Wooden bookmark – laser engraving settings
- Materials: 3mm Basswood Plywood
- Engrave (flowers and name): Blue light, 70% power, 300 mm/s, 100 l/cm, 1 pass
- Cut (hole and outline): Blue light, 90% power, 6 mm/s, 1 pass
- Accessories: Slatted panel with slats facing exhaust fan
2. Engraved Wooden Plant Stakes
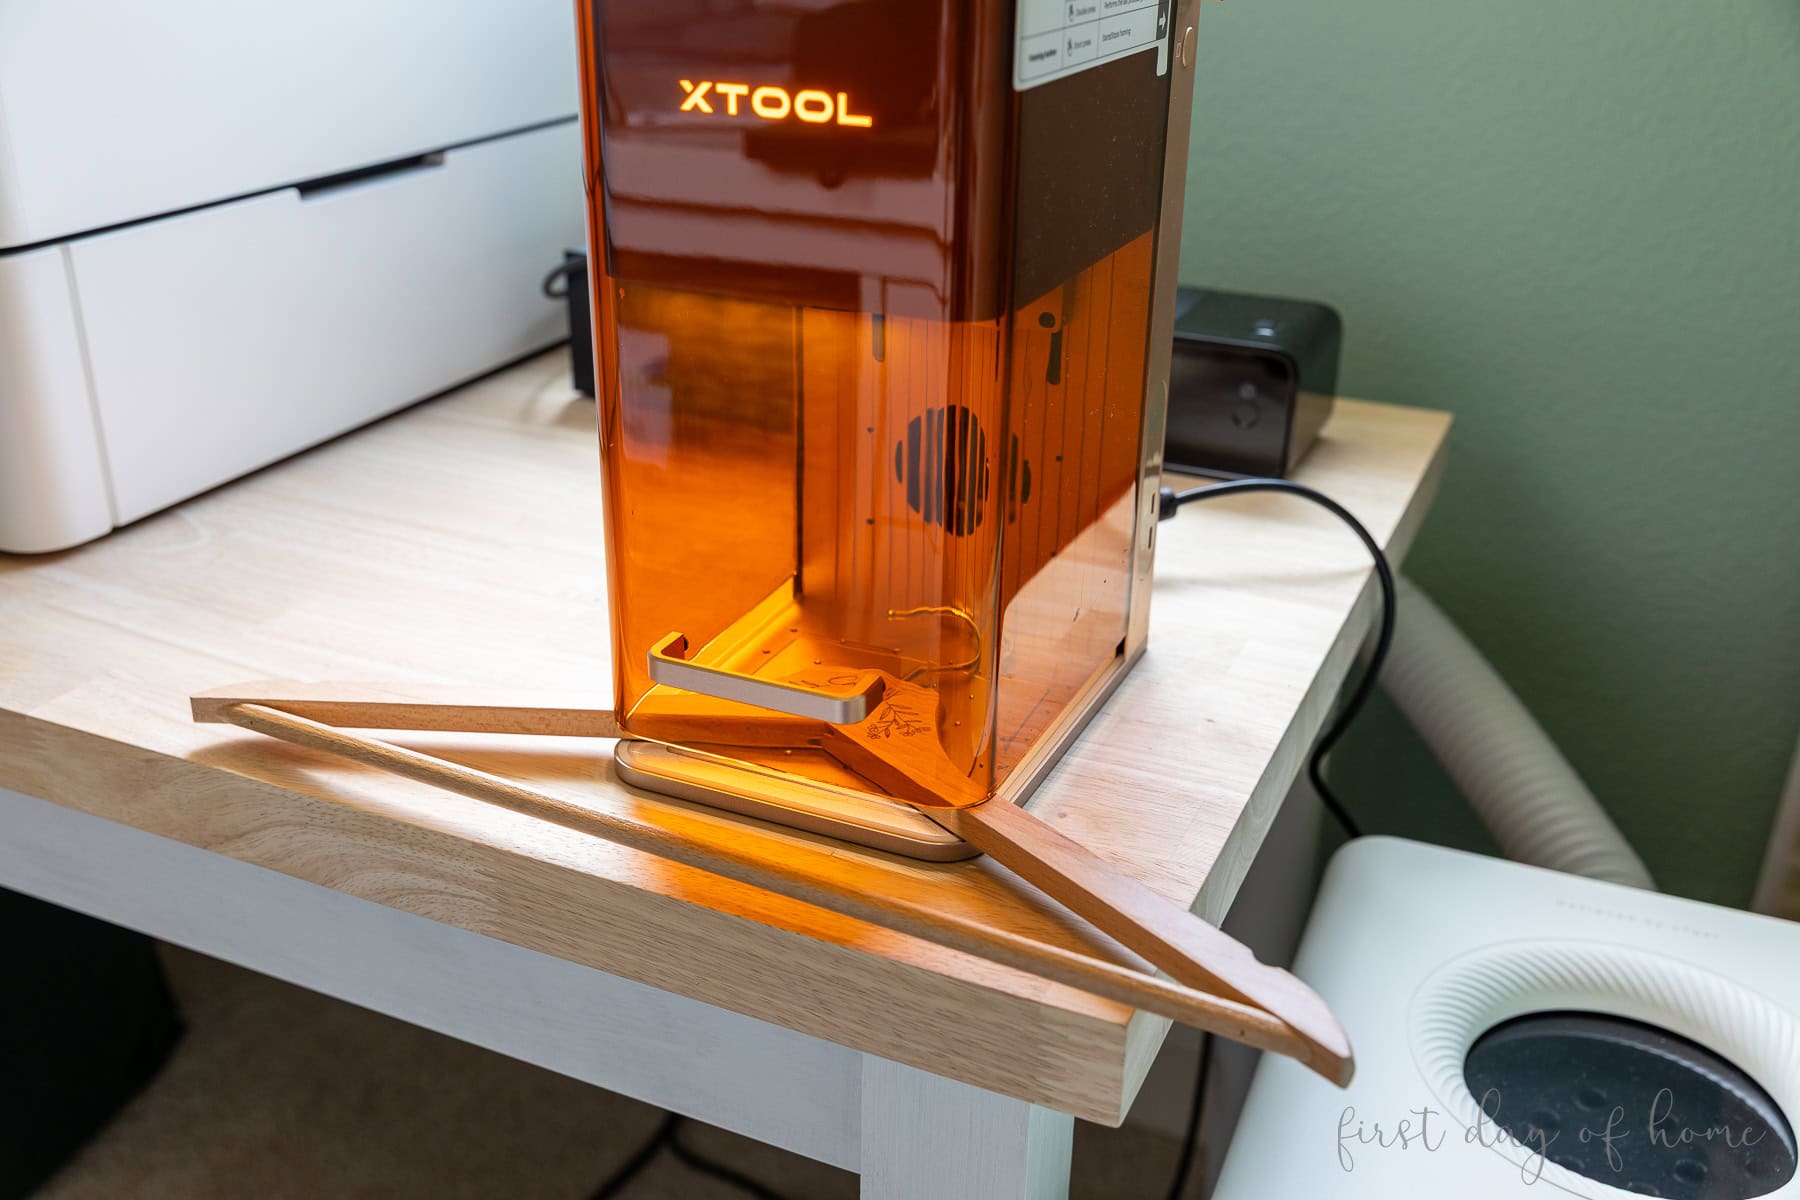
Plant stakes with funny phrases are trending these days. The xTool F2 has a built-in 15 MP camera that makes it easy to preview and cut many designs from a single piece of plywood.
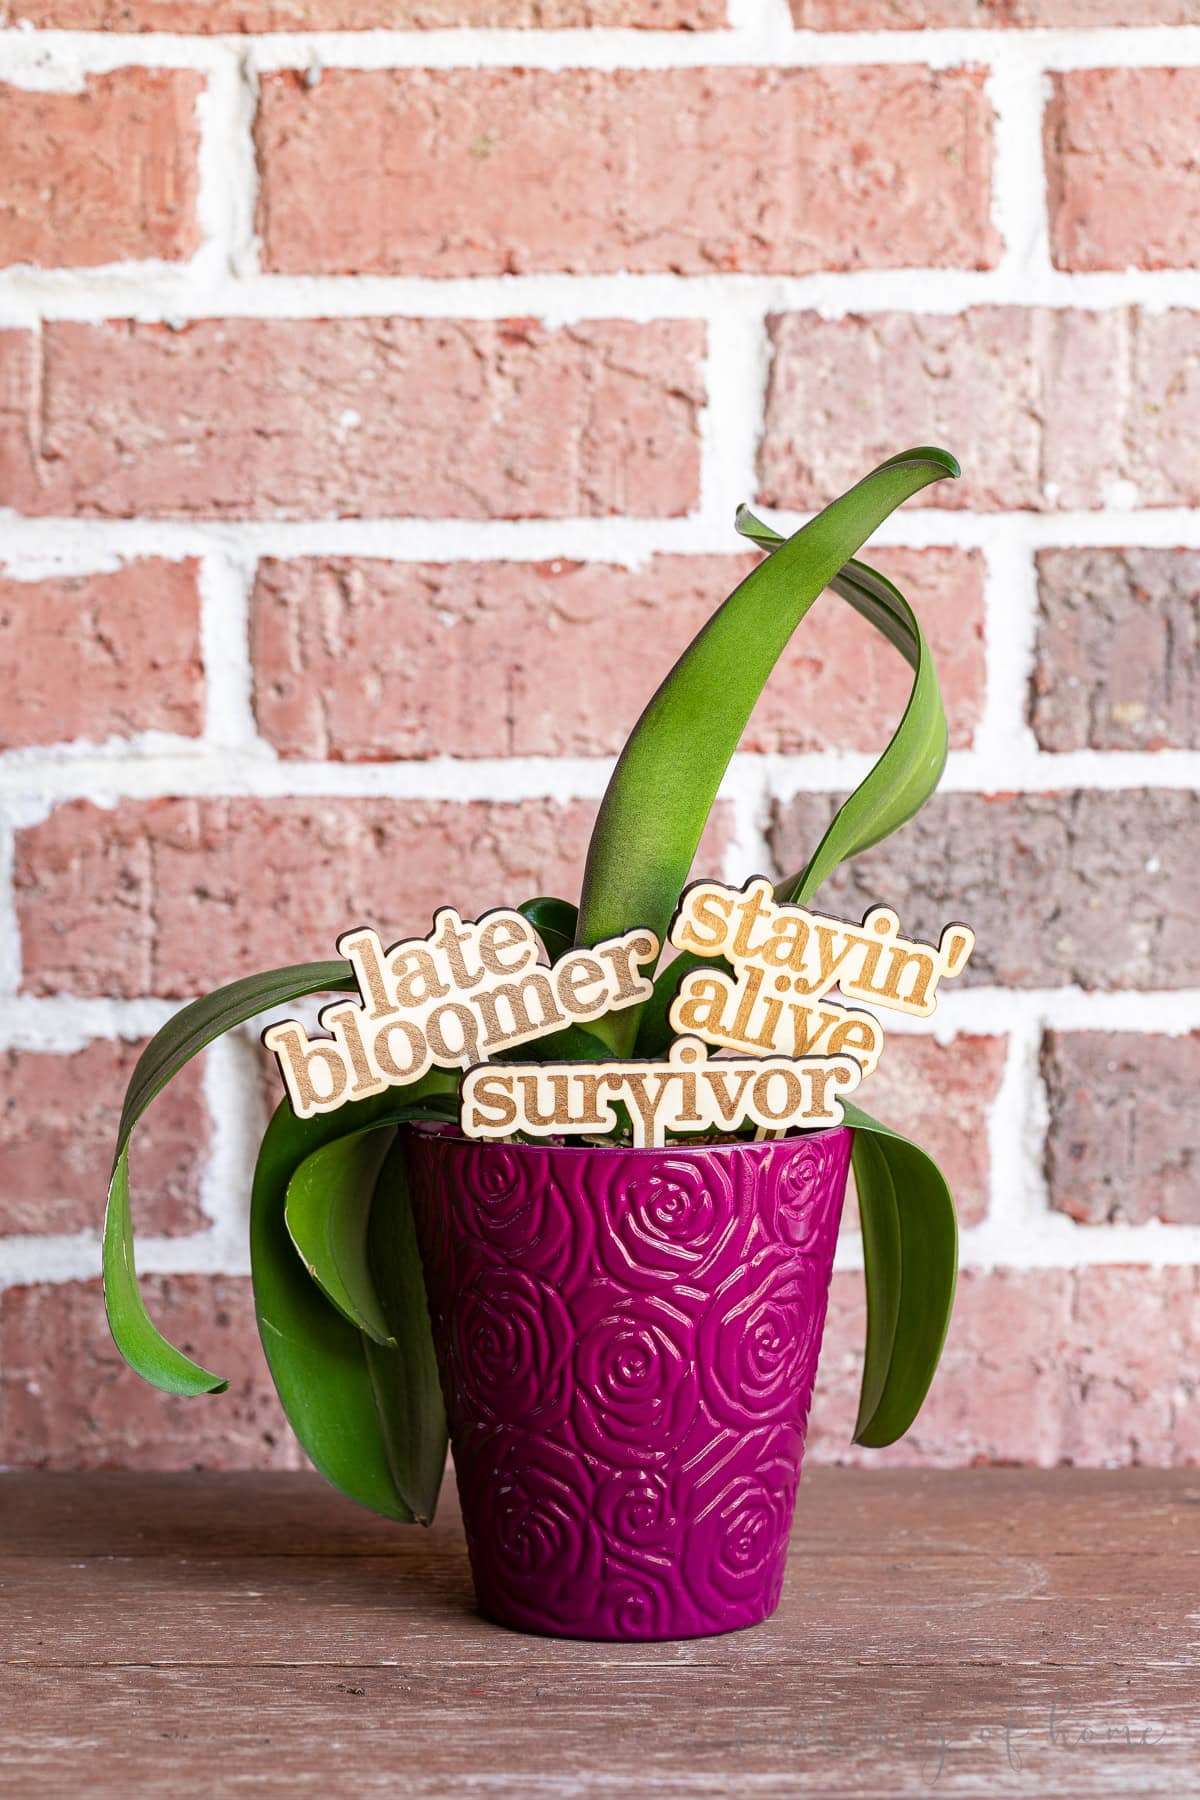
For a shortcut to designing your own plant stakes, check out the Atomm Name Gift Generator. With this tool, you can quickly change fonts and adjust the skewer length before importing your designs into xTool Studio, the free software.
Wooden plant stakes – laser engraving settings
- Material: 3mm Basswood Plywood
- Engrave (text): Blue light, 70% power, 300 mm/s, 100 l/cm, 1 pass
- Cut (outline): Blue light, 90% power, 6 mm/s, 1 pass
- Accessories: Slatted panel with slats facing exhaust fan
3. Christmas Gift Tags
Christmas markets present huge opportunities to sell your laser engraving ideas. Wooden gift tags are a trendy and eco-friendly way to personalize Christmas gifts.
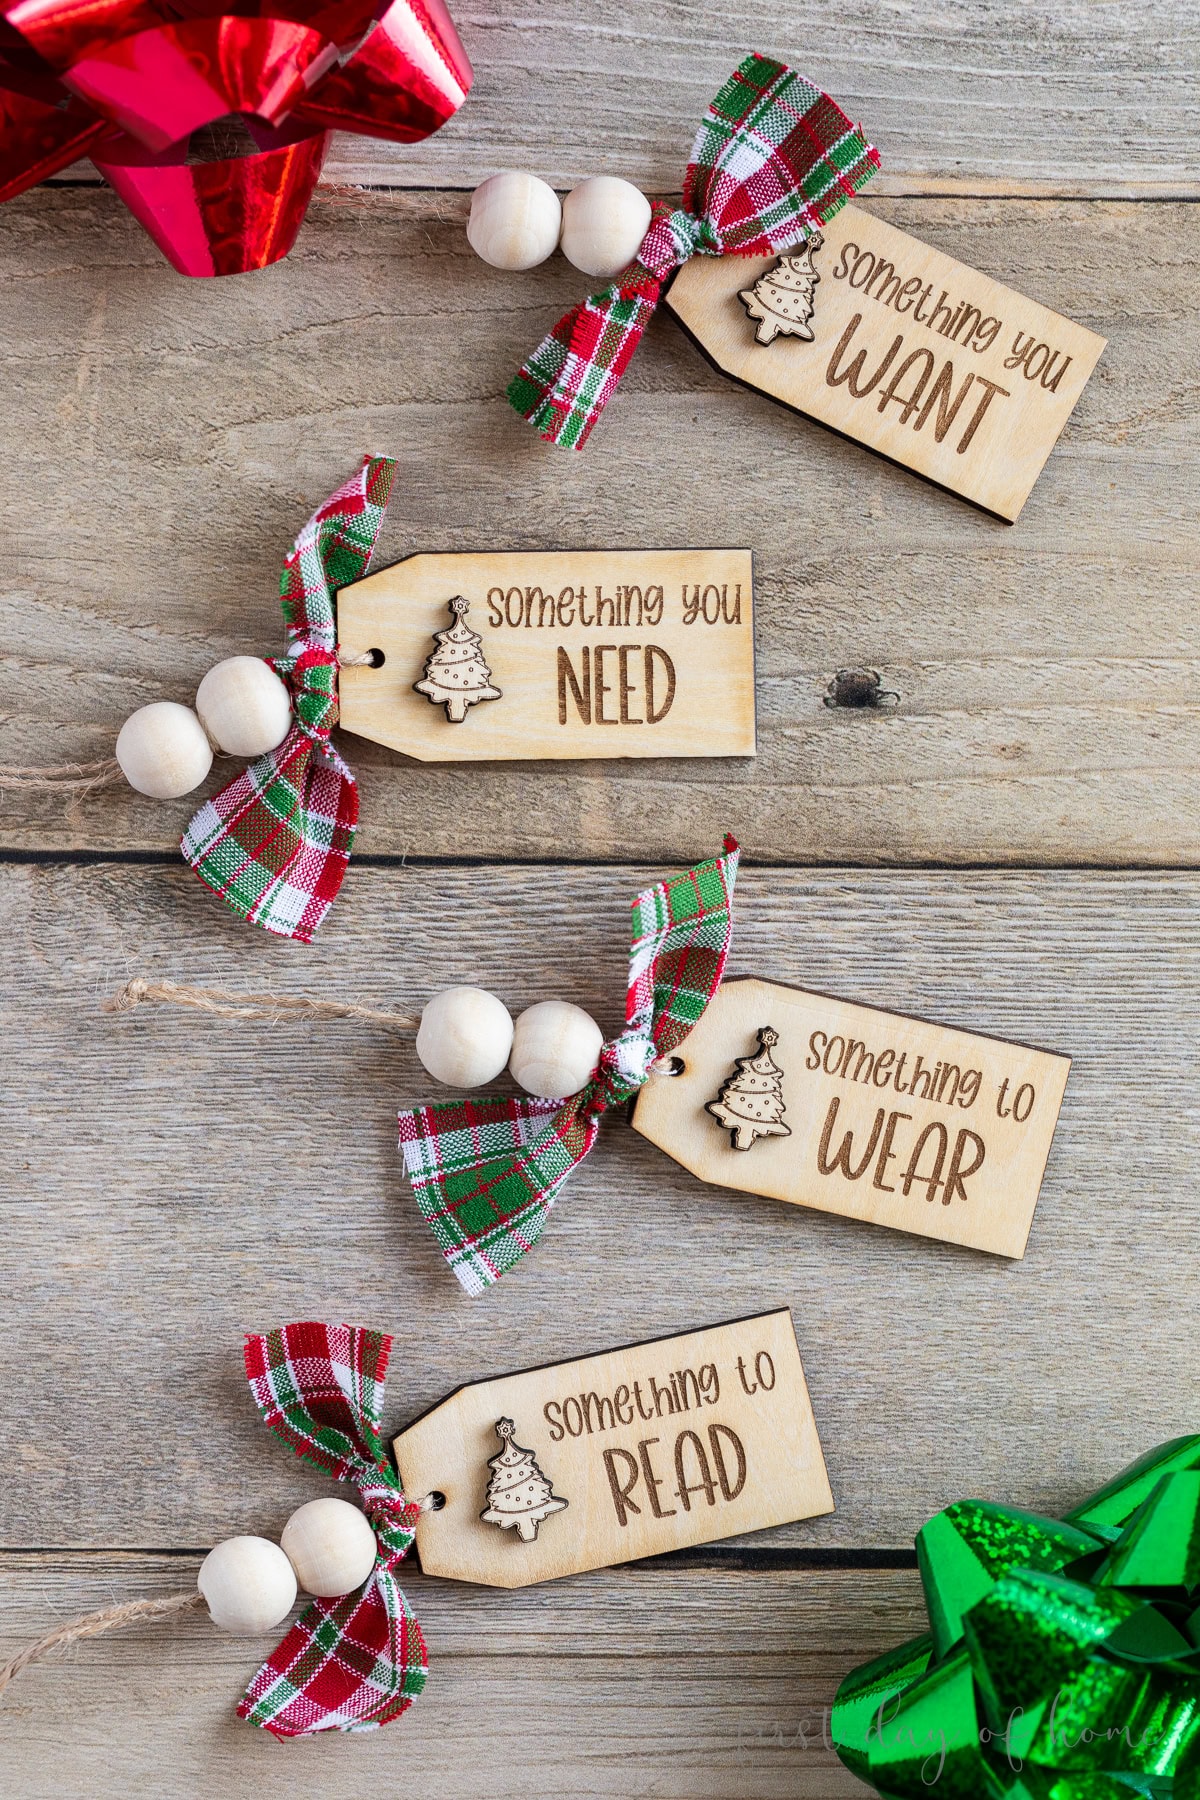
In xTool Studio, you’ll find many free design elements to whip up your own batch of gift tags with the font of your choice. Add wooden beads and cute holiday ribbon to these Christmas gift tags for a finishing touch.
Christmas gift tags – laser engraving settings
- Materials: 3mm Basswood Plywood
- Engrave (text): Blue light, 70% power, 300 mm/s, 100 l/cm, 1 pass
- Cut (outline and charm): Blue light, 90%, 6 mm/s, 1 pass
- Accessories: Slatted panel with slats facing exhaust fan
4. Engraved Teacher Note Holder
Post-it note holders have become a popular laser engraving idea for Teacher Appreciation Week or to kick off the school year.
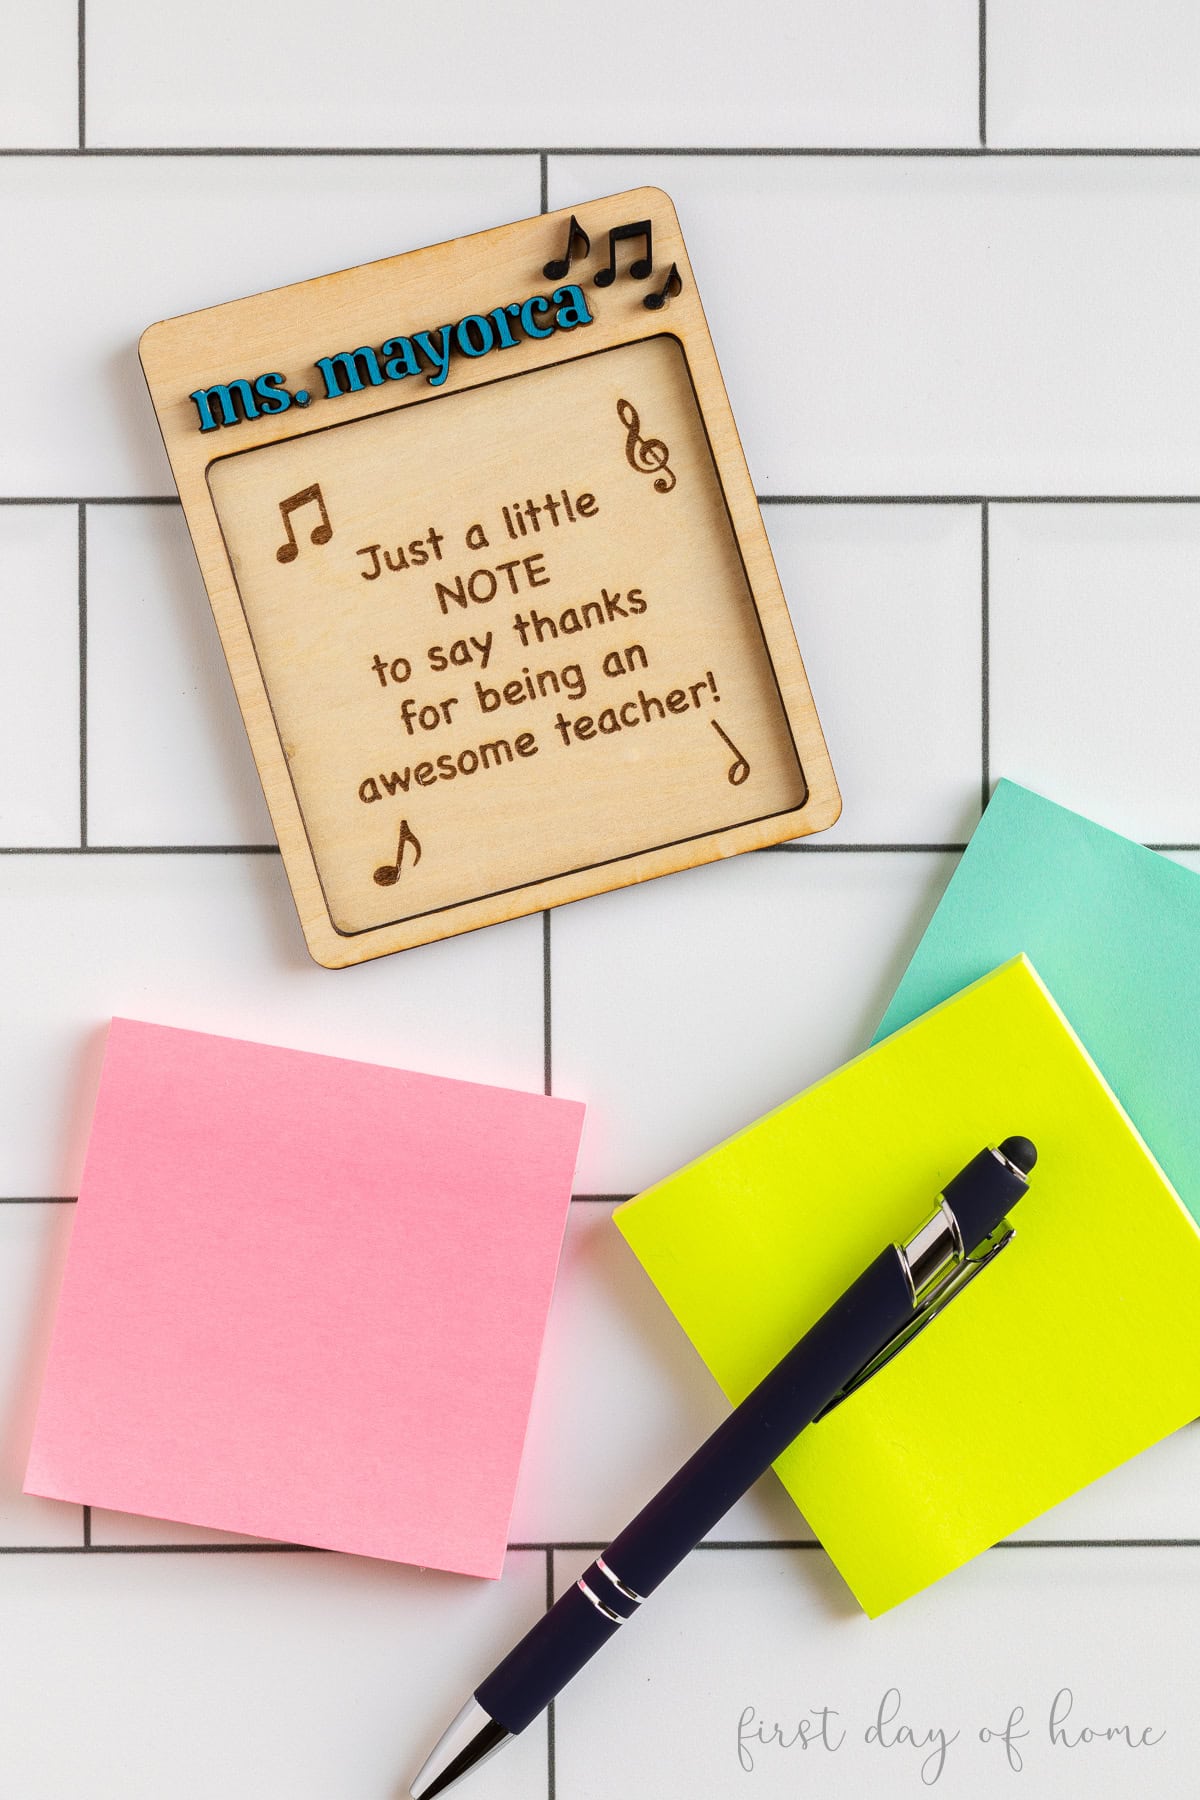
This design consists of two layers: one rectangular backer with the engraved message, and a second rectangular piece with a cutout for the notepad and space to add a teacher’s name at the top.
Be careful when cutting small pieces, as they can easily get sucked up by the machine’s exhaust fan, especially when working with the F2 or other compact portable lasers.
For personalization, you can either paint wood lettering or cut acrylic lettering, though I recommend a CO2 laser to cut most types of acrylic. (Read my guide to laser cutting acrylic using the xTool P2 for more details.)
Teacher post-it note gift – laser engraving settings
- Materials: 3mm Basswood Plywood
- Engrave (text): Blue light, 70% power, 300 mm/s, 100 l/cm, 1 pass
- Cut (outlines and teacher name): Blue light, 90%, 6 mm/s, 1 pass
- Accessories: Slatted panel with slats facing exhaust fan
5. Personalized Engraved Wooden Hanger
Weddings offer countless opportunities to laser engrave items. Wooden hangers with the names of the bride, groom, and bridesmaids make great gifts for the wedding party.
Machines like the F2 allow for personalization of oversized items by lifting the enclosure. Just make sure you wear safety glasses any time you operate a laser machine with the enclosure open.
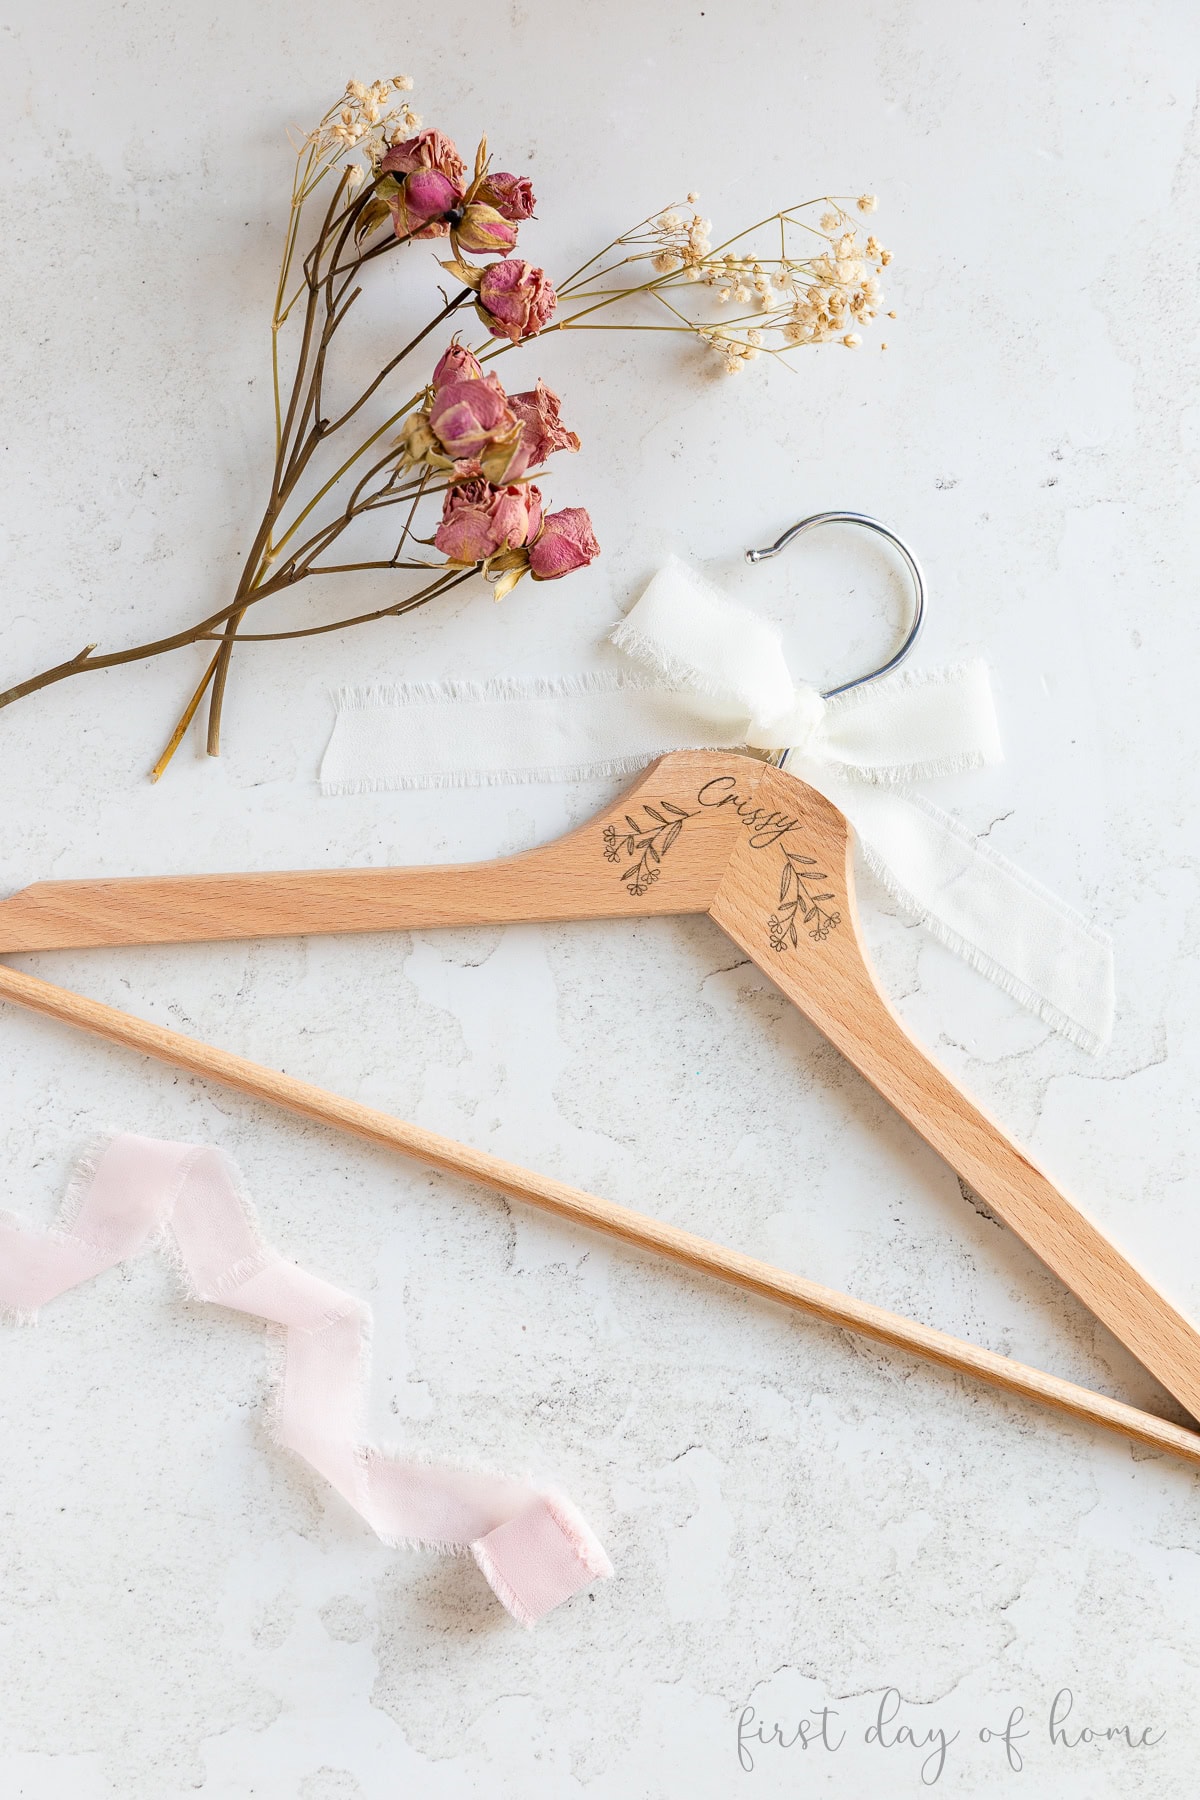
You may want to test the engraving settings on a spare hanger or two to find the best combination of power and speed before you start taking orders. The built-in camera on the xTool F2 makes it easy to align the design once the settings are dialed in.
You can find this floral design on Creative Fabrica. It’s another great resource for SVG designs that are perfect for laser engraving.
Wooden hanger – laser engraving settings
- Materials: Wooden Hanger
- Engrave (text): Blue light, 40% power, 200 mm/s, 120 l/cm, 1 pass
- Accessories: None required
6. Engraved Silicone Watch Bands
Did you know you can laser engrave silicone watch bands with a diode laser? It’s as simple as lining up your design and pushing a button.
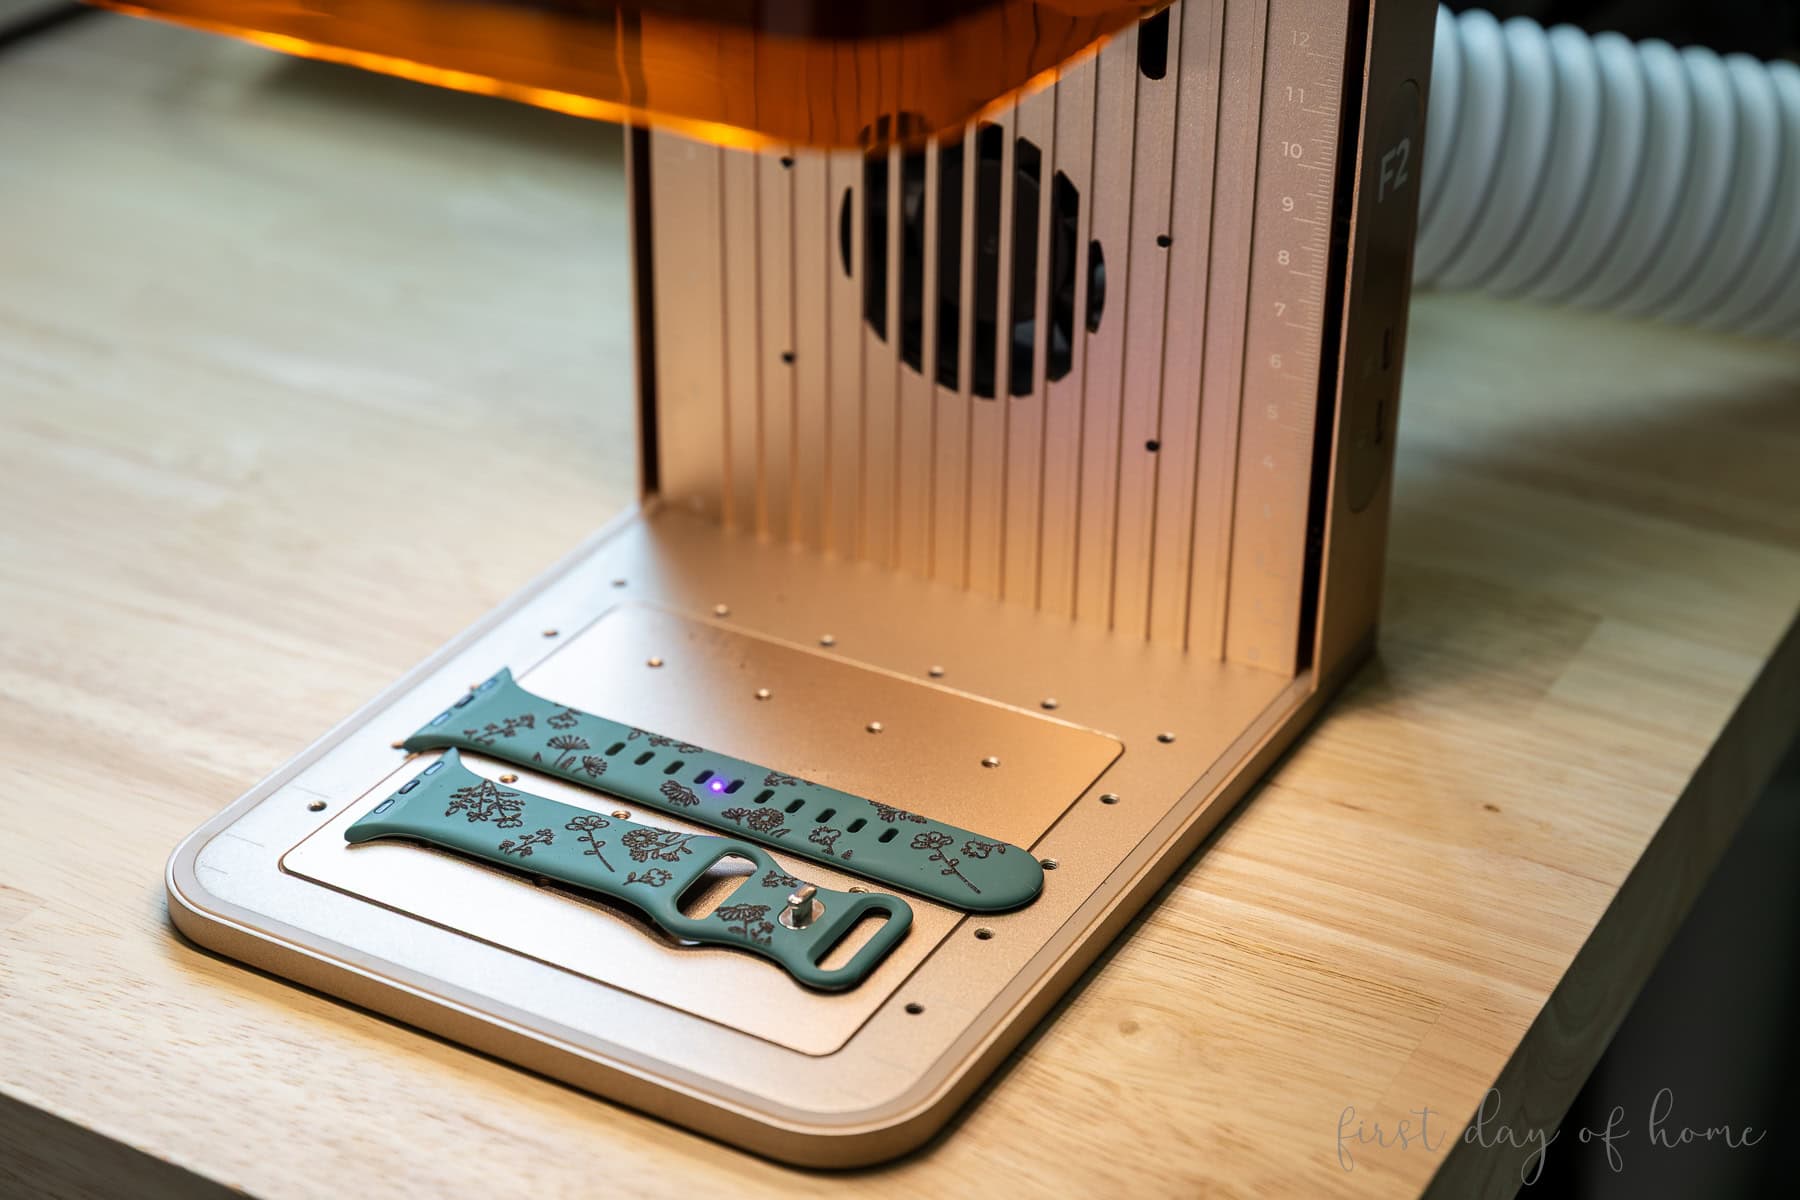
For this project, you could build or purchase a jig to process multiple bands at once. The floral design came from Creative Fabrica, and I was able to format the shapes directly in xTool Studio.
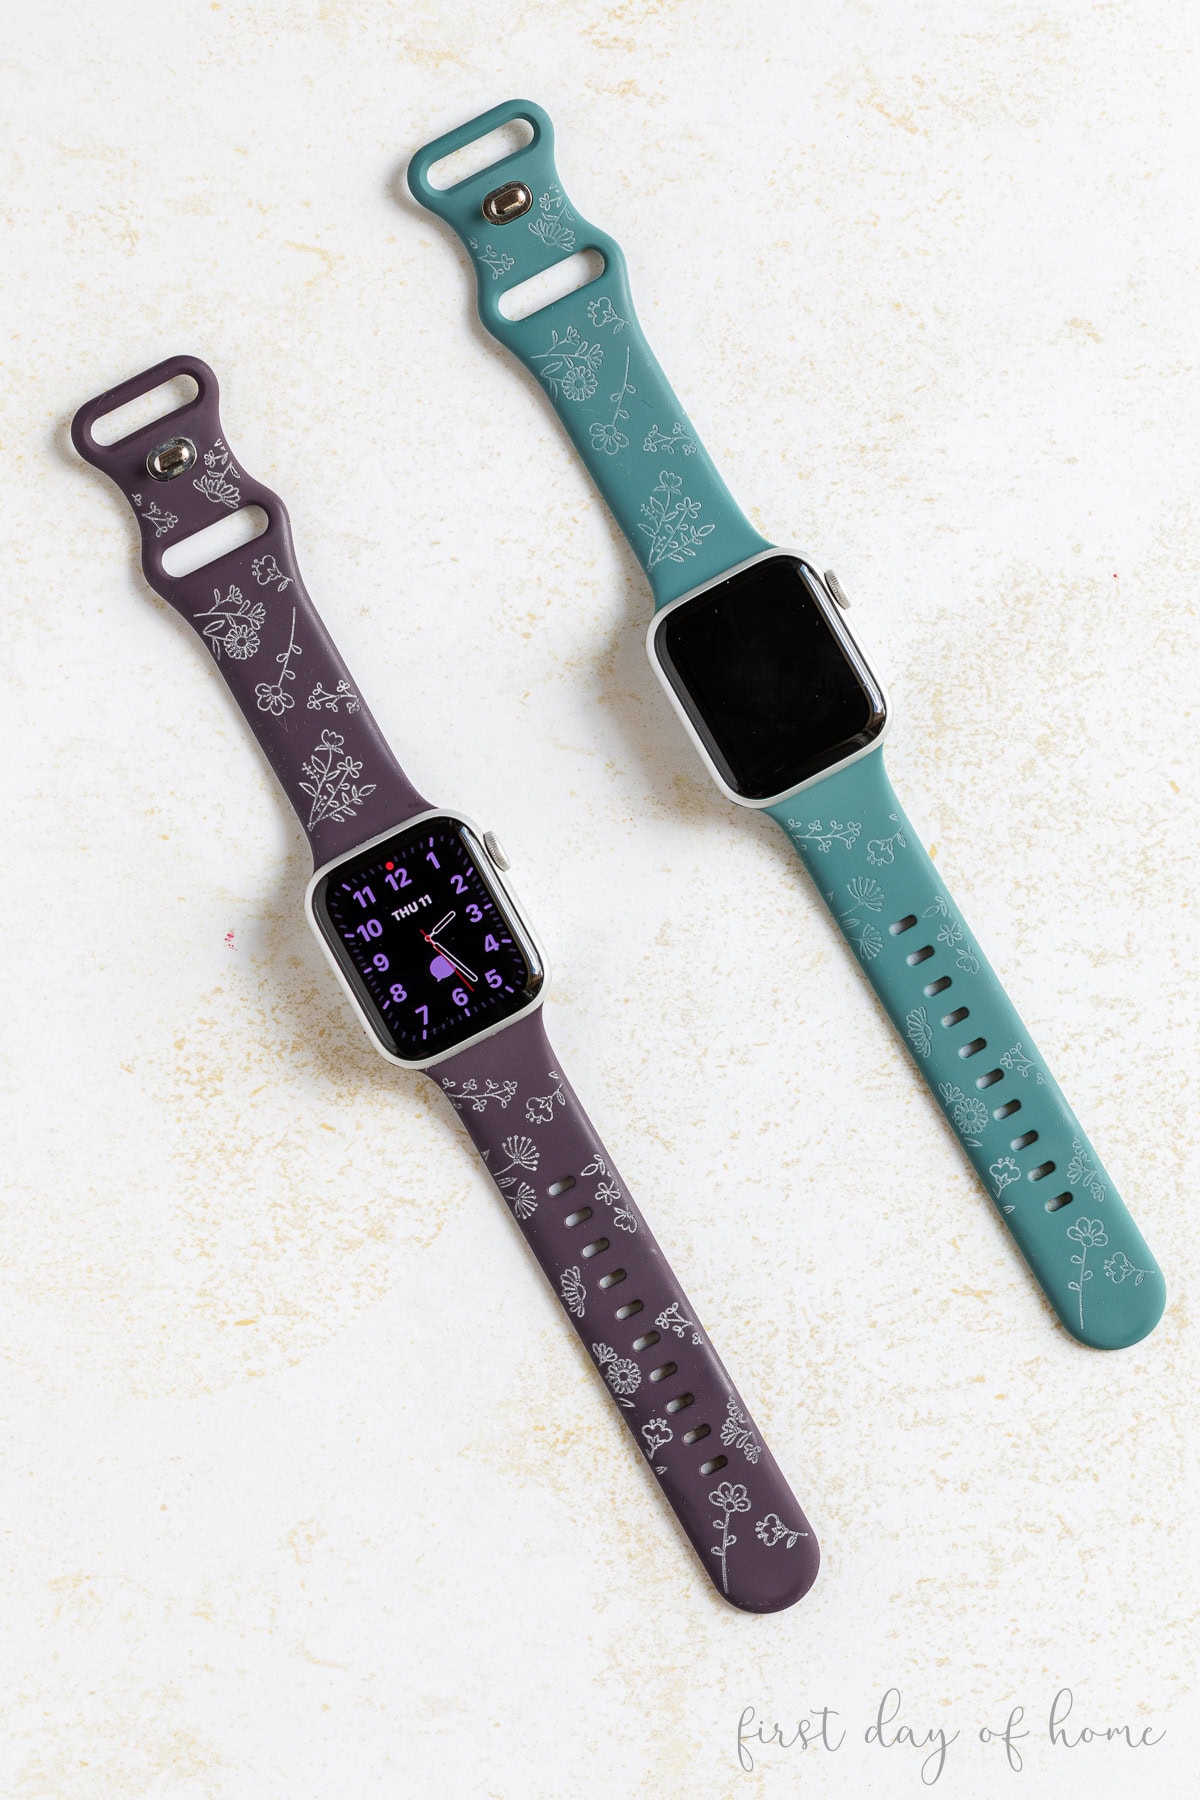
The teal-colored watch band (on the right) had a lighter engraving setting, but the purple watch band got better results with the engraving settings below.
To clean the bands after engraving, use Dawn dish soap.
Silicone watch band – laser engraving settings
- Materials: Silicone watch band
- Engrave: Blue light, 75% power, 160 mm/s, 120 l/cm, 2 passes
- Accessories: Watch band jig (optional)
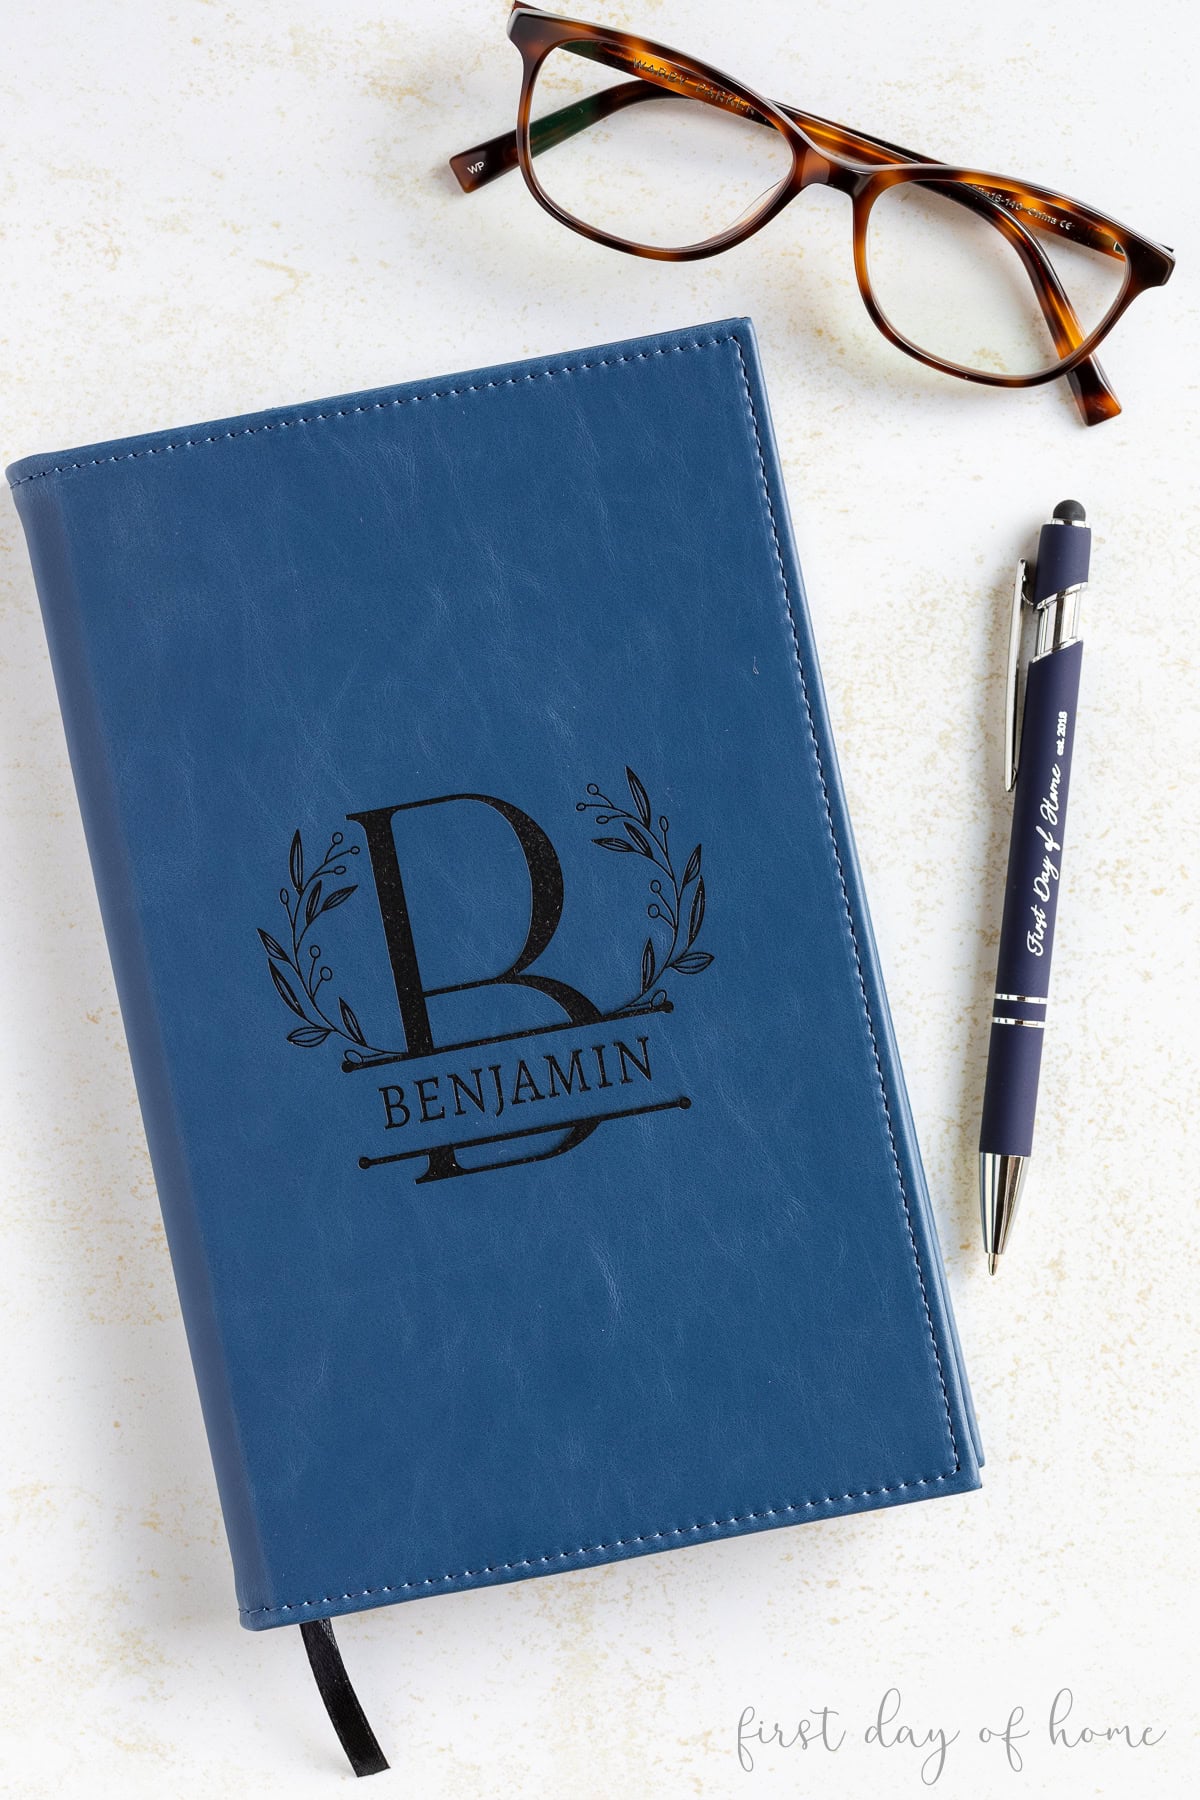
7. Engraved Leatherette Notebook
Leather and leatherette are great materials to use for laser engraving. Just keep in mind that not all leather sold online is laser-safe. As a beginner, stick with materials sold by reputable companies focused on the laser engraving market.
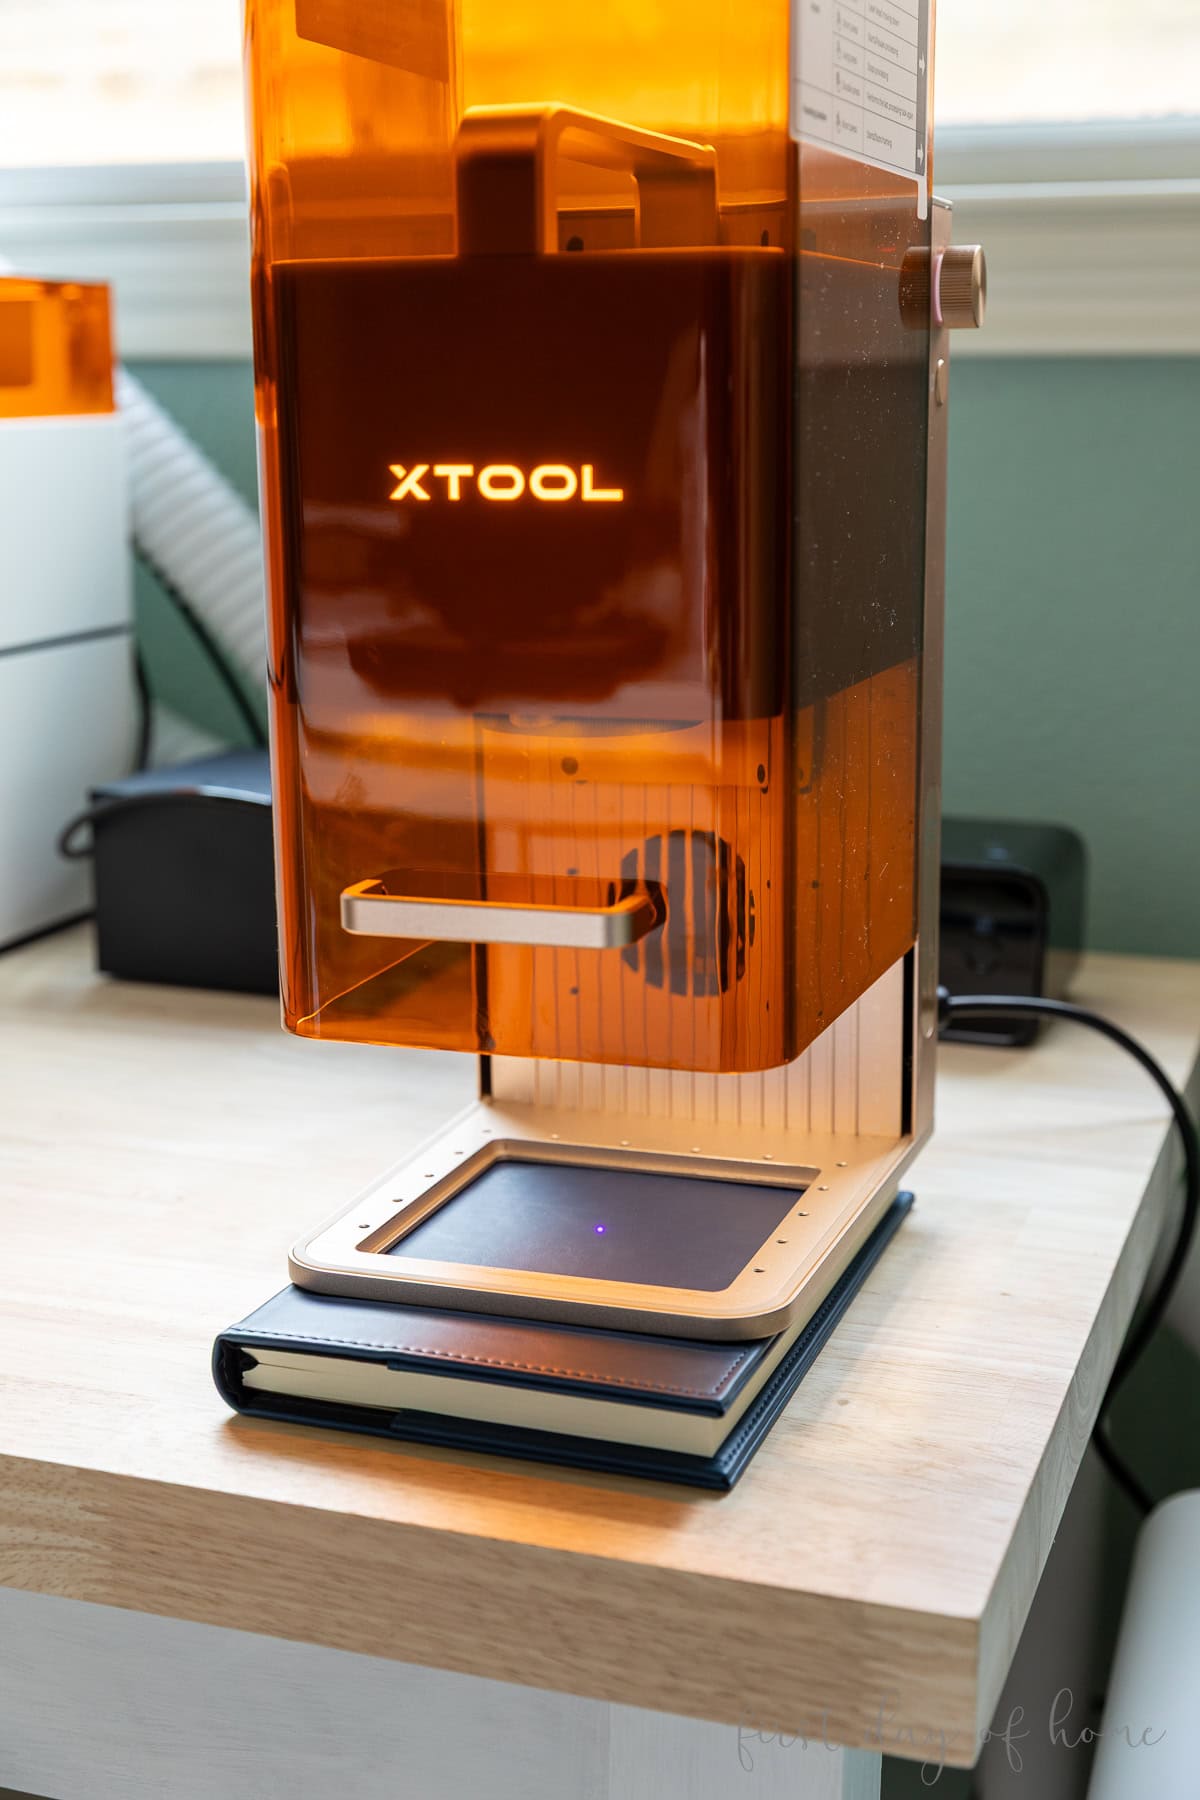
These leatherette notebooks have the look and feel of leather, and they engrave perfectly. With a machine like the xTool F2, you can remove the base plate and place the notebook underneath for laser engraving.
To quickly design a monogram, I highly recommend the Atomm Monogram Generator. You can add a name and export it to your design software in seconds.
To clean leatherette after laser engraving, use LA’s Totally Awesome or a baby wipe. Keep scrolling to see the final engraved notebook below.
Leatherette notebook – laser engraving settings
- Materials: Leatherette notebooks
- Engrave: Blue light, 43% power, 200 mm/s, 120 l/cm, 1 pass
- Accessories: None required (base plate removed)
8. Laser Engraved Pen
The perfect complement to a laser-engraved notebook is a laser-engraved pen.
Ballpoint pens are ripe for personalization. Think weddings, graduations, birthdays, and small businesses, to name a few.
You can easily buy or make a jig to batch-process multiple pens at once. To clean a laser-engraved ballpoint pen, use rubbing alcohol.
Ballpoint pen – laser engraving settings
- Materials: Ballpoint pens with stylus
- Engrave: Blue light, 60% power, 160 mm/s, 200 l/cm, 1 pass
- Accessories: Ballpoint pen jig (optional)
9. Personalized Metal Tags
The F2’s IR laser really outperforms other types of lasers in engraving metal. This opens up unique opportunities to customize jewelry, dog tags, and other metal surfaces.
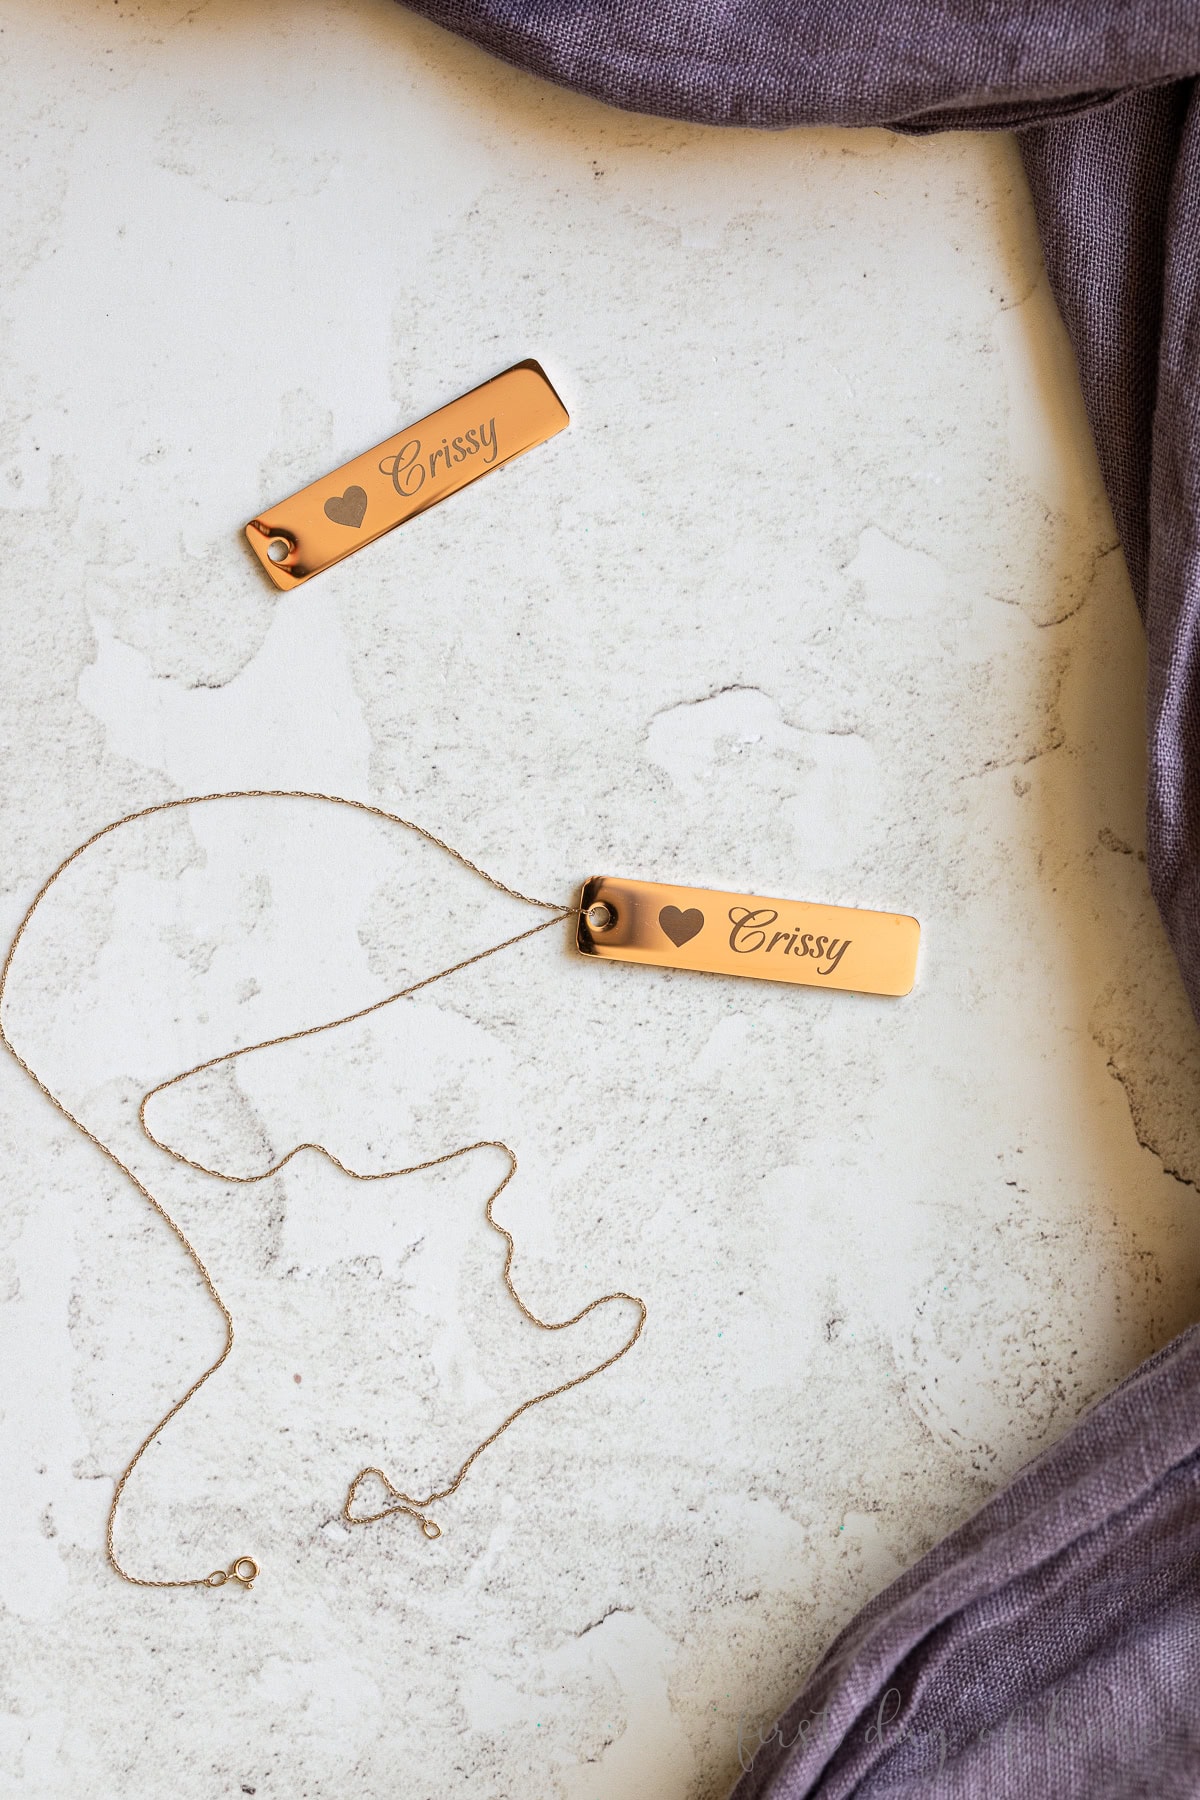
To get the best results, you should clean metal tags with denatured alcohol and a lint-free cloth before laser engraving. If you don’t have denatured alcohol (which also requires some safety precautions like wearing protective gloves), you can try using a high percentage (91-99%) rubbing alcohol instead.
Where to Place Metal Tags
Place the metal tag directly under the laser point just to measure the distance.
Then, move the metal tag toward the back of the machine to prevent the laser from reflecting directly back on itself. An L-shaped positioning piece can help with alignment.
For a darker marking, use a laser marking spray before processing your design. It’s not a requirement, but the results are slightly more defined.
Metal tag – laser engraving settings
- Materials: Stainless steel tags
- Engrave: Infrared light, 90% power, 700 mm/s, 200 l/cm, 1 pass
- Accessories: L-shaped positioning piece (optional)
10. Laser Engraved Photo Keepsake on Acrylic
An IR laser also does a great job engraving materials like opaque acrylic. Compared to a diode laser, the IR laser makes crisp, frosted etchings that can turn a photo into a memorable keepsake.

For the project above, I used a black 6mm acrylic tile to engrave a photo of a recent ski trip. First, I cropped the photo and removed the background in xTool Studio. Then, I used the built-in “Auto Adjust” feature in the Edit menu to invert the image.
Inverting an image is an important step when engraving on a dark surface, such as black acrylic or slate. Without inverting, the image would look like a photo negative.
It’s helpful to create a material test on a scrap piece of acrylic to determine which combination of power (%) and dot duration will give you the best results.
Acrylic photo keepsake – laser engraving settings
- Materials: Black acrylic (6mm)
- Engrave: Infrared light, 1525 dot duration, 25% power, 350 DPI, 1 pass
- Accessories: None required
Selling laser-engraved projects
These laser-engraving ideas are perfect for selling online or at craft fairs and holiday markets. Before you take your projects on the road, consider these tips.
Tips
- Safety: Consider investing in a desktop air purifier for proper ventilation. Always use safety glasses when using the laser with the enclosure open, and never leave the machine unattended while operating. Never process designs with the enclosure open in a public setting.
- Slide extension: To process multiple batches of a design, you can use a slide extension accessory made specifically for the xTool F2.
- Advance preparation: Prepare pre-cut “blanks” of items to personalize later, like bookmarks, teacher gifts, and gift tags. This ensures you can personalize items on the road with the enclosure closed.
- Limit your customization. If you’re planning to personalize items at a show, have a limited menu of fonts and designs available to streamline your production process.
If you’re planning to make some of these projects, let me know in the comments, and don’t forget to pin this article for later, using the image below!
Pin it for later!