How to Make a Homemade Christmas Wreath from Scratch
All the Christmas things have started! If you’re not getting a bazillion Christmas catalogs a week, tell me your secret! While I thoroughly enjoy seeing the sparkly goodies sold by Pottery Barn, Balsam Hill and Frontgate, I don’t always love the price tag. That’s why I’ve learned how to make a homemade Christmas wreath from scratch.
This post contains affiliate links, and I will be compensated if you make a purchase after clicking on my links. For more information, please see my disclosures.
Today, I’m sharing this homemade scratch Christmas wreath as part of the Handmade Christmas Decor Blog Hop. I hope you’ll visit each of my blogging friends at the end of this post.
Big thank you to Rita at Harbour Breeze Home who organized our lovely tour!
You can watch the highlights of this tutorial on my YouTube channel by clicking the video thumbnail below.

Homemade Christmas Wreath from Scratch
My inspiration for this homemade Christmas wreath knock-off came from Pottery Barn, Balsam Hill and Frontgate.
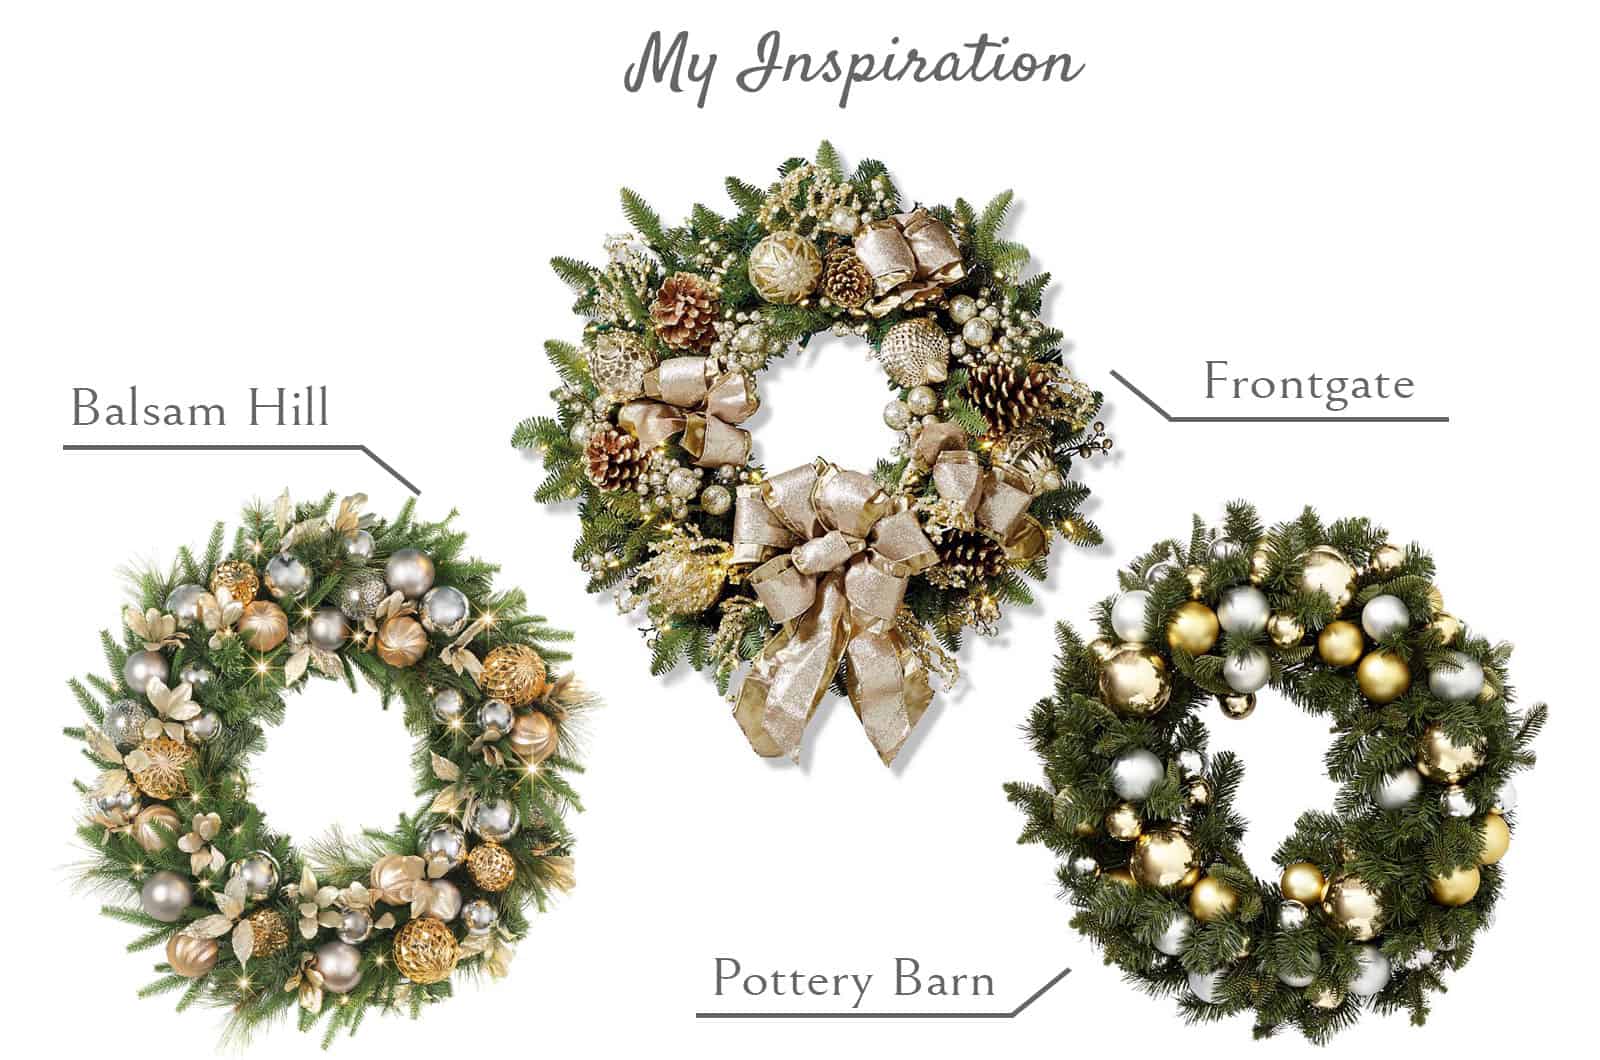
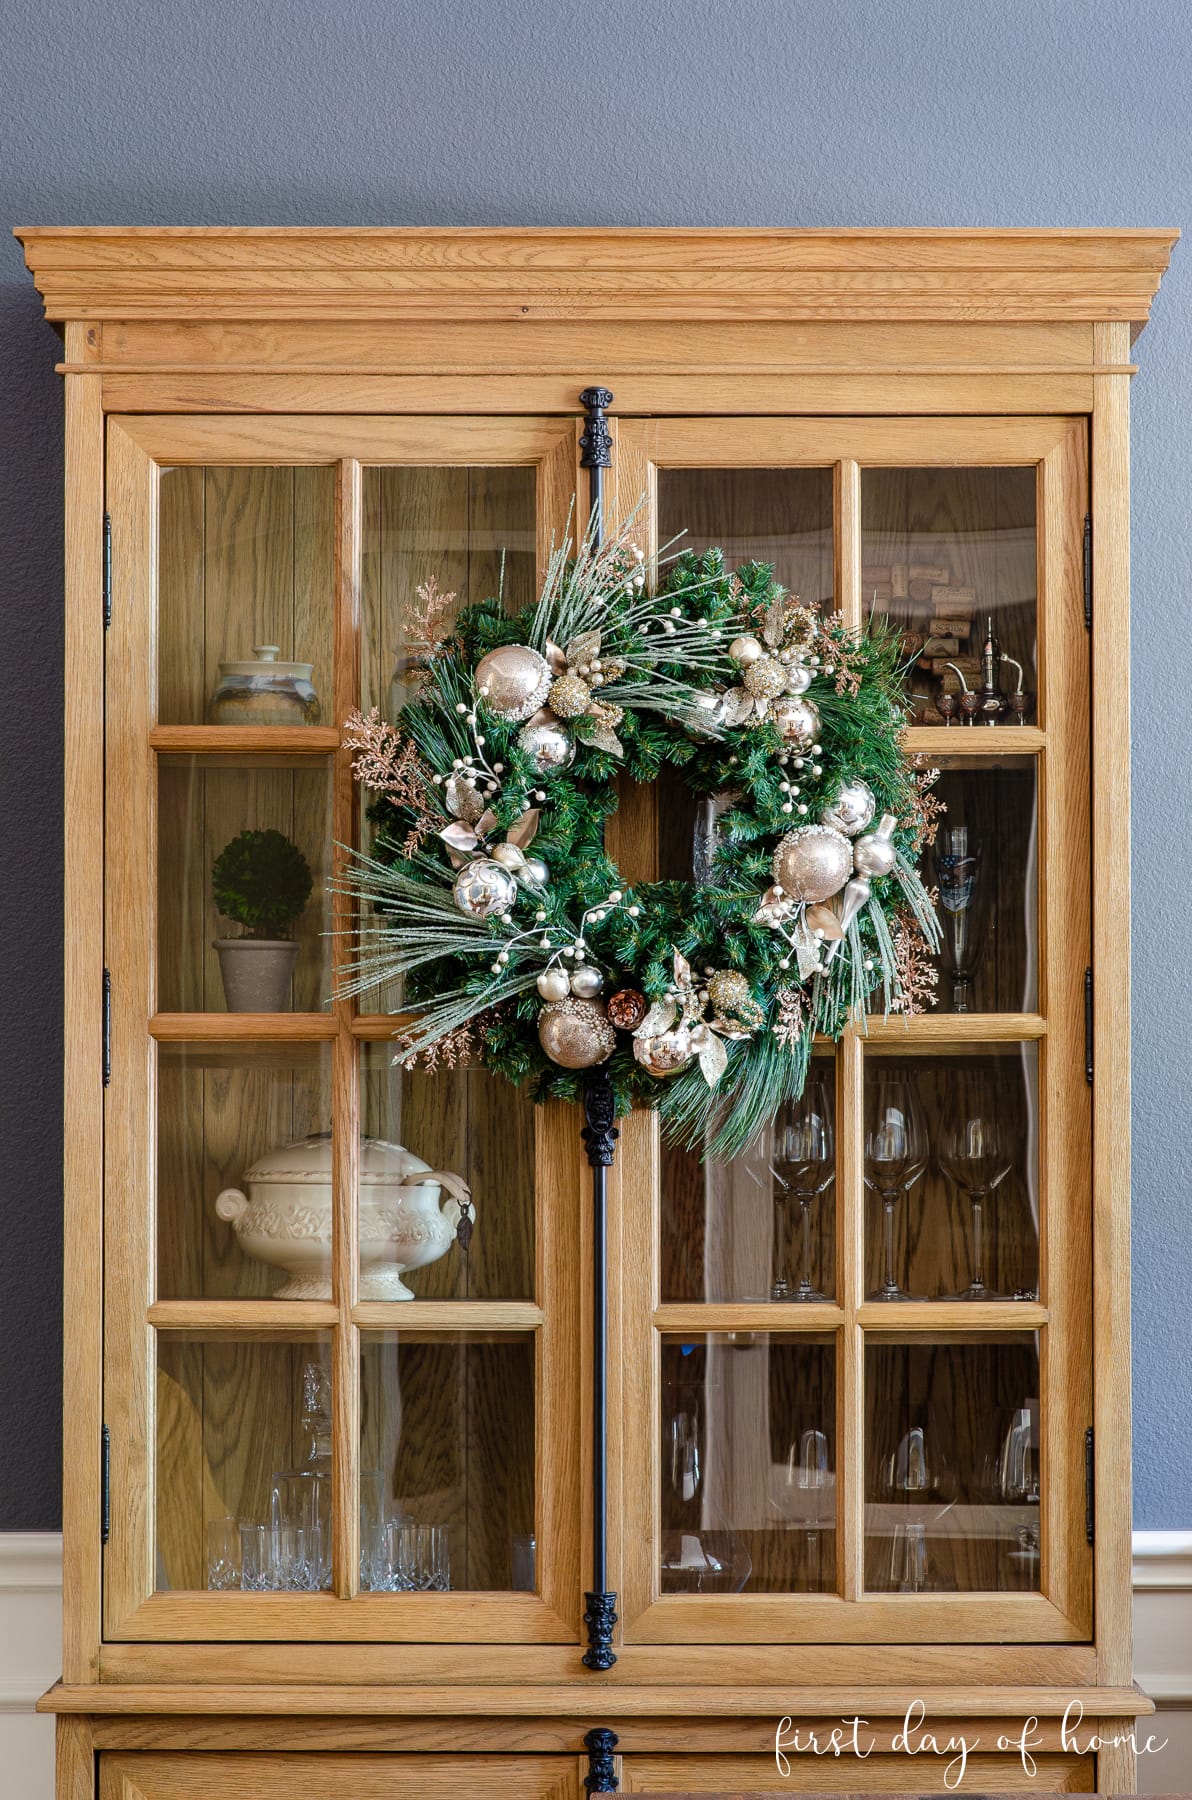
To manage costs, I decided to simplify the Frontgate wreath by removing the ribbon but keeping the metallic silver and gold elements that would complement my charcoal-grey dining room.
Supplies for Homemade Christmas Wreath
The supplies for this homemade Christmas wreath will depend on your personal preference. I suggest choosing a variety of textures with a mix of the following:
- Pine wreath (24 inches or larger)
- Ornaments – Champagne, silver or gold, in various sizes (matte or metallic)
- Floral stems – Gold/glittery leaves, ferns or other wispy stems
- Greenery – Frosted pine needle or similar
- Berries – White or metallic color
- Wire cutters
- Floral wire or glue
- Fishing wire or pipe cleaner to hang
I bought all of my supplies at Hobby Lobby at the end of last season (score!), but you can see this year’s ornament selection in most of the photos below.
Steps for Making a Homemade Christmas Wreath from Scratch
Now, the fun begins! Follow the steps below to prepare your wreath for action. I always arrange my largest pieces first and secure them to the wreath before adding the smaller accents.
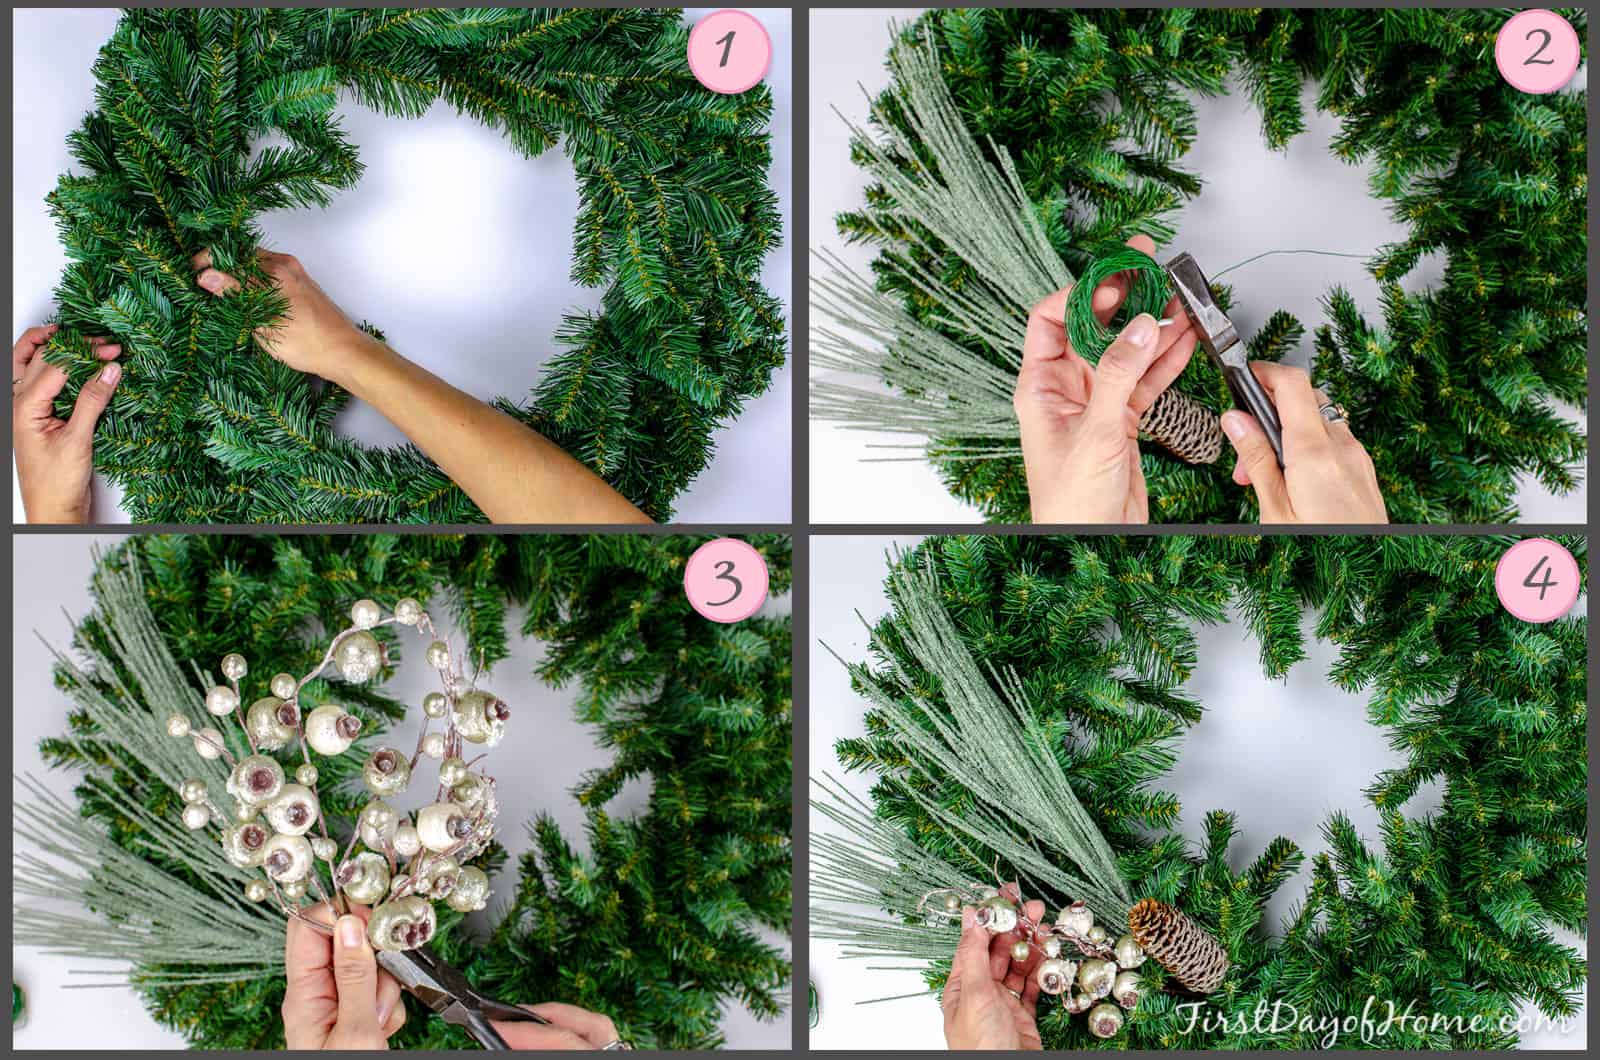
- Begin by opening up your wreath in every direction (inward, outward, forward). Then, attach the fishing wire to the frame to hang your wreath later.
- Add any base greenery/texture elements first. Secure these pieces to the wreath frame with floral wire.
- Separate any large accent berries/stems by pulling them apart or using wire cutters. Now you have double the accents!
- Pair small accents with larger greenery stems. Attach accents with floral wire once you have secured all of the main greenery pieces.
Shop for Wreath Supplies


Next, you’ll begin arranging your other wispy accents, small berries, leaves, and ornaments according to the decorating tips below.
Note: You might end up with glitter here, glitter there, glitter everywhere. Don’t worry, you were born to sparkle!
Decorating Tips: Making a Homemade Christmas Wreath from Scratch
The nitty-gritty of wreath-making comes down to personal preference. However, I’ve collected a few tips that have helped me on my wreath-making journey.
Tip #1: Position greenery and exterior elements in the same direction to create movement

You’ll notice I have a spiral movement on my homemade Christmas wreath, and all of my accents curve downward in a clockwise direction.
I also suggest inserting a few accent stems on the sides of your wreath, not just on top, because it will appear fuller and have more depth.
Tip #2: Mix elements like leaves, berries, and ornaments of various sizes
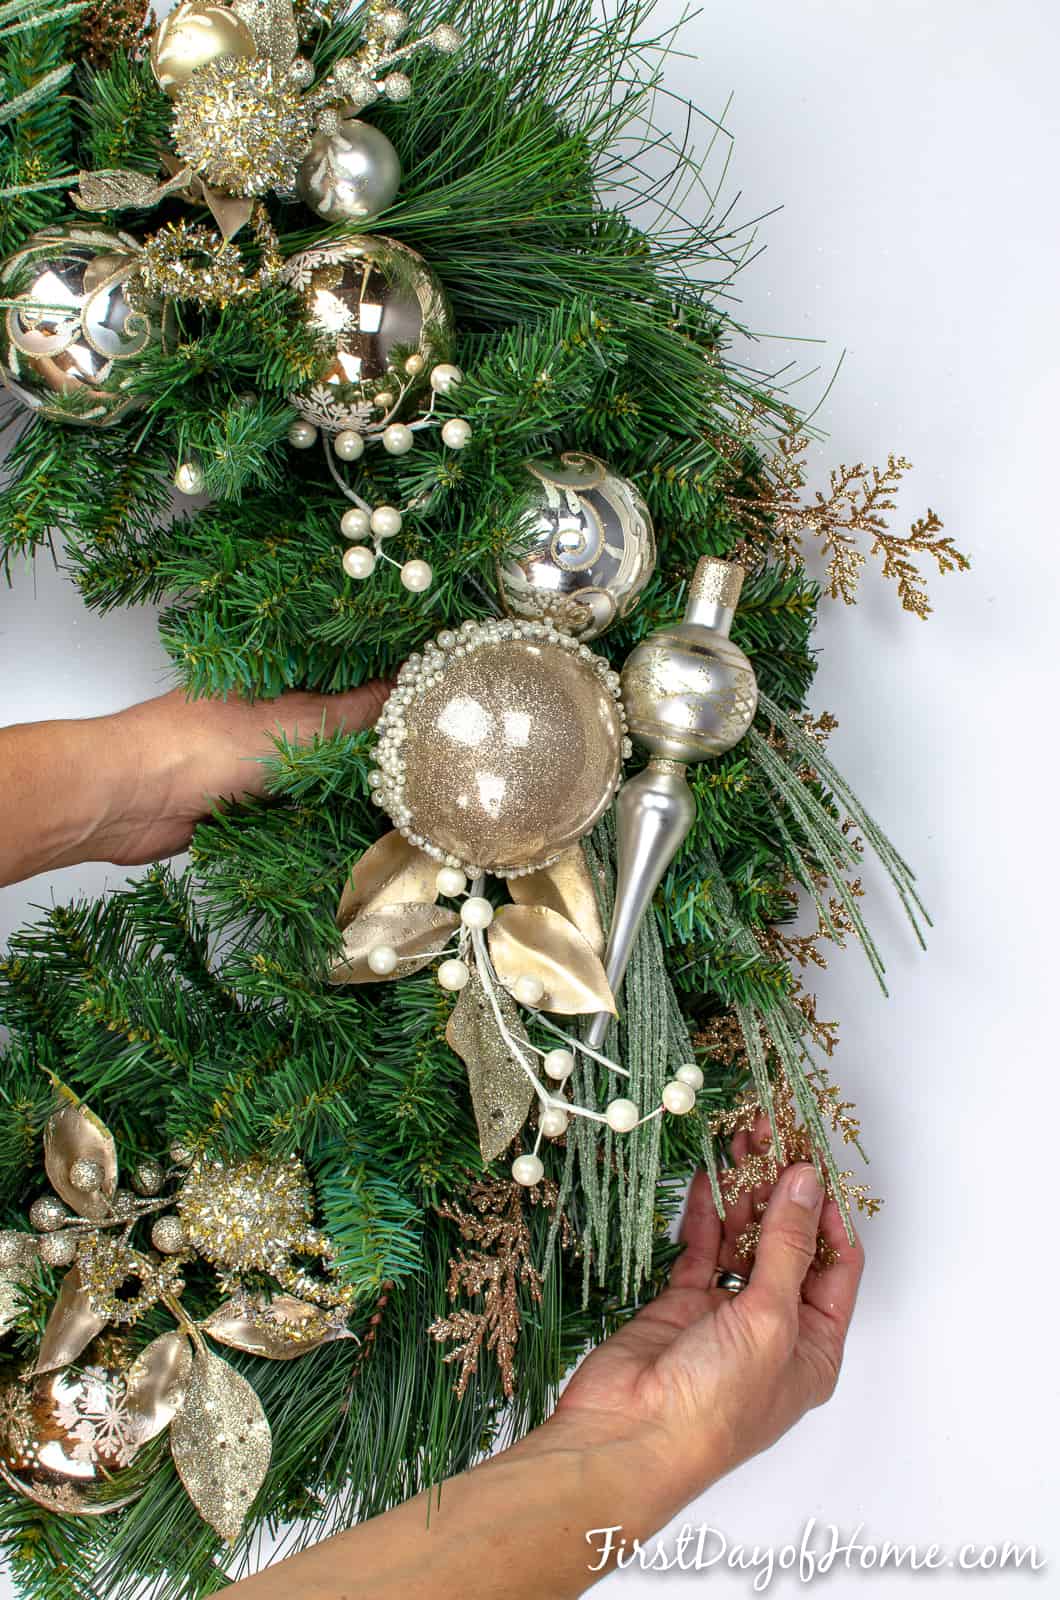
I’m a girl who likes the combo platter, so naturally, I chose a variety of ornament sizes for my wreath.
For the mini ornaments, I created “twins” and paired them with larger ornaments. I also added a few champagne-colored finial ornaments and clustered them with leaves and berries.
Tip #3: Create groupings of three when possible

When creating your homemade Christmas wreath from scratch, you can either space the ornaments evenly throughout the circle or create clusters.
Personally, I arrange in groups of three: three accent greenery pieces, three ornaments of each type and triangular clusters.
In the end, finding a balance that pleases your eye is most important.
Tip #4: Admire your wreath from all sides

Pretend you’re with the paparazzi and check out your homemade wreath from all points of view. Do you see any unflattering angles that would make your wreath worthy of the tabloids?
I always end up rearranging a bit after I leave my wreath hanging for a while. It’s totally normal!
related post
Easy DIY Winter Wreath with Bell
Learn how to use real cedar branches to make a fresh winter wreath in under 10 minutes..
Tip #5: Don’t let yourself get intimidated
Every year, I look at my creations and think of ways to improve or add embellishments. Gotta start somewhere!
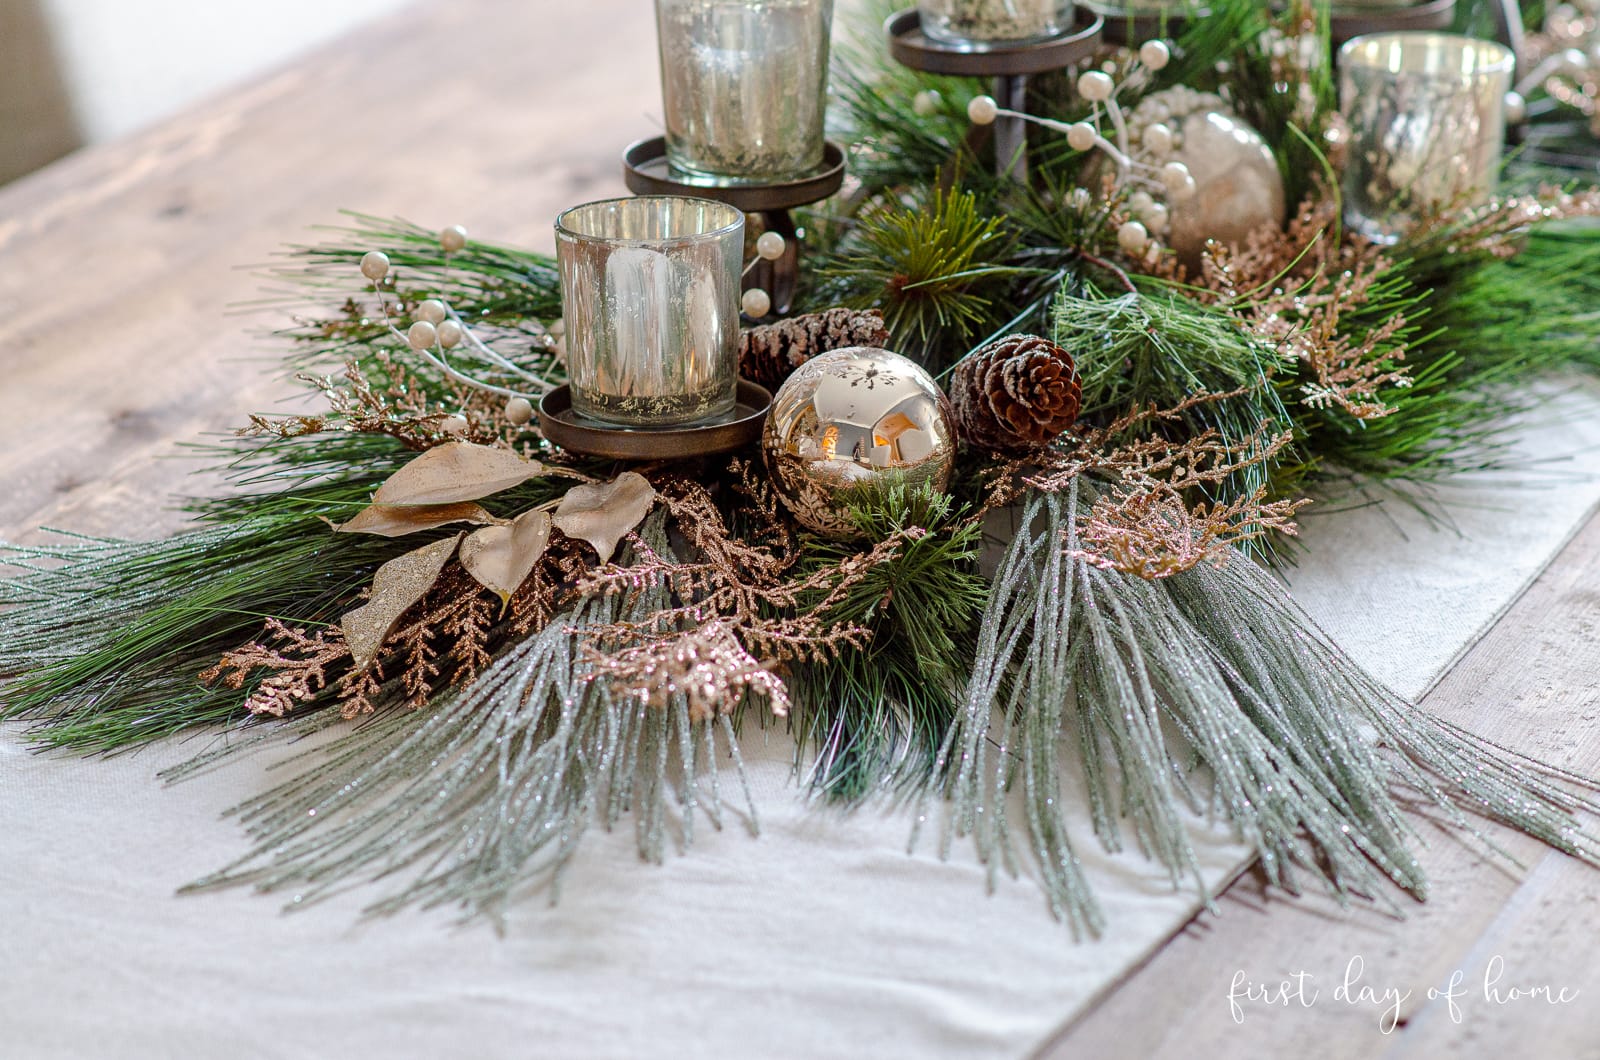
To see how the wreaths coordinate in my dining room, check out my tutorial on creating an easy mercury glass Christmas centerpiece!
And for a completely different look in the dining room, see my other Christmas home decor tour!

Shop the Post
More Holiday Inspiration
For a fraction of the price of a store-bought wreath, I created a homemade Christmas wreath from scratch that my family and I can enjoy for years. I hope with these easy tips, you can do the same!
Here are more holiday projects you might love:
Pin it for later!

Don’t forget to see what my blogging besties have created as part of our Handmade Christmas Decor Blog Hop! These ladies just ooze creativity and talent!

Wishing you a Merry Christmas and a Happy New Year!

How to Make a Christmas Wreath from Scratch
Equipment
Supplies
- Pine wreath (24 inches or larger)
- Ornaments – Champagne (silver or gold, in various sizes (matte or metallic))
- Floral stems – Gold/glittery leaves (ferns or other wispy stems)
- Greenery – Frosted pine needle or similar
- Berries – White or metallic color
- Floral wire or glue
- Fishing wire or pipe cleaner to hang
Instructions
- Open up your wreath in every direction (inward, outward, forward). Then, attach fishing wire to the frame to hang your wreath later.
- Add any base greenery/texture elements first. Secure these pieces to the wreath frame with floral wire.
- Separate any large accent berries/stems by pulling them apart or using wire cutters. Now you have double the accents!
- Pair small accents with larger greenery stems. Attach accents with floral wire once you have secured all of the main greenery pieces.


Your wreath is beautiful, Crissy and thanks so much for the great tips! I’ve been recycling old wreaths this year that are looking rather tired and love with just a few new embellishments how they look brand new again. Pinned
Thank you, Marie! I’m in the same boat this year looking for ways to refresh a few wreaths. It’s funny how every year I notice something new about them that I want to change. I can’t wait to see what you come up with for your wreaths!
Such a pretty wreath will share on my facebook and saw this from Christmas Cuties, what a great group.
Maria
Hi Maria. Thanks so much! I’m glad you liked it, and I appreciate you sharing the post!
Beautiful wreaths!!! Beautiful! You have a real knack for this and I’m glad I found you. I’ll be trying out your directions this weekend. #fingerscrossed ~~~ Peace over perfection…. Rioght? XOXO ~~
Thanks for stopping by, Susie! Oh, I hope you do try to make a wreath this weekend. It’s so much fun! Yes, peace over perfection is my new motto. Ha! 😉
Crissy, your wreath is gorgeous! I’ve not made a wreath in years but am going to try to craft one after the holidays. I need a winter wreath and finding one is difficult so I’ve decided to make one. I like your tutorial and hopefully will be able to use your instructions and come up with something decent…it won’t be beautiful, but maybe it will be passable. 🙂 Have a great one!
Oh, Benita, you’re being modest! I’ve seen your work, and I know anything you make will be beautiful. Something I tell myself is that it just has to be good enough, and I’ll add and modify the more I look at it. Thanks so much for stopping by and leaving kind words. ❤️
Crissy, you are amazing!!! I love, love, love your wreath! So gorgeously elegant!!
You’re so kind, Spela! Thank you! I really enjoyed making it. ❤️
Love the wreath! thanks for the tips on designing my own, we also buy a lot of our decorations from the stores you suggest.
You’re so kind, Susan. Thank you for visiting, and happy decorating!
Such a beautiful wreath!!! And sore on getting things from Hobby Lobby on clearance last year. I went too late and wasn’t able to get much
>> Christene
Keys to Inspiration
Thank you, Christene. Most of the time, I have to dig for goodies post season because they run out!
So gorgeous! I love metallics and golds! This is my kinda wreath!
Carrie
curlycraftymom.com
Thanks, Carrie! I’m fond of the metallics, too. Of course, I love reds and greens also. Oh, I just love Christmas everything!
Crissy this is absolutely stunning! It looks amazing there hung on the curio as well! What a beautiful Christmas project!
Thanks, Marissa! It was fun to put together. I might’ve left a trail of glitter behind me, but what’s Christmas without glitter? 😄
Oh, you guys have such great access to craft stores, I am always so jealous of the trips to Hobby Lobby, or even Target! Great project, such a pretty wreath. So loving the gold this Christmas and it pairs so beautifully with the pine green. Great project Chrissy!
Thanks, Laura, and sorry to tempt you! I tried to include some similar items that you can buy online to replicate the look. It can be overwhelming with so many options out there, though!
Your wreath turned out beautiful, Crissy! I love the different texture that the pine needles offer, and the added embellishments finish it off perfectly. It’s been fun to be on the blog hop with you and the other ladies.
Thanks, Kim! I love experimenting with different designs. It certainly has been fun to participate with you and everyone else! Looking forward to the next time!
Your wreath is beautiful! That’s great you got your supplies on discount. I’ve never actually made a traditional evergreen wreath – the supplies can be pricey!
Thanks, Lauren! Hobby Lobby has the same size wreath on sale right now if you’re interested. I think it’s only $5 or so on discount. You can probably order online if you don’t live near a store.
Wow… just gorgeous, Crissy! And your tutorial is super helpful! Beautiful knock-off wreaths!
Thanks, Julie! I’m glad you stopped by, and I appreciate the kind words, my friend. ❤️
Crissy, your wreaths are gorgeous. Knock off or not I like yours better. The colors and textures are classic and timeless. Perfect all the way around! So happy to be on the blog hop with you!
Michelle, thank you so much. I’m flattered! I really enjoyed making these. I’m also thrilled to be hopping with you. It’s been so fun to meet you and the other ladies. I feel blessed by the friendships. 😊
Just gorgeous! I just may need to overhaul my Christmas decor after seeing this. The color palette would be perfect for my house.
Aww, that’s a big compliment. Thanks! I love using traditional reds and golds in some rooms, but these metallics work well in this room. I hope you have fun overhauling! 😉
This is exactly my dilemma. I can’t decide between my traditional red/green decor and something that suits the house! I want it all! P.S. You get major bonus points for using correct gender and number agreement with “paparazza.” You never cease to impress!
I feel ya. I love it all, too, so I just experiment with different things. I’ll admit I had to look up singular and male/female for paparazza! 😂
I’m still impressed!! 😄
Ha ha ha! ☺️