How to Decoupage on Wood with Perfect Results
Want to learn how to decoupage on wood with perfect results every time? This tutorial shares expert tips for using Mod Podge on wood with a real-life example.
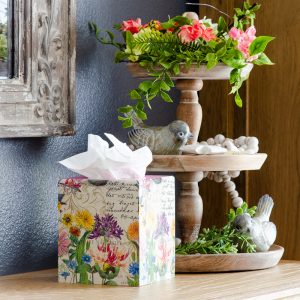
Join me as I show you how to decorate a plain wooden tissue box using decoupage! Are you feeling fancy yet?

This post contains affiliate links, and I will be compensated if you make a purchase after clicking on my links. For more information, please see my disclosures.
How to Decoupage on Wood – Video Tutorial
For a quick-start guide to a simple decoupage project, click the video below or visit my full YouTube tutorial.
What does it mean to “decoupage” on wood?
Decoupage originates from the French word “decouper,” which means “to cut out.” In the 1600s, French artists began applying pictures to furniture as a decorative embellishment.
Today, you’ll still find a beautiful furniture piece or table top decorated with a decoupage technique. It’s one of the easiest ways to personalize a raw piece of wood or upcycle a finished piece. Plus, you can find almost all supplies at your local craft store.
Decoupage is not just for wood, as you’ll see in my other decoupage projects, but the preparation steps differ due to the texture and grain of the surface.
Decoupaging on Wood vs. Other Surfaces
")
When using a decoupage medium (a.k.a. glue) for wood crafts, there are a few notes to keep in mind.
- Sanding: Before decoupaging, you must lightly sand the surface to make it as smooth as possible and prevent air bubbles. For larger objects like a piece of furniture, use a palm grip sander to strip the finish. Otherwise, say au revoir to your decoupage masterpiece, as it will chip away over time.
- Painting: Most crafters paint their wooden pieces before applying any decoupage medium like Mod Podge. I recommend using an acrylic paint or primer to coat the surface.
Whew, now that we got that out of the way, let’s talk about picking out the decorative part of your decoupage project.
Decoupage Materials for Wooden Surfaces

In my video tutorial and written instructions below, I demonstrate how to decoupage with napkins and scrapbook paper. If that’s not your cup of tea, try these other lovely options.
- Fabrics
- Specialty decoupage paper
- Tissue paper
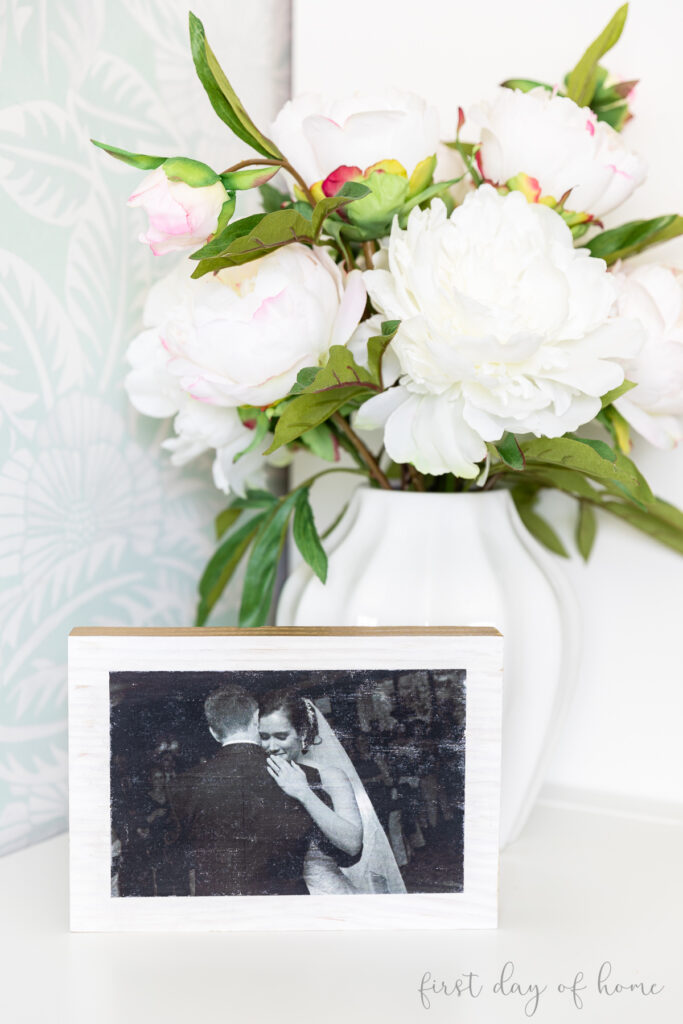
- Laser printed photos (not inkjet, as these will bleed)
- Wrapping paper
- Newspaper
- Sheet music
- Pressed flower petals
Types of Decoupage Glue for Use on Wood
In most of my tutorials, I stick with matte Mod Podge as my decoupage glue because I like its versatility. However, there is a decoupage medium for every man, woman, and child out there.
- Matte: Flat finish, perfect for decoupaging on wood with napkins or scrapbook paper
- Hard coat or Furniture: Ideal for furniture projects or heavily used items that require a strong and durable finish
- Satin: Similar to matte finish, great option for furniture projects to get the “painted” effect
- Glossy: Shiny finish, good option for photo transfer decoupage
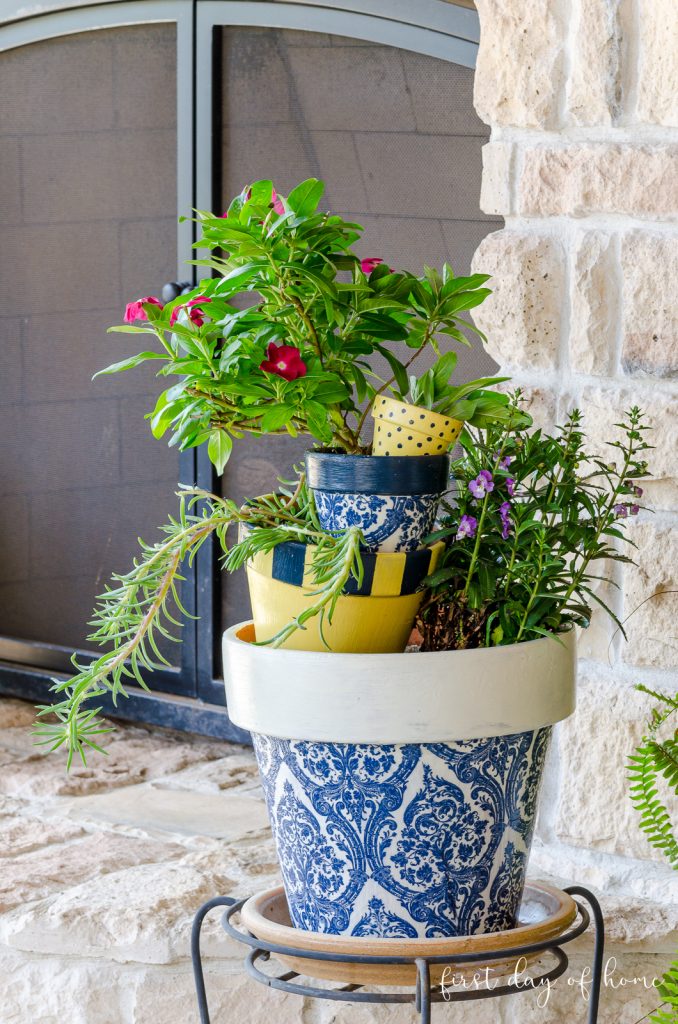
- Outdoor: Perfect for any project exposed to the elements (think clay pots)
- Dishwasher safe: Allows objects (like glassware) to survive a wash in the top rack of a dishwasher (*not intended for surfaces near food/mouth)
There are a number of other varieties of sparkle, shine and colors that I will cover in a future post. In the tutorial below, I keep it simple with Matte Mod Podge.
Tutorial: DIY Wooden Tissue Box

Supplies
- Wooden tissue box cover
- Acrylic paint
- Sandpaper (220 or 320 grit)
- Bristle brush or foam paint brush
- Mod Podge
- Pretty paper, napkins, tissue paper or fabric of your choice
- Clear plastic food wrap
- Varnish or clear acrylic sealer (optional)
Step 1. Prepare wood for decoupage
Use light-to-medium grit sandpaper to smooth the wooden surface. Contrary to popular belief, it’s better to use a clean, dry cloth to wipe the wood after sanding. (A damp cloth will sometimes cause the wood grain to rise or splinter.)
For heavy-duty projects, I recommend using a loosely woven cheesecloth (tack cloth) after sanding.
After sanding, paint the wood in the direction of the grain for best results.
Step 2. Cut decoupage material to size
Before or after cutting the napkins, separate the plies to reveal only the top layer. (Most napkins have three layers, or plies.) You can sand off any long edges after applying Mod Podge, since the paper is thin enough.
For fabric and thicker paper, cut squares slightly smaller than surface area, since thicker materials are harder to sand off later.
Step 3. Apply Mod Podge and decoupage material

Apply a thin layer of Mod Podge to the wood using a foam brush or bristle brush.
For napkins, gently lay a square down starting in one corner and working your way toward the opposite corner. Use plastic food wrap (see video) to smooth out the napkin and prevent wrinkles.
For scrapbook paper, apply a more generous coat to the wood and spread some glue to the back of the paper before applying.
You may also choose to use a brayer and/or squeegee to press out air bubbles on larger wood items.

Step 4. Apply additional coats of Mod Podge and optional sealer
Apply up to three coats of Mod Podge on all sides of the tissue box cover, waiting 15-20 minutes between coats. Once the box is completely dry, you may choose to use a fine-grit sandpaper with water to “wet sand” (smooth) the surface.
For a more protective topcoat, apply a sealer. (If using a spray sealer, always do this in a well-ventilated area, preferably outdoors.)

10 Tips for Perfect Results on Wood Every Time
- Don’t skip the sanding. While it’s tempting to take some shortcuts, you’ll thank yourself for having a smooth surface to decoupage.
- Throw out that old bottle of Mod Podge. If you see lumps, clumps or bumps, that could be a sign you need a new bottle.
- Don’t use brushes that may have loose bristles. ’nuff said.
- Quick and easy brush strokes in the same direction prevent wrinkles and tearing.
- Hands off! Don’t use your bare hands to smooth Mod Podge onto thin paper because this may cause tearing. Use clear plastic storage wrap to help smooth the paper.
- Apply more than one coat. Chances are you could have missed some spots, and this extends the life of your project.
- Wait for it! If you don’t wait for each coat to dry before applying another, you might tear the paper.
- You can “wet sand” projects with thicker coats for a smooth finish and then use steel wool to polish.
- Let your project cure for 1-2 days before use.
- For the most durable finish, use a clear sealer.
What other materials can you decoupage besides wood?
If you’re a decoupage beginner, you may not realize that you can decoupage just about any surface!
Here are just a few examples:
- Terracotta flower pots
- Glass (wine bottles, vases, mirrors)
- Metal (tins, watering cans, frames)
- Papier-mâché
- Fabric
- Hard foam
- Cardboard (puzzles, signs)
- Cardstock
- Scrapbooks/albums
- Canvas
- Magnets
- Candles
- Foam pumpkins
You get the picture. There are so many possibilities for decorating an object with decoupage!
More Mod Podge Crafts!
If you’re all about decoupage crafts now, be sure to check out my other tutorials. This is part of a series of posts covering the art of decorating using decoupage techniques.

How to Decoupage Wooden Objects: A Complete Guide
Equipment
Supplies
- Wooden tissue box cover or wood furniture piece
- Acrylic paint
- Sandpaper (220 or 320 grit)
- Mod Podge
- Decoupage paper or napkins
- Plastic food wrap
- Clear acrylic sealer (Optional)
Instructions
- Use light to medium sandpaper to smooth the wooden surface. Clean with a dry cloth.
- Paint the wood with acrylic paint in the direction of the grain.
- Cut napkins or decoupage medium to size. For a tissue box cover, cut 4 equal squares to cover each side and a top square with an oval cut out for the tissue opening.
- Apply a thin layer of Mod Podge using a foam or bristle brush.
- Gently lay the paper down on the wet surface. Use plastic wrap to press the paper onto the wood and prevent the Mod Podge from sticking to your hands.
- Apply additional coats of Mod Podge on top of the paper to seal, waiting 15-20 minutes between coats.
- For a more protective topcoat, apply a clear spray acrylic sealer.
Hi! I have a piece of unfinished wood, 1/4” thick and I found a greeting card with a wild flower design on it. Can I paint it after sanding and apply the card design to the wood without it sliding off using matte mod podge?
Also, can the card be torn around the design instead of cutting with scissors for a more rough edge? I know this might be challenging, but I’m up for it!!
Hi Kathy! You could definitely do this project with all of the steps you mention. Just make sure you wait for the paint to dry before applying Mod Podge. You can add a top coat of Mod Podge or skip it depending on how you’ll use your finished design. I think the torn edges could look really pretty. One technique you might try is dipping a paint brush in water and dampening the edges of the card to tear off the pieces. This could help you control the torn edge a bit as long as you don’t think it will damage the card. Maybe test it first. Good luck, and have fun!
Hello, can I use rice paper and if so how do I hide or blend in the edges of the paper?
Thanks,
Angie
Hi Angie. My apologies for the late reply. Yes, you can definitely use rice paper. I would try wetting the edges a bit to loosen the fibers and gently tear off the pieces you don’t need. Then you can blend the paper around the edges of your object. You can also gently sand the edges with fine-grit sandpaper. I hope this helps!
Can you use craft paint on copy paper or tissue paper and then put it on wood? My project can’t be sanded completely smooth (it is a big palm seed pod or some call it a paddle). I have painted it with white flat acrylic paint and want to add designs to it and then give it a clear coat. Any help would be appreciated. I have never decoupaged before.
Hi Cyndy! You could try painting on tissue paper if there’s a specific design you want to paint. You could also print a design onto tissue paper by gluing the edges of the tissue paper onto a piece of printer paper and printing as normal on the highest quality setting. Then you’ve essentially created your own decoupage paper. Another option is to find a pretty napkin you like and cut out designs from that. Then you could decoupage those images onto the paddle. Perhaps it’s easier just to paint the pod itself, too. For a sealer, you could use Mod Podge or Krylon clear acrylic spray. I hope this helps! -Crissy
I love the look of DECOPODGE wood!
Thanks, Linda! I do too.
Beautiful project. I was just wondering if there is a reason you used regular paper instead of the napkin on top of the box. Really want to try making one myself. Thanks for your ideas.
Karen
Hi Karen! Thanks so much. There’s no particular reason I chose a different kind of paper other than to illustrate the difference using two different thicknesses of paper. I think it would look even prettier with the napkin on top, so you can easily make that change with yours. Best of luck! You can tag me on Instagram if you’d like to share your finished product, and I will showcase it there. (@firstdayofhome) Thanks, Crissy
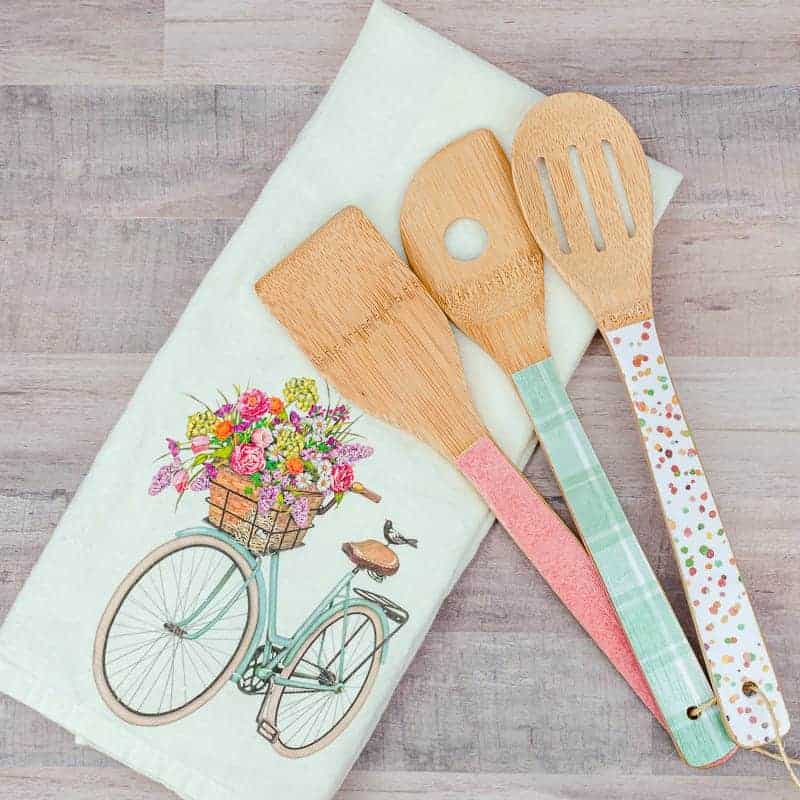
I know that it is not advisable to use inkjet printers because of the bleeding, however I’ve read that you can spray with something after printing and before Mod Podging to keep the images from bleeding, but every article I’m finding is like several years old and links are broken on many of them. Do you know if it’s possible to use my ink jet printer since I’m cheap and haven’t resorted to buying a laser printer? Thank you so much! (Those spoons are ADORABLE btw!)
Hi Tracy! Yes, you should be able to spray the inkjet printed image with an acrylic sealer before using Mod Podge. I would spray both sides with very light coats a few times (in a well-ventilated area, of course). One reviewer said this product worked well to prevent inkjet prints from smearing: https://amzn.to/3pn4sZe. I use a similar sealer for other craft projects, by the way. It adds a nice protective coat to finish things off. Glad you like the spoons! -Crissy
Hi!
I’m in the UK and just wondering what kind of sealer you might recommend to use after Mod Podge? How long after using Mod Podge do I need to wait before applying sealer? I’m a bit confused by the instructions on the back of the glue! 4 weeks?!
Thank you!
Hi Lucy! I would wait about 30 minutes to 1 hour for the top coats of Mod Podge to try before applying a spray sealer. This is the acrylic sealer I use: https://amzn.to/3jHVDIu. I have a short video tutorial with all the steps if you’d like to watch here: https://youtu.be/5OKvFKqjugg. Perhaps it would help clarify the process. I would bet your sealer is giving directions for other types of projects if it’s saying to wait 4 weeks. That sounds very long based on my experience. Best of luck to you! Feel free to write back with any more questions. -Crissy
I am using a gloss finish mod podge to glue, coat an invitation. I tried several “practice” pieces before doing the good one. but I noticed that the mod podge is crinkling as it sets. it has been 14 days. looked really good and shiny when i was finished, but i don’t understand what it is doing. I sanded wood, sealed with a spray acrylic sealer, used glossy mod podge to attach to wood, then coated with 3 coats of the same mod podge. sanded with 400 grit paper, and added 2 more coats of mod podge alternating sanding. it was really smooth when i was done, then i did one coat of the spray acrylic sealer (which is also glossy). now it is crinkling (not the paper that is glued to the wood, but the coating. it looks like stress cracks. or maybe more like someone took their fingernail and ran it across the piece. any suggestions? can I fix that, or do I have to start over?
Hi Andrea! Sorry to hear you’re having trouble. There are a few things that could be causing the crinkling. Did you spray acrylic sealer on the wood before using Mod Podge? I don’t normally do that. I typically use Matte Mod Podge to glue my paper onto wood, then I wait for it to completely dry (about 20-30 minutes) before doing a top coat of Matte Mod Podge or Glossy Mod Podge. If you don’t wait long enough for each coat to dry, that might cause crinkling. My tissue box has held up well. You can see the grains of the wood through the napkin, but it doesn’t look crinkled. Have you checked out the video tutorial just to see if there’s something different you could try? Not sure if seeing me go through the steps might help. https://youtu.be/5OKvFKqjugg
Such an awesome blog! All the information provided by you is really very helpful for all. By using tack cloth we can keep our project dust-free, it will make their work easier. Keep Posting! Keep Sharing!
Thanks for the tip!
Do you have to paint the wood first? Is there another way to prep?
Hello! If you don’t want to paint the wood, you can sand it and wipe it clean with a dry cloth before applying the decoupage medium. If you plan to use a very thin paper like tissue paper or napkin, you just run the risk of the wood showing through. That might be the effect you want, however, depending on the project. I hope that answered your question. Good luck!
Hello Crissy,
Thank you so much for getting back to me, I really appreciate it. I have looked at so many blogs to get info that my head is spinning.
I have just started to venture into the world of decoupage.
I have a piece of older wood that has varnish on it and I’m thinking of tissue paper decoupage. I don’t mind if the wood shows through, I think I might like that.
In your opinion, do you think I could deco over it “without” sanding? Would you foresee any problems I may have? I will definitely be sure it’s clean and with no residue.
Thanks again for taking the time with me, you’re the best!!!
Hi Sandy. My pleasure! The one issue you might face if you don’t sand is that the paper will look wrinkled after you apply it. (That’s not always a bad thing if you want a more rustic look.) I’m also wondering if the tissue paper might be too thin for your project, depending on how much you want the paper design to show. It may turn out looking more like the wood itself is lightly painted with the pattern. That might be the look you’re going for, but I wanted to make sure.
I’m so curious to see your design now! Don’t be intimidated. Have fun with it and do some test runs on wood scraps or other objects if you need to. Please tag me if you have a photo to share. I’m @firstdayofhome on Instagram or Pinterest. Best wishes!
Hello, I am writing to you from Andalusia, Spain! I love your blog! I would like to congratulate you! My English is not very good but I will try to congratulate you for your blog!
Manuela
Buenas tardes, Manuela! Gracias por el mensaje! Hablas inglés muy bien, pero voy a contestar en español para practicar el idioma, vale? (No hablo español perfectamente bien, pero me encanta tratar.) Estoy feliz que te gusta mi blog. Espero que vaya a visitar mi sitio otra vez en el futuro. He visitado a tu región de España (Sevilla y Granada) en el año 2000. Es una región muy hermosa. Thanks for stopping by, and please come again! -Crissy
Hi Crissy, I absolutely love to decoupage and this tissue box is darling. What cute gifts they would make.
Pinned and following!
Hi Rachelle, That is so kind. I’m glad you liked it, especially as someone who knows her way around decoupage! Thanks for following!
This is so pretty! Great idea 🙂
Thanks so much, Sarah! I appreciate you stopping by. 🙂
This is so pretty. The tutorial is great, and I’m going to try to do this. I’m featuring this great post at Thursday Favorite Things tomorrow!
Thanks so much, Pam! I’m so excited to be featured on Thursday Favorite Things! I can’t wait to see how your decoupage tissue box turns out, too.
This is so pretty! I would love for you to share this post with us at Thursday Favorite Things! Hope to see you at the party!
https://followtheyellowbrickhome.com/spring-has-sprung-at-thursday-favorite-things/
Thank you so much, Amber! I thought I had already linked up, so thank you for the reminder! I always love your styling and especially the musical touches you incorporate. 🙂
Such pretty decoration for Easter/Spring! This will be one of my features this afternoon at the Snickerdoodle link party!
Thank you so much, Roseann! I’m thrilled to be one of your features!
Your decoupaged tissue box is lovely and your tutorial for the best way to decoupage is great! Thanks for partying with us at Snickerdoodle. I’ll be featuring this at tomorrow’s party. Hope you’ll join us again for this week’s party.
Thank you so much, Beverly! I’m honored to be featured at Snickerdoodle. I can’t wait to see all the other great projects you’ll be showcasing. 🙂
Hi! I love your sweet project! I totally want to make a tissue box cover now!
Aww, thank you, my friend! It’s so easy to do, and I’m amazed at the results with Mod Podge. It looks like it’s painted on, especially if you use a sealer as a top coat.
What a lovely project! Thank you for sharing. It will be fun to make with my granddaughter. On another note, may I ask where you bought the wooden stand right next to the tissue box?
Hi Lina! Thanks so much for the compliment. I’m thrilled that you’ll get to make this with your granddaughter. Here is the link to the tiered stand. I will add it to the post, thanks to your question! Tiered Tray
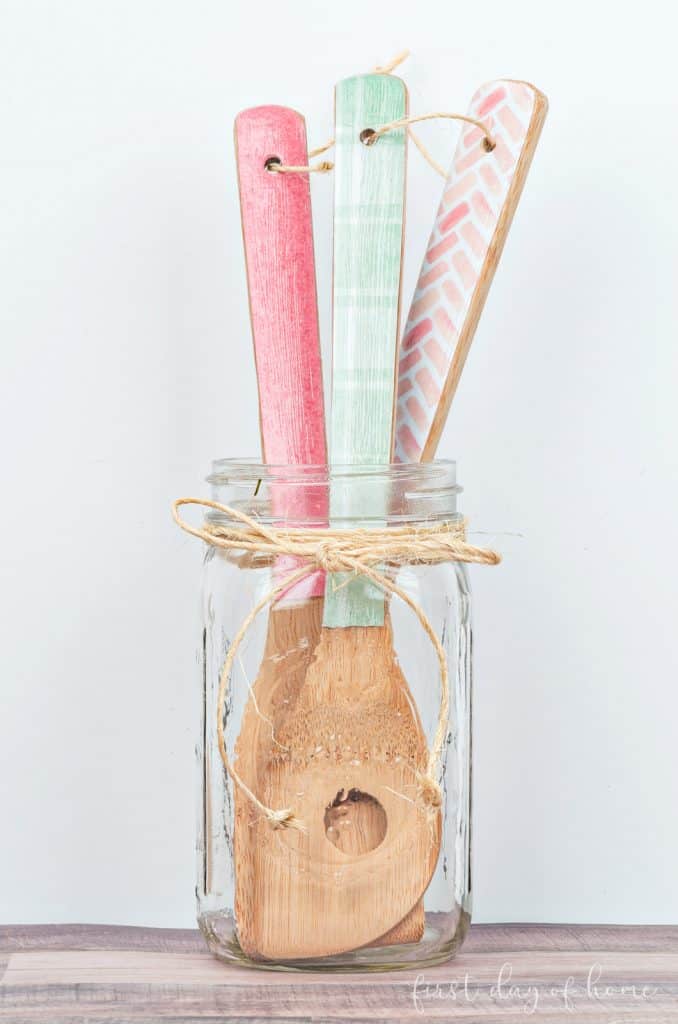
I love those spoons you did. Items like that would make a perfect house watming gift.
Thank you, Sonya! I’m hoping to do more projects like this in the future.
This is pretty! Thanks for the tutorial 🙂
>> Christene
Keys to Inspiration
Thanks, Christene!
These so such cute projects, I have tones of ideas, thanks for the tutorial.
Thank you, Sue! I’m thrilled that you walked away with some new ideas.
Crissy, the tissue box looks like it came from a upscale boutique. So lovely! Pinning!
That’s such a sweet compliment, Michelle. Thank you! I appreciate you pinning, too!
Great tips! I picked up a few pointers for my furniture projects!
Thanks, Jenn! I’m so glad you found some tips that were useful. I’m learning so much from you, too!
Oh my – you are an expert at decoupage! Pinned and shared
Thanks, my friend! Such a sweet compliment. I’ve tried to master it as much as possible, but I’m still not done trying!