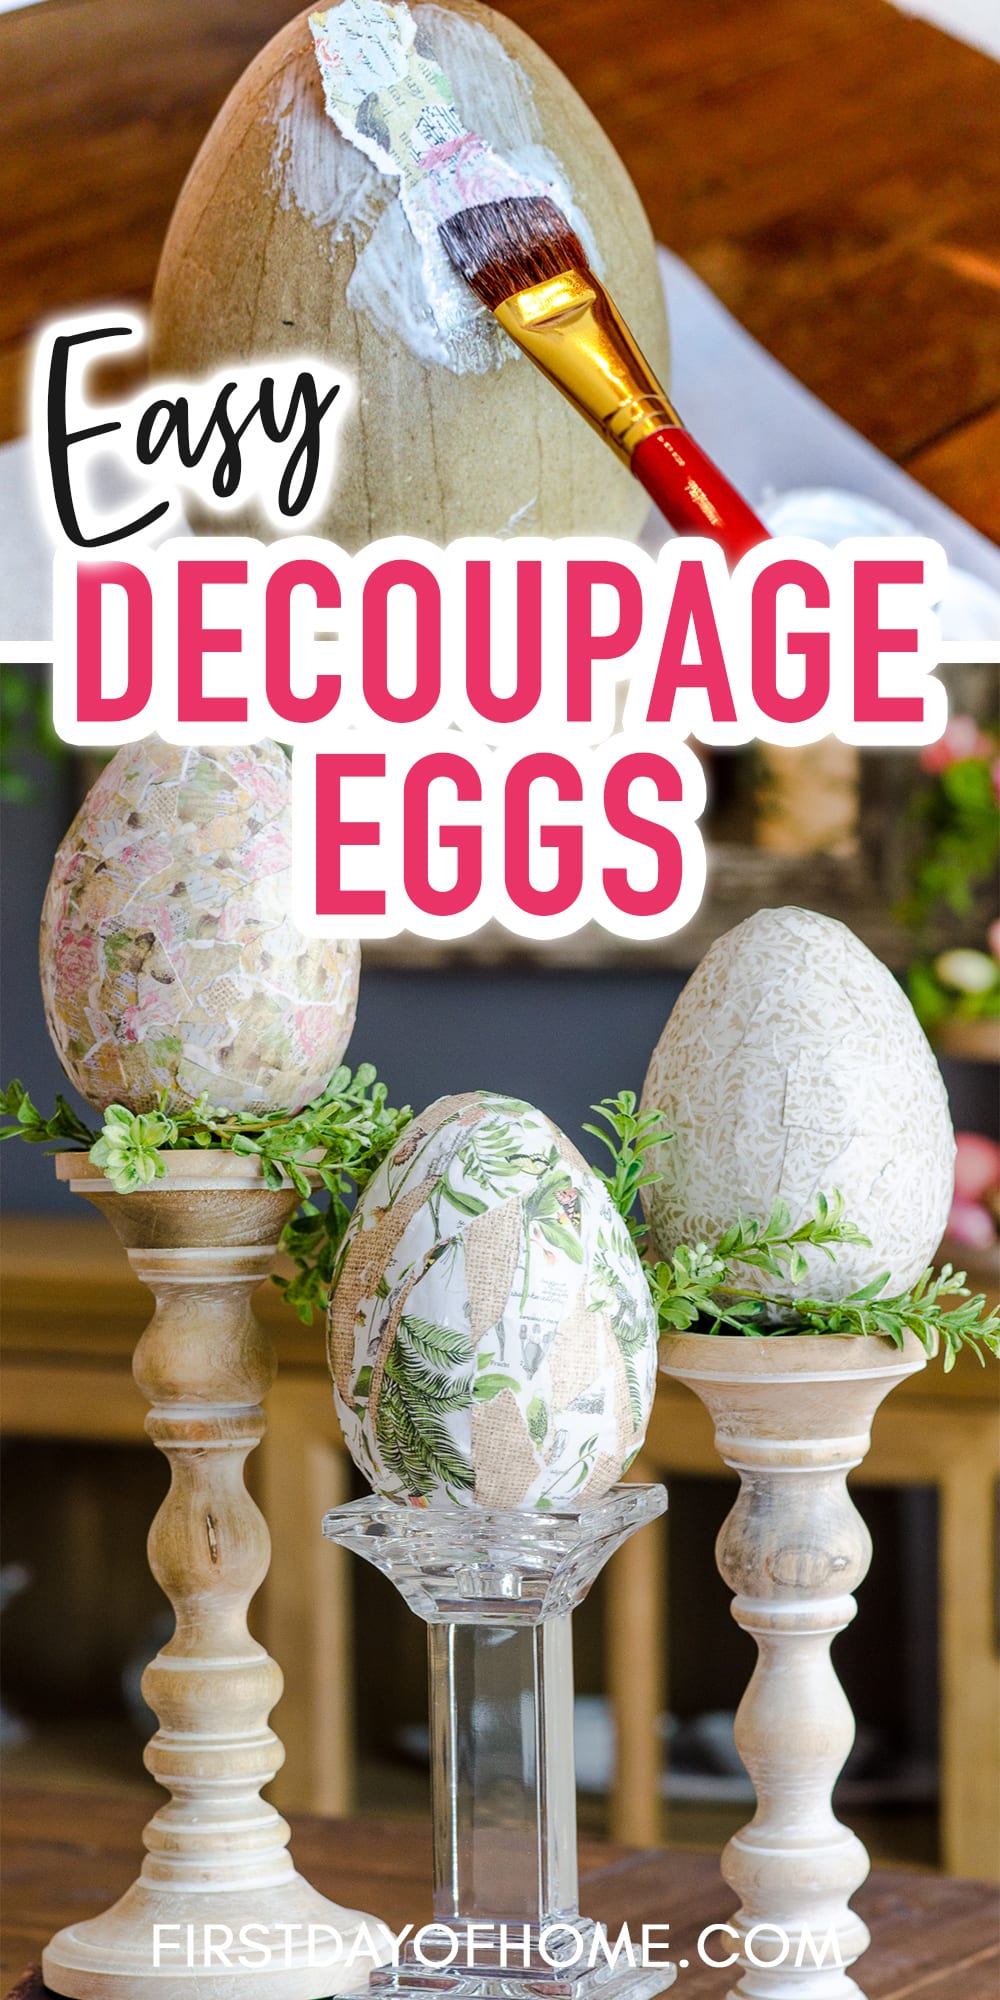
Easy DIY Decoupage Eggs Tutorial
If you’re looking for a quick and easy Easter craft project that won’t break the bank, say hello to DIY decoupage eggs! These beauties require few supplies and can be a fun activity for the whole family, especially for kids.

This post contains affiliate links, and I will be compensated if you make a purchase after clicking on my links. For more information, please see my disclosures.
What material is best for decoupage eggs?
You can decoupage with scrapbook paper, photos, paper napkins, book pages, sheet music, flower petals, or any other thin paper-like material. If you’re new to decoupage, check out my guide to decoupage for more details.

Feel free to substitute napkins, wrapping paper, or tissue paper in the tutorial below. You can see what napkins would look like in my other Easter egg decoupage tutorial using napkins. Just make sure you remove all plies of the napkin except the pattern you wish to apply. The other steps will remain the same.
Can I admit I’m a scrapbook paper hoarder? That’s why you’ll find many of my tutorials involve that type of paper.
Can you use real eggs for decoupage?
Yes, you can decoupage real eggs. First, empty the egg without breaking its shell. Then you can follow the steps below. Just keep in mind you will want smaller pieces of paper for your egg, or you can a thinner paper medium.
White napkins with a pattern work well to give the eggs the look of watercolor Easter eggs. You can even use these blue chinoiserie napkins to make your eggs look more upscale.
Tutorial: How to Make Decoupage Easter Eggs

Supplies
- Paper Mâché Eggs (or substitute styrofoam eggs)
- Scrapbooking Paper
- Mod Podge
- Paint brush or decoupage sponge
Note: For a 6-inch egg, you will use 1-2 sheets of 8.5 x 11-inch scrapbook paper.

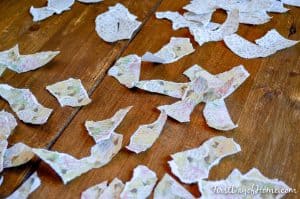
Step 1: Tear paper into small pieces
Since I already had egg forms to start with, I could move straight into decoupage. I started by tearing my patterned scrapbook paper into strips of various sizes.

You’ll want to create pieces that are small enough to mold to the egg’s contours but large enough to display your decoupage pattern. It’s like putting high-rise skinny jeans on your egg… form-fitting but full coverage.
My paper pieces were generally 2 to 2.5″ long. If in doubt, start with bigger pieces. You can always downsize later if needed.
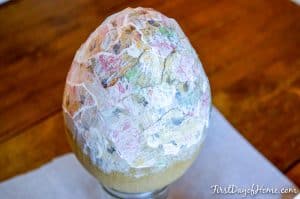
Step 2: Apply Mod Podge and glue pieces onto the egg
There’s no mystery to applying the Mod Podge. My only advice is to apply the glue generously both under and over your strips of paper.

I used the Matte finish, but Mod Podge sells many other varieties like Paper, Glitter or Sparkle.
Tips
When making a decoupage egg, place it in an open mason jar while you work. Then apply the Mod Podge glue to the surface of the egg in sections. Let one area dry before continuing.

Be sure to overlap your pieces well, but you can always fill in any gaps after your first layer dries.

Step 3: Seal the eggs with a top coat of Mod Podge
After you’ve covered 2/3 of the egg, wait 10-20 minutes for the Mod Podge to dry. Patience is a virtue with any decoupage project. A little time can go a long way in making sure the layers are set and won’t become sticky.

I learned the hard way that if the glue hasn’t dried completely, it’s easy to rip off some of the paper with your fingertips. If that happens to you, have no fear. Take a coffee break and patch up the decoupage egg once the glue dries.
After the egg dries completely (after about 20 minutes), apply a top coat of Mod Podge.
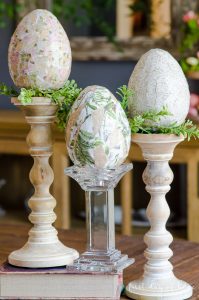
Displaying Decorative Eggs for Easter Decor
The last step is simply finding your favorite way to display your newly decorated eggs. They make the perfect addition to an Easter tablescape, for one.
You can also dress up your eggs with ribbon, lace, feathers, or bling. I like to put them on candlesticks surrounded by Easter decor or sit them upon stacked books.

For a fun way to involve the kids, try using comic book paper or their own colorful drawings as decoupage material. They will love using their creativity for this Easter egg craft.
I look forward to hearing about your decoupage egg-ventures soon! (Sorry, I couldn’t resist.)
For more DIY Easter decor, check out my post on how to make bunny napkin rings. These precious bunnies will make any feast more enjoyable, and they are SO easy to make with my free file downloads!
Shop The Post

Pin it for later!
Below are a few more spring posts you might enjoy. You can also visit my full library of decoupage projects for more inspiration.

How to Make Decoupage Eggs
Equipment
Instructions
- Tear a sheet of scrapbook paper into small strips about 2-2.5 inches long.

- Apply Mod Podge to the egg in small areas, and begin applying the paper strips.
- Overlap the strips slightly to form a mosaic pattern until about 2/3 of the egg is covered. Let the egg dry slightly.
- After 10-20 minutes, continue applying the remaining strips of paper with Mod Podge. Let the egg dry completely (about 20 minutes) before applying a top coat of Mod Podge, if desired. Allow the egg to dry for 1 hour before using it indoors as decor.


These turned out so pretty, Crissy. And I love how simple they are to make. I’ve always wanted to try them…maybe this will be the year I get around to making it happen!
I also wanted to let you know I plan to share a photo and link to your post in my weekly recap on Sunday. I think my readers will really enjoy your DIY project.
Hugs!
Thanks so much, Jen! You should definitely give them a try. You’re so kind to include them in your weekly recap. I’ll head over to take a look! Hugs, Crissy
What a great idea! I’m a scrapbook paper hoarder, too even though I no longer scrapbook. I also have a ton of plastic Easter eggs! I’ll have to try this. So cute!!
Thanks so much, Michelle! Somehow, I can never resist a good scrapbook deal, and then I get home and realize I already have way too much! This is a good way to use it up. I hope you have fun with it!
I am so happy you shared this beautiful eggs at TFT. I am happy to feature you this week.
I am loving all your sping ideas!
Aww, thanks so much, Amber! I’m always thrilled to be featured on your beautiful blog. I appreciate all you do! Hugs, Crissy
Thank you for sharing this beautiful Easter craft. You will be the featured post on this weeks Friday at the Fire Station link up!
Thank YOU, Jen. I’m thrilled to be featured on your site! 🙂
I love the eggs you created Crissy! The green and white botanical is my fav. Pinning!!
Thanks, Michelle! I wish I could say that I don’t have favorites, but that’s my favorite one, too! 😉 I promise I love all my real kids the same, though.
LOVE these! So pretty, and I love them on candle holders! 😉 Pinning! (be sure to share on HG)
Thanks, dear friend! I will link them up!
So pretty, Crissy!!
Thank you, Spela! I appreciate you stopping by to leave a comment. 🙂
I love this sweet craft! Very pretty!
Thanks, Lauren! I love seeing your creativity, too, and can’t wait to check out all of your spring decor!
Love your ideas had a project in mind just didn! know where to start. Thank you
I’m glad I was able to help, Lillian! Thanks for stopping by, and let me know if you have any questions.