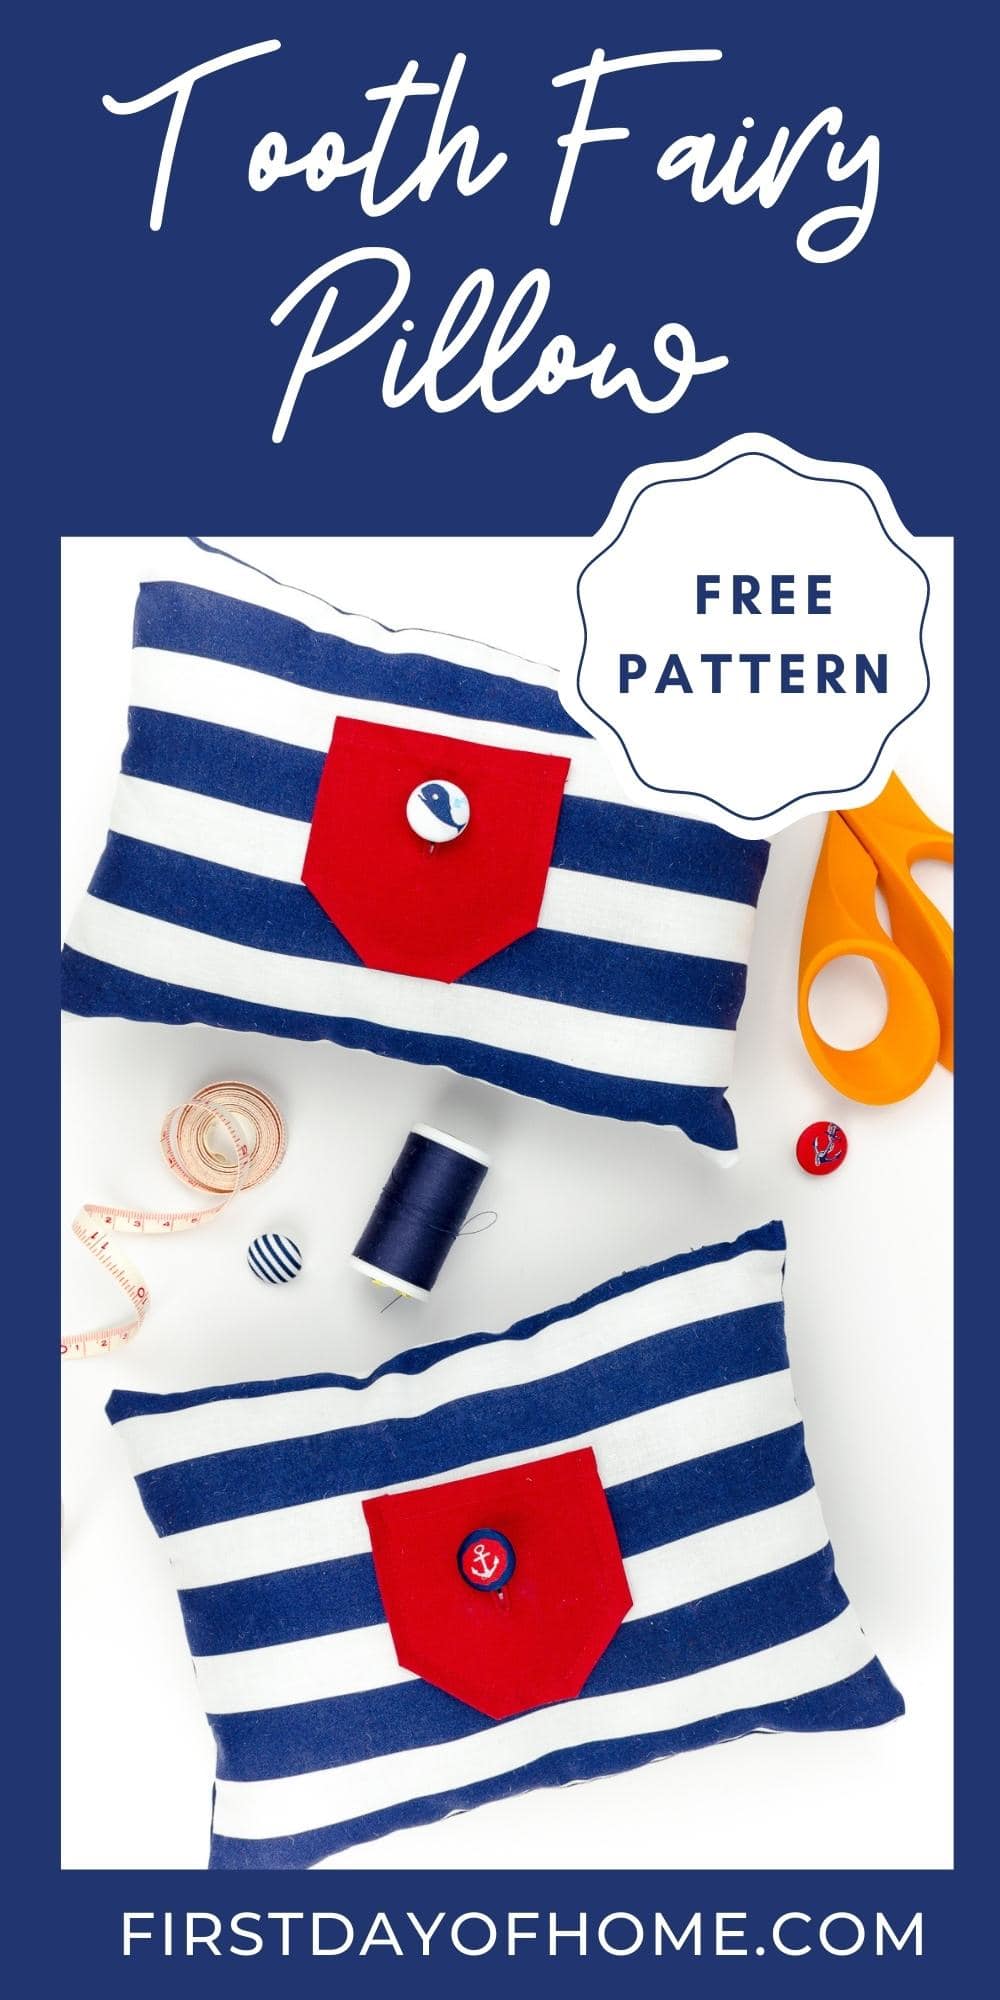
How to Sew an Easy Tooth Fairy Pillow (Free Pattern)
If you’ve followed me for any period of time, you know I have twin boys who are the apples of my eyes. As they prepared to enter Kindergarten, I decided it was time to share a post on how to sew an easy tooth fairy pillow. For all the parents of soon-to-be toothless kiddos, I’m offering a free sewing pattern for a tooth fairy pillow to help your kids get excited about cashing in on their pearly whites.

This post contains affiliate links, and I will be compensated if you make a purchase after clicking on my links. For more information, please see my disclosures.
Beginner Sewing Skills Needed
To begin this tutorial, you’ll only need a few basic sewing skills. I’ll gladly teach you the rest! Over the course of the next few weeks, I’ll continue to post video tutorials with beginner sewing tips and tricks. Be sure to catch all of these tutorials by subscribing to my YouTube channel!
- Straight stitch
- Invisible stitch
- Button hole stitching (optional)
- Hand sewing (to attach buttons and close pillow)
Sewing Supplies for Tooth Fairy Pillow
I picked up my sewing supplies on a whim before Easter, though I already had quite a stash of buttons and scrap fabric at home. This is a GREAT project for scrap fabric or fat quarters!
(Truth be told, I actually had the nautical buttons before I had the fabric. My little boy spotted them at Hobby Lobby last year, and they’d been sitting in my sewing kit ever since!)

Fabric supplies, sewing pattern and notions:
- Pillow fabric – approx. 15 x 39 inches (38 x 48 cm) per pillow
- Pocket fabric – approx. 3.5 x 3.5 inches (9 x 9 cm)
- Tooth pocket pattern – get your free tooth fairy pillow pattern here
- Poly-Fil stuffing
- Buttons
I used simple cotton calico fabrics for this project, but you could also use minky or another material of your choice.
Sewing supplies:
- Thread
- Sewing machine – I use this model
- Needles for hand sewing/pinning
- Scissors
- Water soluble ink pen
Sewing machine settings and accessories:
Most sewing machines will come with the following accessories, so don’t fret. Keep in mind you also have the option to hand-sew some stitches or make a faux button on the pocket.
- Needle: 75/11 or 90/14 needle for medium-weight fabrics
- Buttonhole foot – used to make the hole for a button
- Button fitting foot – used to sew a flat two-to-four hole button
Note: In this tutorial, I used shank buttons that require hand sewing. For that reason, I didn’t end up using my button-fitting foot, but it’s a good option for standard, flat buttons.
How to Sew an Easy Tooth Fairy Pillow
Step 1: Cut tooth fairy pillow pattern
Main pillow
You’ll want to cut two squares of fabric with the dimensions of 7.5 x 9.5 inches (19 x 24 cm) each. This will become the front and back of your pillow.
I didn’t stress about lining up my striped pattern on the front and back, but you can do that if you like an extra challenge.
Note: These dimensions include a seam allowance of about 5/8 inches (1.5 cm). The seam allowance is the extra bit of border fabric that will stay on the inside of the pillow.
Tooth Pocket
You can download the pocket pattern in PDF format here. Feel free to get crazy designing your own pocket shape. You can make a square or rounded edge pocket if you like. I just happen to like my little jean-type pocket shape.
Step 2: Sew the top edge of the pocket and press the remaining edges
First, sew the top edge of the pocket to keep that seam in place.

Then, press around the remaining edges of the pocket with an iron. I find it useful to press my seams before I sew to prevent my hem from going haywire in my sewing machine.
Start by ironing the sides, and press the bottom of the pocket last.

Step 3: Create button hole in the pocket fabric (optional)
Follow your sewing machine’s directions for measuring your button in the button hole foot. Then, select the appropriate stitch on your machine to create the hole…not a straight stitch! Use a seam ripper to tear through the fabric after the machine has finished stitching.
I’ll soon post a video showing how to do this on my Brother machine. It’s so much easier than you think!
Another option is to sew your button onto the front of the pocket as a non-functional, decorative button.
Step 4: Attach button to pillow fabric and sew the pocket on
Measure the placement of your pocket on your pillow fabric, and pin the button in place on the underside of the pillow fabric. Sew the button on using a machine or by hand.

Once the button is in place, you can pin your pocket onto the pillow piece and sew around the edges with your machine.
Step 5: Sew pillow pieces together
Now, pin the two large pieces of fabric together, wrong-side out. Then, sew around all edges with a straight stitch, leaving a 2-inch (5-cm) opening on one side.

Before stuffing my pillow, I trim the corners to reduce bulk. Then, I use pinking shears to further trim the edges, though this is totally not necessary if you’re rushed for time. It just helps prevent fraying.
Step 6: Fill the pillow with poly-fil and sew closed
Turn the pillow right side out by pushing the fabric through the opening you left. I suggest pressing the edges of the pillow with an iron afterward.

Next, it’s time to stuff your pillow! I like to use Poly-Fil for pillows and other plush toys for my kids. It’s easy to use, hypoallergenic and machine-washable.
To finish the pillow, use an invisible stitch. I’ve used this technique for DIY rice and lavender heating pads, a pretend campfire set, and a stenciled table runner. I figured it was time I made a video to demonstrate how to do this stitch! Click below to watch.
")
The only thing missing now is a lost tooth!
Ready for the tooth fairy!
Losing teeth can be a scary prospect for kids. Mine had asked a bazillion questions about the whole process. My gums actually started hurting just talking about it!
I figure having a brand new tooth fairy pillow makes the process a little more exciting. My boys slept with their new pillows every night after I made them. It made me giddy about watching their reactions after the first tooth fairy visit…
I hope you’ll enjoy making your very own tooth fairy pillow for boys or girls!

Pin it for later!
You Might Also Like…
This tooth fairy pillow is absolutely adorable! We would love to have you share this at Celebrate Your Story! The link party is still open for a few more hours! Have a great one! Hugs!
Aww, thanks so much! I loved making these, and they were so easy. I will definitely share in your party. Thanks for stopping by, Benita!
I gasped when I saw your feature image! SO CUTE! Love the nautical theme… makes it so ‘boyish’, too! Super great tutorial, Crissy! Be sure to share at HG either this week or next! 😉 Pinning (to three boards!)
Aww, thanks, Julie! You’re the sweetest! My boys really have slept with them every night. That’s the biggest reward. 🙂