How to Use Heat Transfer Vinyl: Beginner’s Guide
Over the years, I’ve made my fair share of heat transfer vinyl t-shirts, tote bags, and pillows, so it’s high time I shared all of my tips! In this beginner’s guide, I’ll walk through how to use heat transfer vinyl, from creating your design to transferring it.

This tutorial is sponsored by xTool, but all opinions expressed are my own. This post also contains affiliate links, and I will receive a small commission if you make a purchase after clicking on my links. See disclosures for details.
What is heat transfer vinyl?
Heat transfer vinyl, also called HTV or iron-on vinyl, is a thin layer of colored polyurethane (PU) with a heat-activated adhesive. I know it sounds scary, but it’s not!
You can easily cut HTV at home to create custom apparel, home decor, and gifts. There are many types of vinyl with different patterns and textures, like glitter, holographic, foil, glow-in-the-dark, and flock.
The benefit of using vinyl is the versatility of the fabrics and materials (a.k.a. substrates) you can use with it. I’ve applied HTV to everything from shirts to leather and canvas.

How does heat transfer vinyl work?
Heat transfer vinyl involves a three-step process: 1) creating or uploading a design, 2) cutting the design with a cutting machine, and 3) using heat to transfer the design.
The vinyl is semi-permanent (lasting 50-100 wash cycles or more) but sits on top of the fabric. It doesn’t integrate with the fabric like sublimation inks do, but it still looks fabulous.
In the tutorial below, we’ll make a custom HTV shirt using the xTool M1 hybrid laser and blade cutting machine. (Note, the M1 Ultra is the newer model of the M1 originally used in this post.)
The process is nearly identical to using a Silhouette Cameo or
So why use the xTool M1, you might ask?
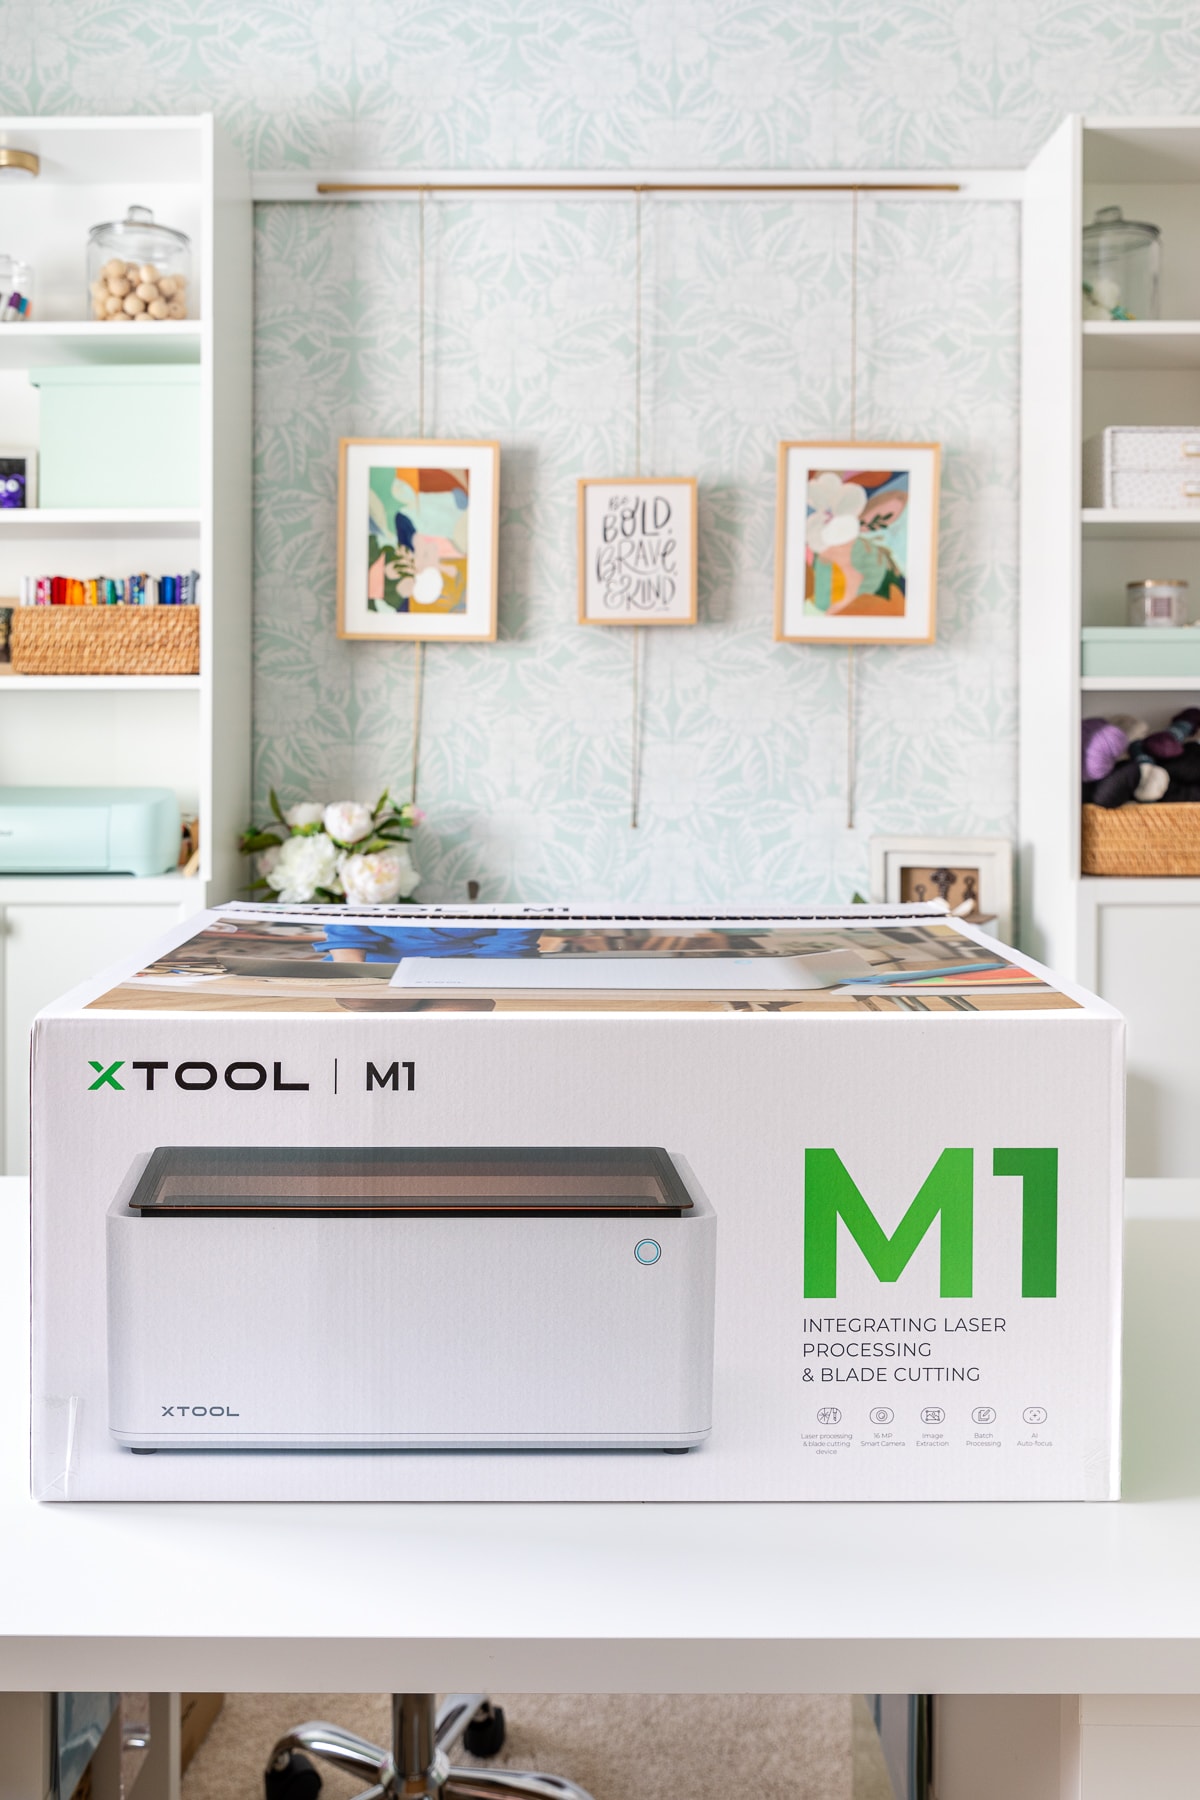
In contrast to the Cricut Maker or Cricut Explore machines, the xTool M1 not only cuts with a blade but also cuts, scores, and engraves objects with a laser. The ability to switch back and forth between blade-cutting and laser-cutting is a game changer!
The newer xTool M1 Ultra model adds even more capabilities, like inkjet printing, drawing, and foiling.
This also sets the M1 line apart from the new Glowforge Aura machine. While the Aura has a similar (but lower-wattage) diode laser, it lacks the blade-cutting feature.
I wanted to share a blade-cutting project with the M1 line in case you’re in the market for an all-in-one machine.
Safety Tip
Just make sure you always use the blade cut setting on the M1 when working with heat transfer vinyl. Cutting vinyl with a laser can pose a serious safety hazard. You can learn more in xTool’s article on laser cutting and vinyl.
How to Use Heat Transfer Vinyl to Make a Shirt
While I’m using a cotton t-shirt for this project, you can select any base material you like. HTV is perfect for making cosmetic bags, onesies, blankets, wine gift bags, or canvas art.
Supplies
- xTool M1 Ultra cutting machine
- Cotton t-shirt (or cotton/polyester blend
- SVG design (see details below)
- Heat transfer vinyl
- Cutting mat
- Weeding tools
- Household iron or heat press
- Heat press mat or flat heat-resistant surface
You can use any brand of vinyl you like for this project. Try starting with a roll of white vinyl or black vinyl.
Other popular vinyl brands include Siser EasyWeed,
Step 1: Create your design
The xTool software called Creative Space looks a lot like
- Design your artwork in a program like Adobe Illustrator, Procreate, Inkscape, or Canva.
- Buy pre-made SVG designs from places like my design shop, Creative Fabrica, or Design Bundles.
- Create graphics right in the software. The steps will closely resemble any design software you might have used in the past.
Note: The most common file type to use with heat transfer vinyl is an SVG. An SVG file comes formatted with outlines that you can scale as needed without distortion.
Add Text or Graphics
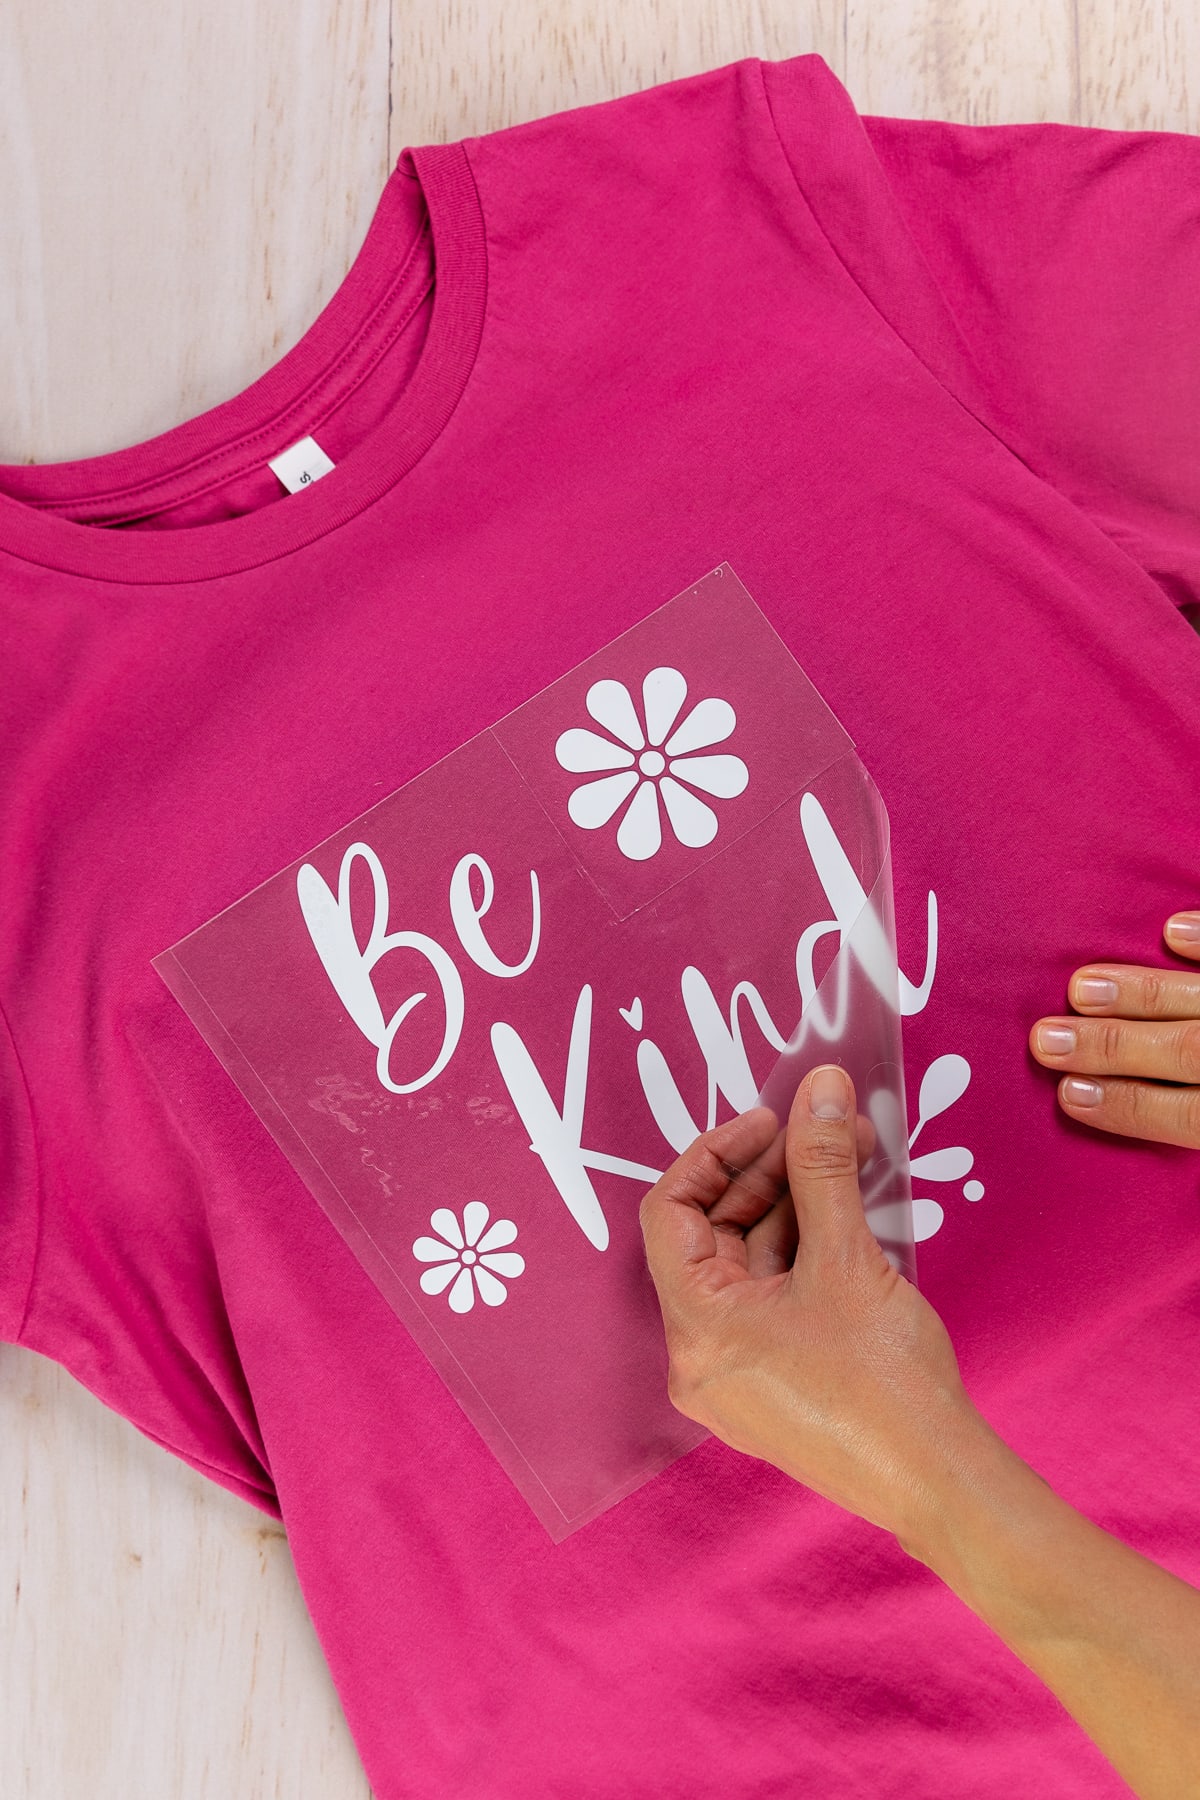
Start by adding some simple text using the text button in the left column. I’m making a “Be Kind” shirt.

To modify or format the text, select the text and choose a font from the drop-down menu (see photo above). Click and drag the corners of the text box to resize it, or type a font size in the Text menu.
I changed my font to one called Adelio Darmanto. (You can choose xTool built-in fonts or any system fonts you have on your computer.)
Format and weld letters
Make sure that script font letters overlap enough to remove any gaps. You can adjust the spacing by selecting the text and changing the Spacing field +/-.

To have the machine cut the letters as one phrase, select the word “kind” and choose Weld in the Text Operations field, as shown above.
Insert additional shapes, if desired
There are tons of free shapes and images built into Creative Space! I’d start there if you’re a beginner.
To add a touch of whimsy, I inserted a stem from the “Festival” collection and a flower from the “Plant” collection.

You can also shop the project gallery in the upper right corner, where it says “xTool Projects.” There’s a thriving community of xTool users who have posted tutorials.
If you want to cut multiple colors of vinyl, you can move shapes to separate layers. This is similar to changing the color of shapes in

Note: One advantage xTool’s Creative Space has over
Step 2: Size the design
Measure your shirt to determine how large you want your design. I’m using a medium Adult t-shirt, so I resized my design to measure roughly 9 by 9 inches.
Anywhere between 9 to 13 inches is common for an SVG t-shirt design for Adults.

You can buy a t-shirt ruler guide for vinyl alignment if you plan to make a lot of shirts.
Step 3: Mirror the design
Before sending the file to cut, you need to mirror the design. We need to cut the design in reverse so it will read correctly when transferred.

To mirror your image, select all the layers while holding Shift. Then choose Reflect Horizontally under the “Reflect” menu. In
After mirroring the design, create a square around the entire graphic to make the next few steps easier.
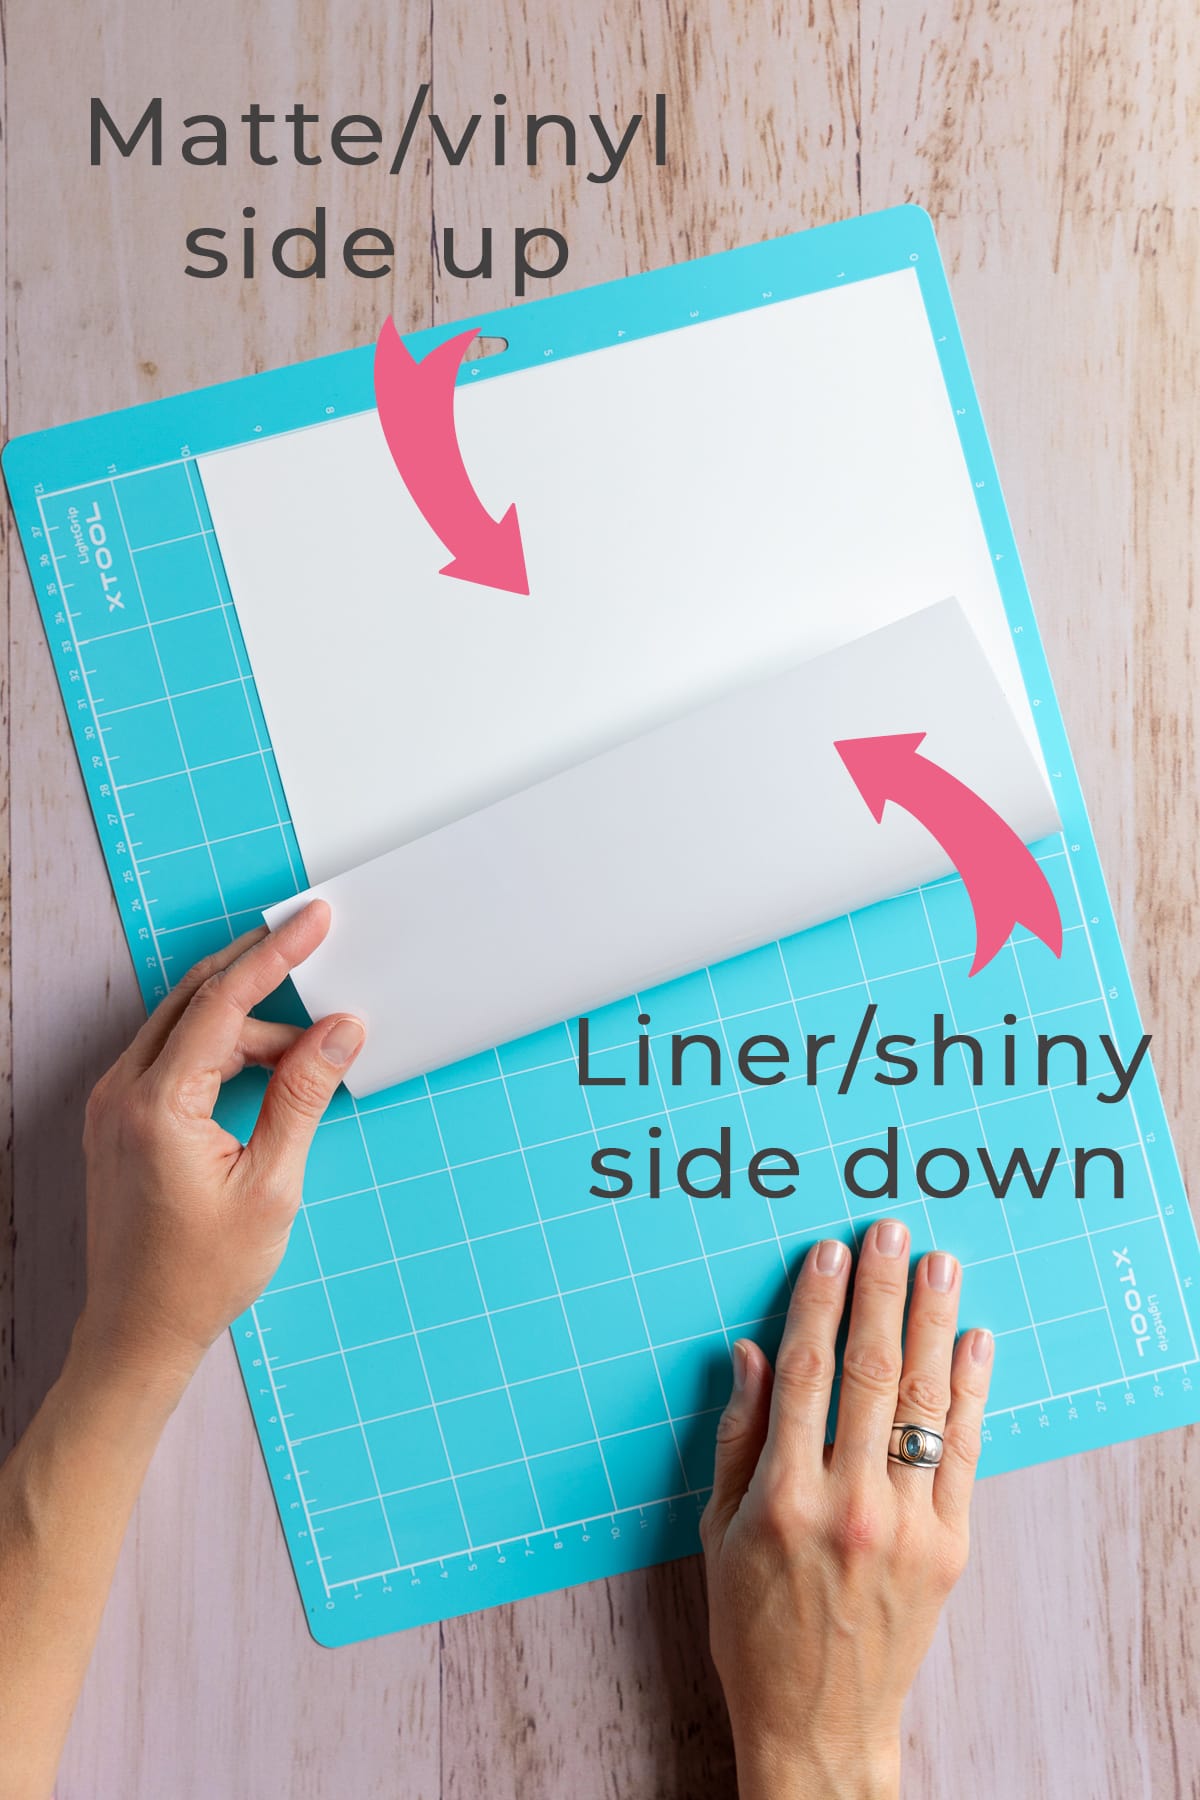
Step 4: Load the vinyl on a cutting mat
The xTool M1 comes with a light-grip mat and fabric-grip mat, much like
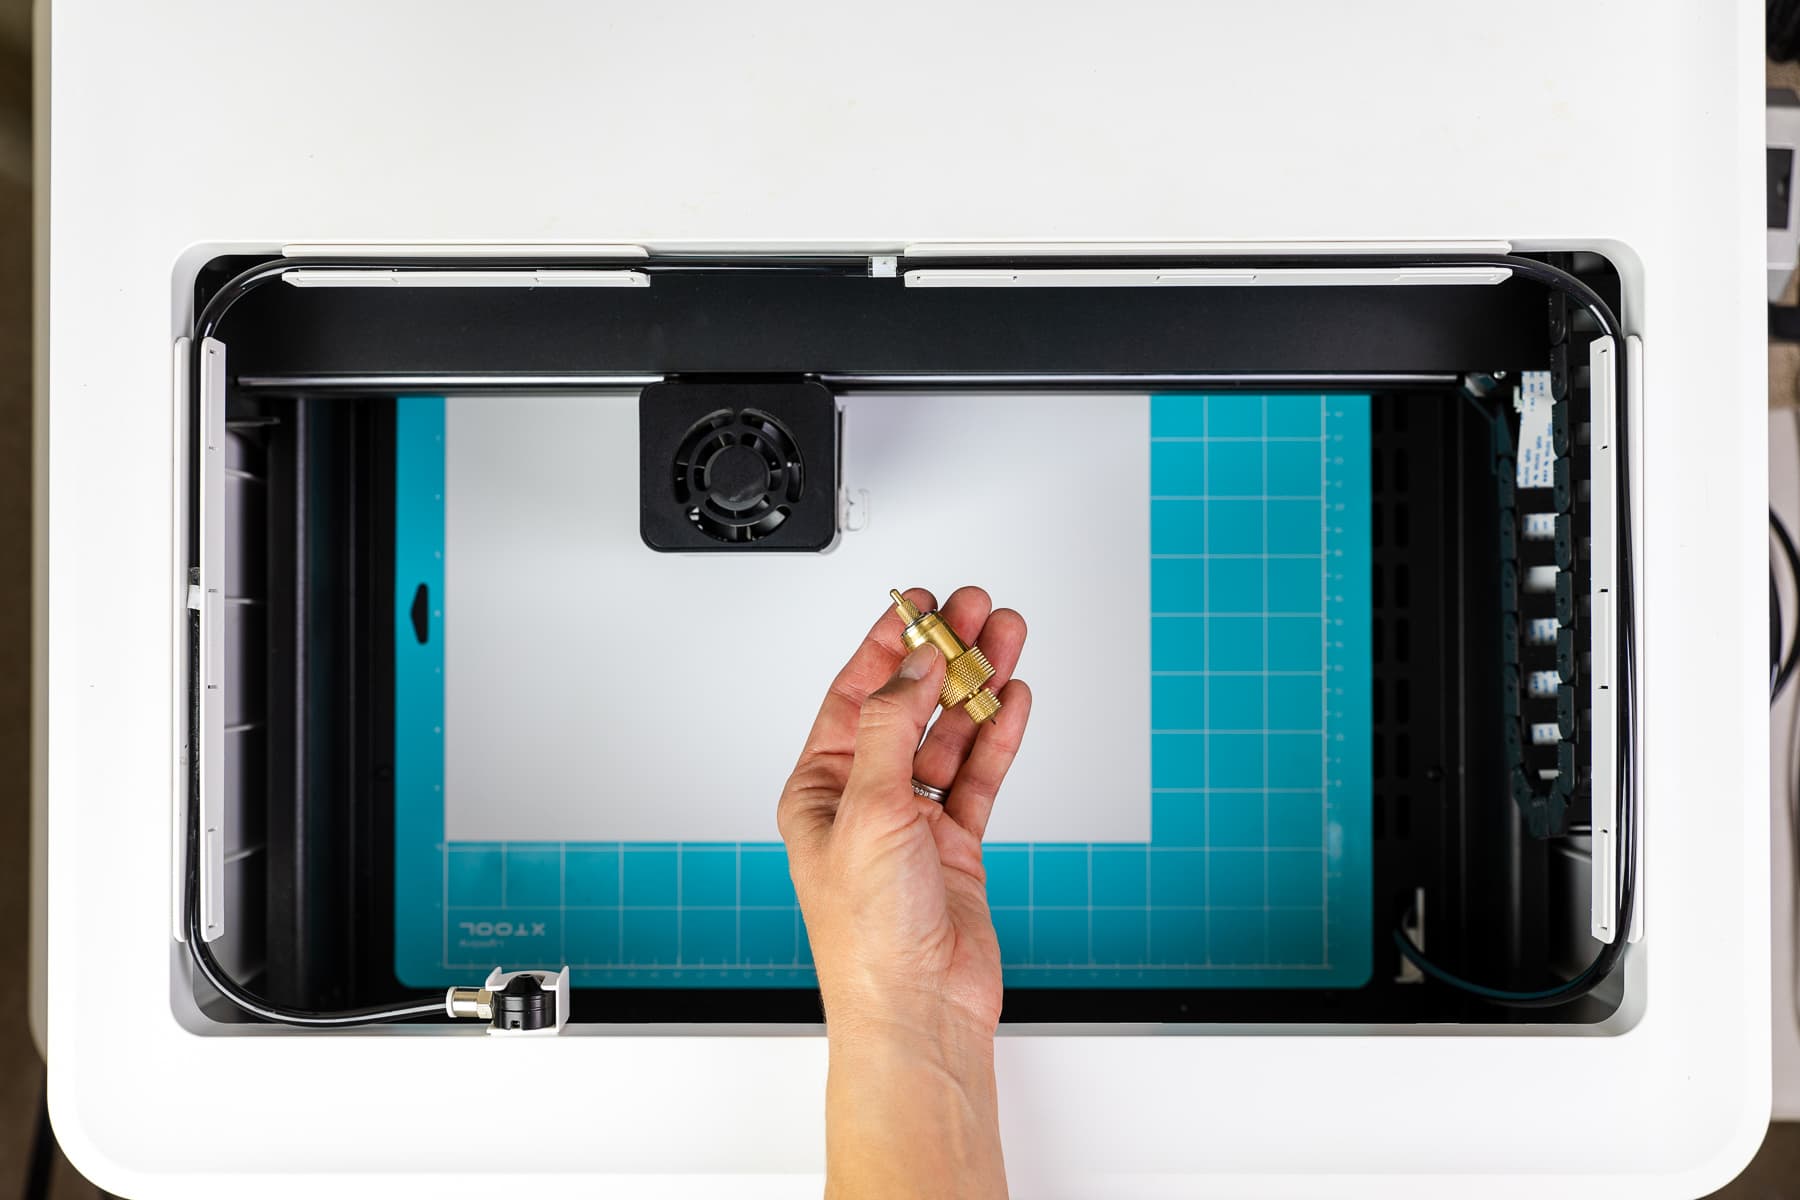
Step 5: Insert mat and preview the design
Insert your mat into the machine, resting it on the base plate. The mat is sticky on both sides, making it easier to attach to the plate.
The fine-point blade should be inserted underneath the square housing. (You should feel a magnet snap the blade into place.)
Here’s where M1 technology has a true advantage over
While

Make sure your software is connected to the machine and click Refresh. You’ll now see the image of your vinyl on the mat, as shown above.
To minimize vinyl scraps, reposition the image on the mat as needed.
Step 6: Cut the design
Once you’re satisfied with the positioning, select PU HTV vinyl as your material. (If you don’t see this option, make sure you click off of the design so no layers are selected.)
I like to adjust the cut pressure higher than the default setting (to 100 instead of 90). You may want to do a test cut to check your machine settings with your brand of vinyl.
If you want to preview where the blade will cut, choose the Framing option and hit the white button on your M1 machine. Then click the Process button to begin cutting your vinyl.
Step 7: Weed the design
After cutting the design, you need to remove the excess vinyl, or “weed” the design. This is my favorite part of HTV projects! It’s so satisfying to see your design come to life.

Step 8: Press the design
To complete the transfer, you can use a professional heat press, a Cricut EasyPress with an EasyPress mat, or a household iron. Household irons may give inconsistent results, but I started my HTV journey with one. You can too!
I’ll show the results using both a heat press and a household iron.

Vinyl manufacturers often provide handy reference guides to help you determine the appropriate heat settings. If you’re using a
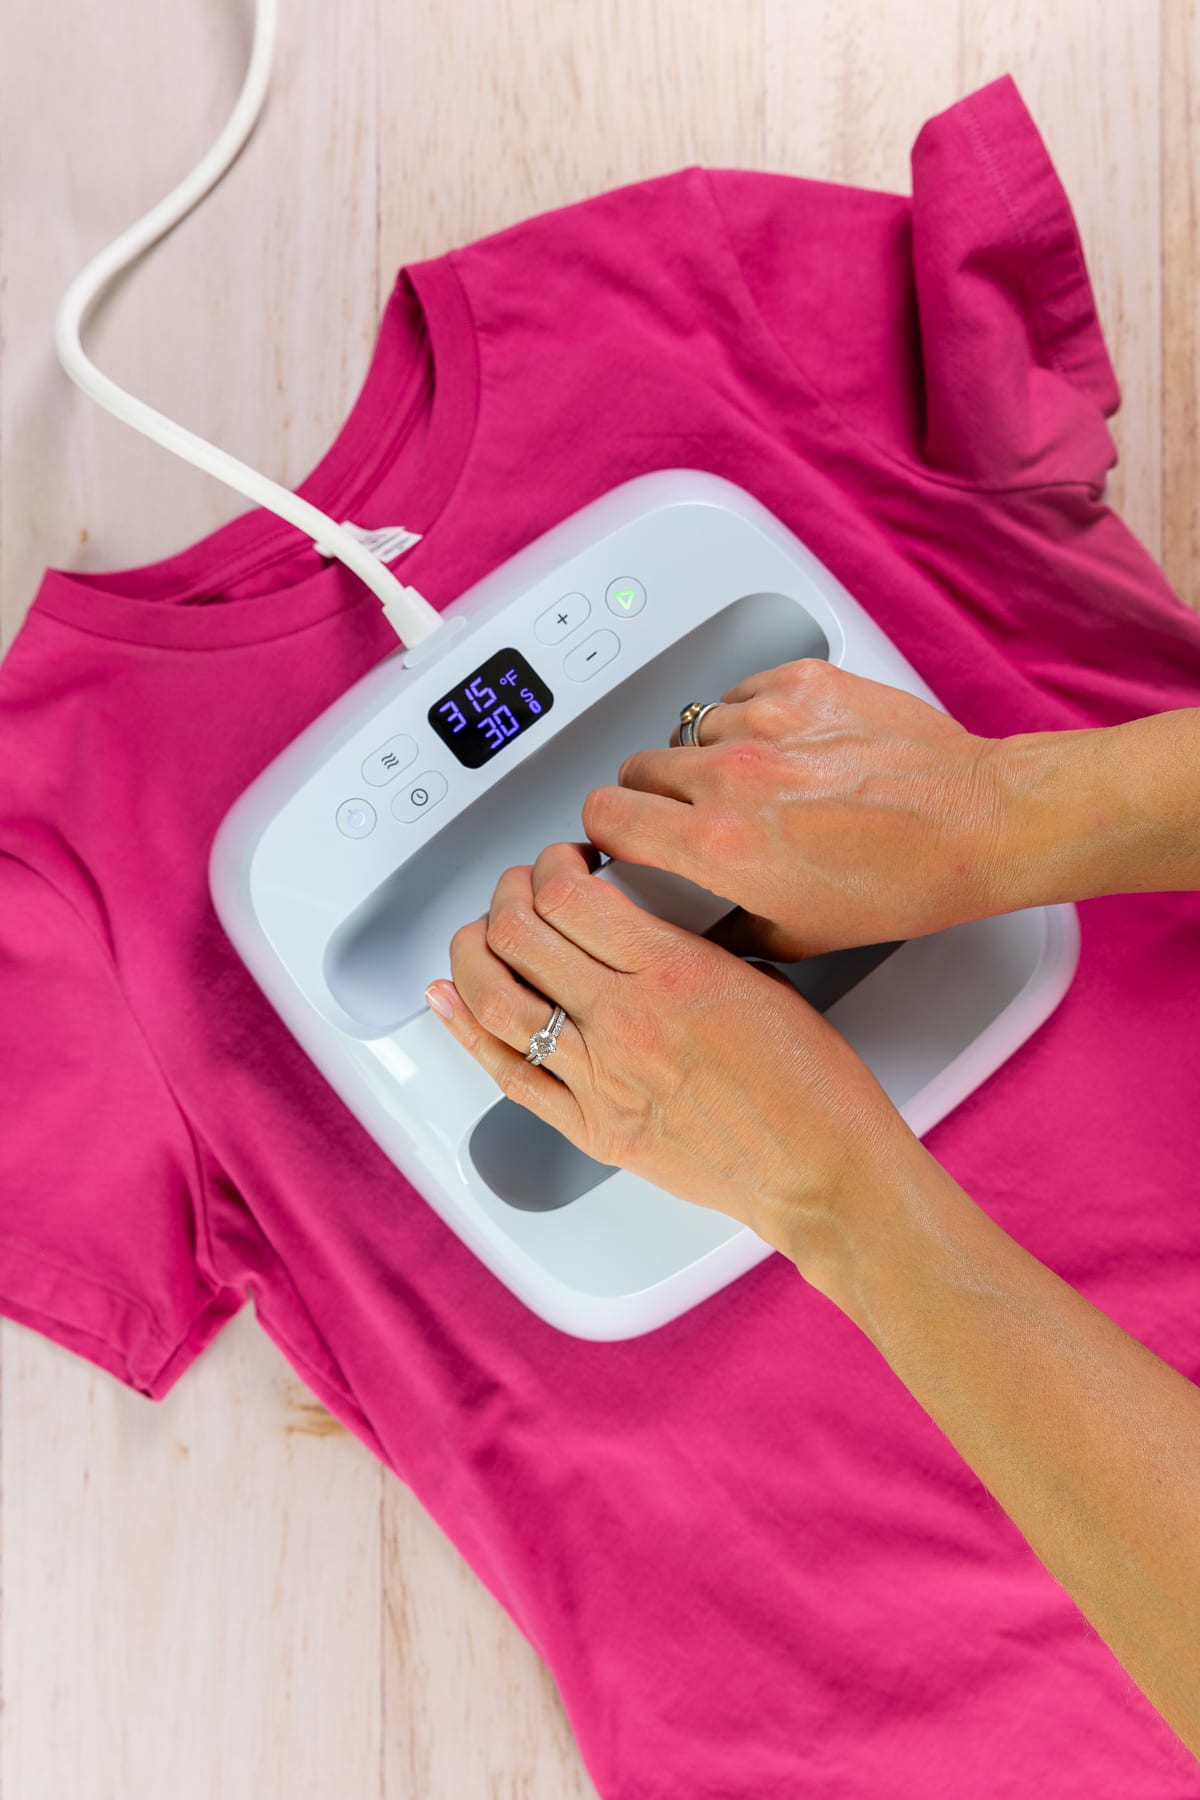
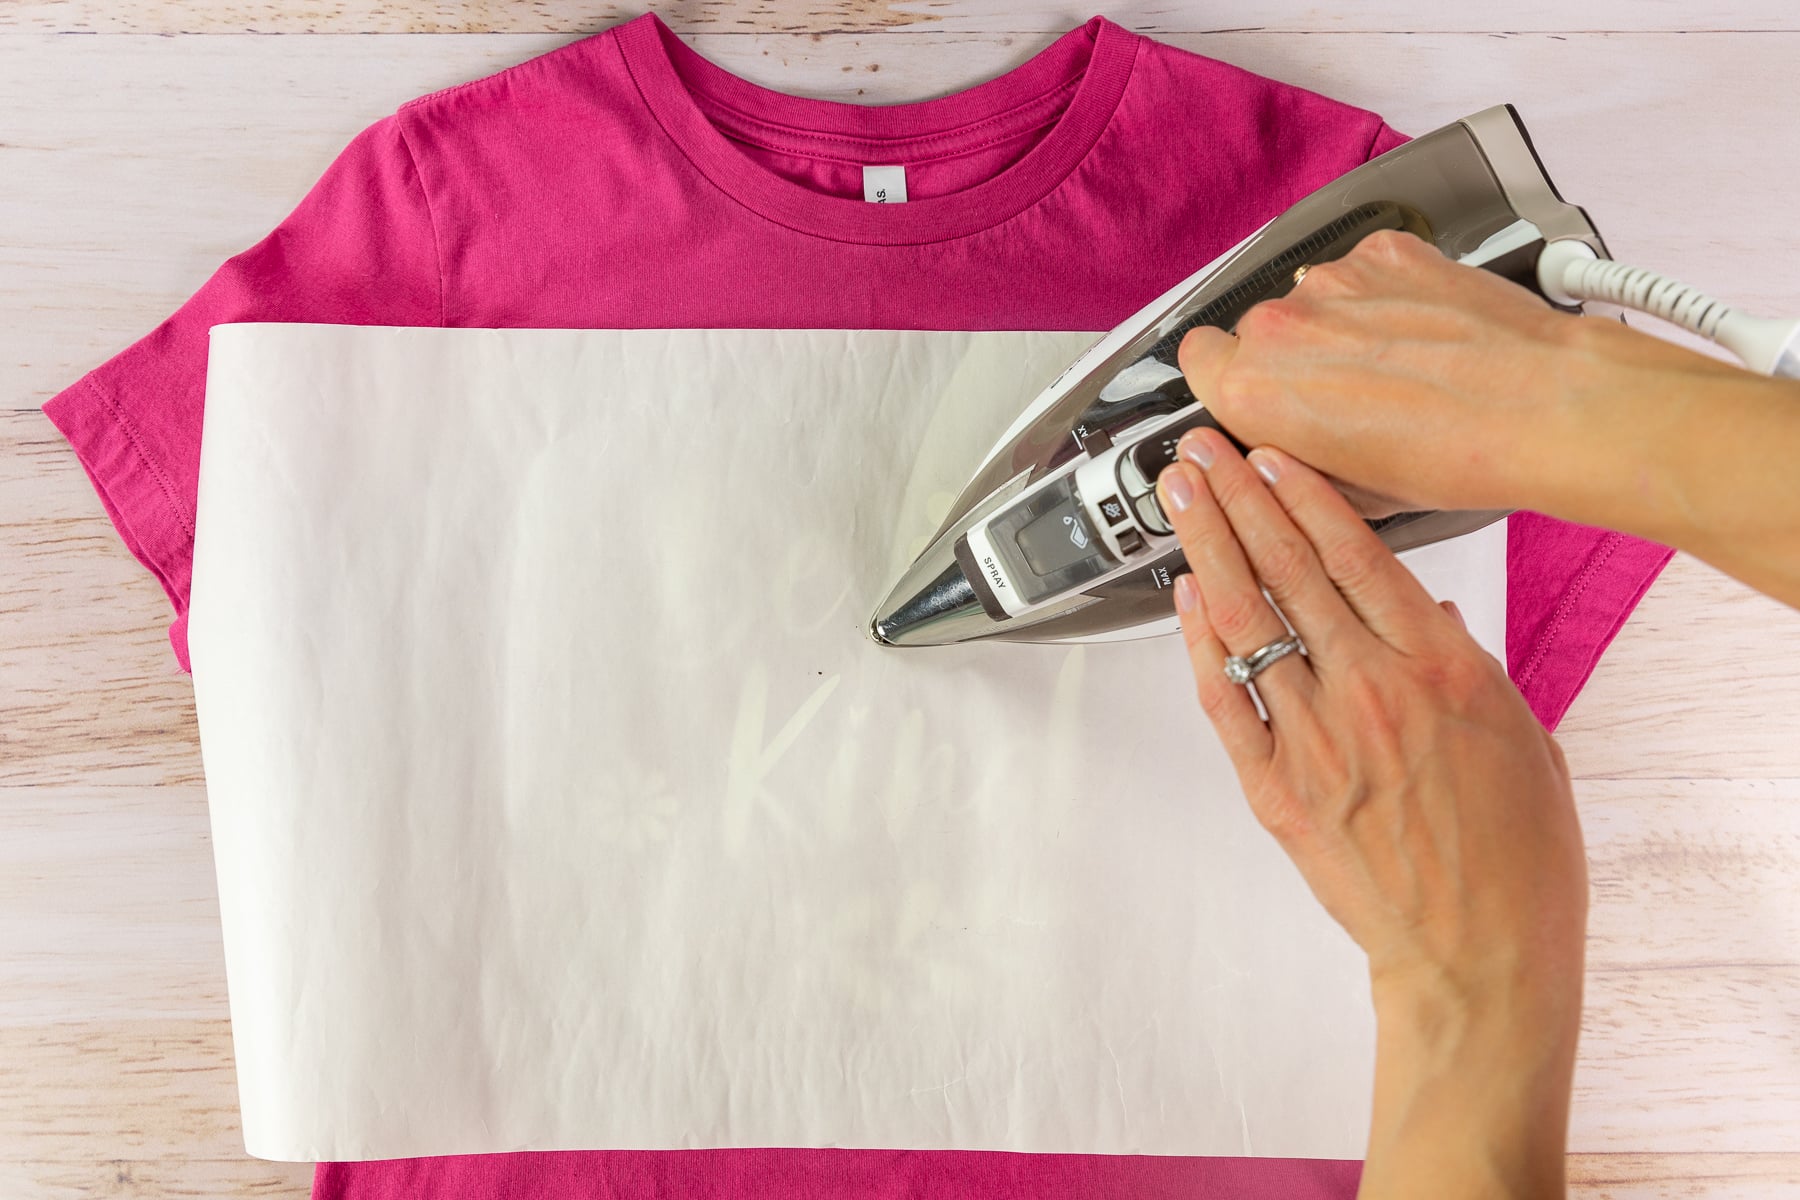
With a household iron, use a high/cotton setting with no steam. With a handheld heat press, the temperature should be set to 315°F for everyday iron-on vinyl.
Begin by pressing your shirt for 5 seconds to remove any moisture from the garment and get a smoother texture.

Then apply the adhesive side of your vinyl transfer to the shirt.
Quick tip: fold the shirt in half and press it to create a center crease before aligning your transfer.
Press the design with medium pressure for 30 seconds, or according to the manufacturer’s instructions.
Tips for using a household iron with HTV
- Use a hard, flat surface underneath that is heat resistant.
- Avoid moving the iron as you press. Hold the iron firmly in one position, then move to another position for the recommended pressing time.
- Place a piece of parchment paper, teflon sheet, thin pillowcase, or handkerchief between the iron and the vinyl carrier sheet.
Your HTV may call for a cold peel (removing the liner after the HTV has cooled) or a hot peel (removing the liner soon after pressing). Once you remove the carrier sheet, you can discard it.
I used a household iron for the flower in the upper right corner, and you can hardly tell a difference in the quality!
Caring for your heat transfer vinyl project
You should wait at least 24 hours before washing your iron-on shirt. Here are my recommended laundering instructions:
- Wash the shirt inside out with mild detergent
- Use a delicate setting for intricate designs
- Tumble dry low, or hang the garment to dry
Do not directly iron the vinyl as this could cause damage to both the garment and your iron. If you want to press the vinyl design to remove wrinkles, you can press it on the back. Otherwise, you can cover the vinyl with parchment paper or a protective Teflon sheet. I use Teflon sheets when layering iron-on vinyl as well.
I’d love to see your projects, so feel free to tag me at @firstdayofhome on Instagram or Facebook. Don’t forget to pin this post for later as well!
Pin it for later!

FAQs
-
Is infusible ink the same as heat transfer vinyl?
You may have heard about infusible ink as another form of heat transfer. However, that type of project requires compatible materials or “blanks”, so you’re more limited in the type of garment you can press. Check out my guide to infusible ink for more details. The process for pressing infusible ink will differ slightly, but most steps until that point will be the same.
-
Can you remove heat transfer vinyl?
It is often difficult to remove heat transfer vinyl after it has been applied. However, some have suggested heating the garment from the inside with a household iron (no steam) and removing the vinyl carefully with tweezers while the iron is sitting upright. Just use caution if you try this method to prevent burns!


