Easy Fabric Covered Flower Pots: Beginner Tutorial
With the spring season upon us, it’s the perfect time to dress up your garden with fabric covered flower pots. This easy craft makes a great gift, and you can finally put those fabric scraps to good use.
This post contains affiliate links, and I will be compensated if you make a purchase after clicking on my links. For more information, please see my disclosures.
How to Make Fabric Covered Flower Pots with Mod Podge
I’ve done quite a few decoupage projects on the blog involving fabric and terra cotta pots, like these DIY charger plates and these decoupage flower pots. Strangely enough, I’ve never tried bringing the two together to make fabric flower pots.
Past Decoupage Crafts

It was about time to try this craft, considering I have plenty of old clay pots and fabric scraps lying around.
These pretty flowerpots make a thoughtful gift for Easter, Mother’s Day, or Teacher Appreciation Week. Of course, they would also look beautiful as a home decor accent on your front porch or patio. Who says you have to give them away? (wink)
You can purchase most supplies at a local craft store, so this is one craft idea that won’t break the bank.

Supplies

- Terra cotta flower pots
- Clay Pot Sealer
- Cotton fabric or outdoor fabric
- Fabric marking pens
- Mod Podge Matte (optional: Mod Podge Outdoor or Mod Podge Ultra)
- Foam brush or bristle brush
- Acrylic paint (optional)
- Wooden cutouts and skewers (optional)
Step 1: Seal the inside of the garden pots
Spray the inside of the clay pot with this sealer, and let it dry 24 hours before beginning to paint or decorate the flower pot.
Having made countless painted flower pots and fingerprint flower pots, I’ve learned that sealing clay pots can really help preserve the design.
The sealer will prevent water from staining the fabric or making a puddle around your decorated flower pot.
Step 2: Measure the pot and cut the fabric to size
On the reverse side of the fabric, trace the arc of the rim and bottom of the flower pot onto the fabric with a fabric marking pen. (The pen will not show through the fabric since it will end up on the inside and bottom of the pot.)
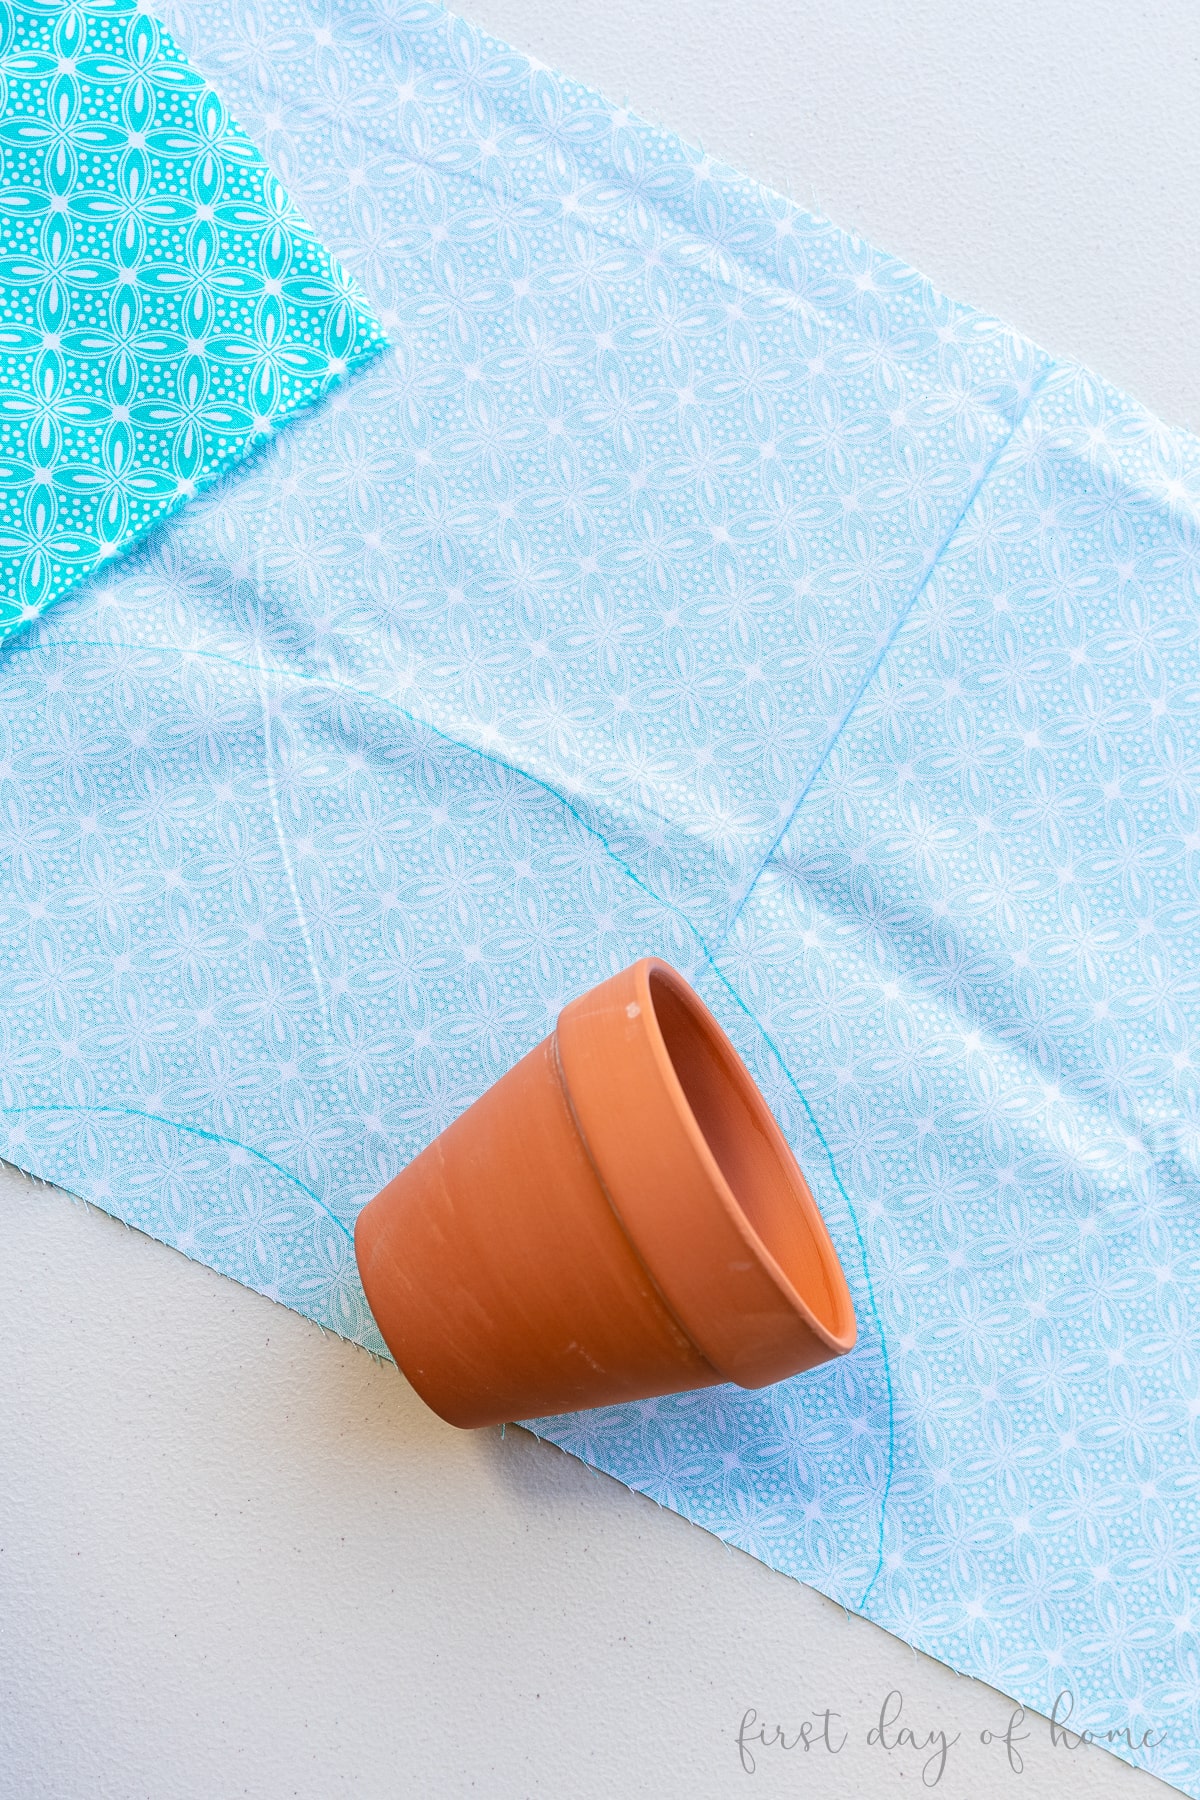
Make sure to leave a ½-inch to 1-inch gap in fabric above and below the pot so you can fold the edges of the fabric along the top rim and bottom edge of the pot.
Cut the length of fabric with scissors. You will end up with a shape that looks like a rainbow.

Step 3: Apply Mod Podge and attach the fabric
Using either a foam brush or soft bristle brush, apply a thin coat of Mod Podge directly onto the flower pot. Work in sections to attach the fabric, smoothing out any air bubbles as you move around the pot.
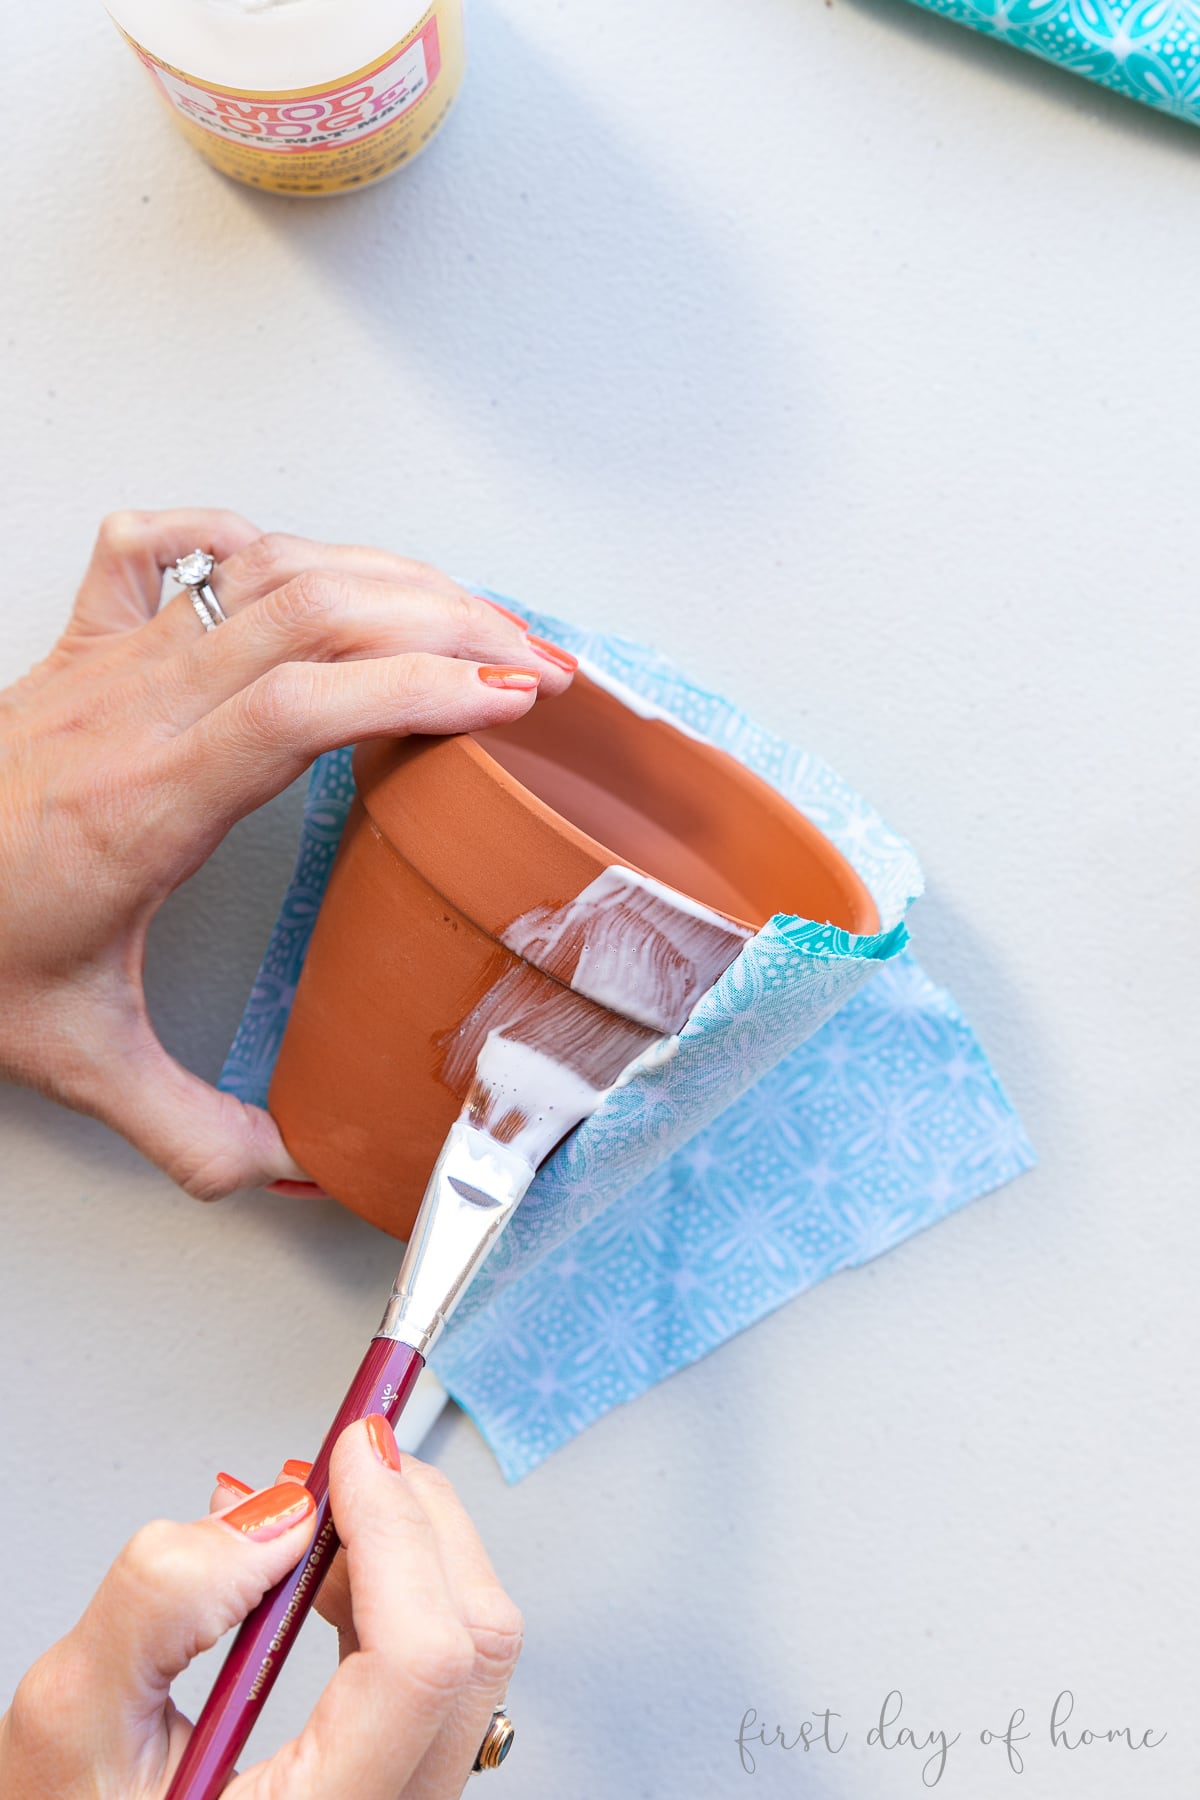
When nearing the end of the flower pot, trim any excess fabric. Make sure to overlap the edges slightly.
Finally, fold the fabric over the top edge of the pot as well as the bottom of your planter.

For best results, let the flower pot dry 20-30 minutes before applying a top coat of Mod Podge.
Step 4: Seal the outside of the pot
In past decoupage projects, I’ve used Mod Podge Outdoor to seal the outside of the pot. It helps make the pot more weather resistant, though it still works best when the planter is sheltered from sun and rain.
For this project, I’m using Mod Podge Matte since I plan to keep the flower pots indoors in a sunny location.
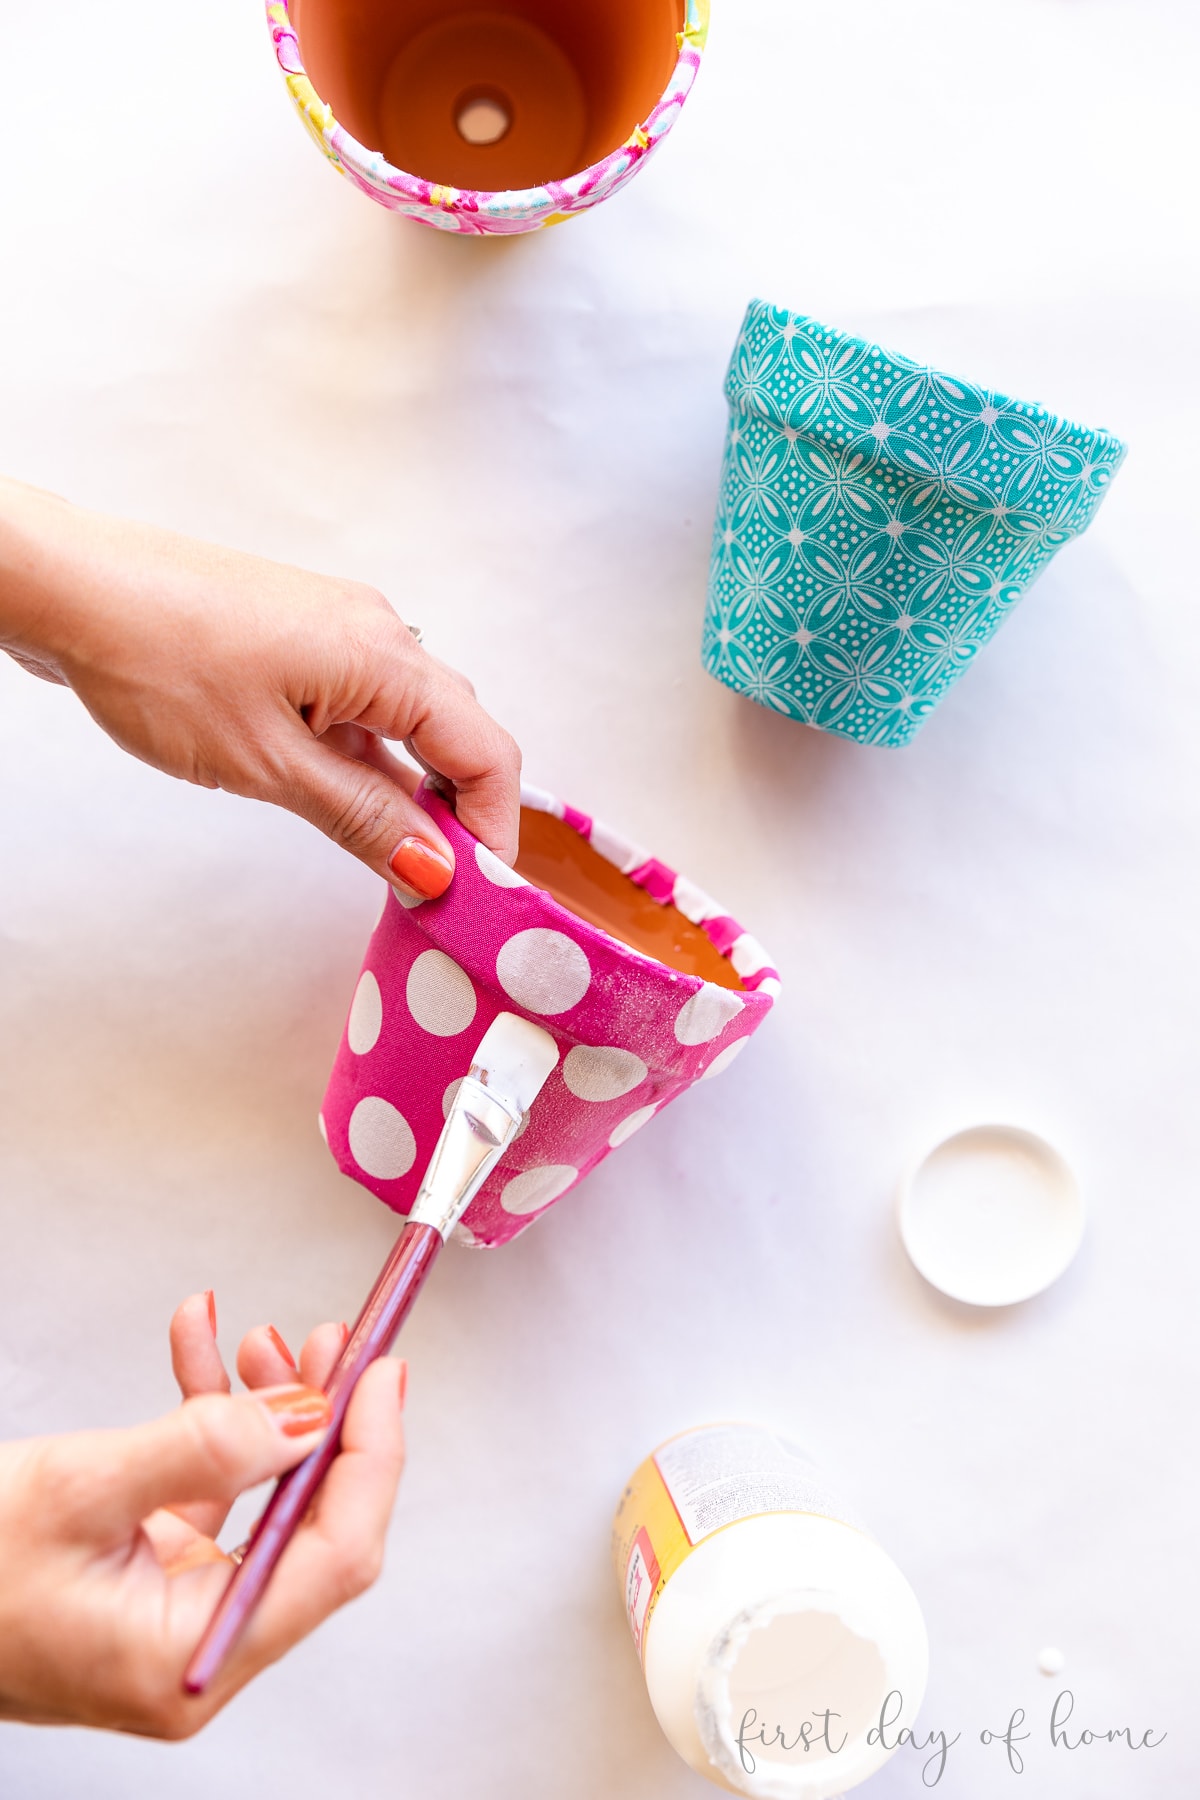
You also have the option of using Mod Podge Ultra, which comes in a spray form and gives a nice, even finish. That product comes in handy when you want to eliminate brush strokes. With fabric, you shouldn’t have much of an issue seeing brush strokes.

When you first apply the top coat of Mod Podge, don’t worry if it looks thick (see above). It will dry clear and smooth.
Let the pots dry completely (at least 15-20 minutes) before adding plants. In areas with high humidity, it may take longer for your pots to fully dry. If it still feels sticky, that’s a good indication you need to wait longer.
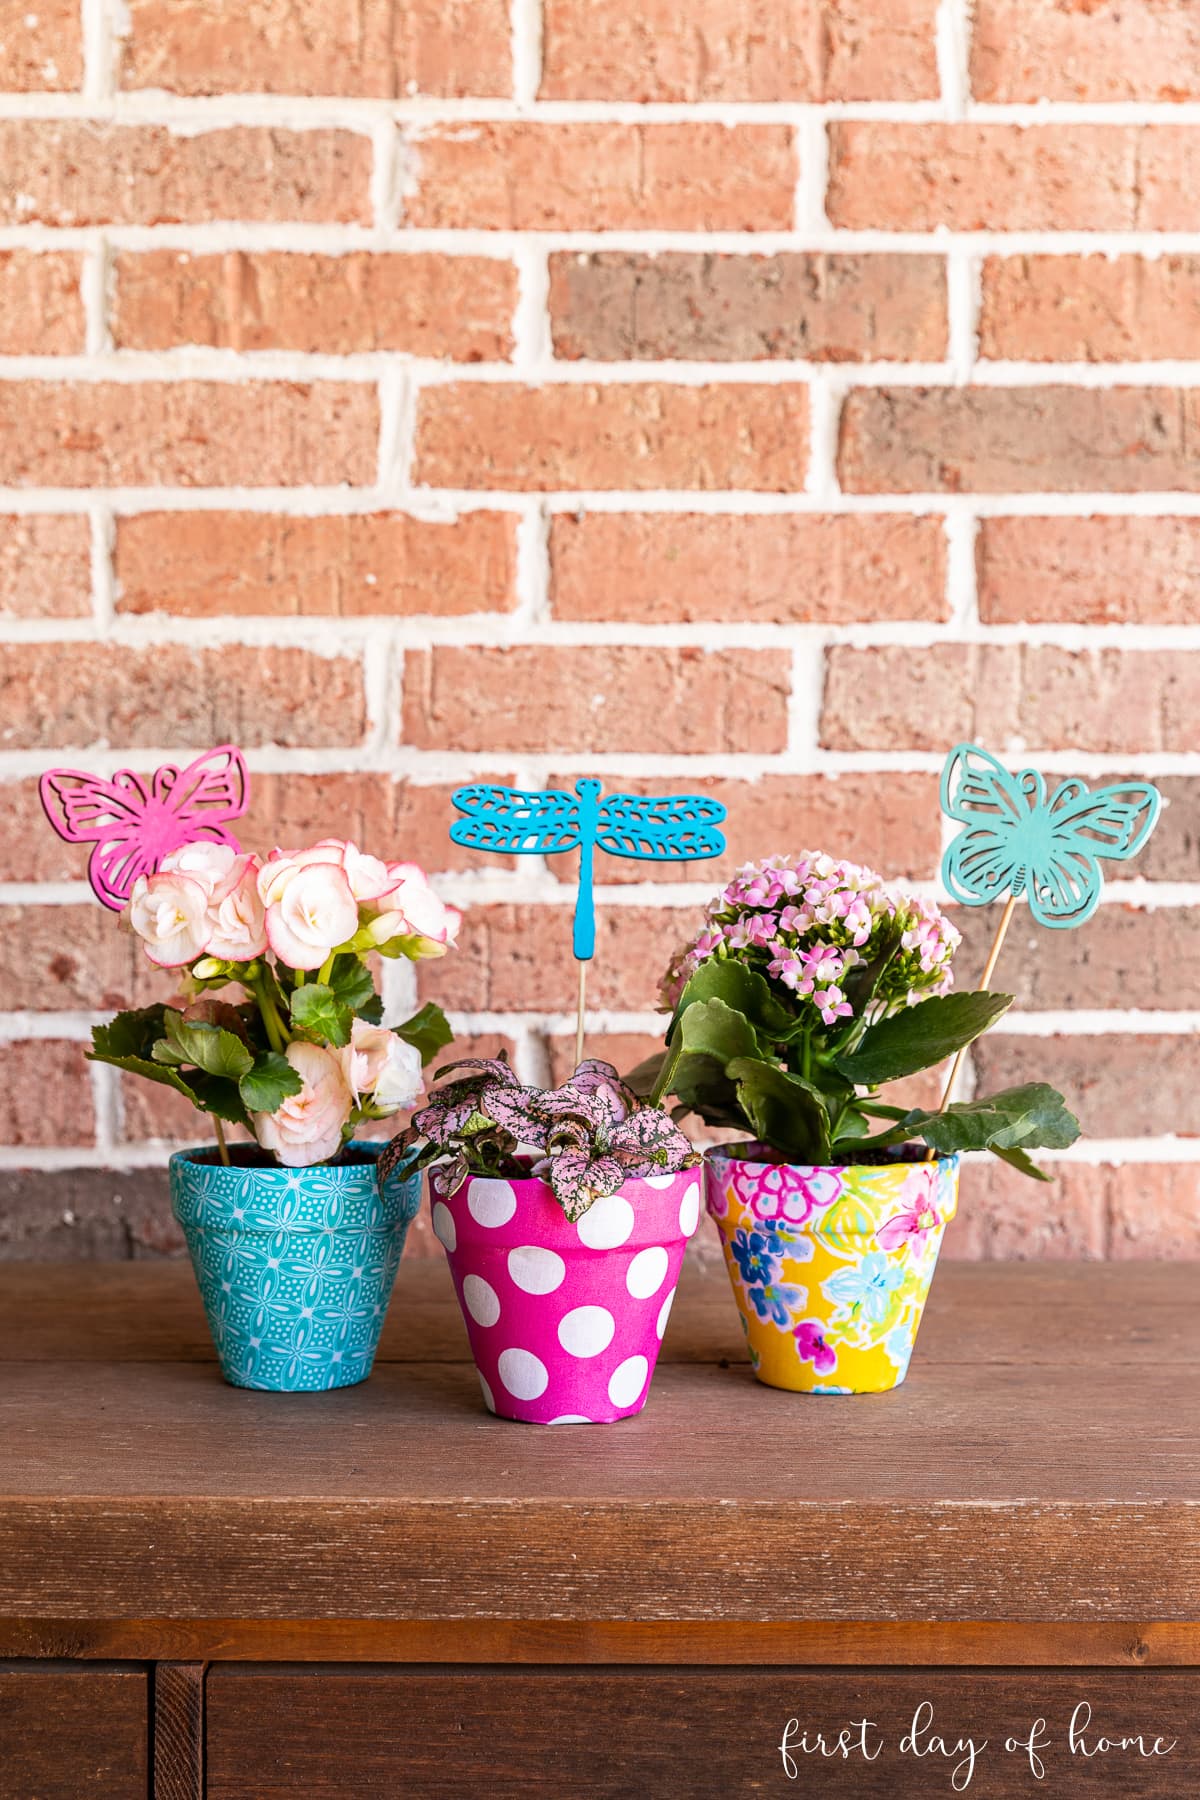
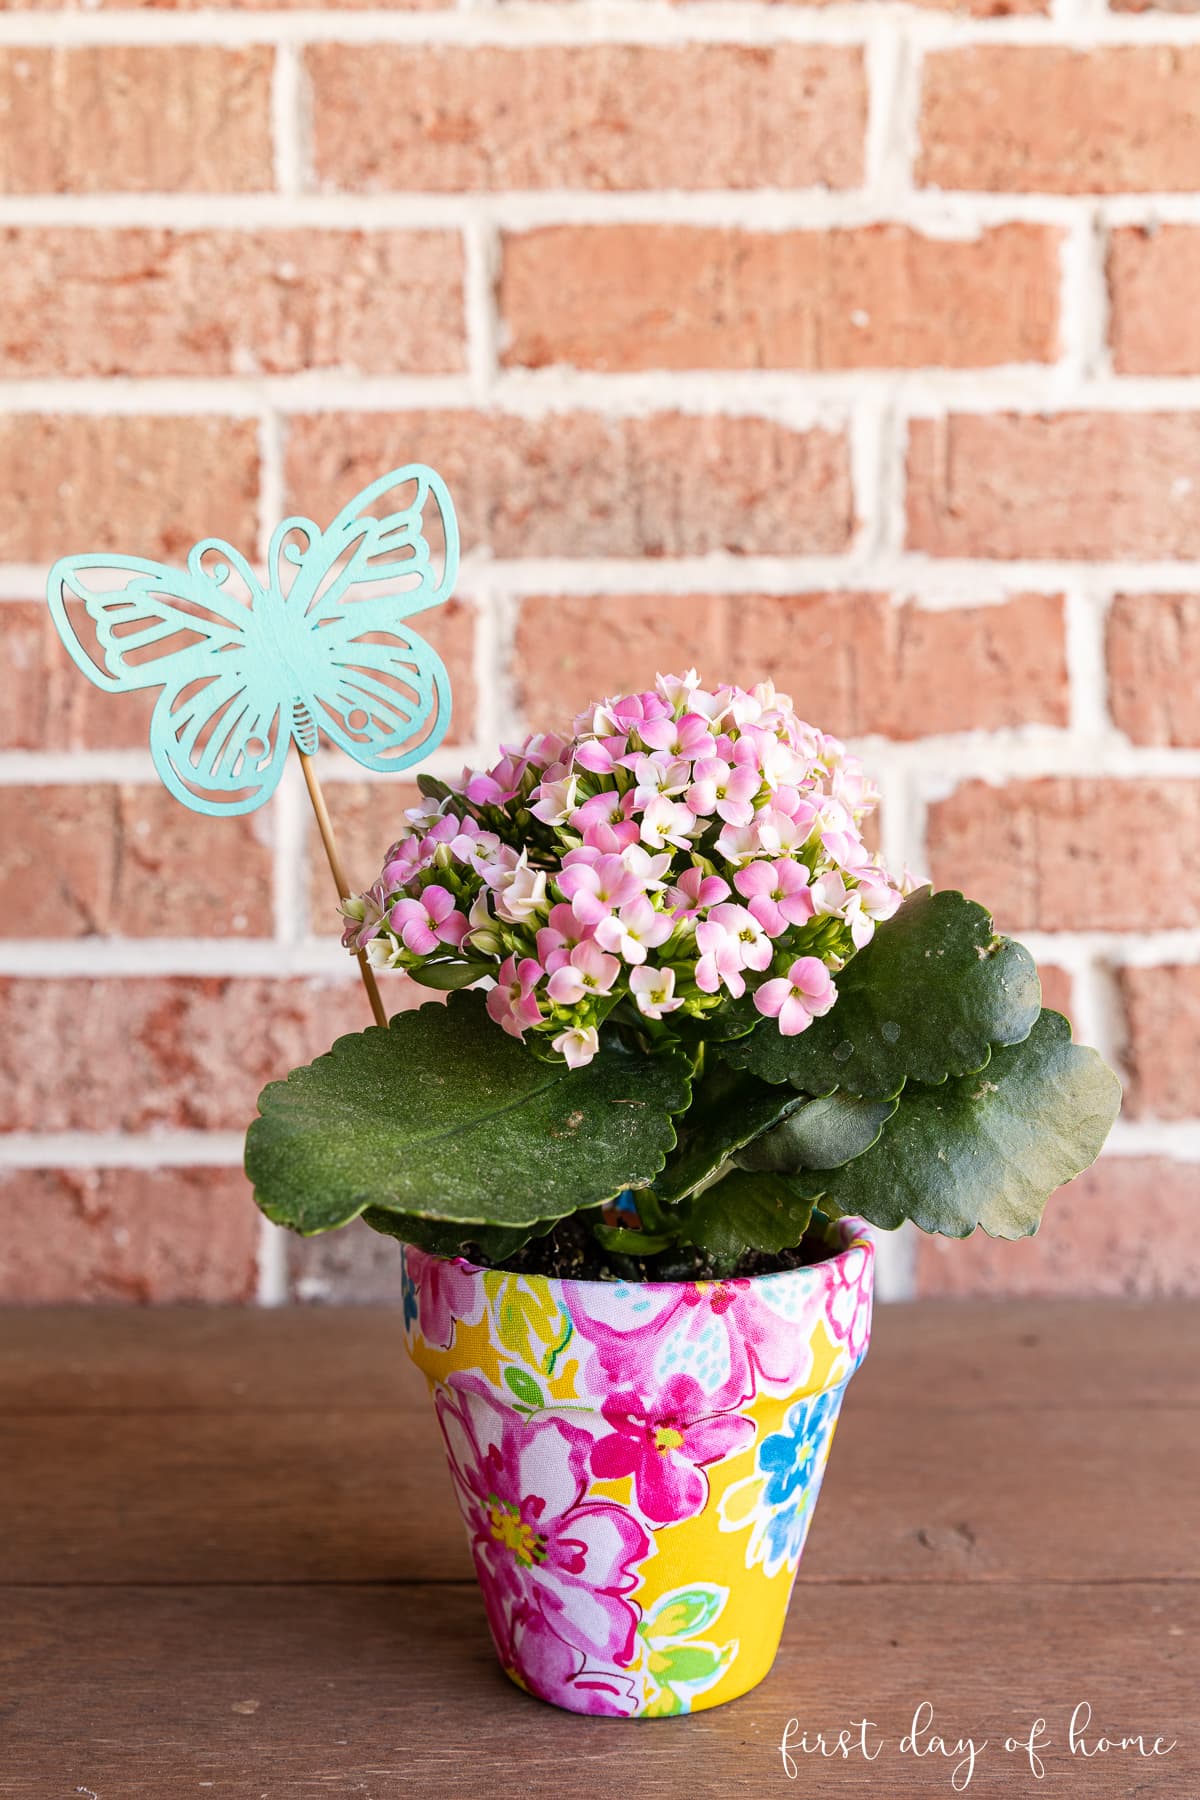
Step 5: Add plant stakes (optional)
To add an extra pop of color, you can paint wooden shapes like butterflies or dragonflies and attach them to wooden skewers using hot glue.
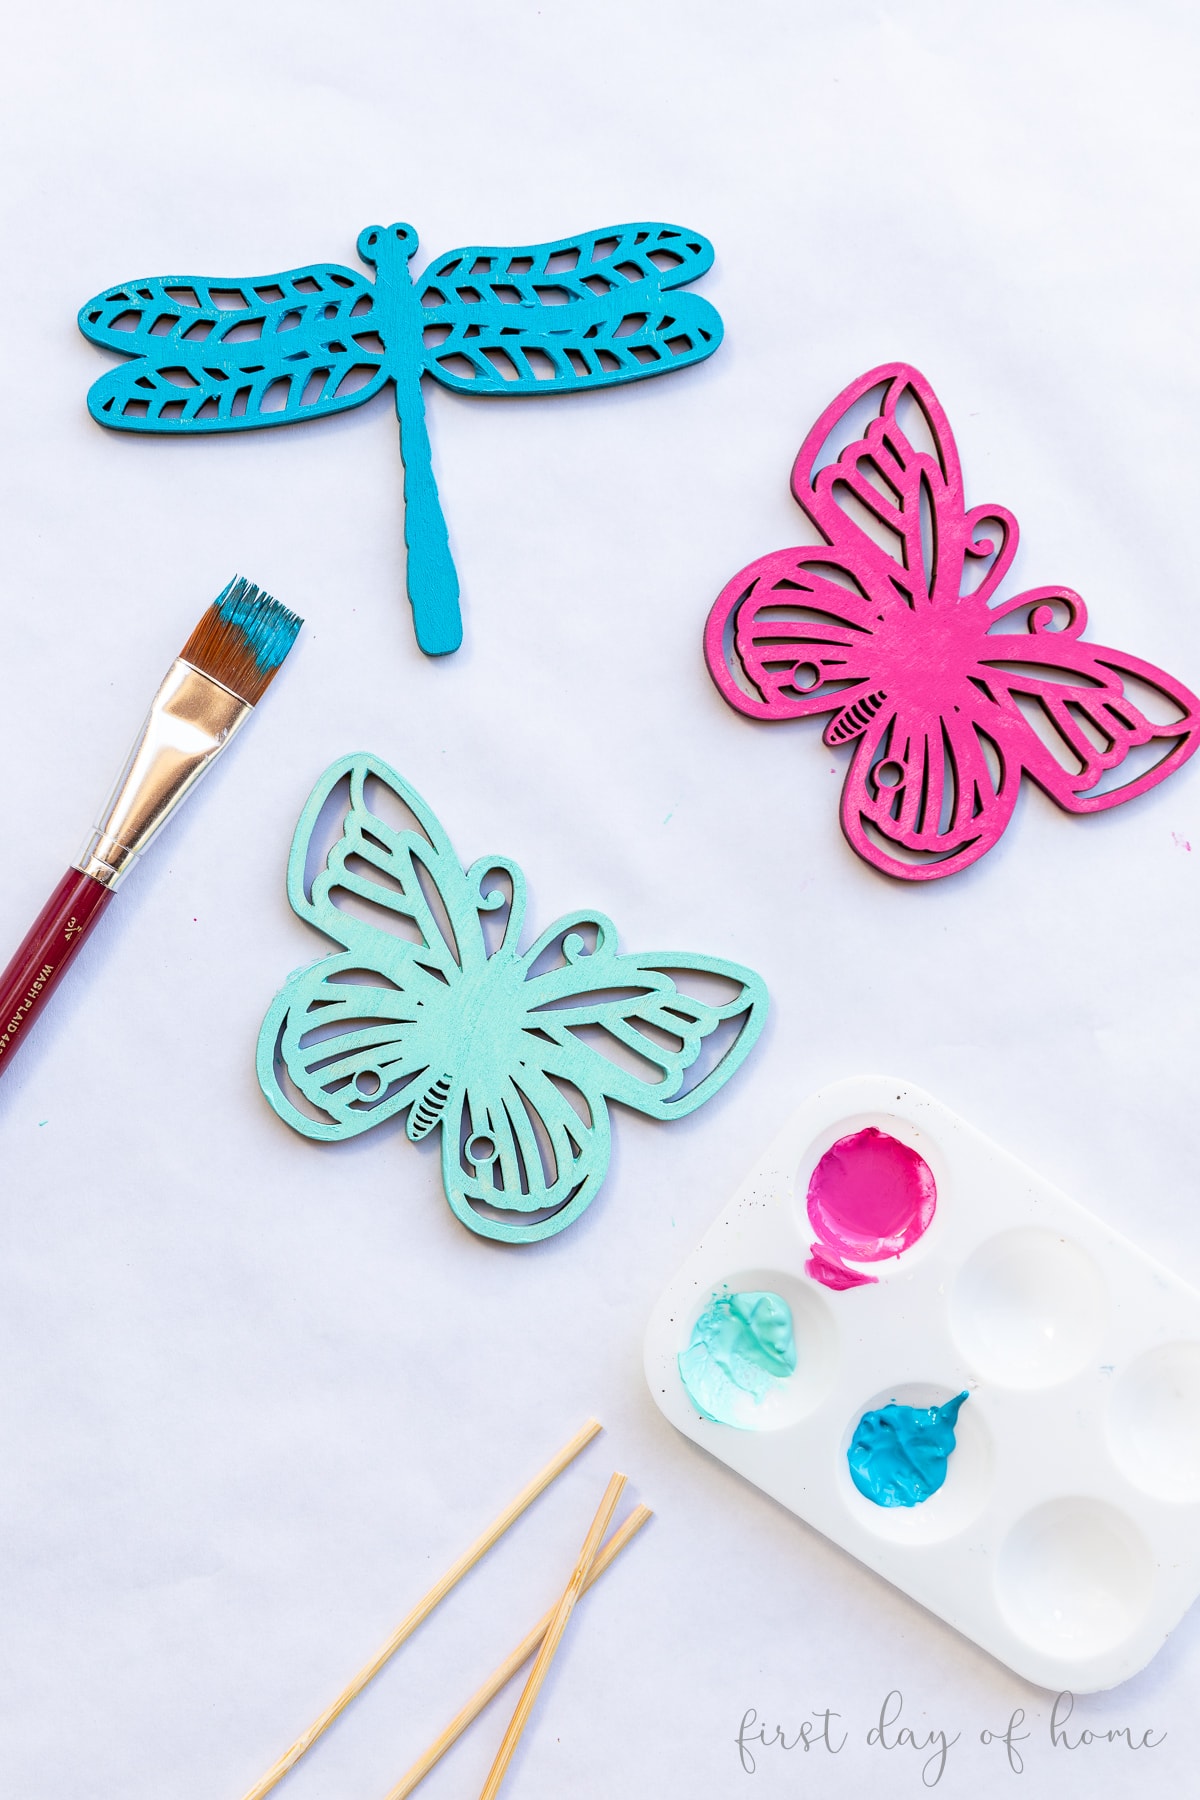
I used a combination of blue, aqua, and fuschia acrylic paint to complement my fabric for an extra “springy” vibe. These paints only take about an hour to dry in between coats.
For better weather resistance, add a coat of Mod Podge Outdoor to seal the wooden stakes. For more information, check out my post on DIY garden stakes.
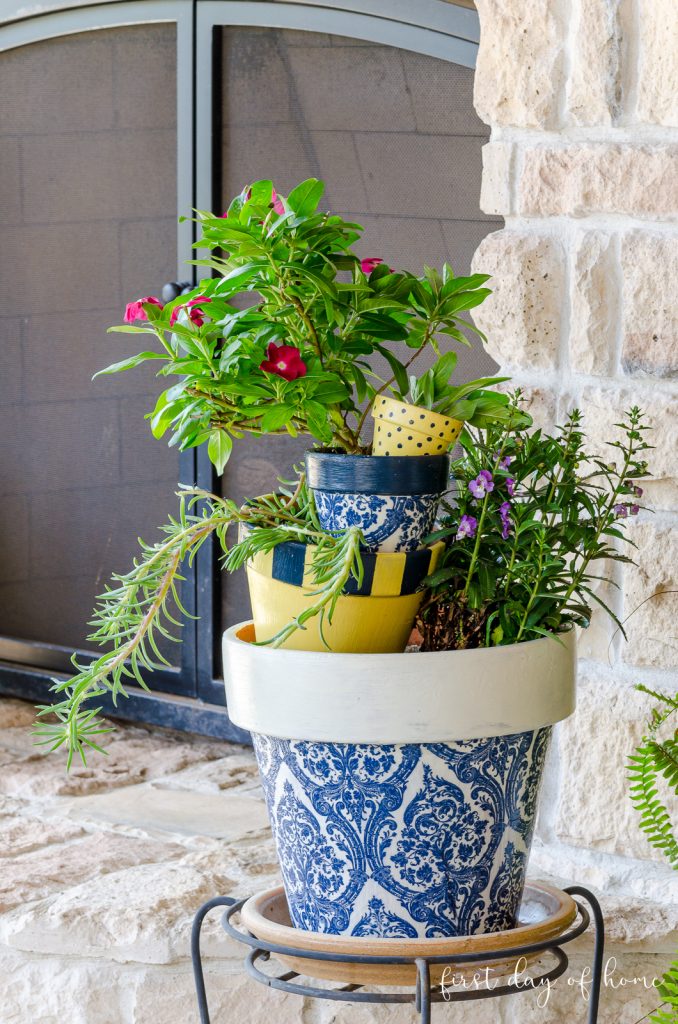
Displaying Fabric Covered Flower Pots
These flower pots would make the perfect gift filled with an Easter treat or spring flowers. If you plan to enjoy your pots indoors, you can add your favorite houseplants too.
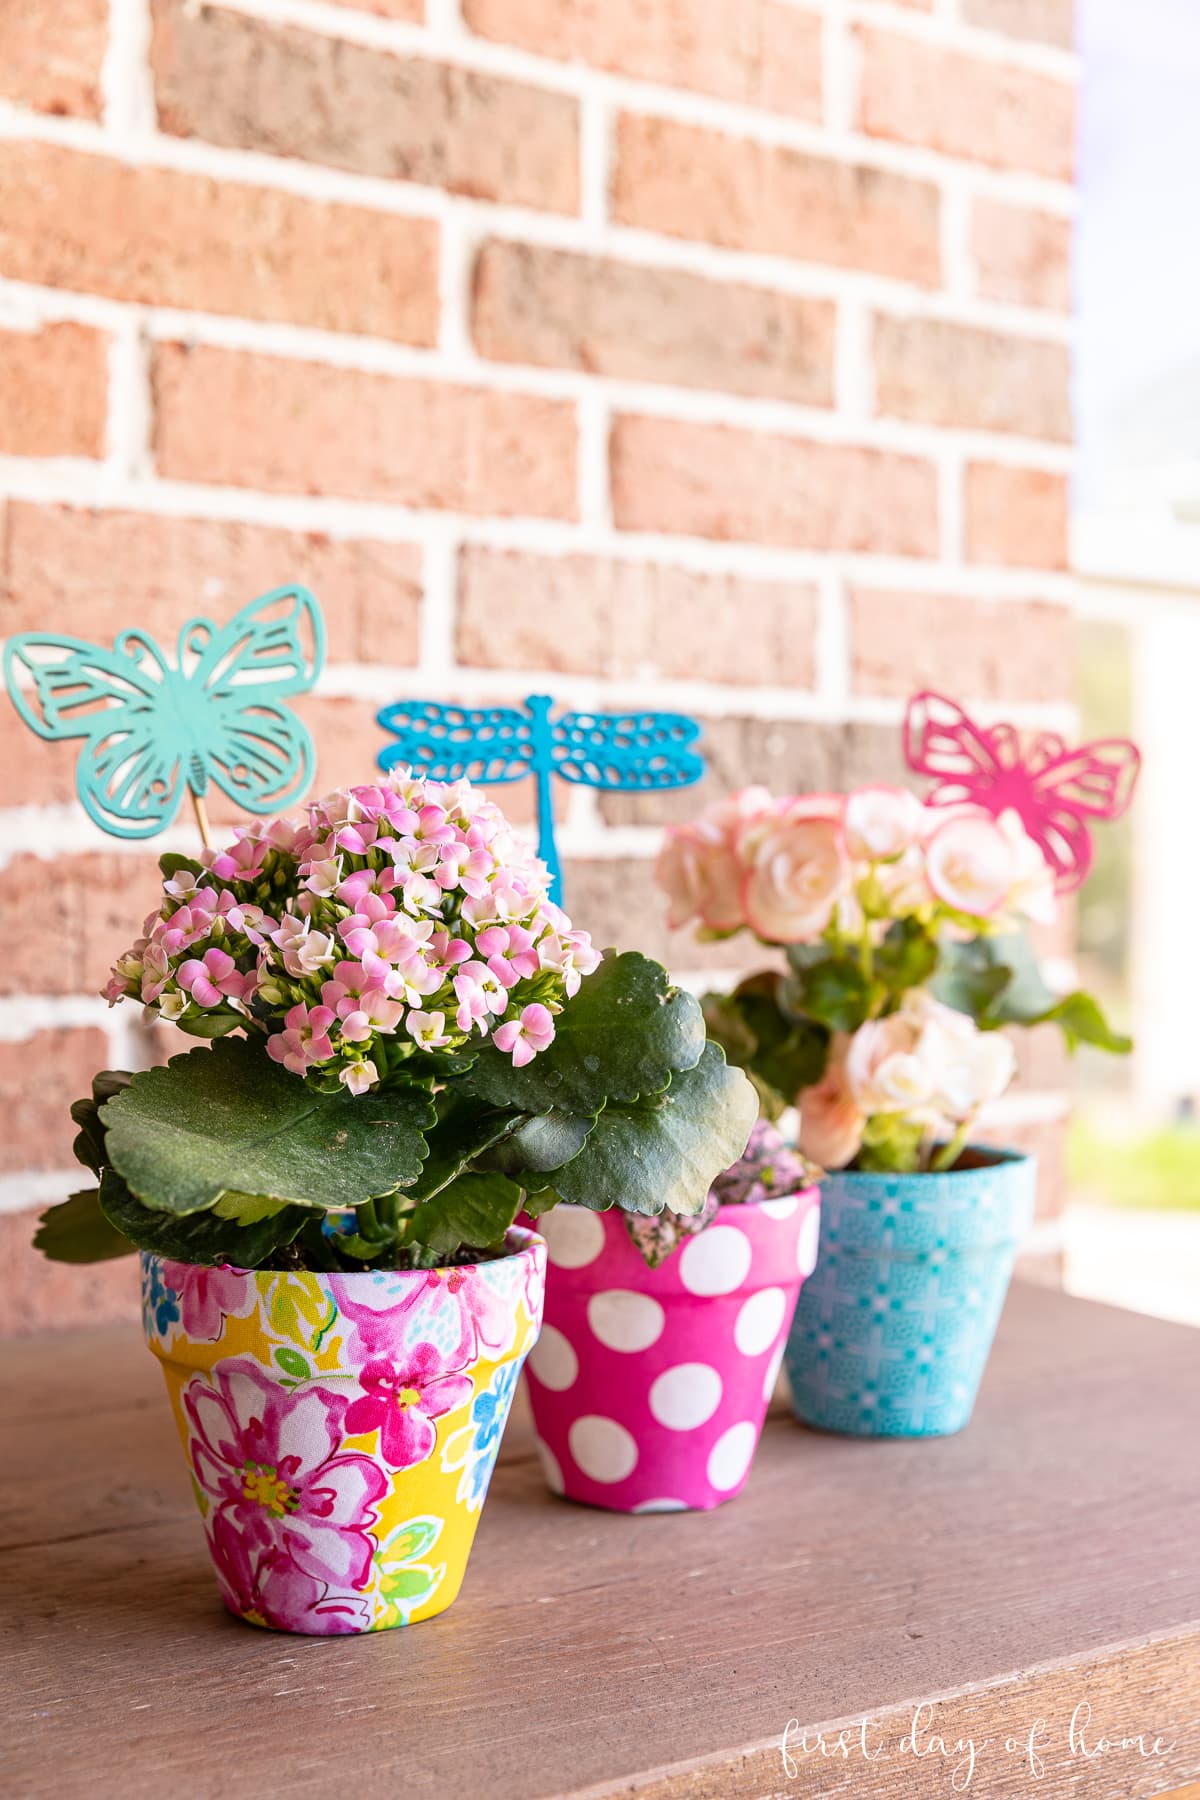
Here I’m using a combination of 4-inch Kalanchoe, Begonia, and Polka Dot Hypoestes. For larger pots, you could also plant spring bulbs like daffodils or tulips.
Caring for your DIY Fabric Planters
To prolong the life of your fabric flower pots, avoid placing the pots in direct sunlight. A covered porch or patio would make a great home for these planters. You could also enjoy them on a windowsill.

It’s also helpful to have a saucer underneath the pots, which you can paint with acrylic paint. First, seal the top of the saucer with Clay Pot Sealer to prevent water from leaking onto the surface underneath.
How will you plan to enjoy your fabric-covered flower pots? Let me know in the comments below!
Pin it for later!


This is very interested article
Thanks, Hanna!
These pots are so cute! I can’t wait to try this out!
Thank you, Kristin! I hope you have fun with it!
Cute! I love a good decoupage project!
Thanks so much, Marie! I do too!
I love these; they’re a must try for me! We’re still getting snow here but maybe this will give Spring a push lol.
Thank you, Sara! I can’t believe you’re still getting snow! I felt totally different once winter finally ended here. I know long periods of snow can have you yearning for spring. I hope it comes soon for you!
I love flower pots and these are amazing! The fun colors and fabrics are perfect for summer.
Happy Spring,
Kippi
Thank you so much, Kippi! I’m so thrilled spring has finally sprung! Hugs, Crissy
Flower pot crafts are a sure sign of Spring. I really love the fabrics you chose for yours, so much colour and cheer.
Thanks so much, Leanna! How have you been? It’s great to see a friendly face again. Thanks for stopping by and leaving a sweet comment!
I love all your decoupage projects, Crissy! And these terra cotta pots covered in fabric are no exception! So pretty! And I love the choices of fabric! Pinned, and I’m so blessed to be able to feature you tomorrow at Tuesday Turn About!
Thank you, dear friend! These pots really put me in the spring mood. I’ve been waiting all winter for spring to arrive. Ha! I always appreciate the love. Hugs!
These little pots are adorable Crissy! I have so much fabric – especially small pieces – that would work great for this project! Thanks for sharing. Pinned! 🥰
Thanks so much, Cindy! Yes, this is a great way to use up those scraps. I have quite the collection of fabric too! Glad I’m not alone! Thanks for pinning, my friend. 🙂